idea搭建springcloud+注册中心+服务提供者+服务消费者
先创建一个maven项目,如图所示

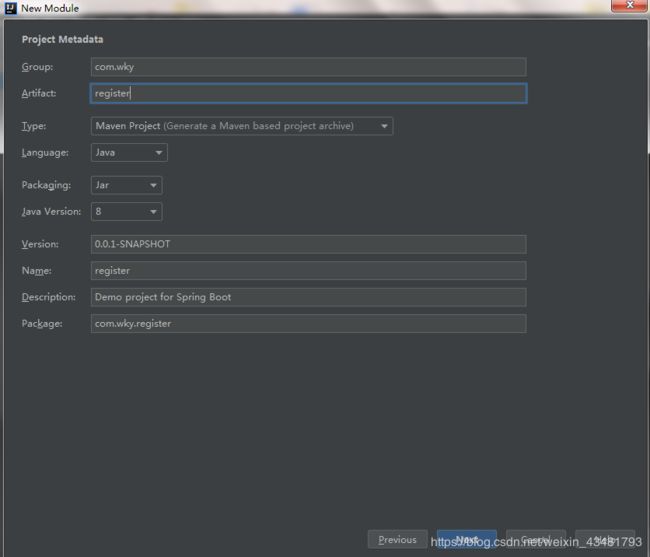
填上必要的内容,这随便填

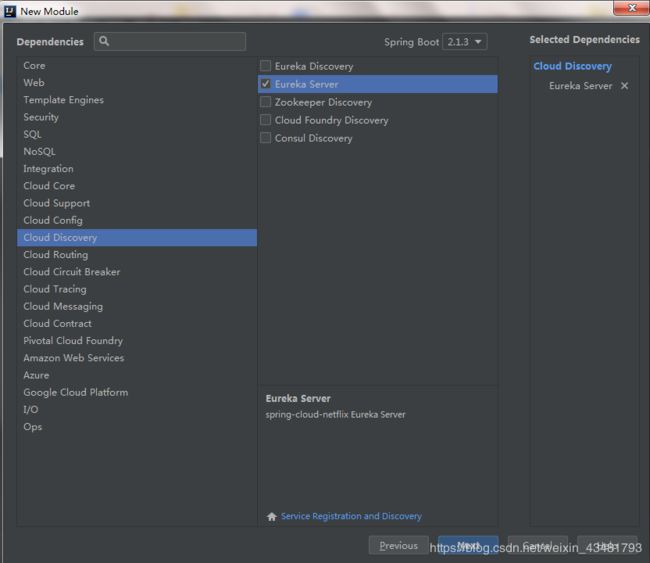
然后新建module,就是一个个的springboot
右击项目名字


此时项目的结构是:

配置文件的内容如下所示:
server.port=9000

eureka.instance.hostname=localhost
#由于该应用为注册中心,所以设置为false 代表不向注册中心注册自己
eureka.client.register-with-eureka=false
#由于注册中心的职责就是维护服务实例,它并不需要去检索服务,所以为false
eureka.client.fetch-registry=false
eureka.client.service-url.defaultZone=http://${eureka.instance.hostname}:${server.port}/eureka/
启动类的内容是:
package com.wky.register;

import org.springframework.boot.SpringApplication;
import org.springframework.boot.autoconfigure.SpringBootApplication;
import org.springframework.cloud.netflix.eureka.server.EnableEurekaServer;

@EnableEurekaServer
@SpringBootApplication
public class RegisterApplication {

    public static void main(String[] args) {
        SpringApplication.run(RegisterApplication.class, args);
    }

}
启动类加上了@EnableEurekaServer注解
pom文件的内容是:
    4.0.0

        org.springframework.boot
        spring-boot-starter-parent
        2.1.3.RELEASE


    com.wky
    register
    0.0.1-SNAPSHOT
    register
    Demo project for Spring Boot


        1.8
        Greenwich.SR1


            org.springframework.cloud
            spring-cloud-starter-netflix-eureka-server


            org.springframework.boot
            spring-boot-starter-test
            test


                org.springframework.cloud
                spring-cloud-dependencies
                ${spring-cloud.version}
                pom
                import


                org.springframework.boot
                spring-boot-maven-plugin
然后运行localhost:9000
得到的结果是:
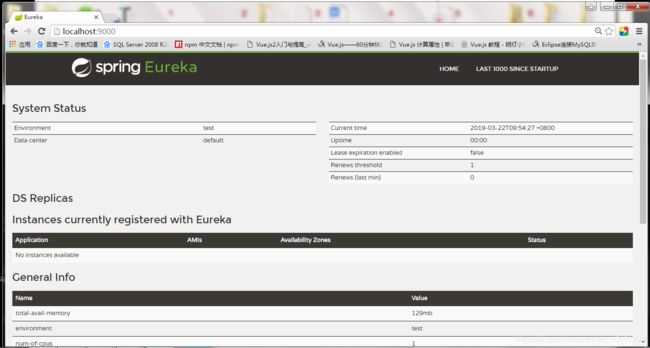
这个时候注册中心就注册好了,接下来我们来写服务提供者,服务提供者的方法跟注册中心差不多,我们直接跳过那些步骤,直接上一些代码
配置文件代码如下所示:
#为服务命名
spring.application.name=hello-service
#指定服务注册中心的地址
eureka.client.service-url.defaultZone=http://localhost:9000/eureka/
pom文件的代码如下:
    4.0.0

        org.springframework.boot
        spring-boot-starter-parent
        2.1.3.RELEASE


    com.wky
    service01
    0.0.1-SNAPSHOT
    service01
    Demo project for Spring Boot


        1.8
        Greenwich.SR1


            org.springframework.cloud
            spring-cloud-starter-netflix-eureka-server


            org.springframework.boot
            spring-boot-starter-test
            test


                org.springframework.cloud
                spring-cloud-dependencies
                ${spring-cloud.version}
                pom
                import


                org.springframework.boot
                spring-boot-maven-plugin
启动类:
package com.wky.service01;

import org.springframework.boot.SpringApplication;
import org.springframework.boot.autoconfigure.SpringBootApplication;
import org.springframework.cloud.netflix.eureka.server.EnableEurekaServer;

@EnableEurekaServer
@SpringBootApplication
public class Service01Application {

    public static void main(String[] args) {
        SpringApplication.run(Service01Application.class, args);
    }

}
新建了一个controller
@RestController
public class Service01Controller {

    @RequestMapping(value = "/hello",method = RequestMethod.GET)
    public String index(){
        return "Hello World ";
    }
}

最后我们来写服务消费者:
基本步骤跟注册中心一样:
我们直接上代码:
pom
    4.0.0

        org.springframework.boot
        spring-boot-starter-parent
        2.1.3.RELEASE


    com.wky
    consumer01
    0.0.1-SNAPSHOT
    consumer01
    Demo project for Spring Boot


        1.8
        Greenwich.SR1


            org.springframework.cloud
            spring-cloud-starter-netflix-eureka-client


            org.springframework.cloud
            spring-cloud-starter-netflix-eureka-server


            org.springframework.cloud
            spring-cloud-starter-ribbon


            org.springframework.boot
            spring-boot-starter-test
            test


                org.springframework.cloud
                spring-cloud-dependencies
                ${spring-cloud.version}
                pom
                import


                org.springframework.boot
                spring-boot-maven-plugin
可以看出依赖中我们引入了ribbon依赖,提供负载均衡机制,
配置文件:
spring.application.name=ribbon-consumer
server.port=9001

eureka.client.service-url.defaultZone=http://localhost:9000/eureka/
启动类:这时候的启动类跟之前不一样,代码如下:
@EnableDiscoveryClient
@SpringBootApplication
public class Consumer01Application {

    @Bean
    @LoadBalanced //负载均衡
    RestTemplate restTemplate(){
        return new RestTemplate();
    }
    public static void main(String[] args) {
        SpringApplication.run(Consumer01Application.class, args);
    }

}
controller层代码如下:
@RestController
public class Consumer01Controller {

    @Autowired
    RestTemplate restTemplate;

    @RequestMapping(value = "/ribbon-consumer",method = RequestMethod.GET)
    public String helloConsumer(){
        return restTemplate.getForEntity("http://HELLO-SERVICE",String.class).getBody();
    }
}
最后我们来看看:
