Ambari以及HDP搭建大数据集群
注:
1、主机均为centos7
2、 安装使用root用户,
3、避免权限问题导致的不成功
四台主机安装,分配如下:
hdp-01 作为:ambari-serrver,hdp-02~hdp-04 作为ambari-agent
一、安装前的系统设定
1) 修改机器名、Hosts文件
# vim /etc/hostname
  hdp-01
# vim /etc/hosts
  192.168.3.100 hdp01.xxxx.com hdp-01
  192.168.3.110 hdp02.xxxx.com hdp-02
  192.168.3.120 hdp03.xxxx.com hdp-03
  192.168.3.130 hdp04.xxxx.com hdp-04
注:第一列为主机的IP,第二列为主机的FQDN域名,作用于主机名类似(配置HDP组件的时候需要),第三列为主机名。修改完以后,重启每一台机器。
2)关闭Selinux,所有机器
# vi /etc/sysconfig/selinux
  selinux=disabled
3)关闭防火墙
# systemctl stop firewalld
# systemctl disable firewalld
4)制作集群的SSH免密码登录
在ambari.server上创建密钥:# ssh-keygen -t rsa
一路Enter到密钥生:进入~/.ssh目录,查看密钥文件:
私钥:id_rsa 公钥:id_rsa.pub
从ambari.server上,发送公钥给目标服务器:
# scp ~/.ssh/id_rsa.pub hdp-01:/root/.ssh/authorized_keys
# scp ~/.ssh/id_rsa.pub hdp-02:/root/.ssh/authorized_keys
# scp ~/.ssh/id_rsa.pub hdp-03:/root/.ssh/authorized_keys
# scp ~/.ssh/id_rsa.pub hdp-01:/root/.ssh/authorized_keys
在ambari.server上验证SHH可以免密码登录目标服务器:
# ssh hdp-02
如果无需输入密码,且用hostname命令查看到正确的主机名,则表示配置免密码登录成功;
5)设置ntpd自动启动,所有机器
# yum install -y ntp      //安装ntp服务
# systemctl enable ntpd  //设置服务开机启动
# systemctl start ntpd   //启动服务
设置时间同步,所有机器,以其中一台作为时间同步的标准
# cp /usr/share/zoneinfo/Asia/Shanghai /etc/localtime
# ntpdate us.pool.ntp.org
# vi /etc/ntp.conf
# systemctl restart ntpd //重启服务
# systemctl status ntpd  //查看ntp是否成功
如图:
# ntpstat
二、所有六台机器安装JDK1.8
# mkdir -p /usr/java/
上传jdk到目录/usr/java/
# tar -xzvf jdk-8u121-linux-x64.tar.gz
配置环境变量,添加以下内容:
# vim /etc/profile
JAVA_HOME=/usr/java/jdk1.8.0_121
CLASSPATH=$JAVA_HOME/lib/
PATH=$PATH:$JAVA_HOME/bin
export PATH JAVA_HOME CLASSPATH
执行以下语句,使环境变量立刻生效:
# source /etc/profile
验证Java安装成功:
# java -version
java version "1.8.0_131"
Java(TM) SE Runtime Environment (build 1.8.0_131-b11)
Java HotSpot(TM) 64-Bit Server VM (build 25.131-b11, mixed mode)
三、安装MySQL(ambari-server)也就是hdp-01
Mysql数据库安装过程如下:
下载mysql的repo源(CentOS 7.2的yum源中默认没有mysql,要先下载mysql的repo源)
# yum install -y wget
# wget http://repo.mysql.com/mysql57-community-release-el7-8.noarch.rpm
安装mysql57-community-release-el7-8.noarch.rpm包
# rpm -ivh mysql57-community-release-el7-8.noarch.rpm  --nodeps --force
安装这个包后,会获得两个mysql的yum repo源
# ll /etc/yum.repos.d
 mysql-community.repo
 mysql-community-source.repo
安装mysql
# yum install -y mysql-server //安装
# systemctl start mysqld      // 启动
# systemctl enable mysqld     // 开机自启
# service mysqld status       // 运行状态
MySQL为root用户生成的随机密码通过mysqld.log文件可以查找到:
# grep 'temporary password' /var/log/mysqld.log
# mysql -u root -p
mysql> Enter password: (输入刚才查询到的随机密码)
修改root用户密码:(MySQL的密码策略比较复杂,过于简单的密码会被拒绝)。首先修改安全策略,避免过于简单的密码被拒绝:
mysql> set global validate_password_policy=0;
mysql> set global validate_password_length=4;
# 重置用户密码
mysql> alter user 'root'@'localhost' identified by 'xxxxxxx';
# 允许使用用户名root密码XXXXXXX从任何主机连接到mysql服务器
GRANT ALL PRIVILEGES ON *.* TO 'root'@'%' IDENTIFIED BY 'xxxxx' WITH GRANT OPTION;
完成后,保存退出:
mysql> flush privileges;
mysql> quit;
安装mysql jdbc 驱动:
# yum install -y mysql-connector-java
创建必要的数据库和数据库用户
# mysql -u root -p
mysql> create database ambari character set utf8;
mysql> CREATE USER 'ambari'@'%' IDENTIFIED BY 'ambari';
mysql> GRANT ALL PRIVILEGES ON *.* TO 'ambari'@'%';
mysql> FLUSH PRIVILEGES;

如果要安装Hive,再创建Hive,ranger和oozie数据库和用户 再执行下面的语句:
mysql> create database hive character set utf8;
mysql> CREATE USER 'hive'@'%' IDENTIFIED BY 'hive';
mysql> GRANT ALL PRIVILEGES ON *.* TO 'hive'@'%';
mysql> FLUSH PRIVILEGES;

mysql> create database oozie character set utf8;
mysql> CREATE USER 'oozie'@'%' IDENTIFIED BY 'oozie';
mysql> GRANT ALL PRIVILEGES ON *.* TO 'oozie'@'%';
mysql> FLUSH PRIVILEGES;

mysql> create database ranger character set utf8;
mysql> CREATE USER 'ranger'@'%' IDENTIFIED BY 'ranger';
mysql> GRANT ALL PRIVILEGES ON *.* TO 'ranger'@'%';
mysql> FLUSH PRIVILEGES;
四、下载Ambari的资源
下载HortWorks官网上的3个库到本地(也可以在线下载,但是速度会很慢)。
我们先把hortworks官网上需要下载的3个库下载到本地(这个还是需要很长时间的,当然你也可以在线下载,通过wget但是由于文件比较大,所以下载会非常慢)然后把他上传到我们的镜像服务器上。
Ambari以及HDP文档地址:
https://www.cnblogs.com/zhang-ke/p/8944240.html
2)把下载到的3个资源文件,上传到ambari.server,并解压到制定目录
# mkdir /var/www/html/ambari-hdp
# mkdir /var/www/html/ambari-hdp/HDP-UTILS
# tar -xvf ambari-2.6.0.0-centos7.tar.gz -C /var/www/html/ambari-hdp/
# tar -xvf HDP-2.6.3.0-centos7-rpm.tar.gz -C /var/www/html/ambari-hdp/
# tar -xvf HDP-UTILS-1.1.0.21-centos7.tar.gz -C /var/www/html/ambari-hdp/HDP-UTILS
3)在ambari.server(hdp-01)上配置httpd服务:
# yum install -y httpd
# systemctl start httpd
# systemctl enable httpd.service
通过浏览器http://hdp-01/ambari-hdp/访问本地资源地址,如果能看到以下页面,则表示配置成功
在ambari.server上执行
# yum install -y yum-plugin-priorities
制作本地资源文件
cd /var/www/html/ambari-hdp/ambari/centos7/2.6.0.0-267/
修改baseurl和gpgkey的地址(http://ecs-hbase-01/ambari-hdp/上面复制下来)
# vim ambari.repo


#VERSION_NUMBER=2.6.0.0-267
[ambari-2.6.0.0]
name=ambari Version - ambari-2.6.0.0
baseurl=http://hdp-01/ambari-hdp/ambari/centos7/2.6.0.0-267/
gpgcheck=1
gpgkey=http://hdp-01/ambari-hdp/ambari/centos7/2.6.0.0-267/RPM-GPG-KEY/RPM-GPG-KEY-Jenkins
enabled=1
priority=1
保存后ambari.repo文件 复制cp ambari.repo /etc/yum.repos.d/
# cp ambari.repo /etc/yum.repos.d/
# cd /var/www/html/ambari-hdp/HDP/centos7/2.6.3.0-235/
# vim hdp.repo


#VERSION_NUMBER=2.6.3.0-235
[HDP-2.6.3.0]
name=HDP Version - HDP-2.6.3.0
baseurl=http://hdp-01/ambari-hdp/HDP/centos7/2.6.3.0-235/
gpgcheck=1
gpgkey=http://hdp-01/ambari-hdp/HDP/centos7/2.6.3.0-235/RPM-GPG-KEY/RPM-GPG-KEY-Jenkins
enabled=1
priority=1

[HDP-UTILS-1.1.0.21]
name=HDP-UTILS Version - HDP-UTILS-1.1.0.21
baseurl=http://hdp-01/ambari-hdp/HDP-UTILS/
gpgcheck=1
gpgkey=http://hdp-01/ambari-hdp/HDP-UTILS/RPM-GPG-KEY/RPM-GPG-KEY-Jenkins
enabled=1
priority=1
保存后,复制
# cp hdp.repo /etc/yum.repos.d/
把hdp.repo和ambari.repo复制到所有的机器上面:
# cd /etc/yum.repos.d/
# scp ambari.repo hdp.repo root@hdp-02:/etc/yum.repos.d/
# scp ambari.repo hdp.repo root@hdp-03:/etc/yum.repos.d/
# scp ambari.repo hdp.repo root@hdp-04:/etc/yum.repos.d/
依次执行以下命令,更新本地资源池:(所有机器)
# yum clean all
# yum makecache
# yum repolist
五、安装Ambari-Server(hdp-01)
执行安装命令:
# yum install -y ambari-server
将Ambari数据库脚本导入到数据库
# mysql -uroot -p
mysql> use ambari;
mysql> source /var/lib/ambari-server/resources/Ambari-DDL-MySQL-CREATE.sql;
六、配置Ambari-Server
# ambari-server setup
Customize user account for ambari-server daemon [y/n] (n)? y

Enter user account for ambari-server daemon (root): root
Adjusting ambari-server permissions and ownership...
// 设置JDK  输入:3
Checking JDK...Do you want to change Oracle JDK [y/n] (n)? y
[1] Oracle JDK 1.8 + Java Cryptography Extension (JCE) Policy Files 8
[2] Oracle JDK 1.7 + Java Cryptography Extension (JCE) Policy Files 7
[3] Custom JDK
==========================================
Enter choice (1): 3

// 如果上面选择3自定义JDK,则需要设置JAVA_HOME。输入
/usr/java/jdk1.8.0_121
WARNING: JDK must be installed on all hosts and JAVA_HOME must be valid on all hosts.
WARNING: JCE Policy files are required for configuring Kerberos security. If you plan to use Kerberos, please make sure JCE Unlimited Strength Jurisdiction Policy Files are valid on all hosts.
Path to JAVA_HOME: /usr/local/jdk/jdk1.8.0_131
Validating JDK on Ambari Server...done.
Completing setup...

//数据库配置。选择:y
Configuring database...Enter advanced database configuration [y/n] (n)? y
//选择数据库类型。输入:3
Configuring database...
========================================
Choose one of the following options:
[1] - PostgreSQL (Embedded)
[2] - Oracle
[3] - MySQL
[4] - PostgreSQL
[5] - Microsoft SQL Server (Tech Preview)
[6] - SQL Anywhere
==========================================
Enter choice (1): 3

// 设置数据库的具体配置信息,根据实际情况输入,如果和括号内相同,则可以直接回车
Hostname (localhost): hdp-01
Port (3306):
Database name (ambari):
Username (ambari):
Enter Database Password (bigDate):
//提示必须安装MySQL JDBC,已安装则直接通过
WARNING: Before starting Ambari Server, you must copy the MySQL JDBC driver JAR file to /usr/share/java.
Press <enter> to continue.
设置 MySQL JDBC
# ambari-server setup --jdbc-db=mysql --jdbc-driver=/usr/share/java/mysql-connector-java.jar
启动ambari-server服务
# ambari-server start
//设置开机自启
# chkconfig --add ambari-server
七、安装ambari-agent(所有机器)
# yum install -y ambari-agent
//设置开机自启
# chkconfig --add ambari-agent
八、安装HDP
1)在浏览器里第一次输入http://hdp-01:8080/#/login
会出现登录界面,默认管理员账户登录, 账户:admin 密码:admin

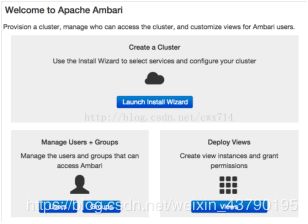
2)安装向导: 登录成功后出现下面的界面:
点击Launch Install Wizard进入
 3)设置集群名称:给你的集群命名,点击下一步

4)选择版本:这一步选择软件版本和安装源。版本选择HDP2.6
使用公共存储库需要外网连接。我们的本地存储库已经创建好了,在这里可以直接选择Use Local Repository
选择安装的操作系统和本地yum源。输入本地源地址
OS	           Name	                               Base URL
Redhat7	   HDP-2.6	                           http://hdp-01/ambari-hdp/HDP/centos7/2.6.3.0-235/
Redhat7	   HDP-UTILS-1.1.0.21	       http://hdp-01/ambari-hdp/HDP-UTILS/
5)设置集群机器
hdp01.xxxx.com
hdp02.xxxx.com
hdp03.xxxx.com
hdp04.xxxx.com
拷贝.ssh目录下的id_rsa私钥(注意,只能是id_rsa)的内容到文本框里,也可以点击选择文件上传id_rsa文件到里面
注:如果通信失败,在success的地方会变成 Failed 一般是这几个原因:
1、 ambari-server主机与agent节点不能使用密钥文件登录,即无法联通。手动检查是否可以无密码在远程机器上执行命令/
2、yum安装时失败,到/etc/yum.repos.d/ 目录下检查,有没有ambari.repo仓库文件。尝试用yum clean all清除过期的缓存,再次尝试安装
3、此前安装过Ambari等相关的功能,没有清理干净,又重新安装的,检查一下残留文件,删除重试
4、因为python 2.7.5有的版本(或更高版本)增加了certificate verification,正是因为这个特性导致ambari-agent无法连接server
解决方法:
# vim /etc/python/cert-verification.cfg
[https]verify=disable 修改为verify=disable
vim /etc/ambari-agent/conf/ambari-agent.ini

[security]
ssl_verify_cert=0
force_https_protocol=PROTOCOL_TLSv1_2
重启 ambari-agent
# ambari-agent restart
注:Host确认成功后,上图底下有个“Click hereto see the warnings.”按钮,打开后会显示主机上的各种警告信息
警告一定要处理:
# python /usr/lib/python2.6/site-packages/ambari_agent/HostCleanup.py --silent --skip=users
7)选择安装服务
根据自己需要自己添加:其中SmartSense是必选,不能取消
这一步分配每个节点需要安装那些服务,这里涉及到集群机器的规划
慎重
9)节点客户端分配
这一步选择每个节点需要安装服务的客户端
10)自定义配置
这一步是对已选服务的自定义配置,需要设置密码的服务非常多
如:oozie、hive的使用库,密码(在安装mysql时的创造hive,oozie的用户名、密码)
11)显示配置信息
所有信息配置完成后,会出现一份报告,汇总这次安装的集群的机器规划情况
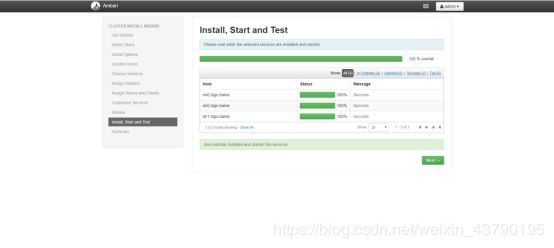
12)安装,启动和测试
这一步安装各个服务,并且完成安装后会启动和测试相关服务。这一步的时间比较长,如果中途出现错误,可根据具体提示或者log进行操作
tail -200f /var/log/ambari-server/ambari-server.log


