Linux企业运维篇——lnmp
一.lnmp数据库的安装编译
在server1中下载mysql-boots-5.7.17.tar.gz压缩包并解压

yum install -y cmake-2.8.12.2-4.el6.x86_64.rpm
![]()
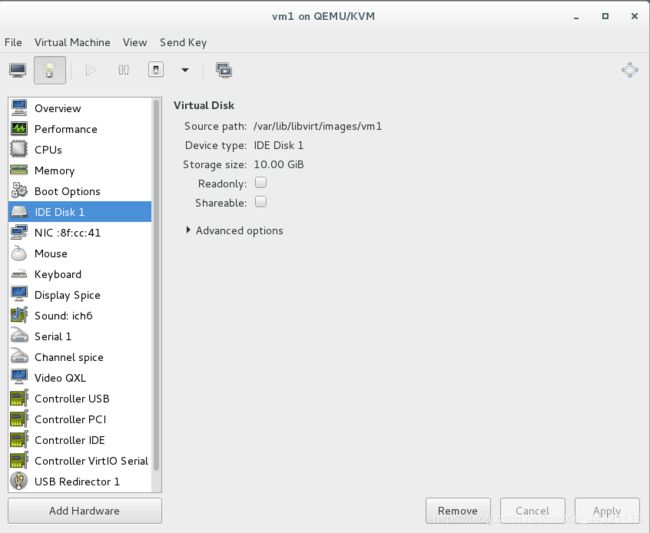
查看硬盘大小,必须为20G,否则解析mysql会报错

用命令添加![]()
重新启动再次查看硬盘大小已经变成20G了

yum install -y ncurses-devel
yum install -y gcc gcc-c++
yum install -y make openssl-devel zlib-devel
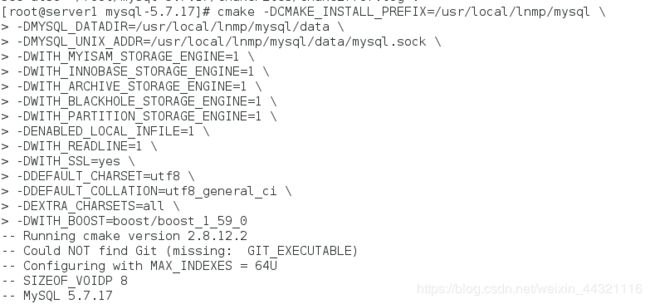
cmake -DCMAKE_INSTALL_PREFIX=/usr/local/lnmp/mysql \
#安装目录
-DMYSQL_DATADIR=/usr/local/lnmp/mysql/data \
#数据库存放目录
-DMYSQL_UNIX_ADDR=/usr/local/lnmp/mysql/data/mysql.sock \ #Unix socket 文件路径
-DWITH_MYISAM_STORAGE_ENGINE=1 \
#安装 myisam 存储引擎
-DWITH_INNOBASE_STORAGE_ENGINE=1 \
#安装 innodb 存储引擎
-DWITH_ARCHIVE_STORAGE_ENGINE=1 \
#安装 archive 存储引擎
-DWITH_BLACKHOLE_STORAGE_ENGINE=1 \
#安装 blackhole 存储引擎
-DWITH_PARTITION_STORAGE_ENGINE=1 \
#安装数据库分区
-DENABLED_LOCAL_INFILE=1 \
#允许从本地导入数据
-DWITH_READLINE=1 \
#快捷键功能
-DWITH_SSL=yes \
#支持 SSL
-DDEFAULT_CHARSET=utf8 \
#使用 utf8 字符
-DDEFAULT_COLLATION=utf8_general_ci \
#校验字符
-DEXTRA_CHARSETS=all \
#安装所有扩展字符集
-DWITH_BOOST=boost/boost_1_59_0
( rm -f CmakeCache.txt ##安装出错时清理缓存再执行上述命令)
make && make install #编译的时间会比较长
[root@server1 mysql-5.7.17]# cd support-files/
[root@server1 support-files]# cp mysql.server /etc/init.d/mysqld
[root@server1 init.d]# cd - /root/mysql-5.7.17/support-files
[root@server1 support-files]# cp my-default.cnf /etc/my.cnf
[root@server1 support-files]# vim /etc/my.cnf (编辑配置文件,指定路径)
[root@server1 ~]# vim ~/.bash_profile
[root@server1 ~]# source ~/.bash_profile
![]()
初始化数据库:
[root@server1 data]# mysqld --user=mysql --initial

[root@server1 data]# /etc/init.d/mysqld start
[root@server1 data]# mysql_secure_installation(重新设置密码)
第一步要输入的root密码就是初始化给出的密码。其他选项直接回车。
二.php安装编译
![]()
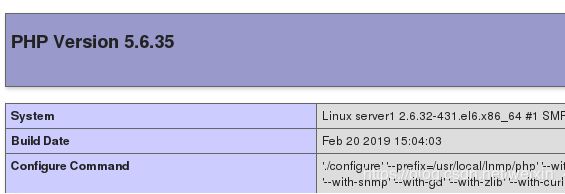
[root@server1 php-5.6.35]# ./configure --prefix=/usr/local/lnmp/php --with-config-file-path=/usr/local/lnmp/php/etc --with-openssl --with-snmp --with-gd --with-zlib --with-curl --with-libxml-dir --with-png-dir --with-jpeg-dir --with-freetype-dir --with-gmp --with-gettext --with-pear --enable-mysqlnd --with-mysql=mysqlnd --with-mysqli=mysqlnd --with-pdo-mysql=mysqlnd --enable-inline-optimization --enable-soap --enable-ftp --enable-sockets --enable-mbstring --enable-fpm --with-fpm-user=nginx --with-fpm-group=nginx --with-mcrypt --with-mhash

在编译的过程中会不断提示我们需要安装其他软件来支持。我们一一安装。
[root@server1 php-5.6.35]# yum install libxml2-devel -y
[root@server1 php-5.6.35]# yum install openssl-devel -y
[root@server1 php-5.6.35]# yum install libcurl-devel -y
[root@server1 php-5.6.35]# yum whatprovides */jpeglib.h(查看合适的软件
[root@server1 php-5.6.35]# yum install libjpeg-turbo-devel-1.2.1-1.el6.x86_64 -y
[root@server1 php-5.6.35]# yum whatprovides */png.h
[root@server1 php-5.6.35]# yum install libpng-devel-1.2.49-1.el6_2.x86_64
[root@server1 php-5.6.35]# yum install -y freetype-devel
[root@server1 php-5.6.35]# yum whatprovides */png.h
[root@server1 php-5.6.35]# yum whatprovides */gmp.h
[root@server1 php-5.6.35]# yum install gmp-devel-4.3.1-7.el6_2.2.x86_64
[root@server1 ~]# ls libmcrypt-devel-2.5.8-9.el6.x86_64.rpm libmcrypt-2.5.8-9.el6.x86_64.rpm
[root@server1 ~]#  yum install libmcrypt-* -y
[root@server1 php-5.6.35]# yum install -y net-snmp-devel
[root@server1 php-5.6.35]# ./configure --prefix=/usr/local/lnmp/php --with-config-file-path=/usr/local/lnmp/php/etc --with-openssl --with-snmp --with-gd --with-zlib --with-curl --with-libxml-dir --with-png-dir --with-jpeg-dir --with-freetype-dir --with-gmp --with-gettext --with-pear --enable-mysqlnd --with-mysql=mysqlnd --with-mysqli=mysqlnd --with-pdo-mysql=mysqlnd --enable-inline-optimization --enable-soap --enable-ftp --enable-sockets --enable-mbstring --enable-fpm --with-fpm-user=nginx --with-fpm-group=nginx --with-mcrypt --with-mhash (再次编译,无报错成功)
三.nginx的安装配置
解压nginx-1.14.0.tar.gz

![]()
删除版本号,防止被攻击


屏蔽debug日志,因其日志太多,占用内存,一般出错后,可打开查看日志

安装pcre-devel
[root@server1 nginx-1.14.0]#  yum install pcre-devel -y
[root@server1 nginx-1.14.0]# ./configure --prefix=/usr/local/lnmp/nginx --with-http_ssl_module --with-http_stub_status_module --with-threads --with-file-aio --user=nginx --group=nginx
[root@server1 nginx-1.14.0]# make && make install
location ~ \.php$ {
	root 			html;
	fastcgi_pass 	127.0.0.1:9000;
	fastcgi_index 	index.php;
	# fastcgi_param    SCRIPT_FILENAME   /scripts$fastcgi_script_name;
	include		 fastcgi.conf;
	  }
语法检测


查看nginx服务端口,我们可以看到其端口与httpd默认端口相同,因此只能打开一项服务,或者修改httpd的端口号,在/etc/httpd/conf/httpd.conf文件修改

编辑一个php网页文件
![]()


四.搭建论坛
获得Discuz_X3.2_SC_UTF8.zip压缩包
将论坛压缩包解压到指定文件
![]()


此时看到很多权限错误
![]()

需要给文件给定权限


选择全新安装

设置mysql密码,和论坛密码

出现问题:连接不了数据库
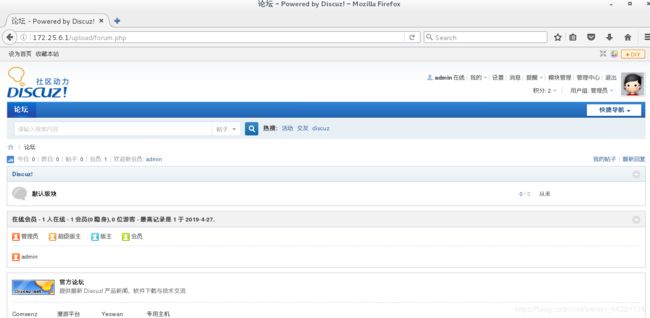
不能操作,需要删除index.php文件。


添加新用户


登陆数据库查看

![]()

五.lnmp----添加缓存(memcache)
![]()
![]()
PORT="11211"
USER="memcached"
MAXCONN="1024"
CACHESIZE="64"
OPTIONS=""(如果这里指定ip只监控指定ip的端口,没有是监控所有端口)
![]()
安装telnet(查看是否远程通信)
 [root@server1 ~]# yum install telnet
 [root@server1 etc]# telnet localhost 11211
 Trying ::1...
 Connected to localhost.
 Escape character is '^]'.
 set name 0 0 6
 westos
 STORED
 wwwwwww
 ERROR
 get name
 VALUE name 0 6
 westos
 END
 set name 0 10 6
 hello1
 STORED
 get name
 VALUE name 0 6
 hello1
 END
 get name
 END
 stats(可查看版本信息)
 STAT pid 22465
 STAT uptime 13172
 STAT time 1550668310
 STAT version 1.4.4
 STAT pointer_size 64
 STAT rusage_user 0.006998
编辑memcache文件,修改密码


访问网页http:/ /172.25.55.1/memcache.php

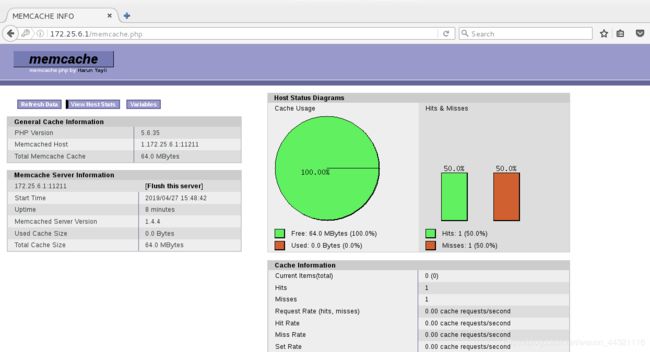
多次访问172.25.6.1/example.php

刷新memcache网页可查看到数据大多来此缓存,只有小部分是直接访问服务端。

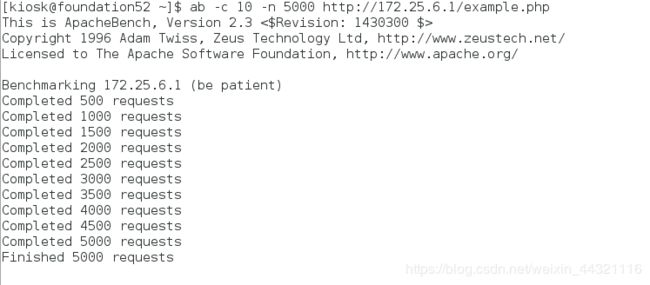
用ab命令模拟访问服务器的数据流量
未加memcache时:
ab -c 10 -n 5000 http:/ /172.25.6.1/index.php

访问时间是42秒左右,失败次数为509次

添加memcache时:
[root@server1 ~]# ab -c 10 -n 5000 http://172.25.6.1/example.php
Time taken for tests: 5.418 seconds(用时5秒)
Complete requests: 5000
Failed requests: 0(没有失败)
Write errors: 0
六.lnmp----openresty外部存储
openresty自带缓存,所以,不能有其他nginx在运行。
![]()
解压openresty包,编译安装

![]()

编辑一个php动态网页
![]()
![]()
编辑openresty自带的nginx的配置文件,如果系统有其他nginx要注意目录名称。


打开nginx
![]()
查看服务端口号
 复制测试页
复制测试页

通过ab模拟服务器访问数据,检测速度,在memcache上再加一次外部缓存后,速度比之前的更快,并且没有失败的请求。(可与memcache的数据做比较)



访问网页

编辑test.java测试页


