Yii 2.x MVC初体验
Yii 2.x MVC 初体验
- 一、我们先介绍控制器 C(controller)
- 二、视图 V(view)的认识
- 三、模型 Model 的创建以及认识
- 四、使用gii创建CURD
- 五、创建项目专属的 Models
- 六、创建全局可用的自定义方法
- 七、关于全局变量或者环境变量的配置
- 八、关于网站语言以及时区的设置
- 九、路由改写并且隐藏入口文件
- 路由改写
- 隐藏入口文件
一、我们先介绍控制器 C(controller)
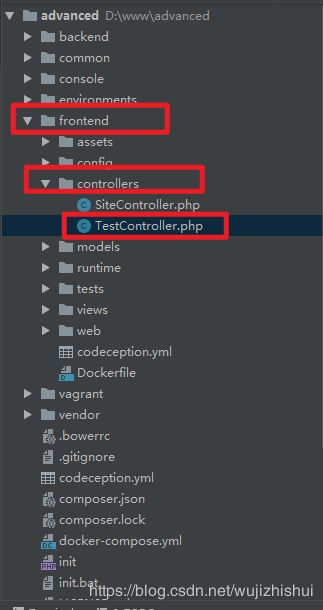
- 在 frontend\controllers\ 目录下新建 TestController.php 文件
namespace frontend\controllers;

use yii\web\Controller;

class TestController extends Controller
{
    public function actionIndex () {}

    public function actionCreate () {}
}
- 输出Hello world
namespace frontend\controllers;

use yii\web\Controller;

class TestController extends Controller
{
    public function actionIndex () {
        echo "Hello World!";
    }
    public function actionCreate () {}
}
- 如何动态的输出 Hello Ketty,Hello Anmy?
public function actionIndex ($name)
{
    echo "Hello {$name}!";
}
此时浏览器访问链接:http://advanced.dev/index.php?r=test/index&name=Kitty, 这里的域名根据自己配置的为准
二、视图 V(view)的认识
- frontend\views下面创建与控制器名一致的目录来保存视图文件,比如控制器名为:TestController, 那么视图文件的目录名为:test,如此一来才方便我们对很多文件进行管理
如果视图文件为AAController,那么文件夹的名字应为a-a
- 创建index.php视图文件
<div class="test-index">
    <h1>Hello World!h1>
div>
- 引用视图
public function actionIndex ($name) {
//        echo "Hello {$name}!";
        return $this->render('index');
    }
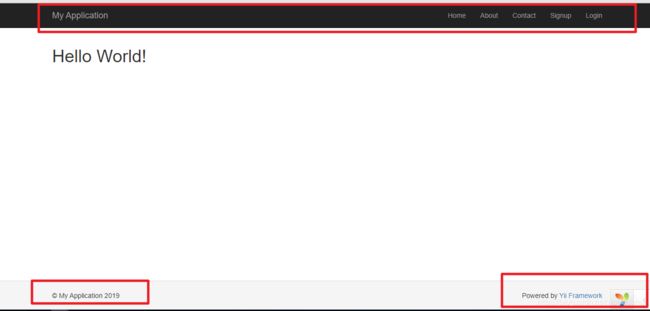
我们调用的是controller的render方法,该方法用于渲染布局。
所谓的渲染布局指的是加载公共的头尾以及我们指定的视图文件 index.php
- 在视图中动态的输出 Hello xx, 即将 C 中的参数传入 V 中
// 控制器中的修改
public function actionIndex ($name)
{
    // echo "Hello {$name}!";
    return $this->render('index', [
        'name' => $name,
    ]);
}

// 页面的修改
<div class="test-index">
    <h1>Hello  $name ?>!</h1>
</div>
访问 http://advanced.dev/index.php?r=test/index&name=Kitty
查看页面

5. 简单的谈了一下如何避免XSS跨站攻击

上图中可以看到并没有输出 Hello
视图修改:
<div class="test-index">
    <h1>Hello !h1>
div>
三、模型 Model 的创建以及认识
·1. 创建迁移文件
// 使用 yii migrate 命令生成 member 对应的数据表迁移:
D:\www\Yii2\advanced>yii migrate/create create_member_table
Yii Migration Tool (based on Yii v2.0.30)

Create new migration 'D:\www\Yii2\advanced\console/migrations\m191205_070353_create_member_table.php'? (yes|no) [no]:yes
New migration created successfully.

D:\www\Yii2\advanced>
生成的迁移文件位于 advanced\console\migrations 目录
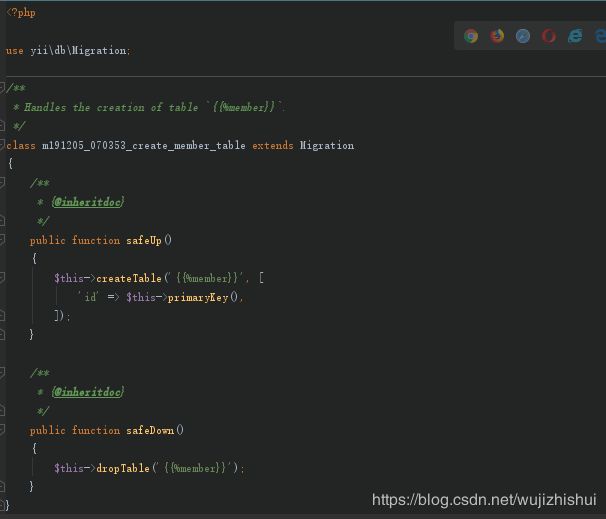
2. 编辑迁移文件: 添加更多的列到数据表中
use yii\db\Migration;

/**
 * Handles the creation of table `{{%member}}`.
 */
class m191205_070353_create_member_table extends Migration
{
    /**
     * {@inheritdoc}
     */
    public function safeUp()
    {
        $this->createTable('{{%member}}', [
            'id' => $this->primaryKey(),
            'name'=> $this->string(20)->notNull()->defaultValue(""),
            'mobile'=> $this->string(11)->notNull()->defaultValue(""),
            'gender'=> $this->tinyInteger(1)->notNull()->defaultValue(0),
            'create_time'=> $this->dateTime(),
            'update_time'=> $this->dateTime(),
        ]);
    }

    /**
     * {@inheritdoc}
     */
    public function safeDown()
    {
        $this->dropTable('{{%member}}');
    }
}
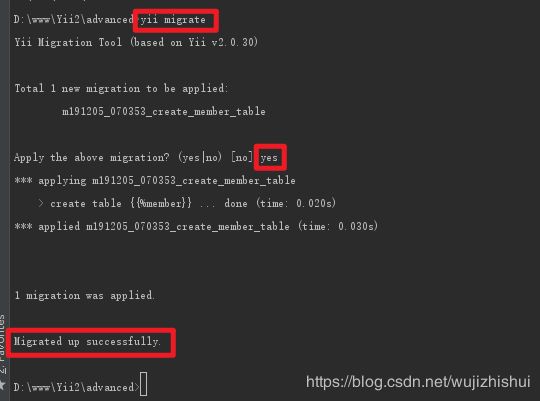
- 运行迁移文件
yii migrate
-
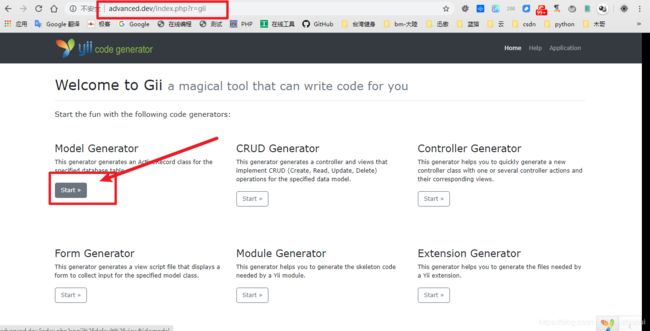
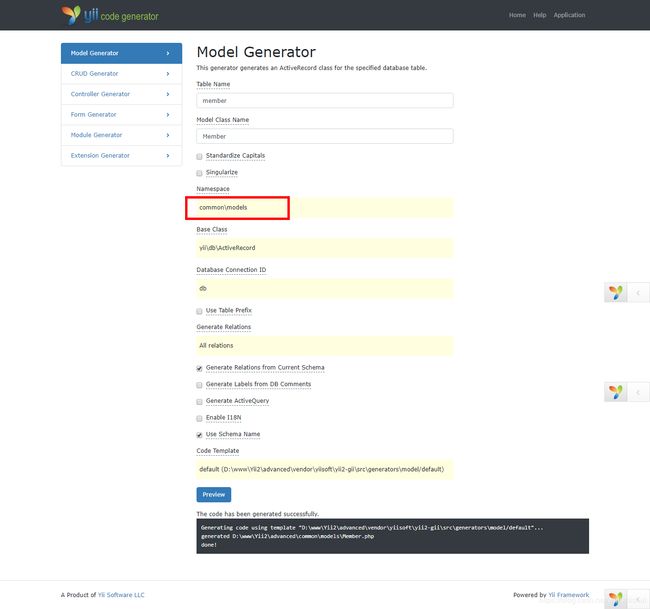
使用gii生成AR模型和CRUD
dev模式下gii是默认开启的
请根据自己配置的网站路由访问
6. 查看model
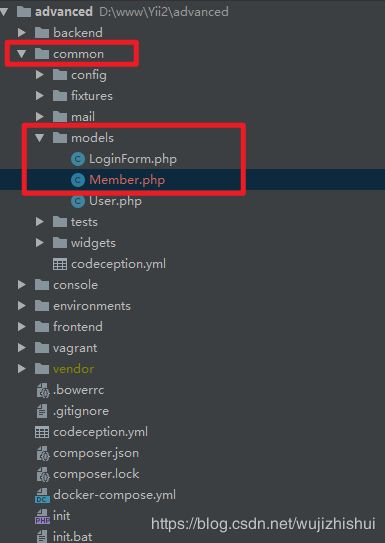
注意在创建model时的命名空间的选择,这里选择common/models是为了之后backend以及frontend项目可以共同使用
四、使用gii创建CURD
五、创建项目专属的 Models
拷贝common\models\Member.php到frontend\models\MemberForm.php后,打开MemberForm.php文件稍作修改:
1. 命名空间修改为 namespace frontend\models; 因为文件目录变了,自然需要修改
2. 增加需要继承的父类 use common\models\Member;
3. 类名修改为MemberForm
4. 继承类修改为Member
打开frontend\controllers\MemberController.php文件,对其进行如下修改:
1. 添加 use frontend\models\MemberForm;
2. 修改actionCreate方法$model实例化的类为MemberForm, 即 $model = new MemberForm();
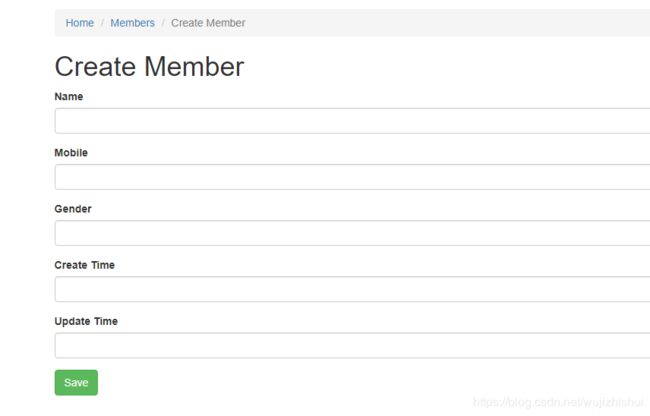
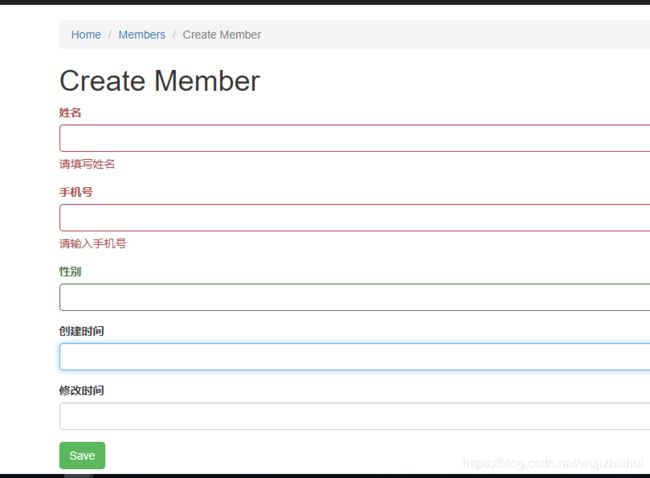
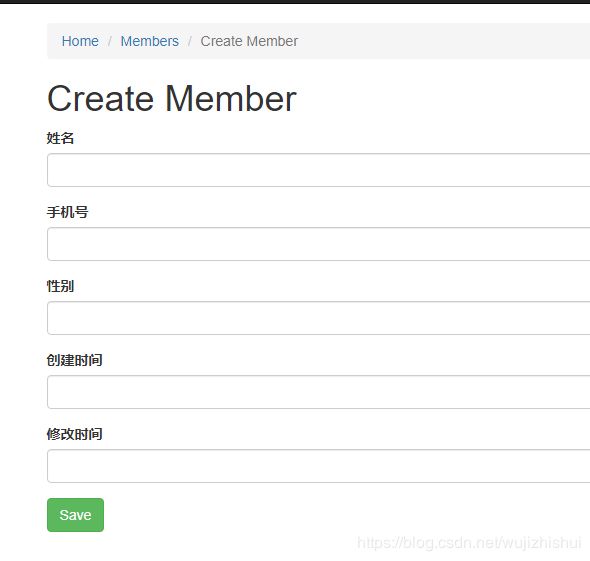
点击Create Member ,看到的输入框说明全是英文,修改MemberForm
 public function attributeLabels()
    {
        return [
            'id' => 'ID',
            'name' => '姓名',
            'mobile' => '手机号',
            'gender' => '性别',
            'create_time' => '创建时间',
            'update_time' => '修改时间',
        ];
    }
在修改MemberForm
 public function rules()
    {
        return [
            [['gender'], 'integer'],
            [['create_time', 'update_time'], 'safe'],
            [['name'], 'string', 'max' => 20],
            [['mobile'], 'string', 'max' => 11],
            ['name', 'required', 'message' => '请填写姓名'],
            ['mobile', 'required', 'message' => '请输入手机号'],
        ];
    }
修改MemberController.php文件中引入的 Member 以及 MemberSearch,并将对应的创建 Member 实例改为 MemberForm 实例
效果
六、创建全局可用的自定义方法
全局性的公共类文件位于common/components/Helper.php(components文件夹是我们自己创建的,用于以后单独存放我们自己的组件类),其内容如下:
namespace common\components;
class Helper
{
    public static function funName($data)
    {
        return $data;
    }
}
如果是在平常,我们可能会这样使用
use common\components\Helper;
Helper::checkMobile('186xxx');
但是,为了说明组件化的配置使用,我们需要在配置文件中增加一项对components的配置。你可以在你的 common\config\main.php 文件中添加如下配置
'components' => [
    // other code...
    'helper' => [
        'class' => 'common\components\Helper',
        'property' => '123',
    ],
],
你可以像下面这样使用
var_dump(Yii::$app->helper->funName('sdfasdf'));
注:在advanced版本中,对一个项目而言,默认有4个配置文件。以frontend引用为例
frontend\config\main-local.php
frontend\config\main.php
common\config\main-local.php
common\config\main.php
如果我在多个配置文件中都配置了某一项怎么办?
从应用的入口文件 frontend\web\index.php 我们了解到,最终生效的配置是经过 yii\helpers\ArrayHelper::merge 方法处理的。
$config = yii\helpers\ArrayHelper::merge(
    require __DIR__ . '/../../common/config/main.php',
    require __DIR__ . '/../../common/config/main-local.php',
    require __DIR__ . '/../config/main.php',
    require __DIR__ . '/../config/main-local.php'
);
也就是说这四个文件,优先级分别是 frontend\config\main-local.php > frontend\config\main.php > common\config\main-local.php > common\config\main.php
也就是说如果我们在common\config\main.php 和frontend\config\main.php 文件内都配置了某一项,很显然frontend\config\main.php 的配置会覆盖掉 common\config\main.php 的配置。
为什么要这么设计呢?main-local又是什么鬼?
第一个问题很好理解,很显然 common下的配置可以多个应用共有,frontend下面的配置只针对当前应用生效。
如果你有使用git的习惯,你会发现在frontend\config目录下有一个隐藏的 .gitignore 文件,我们知道,这个文件内我们可以忽略某些文件,不允许提交到远程git地址。你打开后会发现,main-local.php恰好罗列其中。也就是说这个文件只会在我们本地生效。当我们把项目部署到服务器之后,这个文件并不会被提交到远程服务器,服务器会有他自己的main-local。也就是说不管是在你的测试服务器还是生产服务器,都有自己单独的main-local.php文件,只针对当前环境的配置。
我们举一个例子:你可能在生产环境配置的缓存方式是redis缓存,但是为了节省资源,你本地可能就需要配置为文件缓存了。为了达到这一目的,我们可以分别在本地的main-local.php和生产服务器的main-local.php中配置cache组件。
从上面的栗子中不难看出,其配置项的格式大多数情况下只需要指定一个class即可。当然,我们还可以为配置项(比如说我们配置的全局类)配置属性、行为和事件,鉴于理解,我们这里只对属性进行了配置,行为和事件后面我们会再说。
七、关于全局变量或者环境变量的配置
上面介绍了一些组件的配置,那么关于一些变量的配置又应该怎么配置呢?
同样查看 common/config 目录,可以看到 params.php以及params-local.php 文件:
// params.php 文件的内容

return [
    'adminEmail' => '[email protected]',
    'supportEmail' => '[email protected]',
    'senderEmail' => '[email protected]',
    'senderName' => 'Example.com mailer',
    'user.passwordResetTokenExpire' => 3600,
];
// params-local.php 文件的内容

return [
];
这里以 frontend 项目为例
查看项目的config/main.php 文件
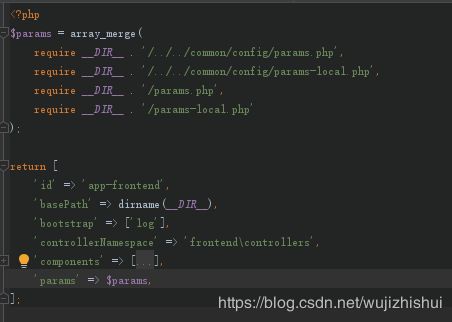
我们了解到,最终生效的配置是经过 array_merge() 方法处理的。所以出现的问题就如同六一样了。
在项目中使用定义的变量
var_dump(Yii::$app->params['adminEmail']);
同样,自定义变量的优先级为:frontend\config\params-local.php > frontend\config\params.php > common\config\params-local.php > common\config\params.php
八、关于网站语言以及时区的设置
设置在 common/config/main.php 文件中,因为这个应该是全局统一的
    // 配置语言
    'language'=>'zh-CN',
    // 配置时区
    'timeZone'=>'Asia/Chongqing',
九、路由改写并且隐藏入口文件
路由改写
因为对于所有的项目路由我都想改写,那么我将该组件配置在 common/config/main.php 文件中,配置如下:
// 在 components 配置下添加一项配置
'urlManager' => [
    'enablePrettyUrl' => false,// 是否开启美化效果
    'showScriptName' => true,// 是否或略脚本名index.php
    'enableStrictParsing' => false,// 是否开启严格解析路由
    'suffix' => '',// url后缀
    'rules' => [
    ],// 包含了路由的匹配规则列表
],
隐藏入口文件
同时在项目的入口目录添加文件 .htaccess,.htaccess文件内容如下:
RewriteEngine on
RewriteCond %{REQUEST_FILENAME} !-d
RewriteCond %{REQUEST_FILENAME} !-f
RewriteRule . index.php [L]
之后访问 member 首页路由由 http://advanced.dev/index.php?r=member 变为 http://advanced.dev/member/index。
注意:默认 httpd.conf 的 LoadModule rewrite_module modules/mod_rewrite.so 扩展开启
