部署Wordpress博客平台
简介
Wordpress是一个使用PHP语言开发的博客平台,是一个免费的开源项目,由于wordpress是使用PHP语言开发,那么你可以在支持PHP和MySQL数据库的服务器上架设属于自己的网站,可以把WordPress当作一个内容管理系统(CMS)来使用。
先决条件
首先它是一个PHP语言开发的博客,那么你必须满足以下前提条件,你才可以部署wordpress,也就是所谓的LAMP、LNMP环境,就是目前用的最多的动态网站的解决方案,一般我们会把这LAMP或者LNMP部署在一台主机,也可以进行分布式部署来提高性能和访问速度。
此次我们使用Apache+PHP部署在一台server上,Mysql单独部署在一台Server上,你也可以所有都部署在一台Server上,看看下面的解决方案是不是可以实现
环境
系统: RedHat 6.5
软件: Apache/Nginx、PHP、Mysql、Wordpress
web_server: 192.168.40.10
mysql_server: 192.168.40.20
Apache安装
这里我们全部使用Yum来安装简化安装操作复杂性,如果有特殊需求无法满足,那么你可以使用源码包进行LAMP/LNMP的安装,你可以参考LAMP环境官方最新源码编译安装进行部署.
安装apache
注:如果你使用Yum安装,前提你还要配置yum源,这里就不在赘述了,你可以去Google或者Baidu.
[root@web_server ~]# yum install -y httpd启动服务并且设置为开机启动
[root@web_server ~]# service httpd start
Starting httpd: httpd: apr_sockaddr_info_get() failed for web_server
httpd: Could not reliably determine the server's fully qualified domain name, using 127.0.0.1 for ServerName
                                                           [  OK  ]
[root@web_server ~]# chkconfig httpd on
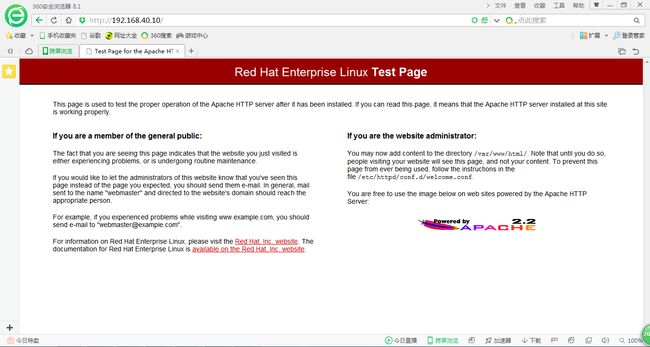
测试访问
注意: 如果你系统开启了iptables,端口一定要放开,httpd默认端口号80,这里不排除你自定义的端口,还是建议关闭iptables.
安装PHP
安装PHP及常用组件
注意:下面的安装包只要php和php-mysql是必须的,其他的你可以根据自己的需要进行安装
[root@web_server ~]# yum install -y php php-mysql php-gd php-ldap php-odbc php-pear php-xml php-xmlrpc php-mbstring php-snmp php-soap curl curl-devel编辑Apache配置文件,在DirectoryIndex选项后添加index.php,让其可以支持php网页
[root@web_server ~]# vim /etc/httpd/conf/httpd.conf
DirectoryIndex index.html index.html.var index.php
重启Apache服务
[root@web_server ~]# service httpd restart
Stopping httpd:                                            [  OK  ]
Starting httpd: httpd: apr_sockaddr_info_get() failed for web_server
httpd: Could not reliably determine the server's fully qualified domain name, using 127.0.0.1 for ServerName
                                                           [  OK  ]
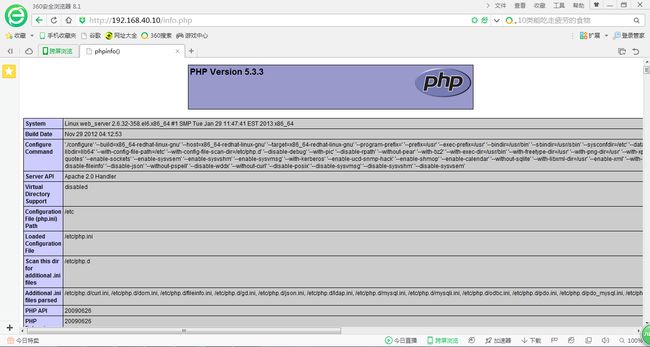
在Apache网页根目录下创建一个.php结尾的php文件,测试是否可以访问.
[root@web_server ~]# vim /var/www/html/info.php

phpinfo();
?>
测试Apache是否支持PHP网页
安装Mysql服务(mysql_server节点)
安装mysql启动服务并设置为开启启动
[root@mysql_server ~]# yum install -y mysql mysql-server
[root@mysql_server ~]# chkconfig mysqld on
[root@mysql_server ~]# service mysqld start
Starting mysqld:                                           [  OK  ]
初始化数据库
[root@mysql_server ~]# mysql_secure_installation
Setting the root password ensures that nobody can log into the MySQL
root user without the proper authorisation.

You already have a root password set, so you can safely answer 'n'.

Change the root password? [Y/n]
New password:
Re-enter new password:
Password updated successfully!
Reloading privilege tables..
 ... Success!


By default, a MySQL installation has an anonymous user, allowing anyone
to log into MySQL without having to have a user account created for
them.  This is intended only for testing, and to make the installation
go a bit smoother.  You should remove them before moving into a
production environment.

Remove anonymous users? [Y/n]
 ... Success!

Normally, root should only be allowed to connect from 'localhost'.  This
ensures that someone cannot guess at the root password from the network.

Disallow root login remotely? [Y/n]
 ... Success!

By default, MySQL comes with a database named 'test' that anyone can
access.  This is also intended only for testing, and should be removed
before moving into a production environment.

Remove test database and access to it? [Y/n]
 - Dropping test database...
 ... Success!
 - Removing privileges on test database...
 ... Success!

Reloading the privilege tables will ensure that all changes made so far
will take effect immediately.

Reload privilege tables now? [Y/n]
 ... Success!

Cleaning up...


All done!  If you've completed all of the above steps, your MySQL
installation should now be secure.

Thanks for using MySQL!
为wordpress创建数据库和用户并设置访问授权
[root@mysql_server ~]# mysql -u root -p
Enter password:
Welcome to the MySQL monitor.  Commands end with ; or \g.
Your MySQL connection id is 12
Server version: 5.1.66 Source distribution

Copyright (c) 2000, 2012, Oracle and/or its affiliates. All rights reserved.

Oracle is a registered trademark of Oracle Corporation and/or its
affiliates. Other names may be trademarks of their respective
owners.

Type 'help;' or '\h' for help. Type '\c' to clear the current input statement.

mysql> CREATE DATABASE wordpressdb;
Query OK, 1 row affected (0.01 sec)

mysql> GRANT ALL PRIVILEGES ON wordpressdb.* TO 'wordpress'@'192.168.40.10' IDENTIFIED BY 'wordpress';
Query OK, 0 rows affected (0.03 sec)

mysql> FLUSH PRIVILEGES;
Query OK, 0 rows affected (0.00 sec)

mysql> QUIT
Bye
在web_server节点安装wordpress安装包
下载wordpress安装包
[root@web_server ~]# wget https://cn.wordpress.org/wordpress-4.5.3-zh_CN.tar.gz解压缩wordpress安装包并cp配置文件
[root@web_server ~]# tar xf wordpress-4.5.3-zh_CN.tar.gz
[root@web_server ~]# cd wordpress
[root@web_server wordpress]# cp wp-config-sample.php wp-config.php
编辑配置文件,做以下修改
[root@web_server wordpress]# vim wp-config.php
// ** MySQL 设置 - 具体信息来自您正在使用的主机 ** //
/** WordPress数据库的名称 */
define('DB_NAME', 'wordpressdb');

/** MySQL数据库用户名 */
define('DB_USER', 'wordpress');

/** MySQL数据库密码 */
define('DB_PASSWORD', 'wordpress');

/** MySQL主机 */
define('DB_HOST', '192.168.40.20');
复制wordpress目录下所有文件到/var/www/html下,并设置目录的权限
[root@web_server wordpress]# cp -rf ./* /var/www/html/
[root@web_server html]# chown -R apache:apache /var/www/html/
[root@web_server html]# chmod -R 755 /var/www/html/
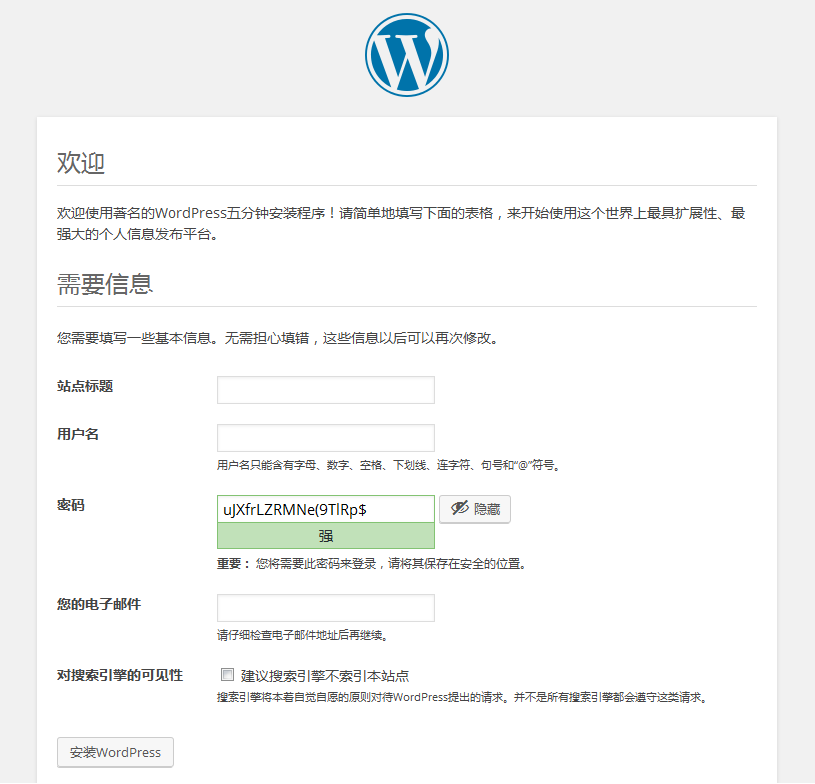
完成以上配置后,便可以登陆http://192.168.40.10来安装你的博客了
END
你可以根据你自己的需求来定制自己的博客了,对于一些定制化的操作步骤,还是建议去wordpress官网去学习,有详细的解释.


