yolov3学习笔记(一)yolov3的配置实现与mAP的计算
本篇为yolov3源码配置实现部分及 使用官方模型进行批量测试
yolo官方主页(包含源码配置)
yolo v3论文
目录
文章目录
- 源码配置
- 批量测试
- yolov3 的AP,mAP计算
源码配置
- 下载源码并编译
git clone https://github.com/pjreddie/darknet
cd darknet
make
- 下载预训练权重(coco)
wget https://pjreddie.com/media/files/yolov3.weights
- 单张图片测试
darknet下
./darknet detect cfg/yolov3.cfg yolov3.weights data/dog.jpg
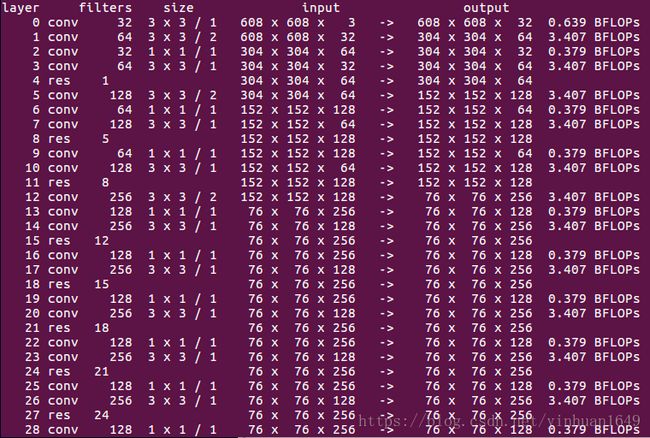
应该会出现这个界面:

再然后会保存到darknet下prediction.jpg,不会显示,因为没有在opencv下编译
好的,这是单次测试,然后是批量测试
批量测试
如果只是想要批量测试一下并输出记录目标位置信息的txt文件,可以使用valid命令,如下:
./darknet detector valid cfg/voc.data cfg/yolov3.cfg yolov3.weights
其中,cfg/voc.data 为测试训练路径等配置,这里需要修改
而cfg/yolov3.cfg为yolov3网络配置文件
yolov3.weights 为刚刚下载的权重文件
classes= 20
train  = /home/pjreddie/data/voc/train.txt
valid  = /home/dbc/darknet/test.txt   #你自己的测试图像路径
names = data/coco.names   #注意这里使用的是coco所训练的模型yolov3.cfg所以这里对应为coco.names
backup = backup
这里test.txt为测试图像的路径,
可以使用命令
ls -R /home/dbc/DATASET/1/pic/*.jpg > files.txt
将路径下文件的绝对路径写入files.txt文件中。
我的test.txt中内容如下:
/home/dbc/DATASET/1/pic/000001.jpg
/home/dbc/DATASET/1/pic/000002.jpg
/home/dbc/DATASET/1/pic/000003.jpg
/home/dbc/DATASET/1/pic/000004.jpg
/home/dbc/DATASET/1/pic/000005.jpg
/home/dbc/DATASET/1/pic/000006.jpg
/home/dbc/DATASET/1/pic/000007.jpg
/home/dbc/DATASET/1/pic/000008.jpg
……
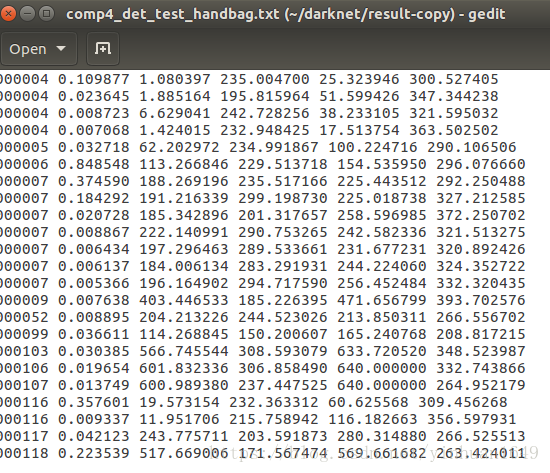
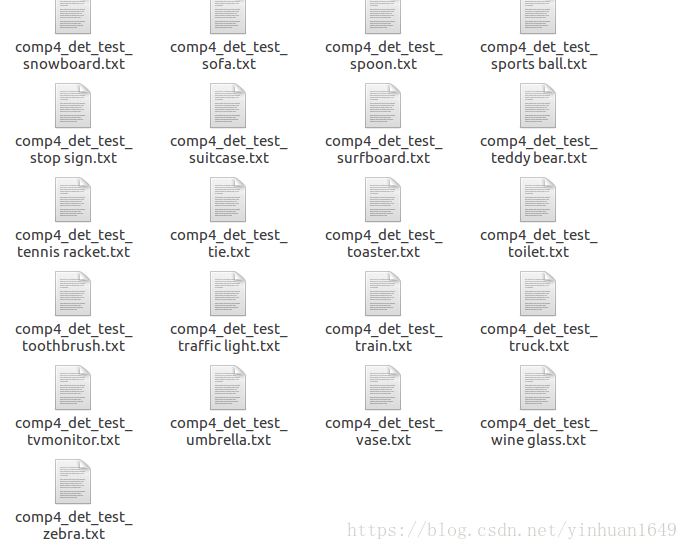
执行完在./results/comp4_det_test_[类名].txt里会保存测试结果,像这样
打开comp4_det_test_[handbag].txt看一下:

按列,分别为:图像名称 | 置信度 | xmin,ymin,xmax,ymax
如果想要批量测试并保存测试结果则需要修改./example/detector.c文件
这里参考了博客
https://blog.csdn.net/mieleizhi0522/article/details/79989754
中的修改方法:
- 使用以下函数替换了detector.c中的void test_detector函数, 注意修改3处路径
void test_detector(char *datacfg, char *cfgfile, char *weightfile, char *filename, float thresh, float hier_thresh, char *outfile, int fullscreen)
{
    list *options = read_data_cfg(datacfg);
    char *name_list = option_find_str(options, "names", "data/names.list");
    char **names = get_labels(name_list);

    image **alphabet = load_alphabet();
    network *net = load_network(cfgfile, weightfile, 0);
    set_batch_network(net, 1);
    srand(2222222);
    double time;
    char buff[256];
    char *input = buff;
    float nms=.45;
    int i=0;
    while(1){
        if(filename){
            strncpy(input, filename, 256);
            image im = load_image_color(input,0,0);
            image sized = letterbox_image(im, net->w, net->h);
        //image sized = resize_image(im, net->w, net->h);
        //image sized2 = resize_max(im, net->w);
        //image sized = crop_image(sized2, -((net->w - sized2.w)/2), -((net->h - sized2.h)/2), net->w, net->h);
        //resize_network(net, sized.w, sized.h);
            layer l = net->layers[net->n-1];


            float *X = sized.data;
            time=what_time_is_it_now();
            network_predict(net, X);
            printf("%s: Predicted in %f seconds.\n", input, what_time_is_it_now()-time);
            int nboxes = 0;
            detection *dets = get_network_boxes(net, im.w, im.h, thresh, hier_thresh, 0, 1, &nboxes);
            //printf("%d\n", nboxes);
            //if (nms) do_nms_obj(boxes, probs, l.w*l.h*l.n, l.classes, nms);
            if (nms) do_nms_sort(dets, nboxes, l.classes, nms);
                draw_detections(im, dets, nboxes, thresh, names, alphabet, l.classes);
                free_detections(dets, nboxes);
            if(outfile)
             {
                save_image(im, outfile);
             }
            else{
                save_image(im, "predictions");
#ifdef OPENCV
                cvNamedWindow("predictions", CV_WINDOW_NORMAL);
                if(fullscreen){
                cvSetWindowProperty("predictions", CV_WND_PROP_FULLSCREEN, CV_WINDOW_FULLSCREEN);
                }
                show_image(im, "predictions");
                cvWaitKey(0);
                cvDestroyAllWindows();
#endif
            }
            free_image(im);
            free_image(sized);
            if (filename) break;
         }
        else {
            printf("Enter Image Path: ");
            fflush(stdout);
            input = fgets(input, 256, stdin);
            if(!input) return;
            strtok(input, "\n");

            list *plist = get_paths(input);
            char **paths = (char **)list_to_array(plist);
             printf("Start Testing!\n");
            int m = plist->size;
            if(access("/home/FENGsl/darknet/data/out",0)==-1)//"/home/FENGsl/darknet/data"修改成自己的路径
            {
              if (mkdir("/home/FENGsl/darknet/data/out",0777))//"/home/FENGsl/darknet/data"修改成自己的路径
               {
                 printf("creat file bag failed!!!");
               }
            }
            for(i = 0; i < m; ++i){
             char *path = paths[i];
             image im = load_image_color(path,0,0);
             image sized = letterbox_image(im, net->w, net->h);
        //image sized = resize_image(im, net->w, net->h);
        //image sized2 = resize_max(im, net->w);
        //image sized = crop_image(sized2, -((net->w - sized2.w)/2), -((net->h - sized2.h)/2), net->w, net->h);
        //resize_network(net, sized.w, sized.h);
        layer l = net->layers[net->n-1];


        float *X = sized.data;
        time=what_time_is_it_now();
        network_predict(net, X);
        printf("Try Very Hard:");
        printf("%s: Predicted in %f seconds.\n", path, what_time_is_it_now()-time);
        int nboxes = 0;
        detection *dets = get_network_boxes(net, im.w, im.h, thresh, hier_thresh, 0, 1, &nboxes);
        //printf("%d\n", nboxes);
        //if (nms) do_nms_obj(boxes, probs, l.w*l.h*l.n, l.classes, nms);
        if (nms) do_nms_sort(dets, nboxes, l.classes, nms);
        draw_detections(im, dets, nboxes, thresh, names, alphabet, l.classes);
        free_detections(dets, nboxes);
        if(outfile){
            save_image(im, outfile);
        }
        else{

             char b[2048];
            sprintf(b,"/home/FENGsl/darknet/data/out/%s",GetFilename(path));//"/home/FENGsl/darknet/data"修改成自己的路径

            save_image(im, b);
            printf("save %s successfully!\n",GetFilename(path));
#ifdef OPENCV
            cvNamedWindow("predictions", CV_WINDOW_NORMAL);
            if(fullscreen){
                cvSetWindowProperty("predictions", CV_WND_PROP_FULLSCREEN, CV_WINDOW_FULLSCREEN);
            }
            show_image(im, "predictions");
            cvWaitKey(0);
            cvDestroyAllWindows();
#endif
        }

        free_image(im);
        free_image(sized);
        if (filename) break;
        }
      }
    }
}
- 在前面添加*GetFilename(char *p)函数(这里和原博客略有不同,增加
#include不然会报错)
#include "darknet.h"
#include - 在darknet下重新make
- 执行批量测试命令如下
./darknet detector test cfg/voc.data cfg/yolov3.cfg yolov3.weights
执行结果:
layer     filters    size              input                output
    0 conv     32  3 x 3 / 1   416 x 416 x   3   ->   416 x 416 x  32  0.299 BFLOPs
    1 conv     64  3 x 3 / 2   416 x 416 x  32   ->   208 x 208 x  64  1.595 BFLOPs
    .......
  104 conv    256  3 x 3 / 1    52 x  52 x 128   ->    52 x  52 x 256  1.595 BFLOPs
  105 conv    255  1 x 1 / 1    52 x  52 x 256   ->    52 x  52 x 255  0.353 BFLOPs
  106 detection
Loading weights from yolov3.weights...Done!
Enter Image Path:
然后输入测试用图像路径,与上文valid参数一样,输入
/home/dbc/darknet/test.txt #你的测试图像路径
测试结果图像会保存在./data/out中。
进入下一部分,AP及mAP的计算
yolov3 的AP,mAP计算
这里,你需要准备:
- 测试图像
- 测试图像所对应的VOC格式的标记文件(xml)
- 测试图像文件列表的txt文件
- 上文yolo批量测试所输出的对测试图像测试的结果文件(txt),其中包含模型所预测的位置信息。*注意:*这里的txt文件的命名,应当与xml文件中所标记的类别名称相同,如:handbag.txt, person.txt etc.
- 下载fasterrcnn的eval_voc.py,自行下载放在darknet目录下
1大家肯定都有哈哈,2 我是用labelimg标记的,labelImg链接
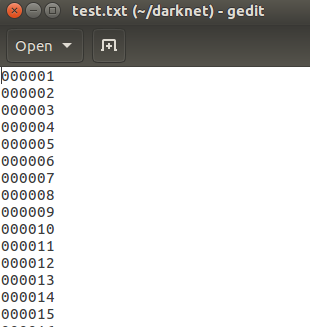
3测试图像文件列表的txt文件的格式如下:
只有文件名,不需要路径和后缀名

在darknet目录下新建一个compute_mAP.py,内容;
from voc_eval import voc_eval
import _pickle as cPickle

rec,prec,ap = voc_eval('/home/dbc/darknet/results/{}.txt', '/home/dbc/DATASET/1/anno/{}.xml', '/home/dbc/darknet/test.txt', 'person', '.')

print('rec',rec)
print('prec',prec)
print('ap',ap)
运行python compute_mAP.py 计算出单类别的AP
###tips:有关keyerror
每次运行前记得删掉annots.pkl,不然会报错
