OpenCV使用Cmake和MinGW编译安装在QT中配置运行
一、软件环境:
Win7-64bit
Qt-5.14.0
MinGW-7.3.0-32bit
CMake-3.16.5
Opencv3.4.7
我的主机上已经有QT和MinGW,只需下载CMake和Opencv。
1、opencv下载地址:
https://sourceforge.net/p/opencvlibrary/activity/?page=0&limit=100#5dfd53dae8ba7c1415f4b10f
运行解压得到opencv文件夹主要包括 build 和sources 两个文件夹 。
2、CMake下载地址:https://cmake.org/download/ cmake-3.17.0-win64-x64.msi
要先添加MinGW的环境变量, D:\Qt\Qt5.14.0\Tools\mingw730_32\bin,还有之前的Qt环境变量,以及CMake的环境变量
二、使用 CMake 生成 OpenCV 的 Makefile
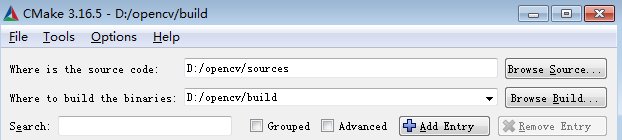
打开 cmake-gui,设置源码和生成路径:
点击 Configure,设置编译器
Specify the generator for this project: MinGW Makefiles
Specify native compilers
Next
Compilers C: D:\Qt\Qt5.14.0\Tools\mingw730_32\bin\gcc.exe
Compilers C++:D:\Qt\Qt5.14.0\Tools\mingw730_32\bin\g++.exe
Finish
编译配置:
勾选 WITH_QT
勾选 WITH_OPENGL
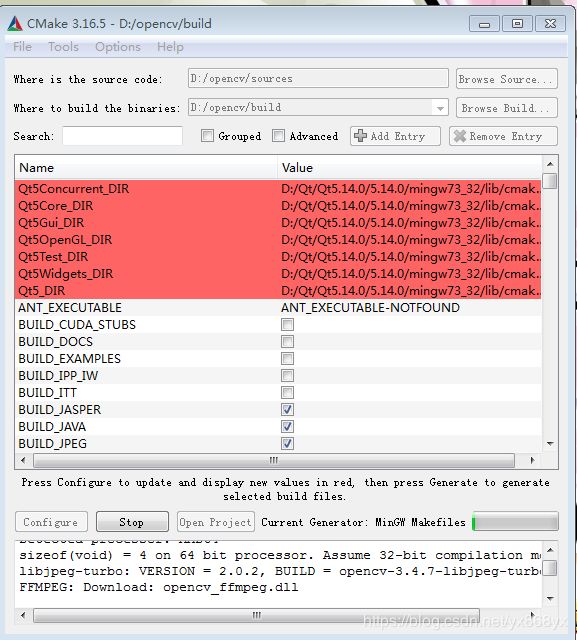
点击 Configure,再次配置:
不勾选 WITH_IPP
设置 QT_MAKE_EXECUTABLE 为 E:\Qt\Qt5.9.3\5.9.3\mingw53_32\bin\qmake.exe
设置 Qt5Concurrent_DIR 为 D:/Qt/Qt5.14.0/5.14.0/mingw73_32/lib/cmake/Qt5Concurrent
设置 Qt5Core_DIR 为 D:/Qt/Qt5.14.0/5.14.0/mingw73_32/lib/cmake/Qt5Core
设置 Qt5Gui_DIR 为 D:/Qt/Qt5.14.0/5.14.0/mingw73_32/lib/cmake/Qt5Gui
设置 Qt5Test_DIR 为 D:/Qt/Qt5.14.0/5.14.0/mingw73_32/lib/cmake/Qt5Test
设置 Qt5Widgets_DIR 为 D:/Qt/Qt5.14.0/5.14.0/mingw73_32/lib/cmake/Qt5Widgets
设置 Qt5OpenGL_DIR 为D:/Qt/Qt5.14.0/5.14.0/mingw73_32/lib/cmake/Qt5OpenGL
设置 CMAKE_BUILD_TYPE 为 Release
不勾选 ENABLE_PRECOMPILED_HEADERS
发生错误:
1、无法下载opencv_ffmpeg.dll文件
Call Stack (most recent call first): 3rdparty/ffmpeg/ffmpeg.cmake:20
(ocv_download) cmake/OpenCVFindLibsVideo.cmake:227
(download_win_ffmpeg) CMakeLists.txt:803 (include) FFMPEG: Download:
ffmpeg_version.cmakeCouldn’t connect to server from the Internet. Perhaps direct
connections are not allowed in the current network. To use proxy
please check/specify these environment variables:
-http_proxy/https_proxy -and/or HTTP_PROXY/HTTPS_PROXYCMake Warning at cmake/OpenCVDownload.cmake:193 (message): FFMPEG:
Download failed: 7;“Couldn’t connect to server”
solution:
https://www.cnblogs.com/huluwa508/p/10142718.html
直接下载:
https://raw.githubusercontent.com/opencv/opencv_3rdparty/d284fd09e76966e95f08e1ac3a1a28b227447501/ffmpeg/opencv_ffmpeg.dll
然后放到目标路径 D:\opencv\build\3rdparty\ffmpeg\opencv_ffmpeg.dll
2、如何去掉cmake编译Opencv时的Cmake
Warning:“OpenCVGenSetupVars.cmake:54”
solution:https://blog.csdn.net/allen101zhang/article/details/104632077
点击 Generate 生成 Makefile

$ cd D:\opencv\build
$ mingw32-make -j 8
编译的过程发生了很多错误:
1、
Linking CXX shared library …\bin\libopencv_dnn331.dll
Build target opencv_dnn
Makefile:161: recipe for target ‘all’ failed
mingw32-make: *** [all] Error 2
solution:
用mingw32-make 使用单线程
2、chmod’ 不是内部或外部命令,也不是可运行的程序 或批处理文件
在 D:\opencv\sources\cmake\OpenCVPCHSupport.cmake 中使用了 chmod 命令,然而 Windows 下不支持 chmod 命令,因此报错。
solution:
参考:fix ‘chmod’ is not recognized as an internal or external command in Windows #15433
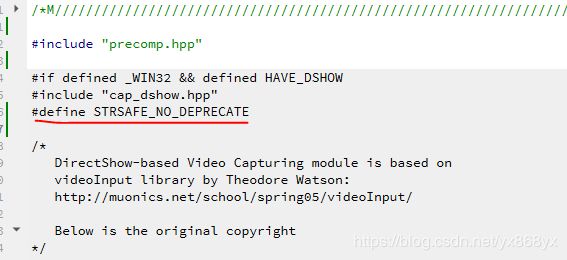
3、Videoio模块问题
mingw32-make[2]: ***
[modules/videoio/CMakeFiles/opencv_videoio.dir/src/cap_dshow.cpp.obj]
Error 1 CMakeFiles\Makefile2:2867: recipe for target
‘modules/videoio/CMakeFiles/opencv_videoio.dir/all’ failed
mingw32-make[1]: ***
[modules/videoio/CMakeFiles/opencv_videoio.dir/all] Error 2
Makefile:161: recipe for target ‘all’ failed mingw32-make: *** [all]
Error 2
solution:
在opencv的源码文件cap_dshow.cpp中添加
#define STRSAFE_NO_DEPRECATE
4、test_common.hpp: No such file or directory
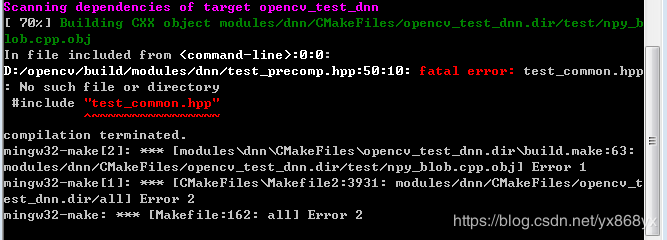
方法一:(issues/15381)
在 cmake-gui 编译配置中:
*
不勾选 ENABLE_PRECOMPILED_HEADERS(禁用预编译头)
然后重新 Configure-Generate-mingw32-make
方法二:
把 E:\opencv-3.4.7\opencv-3.4.7\modules\dnn\test\test_common.hpp 复制到 E:\opencv-3.4.7\opencv-3.4.7-build\modules\dnn\ 目录下
然后继续 mingw32-make
原文链接:https://blog.csdn.net/fengxueniu/article/details/77478669
5、 Anaconoda冲突问题错误
mingw32-make[1]: ***
[modules/python3/CMakeFiles/opencv_python3.dir/all] Error 2
Makefile:161: recipe for target ‘all’ failed mingw32-make: *** [all]
Error 2
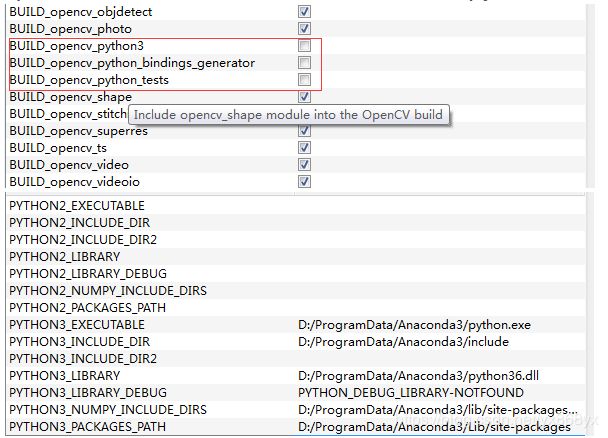
由于本人之前电脑装了Anaconda,所以在cmake进行configure之后总是自动检测到python路径并且为其自动build了python的opencv链接,所以后面我取消选中一切关于python的选项。
https://blog.csdn.net/KID_yuan/article/details/86769144
再重新 Configure-Generate-mingw32-make
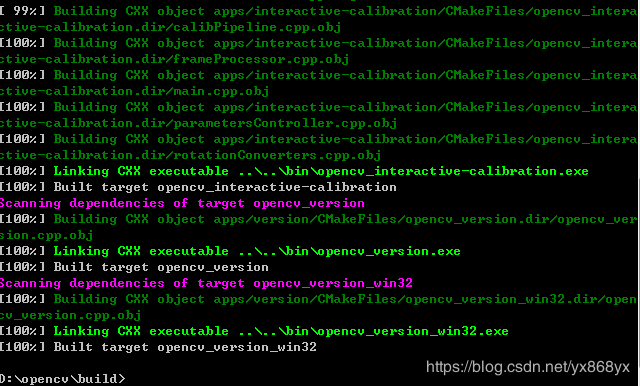
mingw32-make install
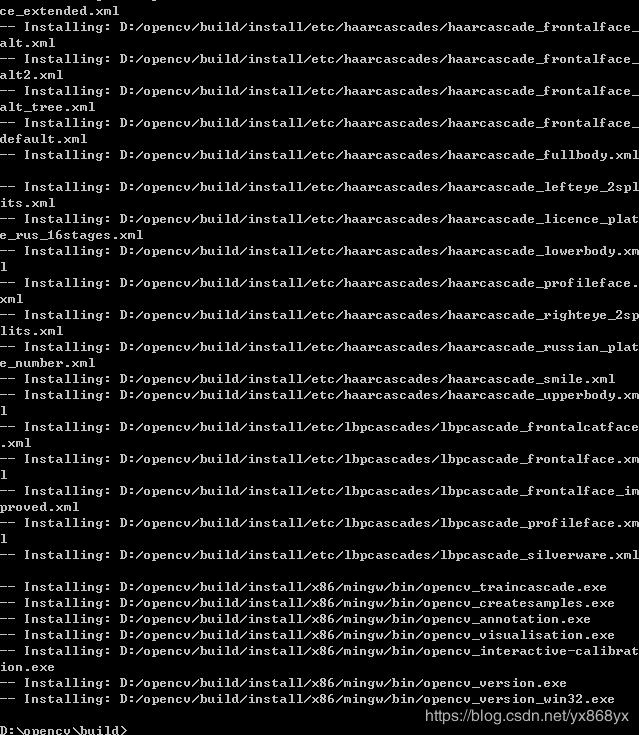
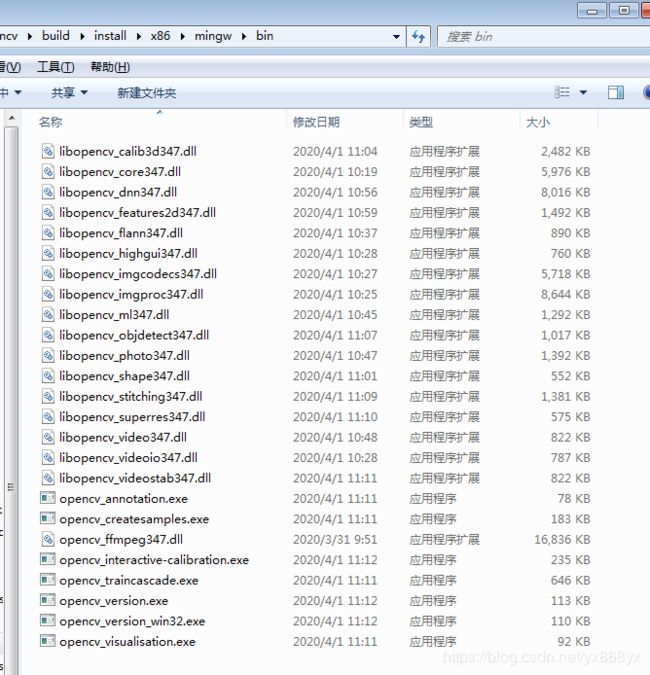
添加 OpenCV 编译的库到环境变量
为系统变量 Path 添加 D:\opencv\build\install\x86\mingw\bin
三、新建 OpenCV 的 Qt 项目
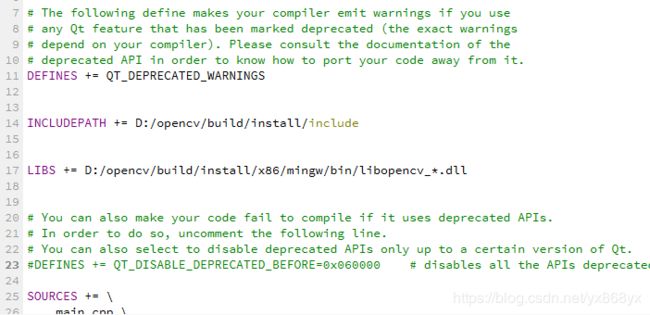
1、在 .pro 文件里面添加:
INCLUDEPATH += D:/opencv/build/install/include
LIBS += D:/opencv/build/install/x86/mingw/bin/libopencv_*.dll
2、在 MainWindow.cpp 中如下
#include "mainwindow.h"
#include "ui_mainwindow.h"
#include 运行结果:
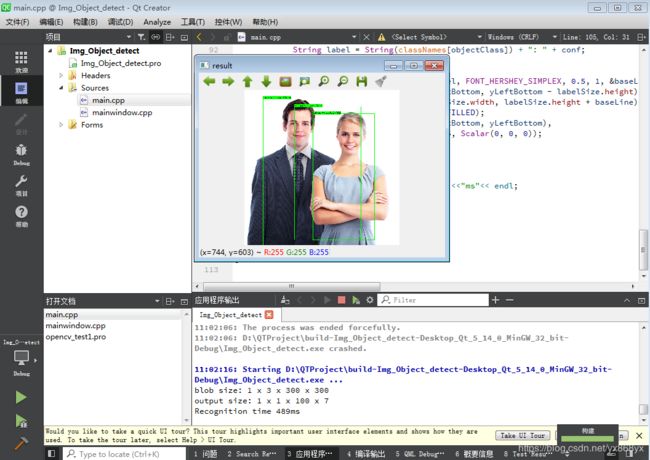
四、Qt+opencv dnn模块调用tensorflow模型图像检测
1、在 .pro 文件里面添加:
INCLUDEPATH += D:/opencv/build/install/include
LIBS += D:/opencv/build/install/x86/mingw/bin/libopencv_*.dll
2、点击构建,完成之后,把ssd_mobilenet_v1_coco_11_06_2017放在构建目录下(build-XXX_Qt_5_14_0_MinGW_32_bit-Debug)。
mian.cpp中:
#include 结果:
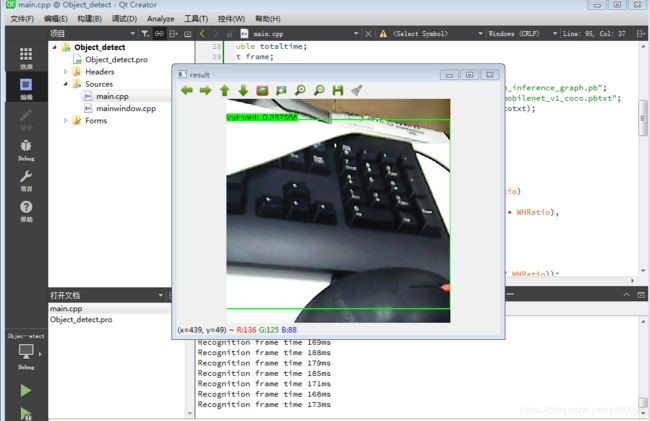
五、Qt+opencv dnn模块调用tensorflow模型视频检测
mian.cpp中:
#include 结果:
参考博客:
https://blog.huihut.com/2017/12/03/CompiledOpenCVRunInQt/
https://wiki.qt.io/How_to_setup_Qt_and_openCV_on_Windows
https://blog.csdn.net/yuwenlingfeng/article/details/79154489?depth_1-utm_source=distribute.pc_relevant.none-task&utm_source=distribute.pc_relevant.none-task
https://blog.csdn.net/m0_38133212/article/details/87908101
https://blog.csdn.net/m0_38133212/article/details/88032546