vue-router
前端渲染后端渲染、前端路由后端路由
后端渲染
图解:
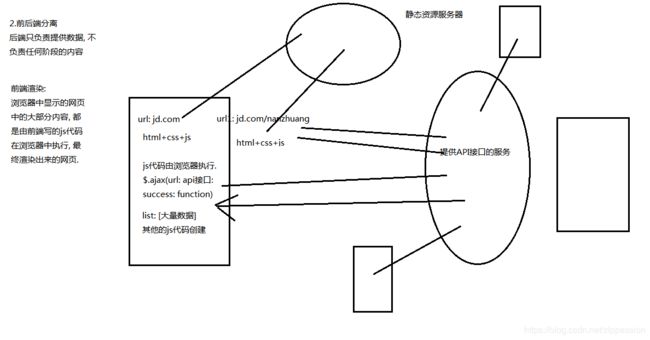
前后端分离
图解
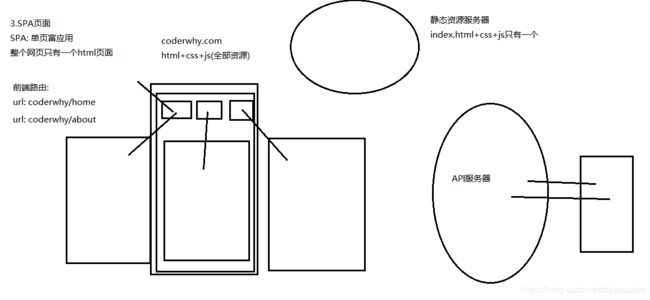
 SPA页面
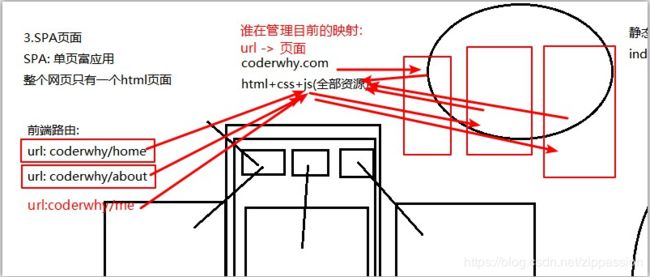
SPA页面
映射
URL的hash
URL的hash也就是锚点(#), 本质上是改变window.location的href属性.
我们可以通过直接赋值location.hash来改变href, 但是页面不发生刷新
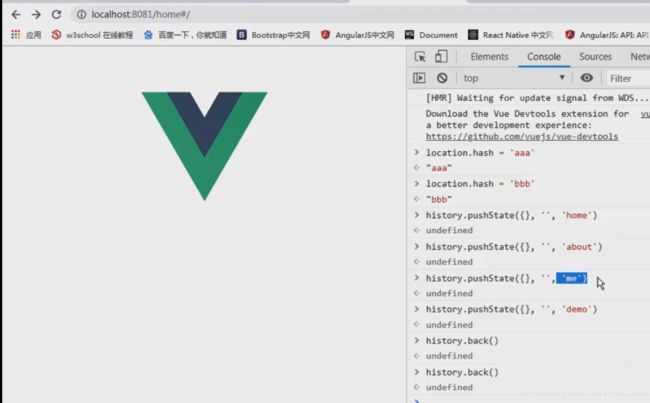
HTML5的history模式:pushState
history接口是HTML5新增的, 它有五种模式改变URL而不刷新页面.
类似栈
history.pushState()
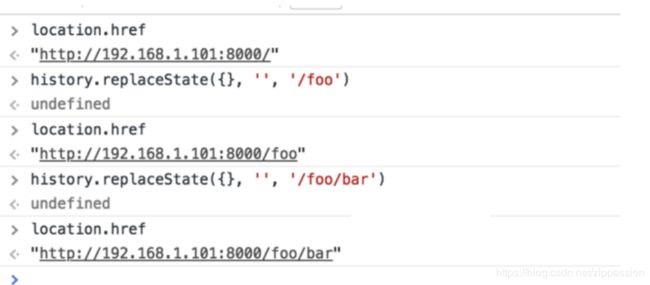
HTML5的history模式:replaceState
history.replaceState()
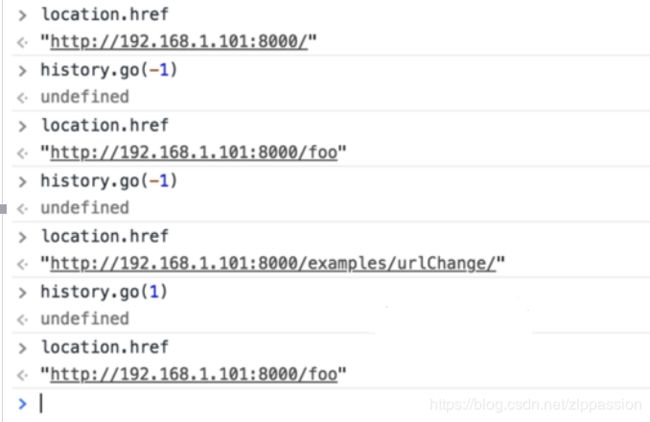
HTML5的history模式:go
history.go()
history.back() 等价于 history.go(-1)
history.forward() 则等价于 history.go(1)
这三个接口等同于浏览器界面的前进后退
创建项目
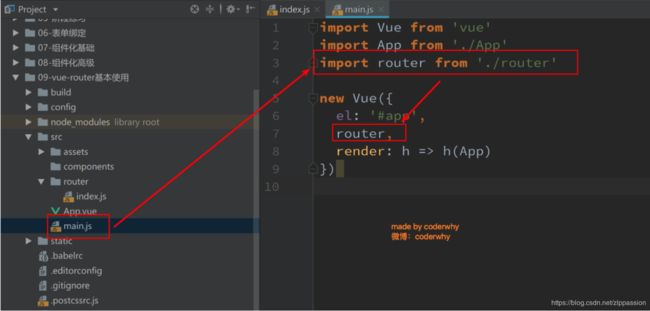
创建router实例
挂载到Vue实例中
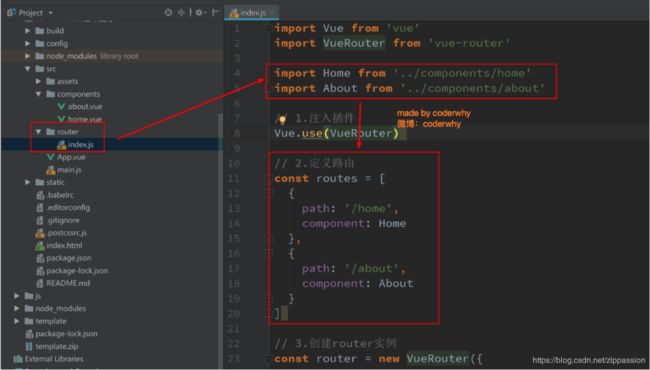
 步骤一:创建路由组件
步骤二:配置组件和路径的映射关系
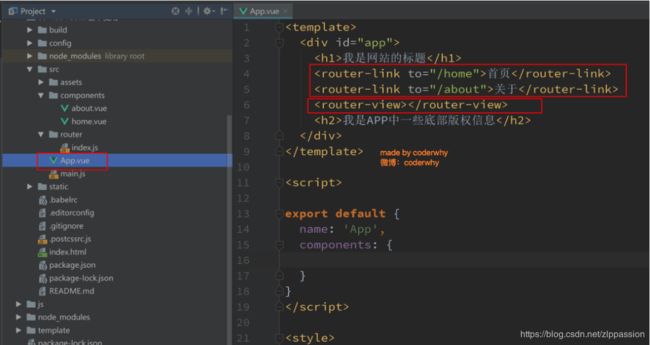
步骤三:使用路由.
网页的其他内容, 比如顶部的标题/导航, 或者底部的一些版权信息等会和
在路由切换时, 切换的是
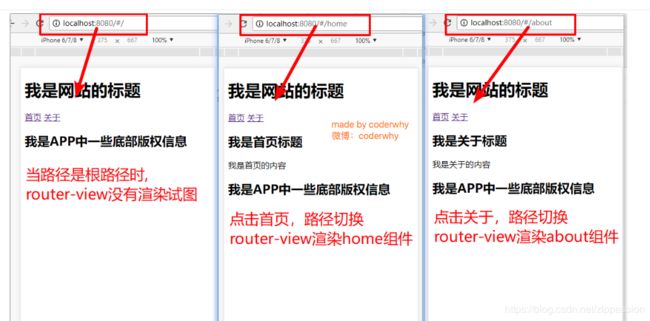
最终效果
路由的默认路径
默认情况下, 进入网站的首页, 我们希望
我们只需要配置多配置一个映射就可以了.
配置解析:
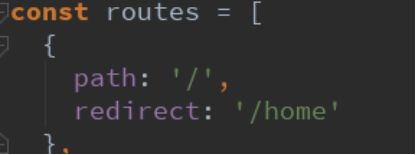
我们在routes中又配置了一个映射.
path配置的是根路径: /
redirect是重定向, 也就是我们将根路径重定向到/home的路径下, 这样就可以得到我们想要的结果了.
HTML5的History模式
我们前面说过改变路径的方式有两种:
①URL的hash
②HTML5的history
③默认情况下, 路径的改变使用的URL的hash.
如果希望使用HTML5的history模式, 非常简单, 进行如下配置即可
history
hash
router-link补充
在前面的
tag: tag可以指定
replace: replace不会留下history记录, 所以指定replace的情况下, 后退键返回不能返回到上一个页面中
active-class: 当
修改linkActiveClass
该class具体的名称也可以通过router实例的属性进行修改
路由代码跳转
有时候, 页面的跳转可能需要执行对应的JavaScript代码, 这个时候, 就可以使用第二种跳转方式了
动态路由
在某些情况下,一个页面的path路径可能是不确定的,比如我们进入用户界面时,希望是如下的路径:
/user/aaaa或/user/bbbb
除了有前面的/user之外,后面还跟上了用户的ID
这种path和Component的匹配关系,我们称之为动态路由(也是路由传递数据的一种方式)。
$route:谁处于活跃状态,取到的就是谁
$router:是整个大的new出来的router对象
User.vue
我是user
{{userId}}
index.js
import Vue from 'vue'
import Router from 'vue-router'
//import HelloWorld from '@/components/HelloWorld'
import Home from '../components/Home'
import About from '../components/About'
import User from '../components/User'

Vue.use(Router)

export default new Router({
  routes: [
    {
      path: '/',
      redirect:'/home'
    },
    {
      path:'/home',
      component:Home
    },
    {
      path:'/about',
      component:About
    },
    {
      path:'/user/:id',
      component:User
    }
  ],

  mode:'history',
  linkActiveClass:'active'
})
App.vue
首页
关于
用户
认识路由的懒加载
官方给出了解释:
当打包构建应用时,Javascript 包会变得非常大,影响页面加载。
如果我们能把不同路由对应的组件分割成不同的代码块,然后当路由被访问的时候才加载对应组件,这样就更加高效了
路由懒加载做了什么?
路由懒加载的主要作用就是将路由对应的组件打包成一个个的js代码块.
只有在这个路由被访问到的时候, 才加载对应的组件
路由懒加载的效果
懒加载的方式
认识嵌套路由
嵌套路由是一个很常见的功能
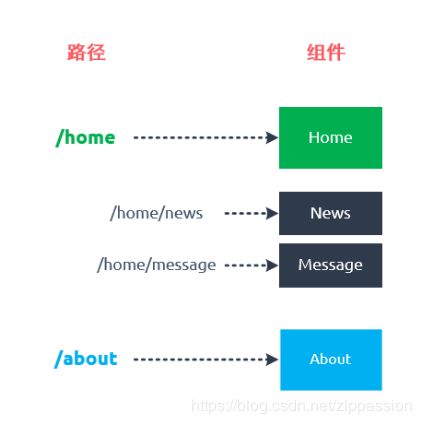
比如在home页面中, 我们希望通过/home/news和/home/message访问一些内容.
一个路径映射一个组件, 访问这两个路径也会分别渲染两个组件.
路径和组件的关系如下:
实现嵌套路由有两个步骤:
创建对应的子组件, 并且在路由映射中配置对应的子路由.
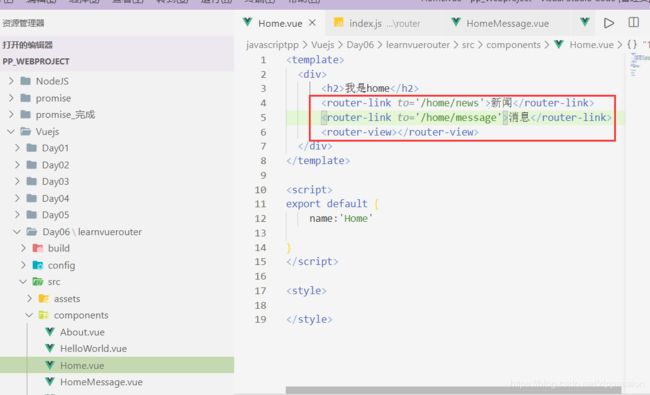
在组件内部使用
嵌套路由实现
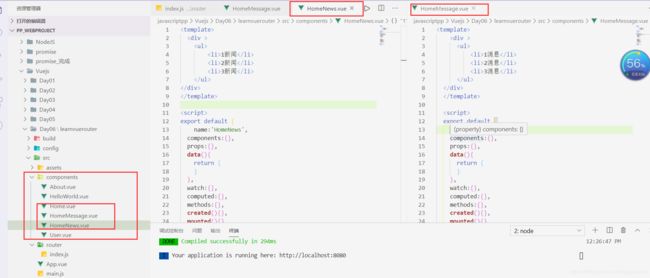
创建两个组件
Home.vue
index.js
children属性添加。
子路径的path就不用写/了。
import Vue from 'vue'
import Router from 'vue-router'
//import HelloWorld from '@/components/HelloWorld'
// import Home from '../components/Home'
// import About from '../components/About'
// import User from '../components/User'

Vue.use(Router)

const HomeNews=()=>import('../components/HomeNews.vue')
const HomeMessage=()=>import('../components/HomeMessage.vue')
export default new Router({
  routes: [
    {
      path: '/',
      redirect:'/home'
    },
    {
      path:'/home',
      component:()=>import('../components/Home'),
      children:[
        {
          path:'',
          redirect:'news'
        },
        {
          path:'news',
          component:HomeNews
        },
        {
          path:'message',
          component:HomeMessage
        }
      ]
    },
    {
      path:'/about',
      component:()=>import('../components/About')
    },
    {
      path:'/user/:id',
      component:()=>import('../components/User')
    }
  ],

  mode:'history',
  linkActiveClass:'active'
})
传递参数
传递参数的方式
传递参数主要有两种类型: params和query
params的类型:
配置路由格式: /router/:id
传递的方式: 在path后面跟上对应的值
传递后形成的路径: /router/123, /router/abc
query的类型:
配置路由格式: /router, 也就是普通配置
传递的方式: 对象中使用query的key作为传递方式
传递后形成的路径: /router?id=123, /router?id=abc
两种方式代码
App.vue
首页
关于
用户
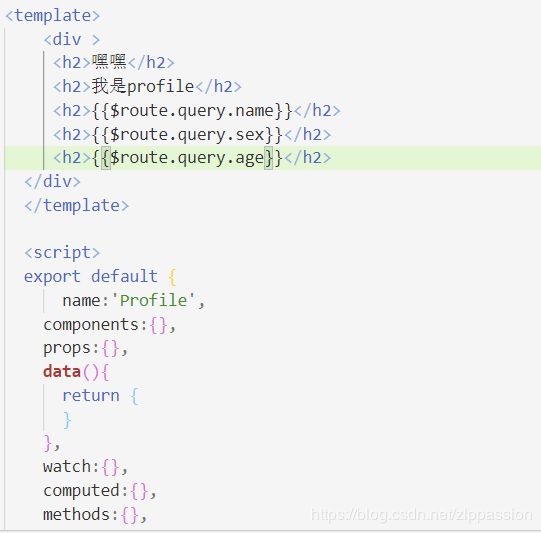
组件
获取
params
query
$route和$router是有区别的
所有的组件都继承自vue类的原型
$router为VueRouter实例,想要导航到不同URL,则使用$router.push方法
$route为当前router跳转对象里面可以获取name、path、query、params等
导航守卫使用
我们可以利用beforeEach来完成标题的修改.
首先, 我们可以在钩子当中定义一些标题, 可以利用meta来定义
其次, 利用导航守卫,修改我们的标题.
导航钩子的三个参数解析:
to: 即将要进入的目标的路由对象. from: 当前导航即将要离开的路由对象. next: 调用该方法后, 才能进入下一个钩子.
index.js
matched[0],是由于Home下面还有children,不加的话会出错。
import Vue from 'vue'
import Router from 'vue-router'
import VueRouter from 'vue-router'
//import HelloWorld from '@/components/HelloWorld'
// import Home from '../components/Home'
// import About from '../components/About'
// import User from '../components/User'

Vue.use(Router)

const HomeNews=()=>import('../components/HomeNews.vue')
const HomeMessage=()=>import('../components/HomeMessage.vue')
const Profile=()=>import('../components/Profile.vue')
const routes=[
  {
    path: '/',
    redirect:'/home'
  },
  {
    path:'/home',
    component:()=>import('../components/Home'),
    children:[
      {
        path:'',
        redirect:'news'
      },
      {
        path:'news',
        component:HomeNews
      },
      {
        path:'message',
        component:HomeMessage
      }
    ],
    meta:{
      title:'首页'
    }
  },
  {
    path:'/about',
    component:()=>import('../components/About'),
    meta:{
      title:'关于'
    }
  },
  {
    path:'/user/:id',
    component:()=>import('../components/User'),
    meta:{
      title:'用户'
    }
  },
  {
    path:'/profile',
    component:Profile,
    meta:{
      title:'组件'
    }
  }
]
const router=new VueRouter({
  routes,
  mode:'history',
  linkActiveClass:'active'
})
router.beforeEach((to,from,next)=>{
  //从from跳转到to
  document.title=to.matched[0].meta.title,
  next()
})
export default router
导航守卫补充
补充一:如果是后置钩子, 也就是afterEach, 不需要主动调用next()函数. 补充二: 上面我们使用的导航守卫, 被称之为全局守卫.
更多参考官网https://router.vuejs.org/zh/guide/advanced/navigation-guards.html#%E8%B7%AF%E7%94%B1%E7%8B%AC%E4%BA%AB%E7%9A%84%E5%AE%88%E5%8D%AB
 {
    path:'/about',
    component:()=>import('../components/About'),
    beforeEnter: (to, from, next) => {
      // ...
      console.log("xixixi")
      next()
    },
    meta:{
      title:'关于'
    }
  },
按钮多次点击报错解决方案:
在main.js中添加
import Router from 'vue-router'

const originalPush = Router.prototype.push
Router.prototype.push = function push(location) {
  return originalPush.call(this, location).catch(err => err)
}
keep-alive遇见vue-router
keep-alive 是 Vue 内置的一个组件,可以使被包含的组件保留状态,或避免重新渲染。
它们有两个非常重要的属性:
include - 字符串或正则表达,只有匹配的组件会被缓存
exclude - 字符串或正则表达式,任何匹配的组件都不会被缓存
router-view 也是一个组件,如果直接被包在 keep-alive 里面,所有路径匹配到的视图组件都会被缓存
实现保留历史点击记录
即现在点了首页的消息,之后点了关于再点首页,显示的是消息。而不是重新渲染为默认的新闻。
Home.vue
我是home
新闻
消息
index.js中相关配置
{
    path:'/home',
    component:()=>import('../components/Home'),
    children:[
      // {
      //   path:'',
      //   redirect:'news'
      // },
      {
        path:'news',
        component:HomeNews
      },
      {
        path:'message',
        component:HomeMessage
      }
    ],
    meta:{
      title:'首页'
    }
  },
TabBar
TabBar实现思路
1. 如果在下方有一个单独的TabBar组件,你如何封装
自定义TabBar组件,在APP中使用
让TabBar出于底部,并且设置相关的样式
2.TabBar中显示的内容由外界决定
定义插槽
flex布局平分TabBar
3.自定义TabBarItem,可以传入 图片和文字
定义TabBarItem,并且定义两个插槽:图片、文字。
给两个插槽外层包装div,用于设置样式。
填充插槽,实现底部TabBar的效果
4.传入 高亮图片
定义另外一个插槽,插入active-icon的数据
定义一个变量isActive,通过v-show来决定是否显示对应的icon
5.TabBarItem绑定路由数据
安装路由:npm install vue-router —save
完成router/index.js的内容,以及创建对应的组件
main.js中注册router
APP中加入
6.点击item跳转到对应路由,并且动态决定isActive
监听item的点击,通过this.$router.replace()替换路由路径
通过this.$route.path.indexOf(this.link) !== -1来判断是否是active
7.动态计算active样式
封装新的计算属性:this.isActive ? {'color': 'red'} : {}
代码实现
TabBar.vue
TabBarItem.vue
MainTabBar.vue

 首页
首页

 分类
分类

 购物车
购物车

 我的
我的
index.js
import Vue from 'vue'
import Router from 'vue-router'


Vue.use(Router)

const Home = () =>import('../views/home/Home.vue')
const Category = () =>import('../views/category/Category.vue')
const Cart = () =>import('../views/cart/Cart.vue')
const Profile = () =>import('../views/profile/Profile.vue')

const routes=[
    {
        path:'',
        redirect:'/home'
    },
    {
        path:'/home',
        component:Home
    },
    {
        path:'/cart',
        component:Cart
    },
    {
        path:'/profile',
        component:Profile
    },
    {
        path:'/category',
        component:Category
    }

]
const router=new Router({
    routes

})
export default router
App.vue
