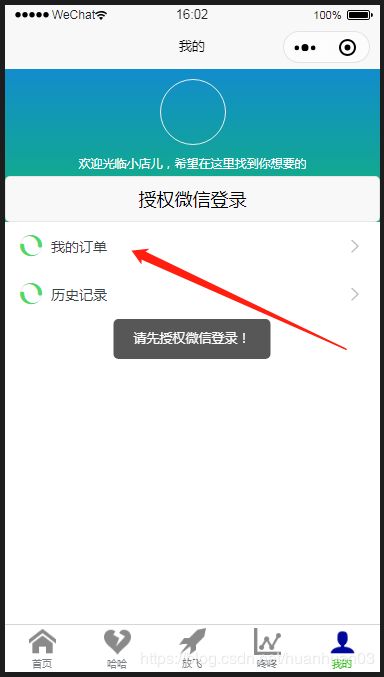
uni-app小程序--授权登录、分享页面
uni-app框架写小程序如何微信授权、分享页面
首先明确思路:
1.将判断用户是否授权逻辑放在App.vue里,每次用户进入mounted, 判断用户是否已经授权过,将授权状态存在vuex里,(我测试时先存在了storge里)
setting(){
 const that = this;
  wx.login({
      //用户登录
      success(res) {
          console.log(res.code)
          if (res.code) {
              // 发起网络请求
              var code = res.code;
              wx.getSetting({
                  //查看用户是否授权
                  success(res) {
                      console.log(res)
                      if (res.authSetting['scope.userInfo']) {
                          //用户已经授权
                          wx.getUserInfo({
                            //获取用户信息
                              success: (res) => {
                                  console.log(res)
                                  res.userInfo.nickName    // 存起来用户昵称
                                  res.userInfo.avatarUrl   // 存起来用户头像
								  uni.setStorage({         // 存起来授权状态
								  	key: 'loginSwitch',
									data: '1'
								  })
			                    },
								fail(err) {
									console.log(err)
								}
                          })
                          // wx.switchTab({
                          //   url: '../counter/main'
                          // })
                      }
                  }
              })
          }
      }
  })
},
	  // 我的订单
	  getMyOrder () {
		  uni.getStorage({            // 判断用户授权状态,提示相应操作
		  	key: 'loginSwitch',
			success(e){
				if (e.data == 1) {
					uni.showToast({
					    title: '跳转‘我的订单’页',
					    duration: 2000,
						icon: 'none'
					});
				} else {
					uni.showToast({
					    title: '请先授权微信登录!',
					    duration: 2000,
						icon: 'none'
					});
					// 授权放在了user.vue,所以这里可以跳转到user.vue,依需求而定
					// wx.switchTab({
                    //   url: '../pages/mine'
                    // })
				}
			},
			fail(err) {
				uni.showToast({
				    title: '请先授权微信登录!',
				    duration: 2000,
					icon: 'none'
				});
			}
		  })
	  },
- 一般用户授权放在最后user页面,在用户完全了解了小程序的功能后,再选择是否授权
以上是整体思路,我测试的时候为为了省事,将这些逻辑都写在了user.vue页面里,存储也都用的storge,个人觉得要用vuex。
user.vue内容如下:
<template>
  <div class="indexBg">
    <div class="userinfos">
      <img class="userinfo-avatar" :src="userInfos.avatarUrl"/>
      <p>{{userInfos.nickName}}</p>
    </div>
    <p class="tips">欢迎光临小店儿,希望在这里找到你想要的</p>
    <button open-type="getUserInfo" @getuserinfo="bindGetUserInfo">授权微信登录</button>
	<view>
		<uni-list>
		    <uni-list-item @click="getMyOrder" title="我的订单" :show-extra-icon="true" :extra-icon="{color: '#4cd964',size: '22',type: 'spinner'}"></uni-list-item>
			<uni-list-item @click="getHistory" title="历史记录" :show-extra-icon="true" :extra-icon="{color: '#4cd964',size: '22',type: 'spinner'}"></uni-list-item>
		</uni-list>
	</view>
  </div>
</template>

<script>
import uniList from "@/components/uni-list/uni-list.vue"
import uniListItem from "@/components/uni-list-item/uni-list-item.vue"
export default {
  data () {
    return {
      userInfos: {
        nickName: '',
        avatarUrl: ''
      }
    }
  },

  components: {
    uniList,uniListItem
  },

  mounted () {
      this.setting()
  },
  methods: {
	  // 我的订单
	  getMyOrder () {
		  uni.getStorage({
		  	key: 'loginSwitch',
			success(e){
				if (e.data == 1) {
					uni.showToast({
					    title: '跳转‘我的订单’页',
					    duration: 2000,
						icon: 'none'
					});
				} else {
					uni.showToast({
					    title: '请先授权微信登录!',
					    duration: 2000,
						icon: 'none'
					});
				}
			},
			fail(err) {
				uni.showToast({
				    title: '请先授权微信登录!',
				    duration: 2000,
					icon: 'none'
				});
			}
		  })
	  },
	  // 历史
	  getHistory () {

	  },
	  // 判断授权
      setting(){
        const that = this;
        wx.login({
            //用户登录
            success(res) {
                console.log(res.code)
                if (res.code) {
                    // 发起网络请求
                    var code = res.code;
                    wx.getSetting({
                        //查看用户是否授权
                        success(res) {
                            console.log(res)
                            if (res.authSetting['scope.userInfo']) {
                                //用户已经授权
                                wx.getUserInfo({
                                  //获取用户信息
                                    success: (res) => {
                                      console.log(res)
                                      that.userInfos.nickName = res.userInfo.nickName
                                      that.userInfos.avatarUrl = res.userInfo.avatarUrl
									  uni.setStorage({
									  	key: 'loginSwitch',
										data: '1'
									  })
                                    },
									fail(err) {
										console.log(err)
									}
                                })
                                // wx.switchTab({
                                //   url: '../counter/main'
                                // })
                            }
                        }
                    })
                }
            }
        })
      },
      bindGetUserInfo(e) {
          const that = this;
          if (e.mp.detail.rawData){
              //用户按了允许授权按钮
              // that.setting();
			  uni.getStorage({
			  	key: 'loginSwitch',
				success(e) {
					if (e.data == 1) {
						uni.showToast({
							title: '您已经授权过了!',
							duration: 2000
						})
					} else {
						that.setting()
					}
				},
				fail() {
					that.setting()
				}
			  })
          } else {
              //用户按了拒绝按钮
              wx.showModal({
                title: '提示',
                content: '您拒绝授权,无法进行操作哦!',
                showCancel: false,
                confirmText: '返回授权',
                success: function (res) {
                  // 用户没有授权成功,不需要改变 isHide 的值
                  if (res.confirm) {
						console.log('用户点击了“返回授权”');
                  }
                }
              })
			  uni.setStorage({
			  	key: 'loginSwitch',
			  	data: '0'
			  })
          }
      },
  },
   onShareAppMessage: function(res) {
    // return eventHandler接收到的分享参数
    return {
      title: '我发现了一家好店,快来看看吧!',  // 分享名称
      path: 'pages/laugh/index', // 这里写你这个页面的路径
      imageUrl:'https://fuss10.elemecdn.com/e/5d/4a731a90594a4af544c0c25941171jpeg.jpeg', //这个是显示的图片,不写就默认当前页面的截图
      success: function (shareTickets) {
        console.log(shareTickets + '成功');
        // 转发成功
      },
      fail: function (res) {
        console.log(res + '失败');
        // 转发失败
      },
      complete:function(res){
        // 不管成功失败都会执行
      }
    }
  },
  created () {
    // let app = getApp()
  }
}
</script>

<style scoped lang="less">
.indexBg{
  height: 100%;
  background: linear-gradient(to bottom, #128dcd 0%,#12cd43 100%);
}
.tips{
  text-align: center;
  color: #fff;
  font-size: 12px;
  margin-bottom: 10rpx;
}
.userinfos {
  display: flex;
  flex-direction: column;
  align-items: center;
  p{
	  text-align: center;
  }
}

.userinfo-avatar {
  width: 128rpx;
  height: 128rpx;
  margin: 20rpx;
  border-radius: 50%;
  border: 1px solid #eee;
}
.userinfo-nickname {
  color: #aaa;
}
</style>
我的文件目录如下:
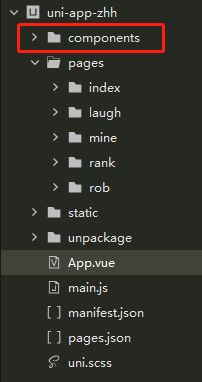
这个components文件夹可以在官网上下载,是uni-app的扩展组件的文件,pages里面放的就是我的页面,static下面就放静态文件,基本写法和vue差不多。
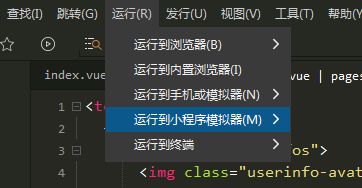
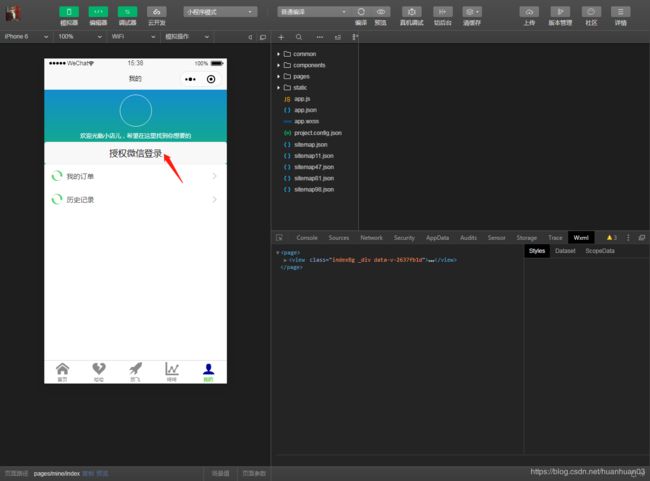
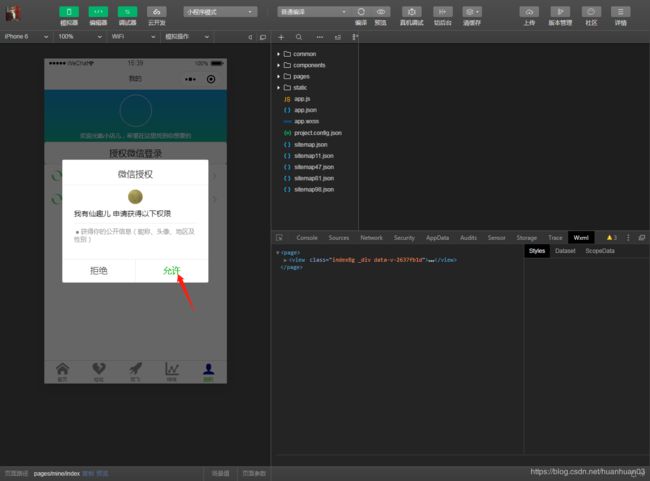
这个授权要在‘微信开发者工具’里面调试,去官网下载一个,然后在HbuilderX里面配置一下路径,直接在菜单栏里面运行到微信开发者工具里面就可以直接打开:
打开之后:
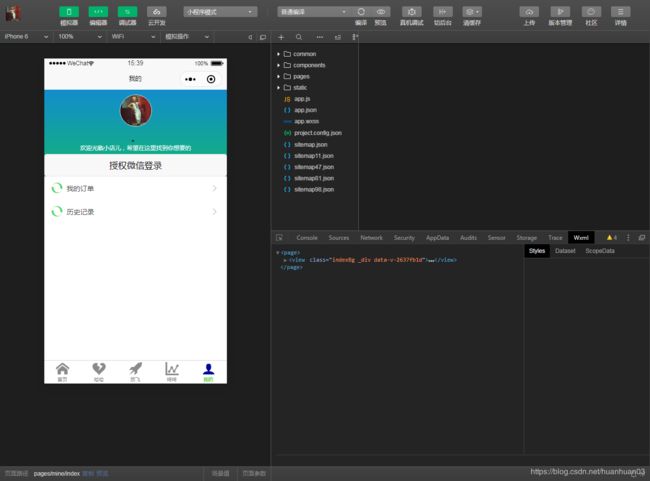
同意授权:
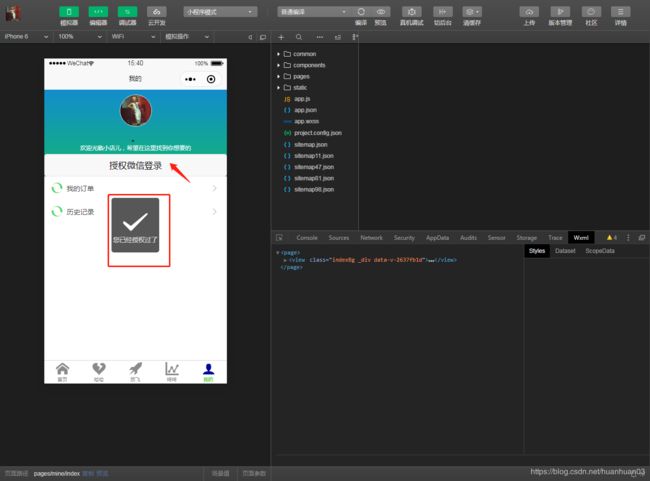
再次授权:
我这个页面里还写了分享事件,它的位置是和methods平级的,只有写了这个事件的页面在右上角点开才有分享的菜单选项,不写是不能分享当前页的:
onShareAppMessage: function(res) {
    // return eventHandler接收到的分享参数
    return {
      title: '我发现了一家好店,快来看看吧!',  // 分享名称
      path: 'pages/laugh/index', // 这里写你这个页面的路径
      imageUrl:'https://fuss10.elemecdn.com/e/5d/4a731a90594a4af544c0c25941171jpeg.jpeg', //这个是显示的图片,不写就默认当前页面的截图
      success: function (shareTickets) {
        console.log(shareTickets + '成功');
        // 转发成功
      },
      fail: function (res) {
        console.log(res + '失败');
        // 转发失败
      },
      complete:function(res){
        // 不管成功失败都会执行
      }
    }
  },
如下:
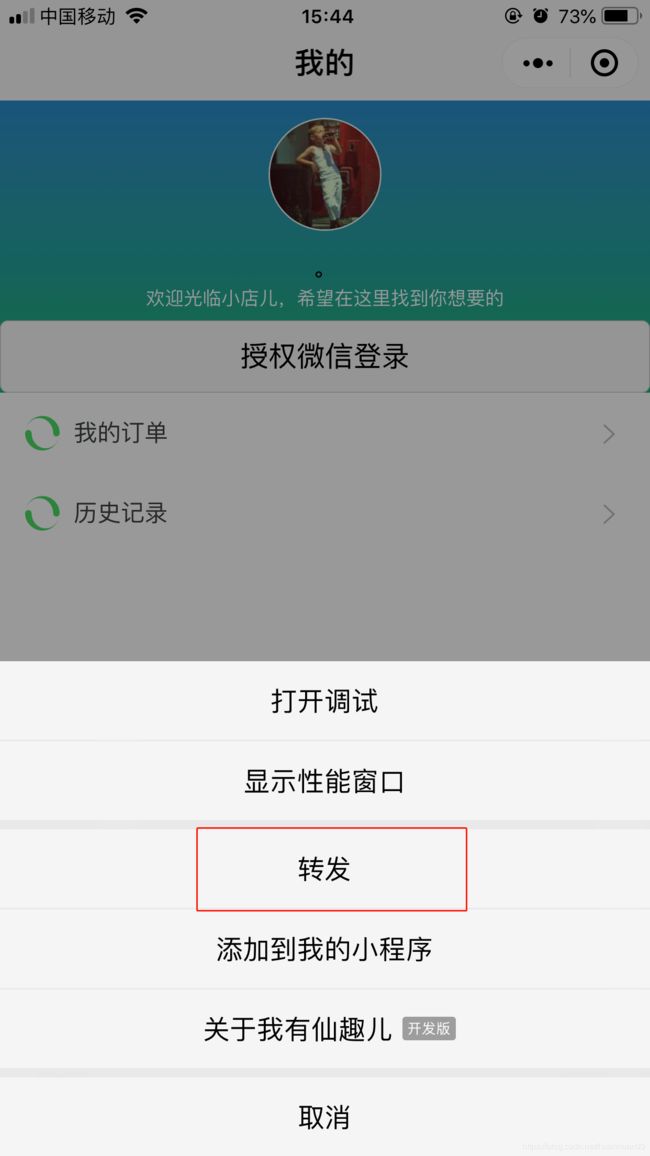
发送给朋友:
看见上下文中的弹窗了吗,开发版的小程序要让别人预览,要在微信公众平台将这个人添加为开发者,就可以了。这里分享的path是哪个路径,这个接收到的人打开就是哪个页面。
