Ubuntu16.04下Apache2.4部署Django1.8.7
一、搭建环境
1) 安装Django1.8.7
sudo apt-get install python-django-y
2) 安装Apache
sudo apt-get install apache2
3) 安装WSGI模块
sudo apt-get install libapache2-mod-wsgi
二、建立Django文件
1) 将Django工程建立在/var/www/html下
django-admin.py startproject Website
django-admin.py startapp Video
2) 修改/Website/Website/settings.py文件
在ALLOWED_HOSTS里添加’www.cupspjk.com’,’127.0.0.1’,’192.168.10.115’(这是我的本机IP地址)
三、让Apache找到Django文件
1) 在/etc/apache2/sites-available/下新建cupspjk.conf配置文件
添加cupspjk.conf文件内容:
ServerName www.cupspjk.com
#ServerAlias www.video.com
ServerAdmin webmaster@localhost
DocumentRoot /var/www/html/Website
Alias /media//var/www/html/Website/media/
Alias /static//var/www/html/Website/static/
Require all granted
Require all granted
WSGIScriptAlias //var/www/html/Website/Website/wsgi.py
Require all granted
ErrorLog ${APACHE_LOG_DIR}/error.log
CustomLog ${APACHE_LOG_DIR}/access.logcombined
WSGIPythonPath /var/www/html/Website/
2) 使配置文件生效
sudo a2ensite cupspjk.conf
3) 使默认配置文件失效(否则局域网内其他电脑不能通过IP地址访问)
sudo a2dissite 000-default.conf
4) 重启Apache
sudo /etc/init.d/apache2 restart
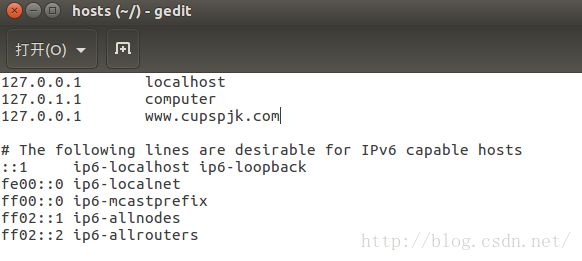
四、修改hosts文件
修改/etc下hosts文件,添加127.0.0.1 www.cupspjk.com
五、重启Apache服务器
sudo /etc/init.d/apache2 restart
六、验证配置
在浏览器中输入192.168.10.115(即本机IP地址)或者www.cupspjk.com都能显示Django的It works!页面
