《Cocos Creator游戏实战》打砖块主要功能与逻辑实现
打砖块主要功能与逻辑实现
资源文件和节点
添加分组
编写脚本
在本节教程中,我们来完成打砖块游戏中的主要功能与逻辑。
运行效果如下:
Cocos Creator版本:2.2.0
后台回复"打砖块",获取该项目完整文件:
资源文件和节点
首先我们来看下该项目中的资源文件有哪些:
1. audios文件夹
- ball音频在小球碰到墙壁或者条形板时播放
- hit音频在小球碰到砖块时播放
2. prefabs文件夹
- 因为要生成多个方块,可想而知要把brick节点变为预制
3. scripts文件夹
- Ball.js会挂载到ball节点上,用于处理小球逻辑
- Brick.js会挂载到brick节点上(也就是说预制上有Brick组件),用于处理砖块逻辑
- Game.js会挂载到Canvas节点上,处理整个游戏逻辑
4. textures文件夹
- ball为小球图片
- bar为条形板
- bg为游戏背景
- brick为砖块图片
再来看下节点:
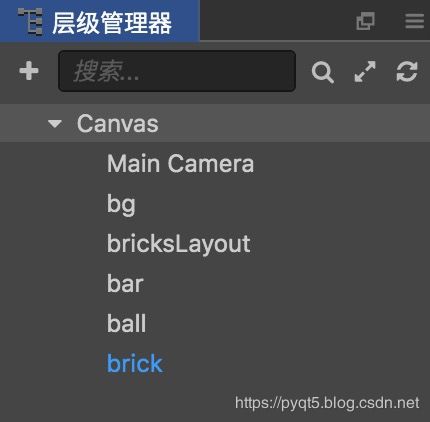
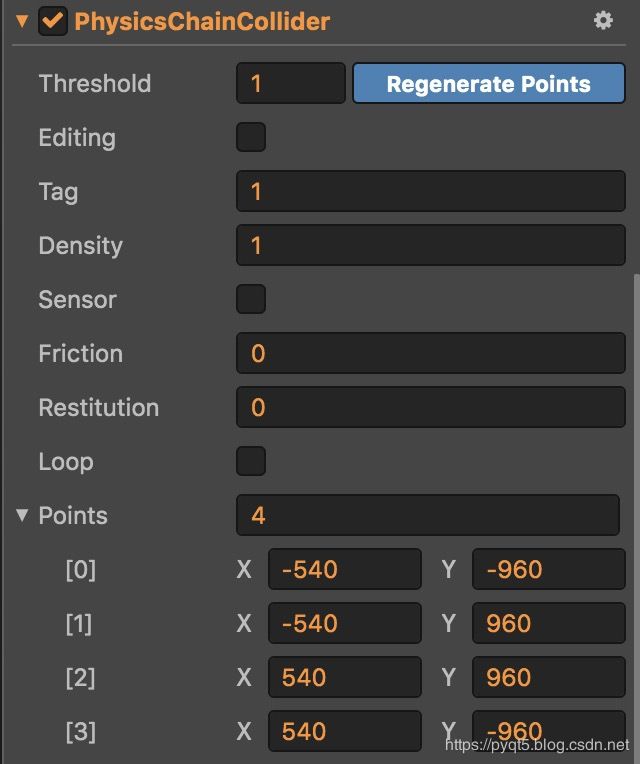
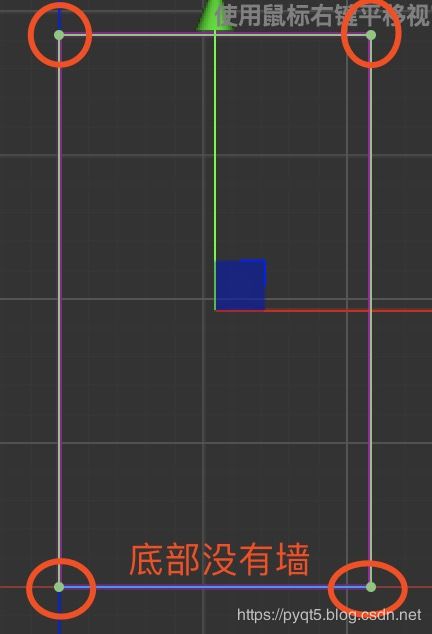
1. 第一个Canvas节点(设计分辨率为1080x1920),我们需要为它挂上一个Chain物理组件来设置一个三面的墙(上左右),目的是让小球在墙里运动:
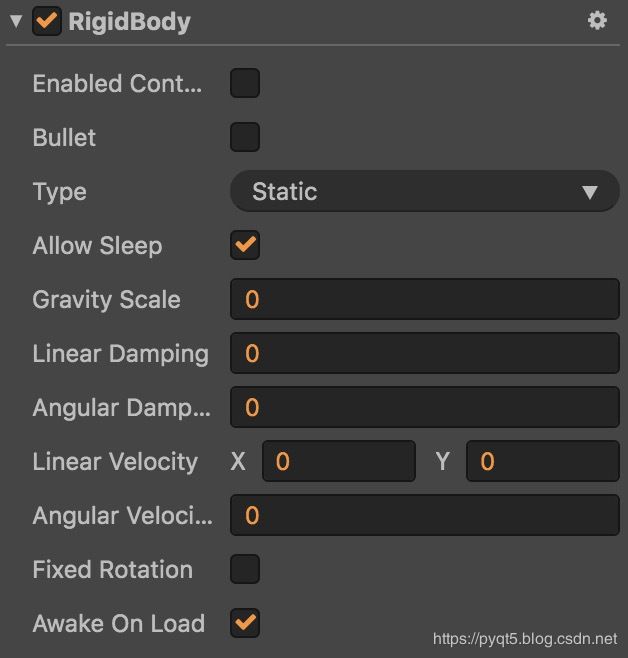
刚体组件(RigidBody)设置如下:
PhysicsChainCollider组件设置如下:
此时碰撞边框刚好与Canvas边框重叠(除了底部):
2. bg为背景图片节点。
3. bricksLayout节点用于放置砖块,它上面挂有Layout组件,设置如下:
- type设置为GRID(网格布局)
- Resize Mode设置为CHILDREN模式
- 其余不用管,我们之后会在代码中调整
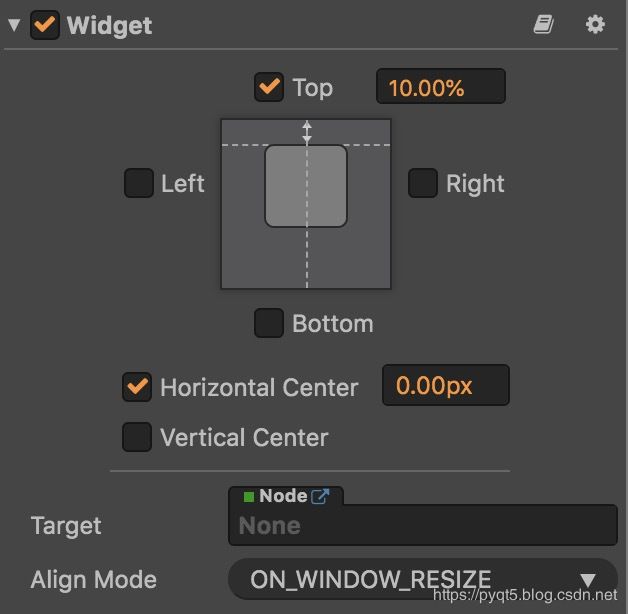
笔者还为bricksLayout加上了Wight组件:
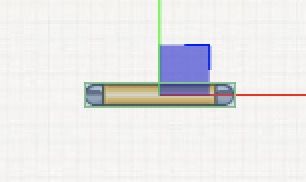
3. bar节点为条形板,我们同样为它加上物理碰撞组件(具体属性设置请看项目,笔者这里就不再赘述):
4. ball节点为小球,也要加上物理碰撞组件:
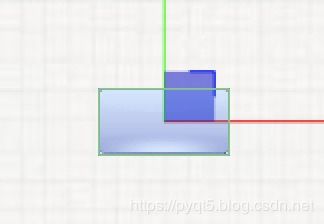
5. brick节点为砖块,我们给它挂上物理碰撞组件和Brick.js脚本组件后,将其转为预制:
添加分组
分组管理设置如下:
小球可以跟砖块、墙和板碰撞,其余组件相互之前不碰撞。
请大家自行给各个节点设置分组,笔者这里就不截图了。
编写脚本
我们首先来看下Brick.js脚本,内容如下:
// Brick.js
cc.Class({
    extends: cc.Component,

    properties: {

    },

    // LIFE-CYCLE CALLBACKS:

    onLoad () {
        // 设置砖块颜色
        this.node.color = this.randomColor();
    },

    randomColor () {
        // 获取随机颜色
        let red = Math.round(Math.random()*255);
        let green = Math.round(Math.random()*255);
        let blue = Math.round(Math.random()*255);
        return new cc.Color(red, green, blue);
    },

    // update (dt) {},
});
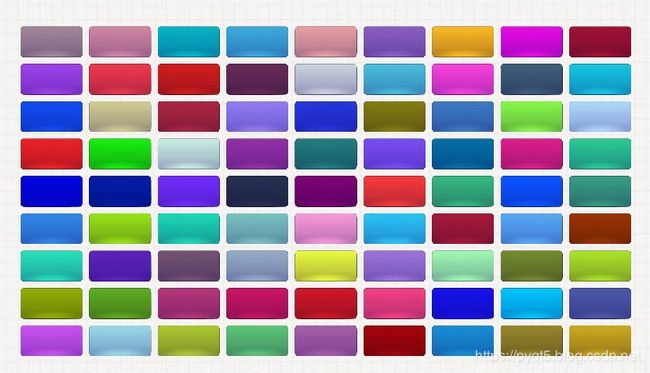
很简单,就是给每个生成的砖块添上一个随机颜色。完成的效果如下图所示:
再来看下Ball.js脚本:
// Ball.js
cc.Class({
    extends: cc.Component,

    properties: {
        ballAudio: {
            type: cc.AudioClip,
            default: null
        },
        hitAudio: {
            type: cc.AudioClip,
            default: null
        }
    },

    // LIFE-CYCLE CALLBACKS:

    onLoad () {
        // 球方向随机
        this.node.getComponent(cc.RigidBody).linearVelocity.x = Math.random() * -1200 + 600;
        this.node.getComponent(cc.RigidBody).linearVelocity.y = 1000;
    },

    onBeginContact (contact, self, other) {
        if (other.tag == 1) {
            cc.audioEngine.playEffect(this.ballAudio);
        }
        else if (other.tag == 2) {
            other.node.opacity = 0;                             // 变透明
            other.node.removeComponent(cc.RigidBody);           // 移出刚体组件,让该砖块无法与球碰撞
            cc.audioEngine.playEffect(this.hitAudio);
        }
    }

    // update (dt) {},
});- properties中就两个音频
- 在onLoad方法中,笔者设置了小球的开始运动时的速度和方向
- 在onBeginContact中进行了碰撞监听。如果目标碰撞物的tag为1(墙或者条形板),那么我们就播放ball音效即可。而如果是2(砖块),那么我们就设置砖块的透明度为0,并且移出刚体组件(因为游戏中砖块不能被二次碰撞)
最后是Game.js脚本。我们首先在properties中添加如下属性:
// Game.js
properties: {
    brickPrefab: cc.Prefab,             // 砖块预制
    bricksLayout: cc.Node,              // 砖块布局
    bar: cc.Node,                       // 条形板
    ball: cc.Node                       // 小球
},
在onLoad方法中添加如下代码:
// Game.js
onLoad () {
    cc.director.getPhysicsManager().enabled = true;                 // 开启物理引擎

    // 为了在下次教程中方便讲解"关卡设置",笔者这里用了以下变量来控制砖块布局
    this.row = 9;                                                   // 行数
    this.col = 9;                                                   // 列数
    this.spaceX = 10;                                               // 列间隔
    this.spaceY = 10;                                               // 行间隔
    this.brickWidth = 100;                                          // 砖块宽度
    this.brickHeight = 50;                                          // 砖块高度
    this.speed = 20;                                                // bar移动速度

    this.bricksArray = [];                                          // 砖块数组

    this.initBricksLayout();                                        // 初始化砖块布局

    // 初始化键盘输入监听
    this.moveDir = null;                                            // 用于确定左右移动方向
    cc.systemEvent.on(cc.SystemEvent.EventType.KEY_DOWN, this.onKeyDown, this);
    cc.systemEvent.on(cc.SystemEvent.EventType.KEY_UP, this.onKeyUp, this);
},- 开启物理引擎
- 添加相关变量用来控制砖块布局样子(笔者在下一个教程"关卡设置"一文中拿打砖块这个例子来讲解如何给游戏加上关卡功能)
- 生成的砖块预制都会被加入到this.bricksArray数组变量中,更方便控制
- 最后我们调用initBricksLayout方法初始化砖块布局并且对键盘进行监听(用于控制条形板左右移动)
initBricksLayout方法编写如下:
// Game.js
initBricksLayout () {
    // 设置bricksLayout相关属性
    this.bricksLayout.getComponent(cc.Layout).spacingX = this.spaceX;
    this.bricksLayout.getComponent(cc.Layout).spacingY = this.spaceY;
    this.bricksLayout.getComponent(cc.Layout).cellSize.width = this.brickWidth;
    this.bricksLayout.getComponent(cc.Layout).cellSize.height = this.brickHeight;
    this.bricksLayout.width = this.col*this.brickWidth + (this.col-1)*this.spaceX;
    this.bricksLayout.height = this.row*this.brickHeight + (this.row-1)*this.spaceY;

    // 循环放置砖块
    for (let i=0; i
在该方法中笔者首先对bricksLayout节点上的Layout组件相关属性进行了设置,有行间隔、列间隔、子节点宽高以及bricksLayout宽高这些属性。然后通过两层循环来放置砖块,在这里有两点需要注意下:
- brick.x=99999;这行代码是必要的,否则砖块实例化后的初始位置就跟brickLayout节点的中间位置(0, 0)重了,导致处在最当中的砖块节点没有同步到物理引擎。大家可以把这行代码去掉看下。
- 碰撞框的大小应该跟砖块节点大小一样。
接下来是控制条形板左右移动的代码:
// Game.js
onKeyDown (event) {
    // 控制bar左右移动
    switch(event.keyCode) {
        case cc.macro.KEY.a:
        case cc.macro.KEY.left:
            this.moveDir = 'left';
            break;

        case cc.macro.KEY.d:
        case cc.macro.KEY.right:
            this.moveDir = 'right';
            break;
    }
},

onKeyUp (event) {
    this.moveDir = '';
},- 当按下A键或者左键时,设置this.moveDir值为'left'
- 当按下D键或者右键时,设置this.moveDir值为'right'
- 当释放鼠标后,设置this.moveDir值为''
然后是update方法:
// Game.js
update (dt) {
    // 移动bar
    if (this.moveDir == 'left') {
        this.bar.x -= this.speed;
    }
    else if (this.moveDir == 'right') {
        this.bar.x += this.speed;
    }

    // 限制bar
    let canvasWidth = cc.Canvas.instance.node.width;
    let canvasHeight = cc.Canvas.instance.node.height;

    if (this.bar.x < -canvasWidth/2+this.bar.width/2) {
        this.bar.x = -canvasWidth/2+this.bar.width/2;
    }

    if (this.bar.x > canvasWidth/2-this.bar.width/2) {
        this.bar.x = canvasWidth/2-this.bar.width/2;
    }

    // 根据小球位置来判断输赢
    if (this.ball.y < -canvasHeight/2) {
        this.lose();
    }
},- 根据this.moveDir值来改变条形板的x坐标
- 将条形板限制在屏幕中
- 根据小球y值来判断它是否掉到了底部,如果是的话则游戏结束
lose方法如下:
// Game.js
lose () {
    console.log('输了= =');
    cc.director.loadScene('打砖块');
},
游戏失败逻辑笔者这里就简单编写下,大家可以自行丰富内容。
最后我们再来看下游戏胜利逻辑。当砖块全部被消灭后,游戏自然就胜利了。那其实我们只用在小球每次跟砖块碰撞时判断下砖块是否都消失了即可。首先在onLoad方法中添加如下代码将Game实例传入Ball.js中:
// Game.js
onLoad () {
    ...

    this.ball.getComponent('Ball').init(this);                      // 将this传到Ball.js中

    ...
},
游戏胜利win方法如下:
// Game.js
win () {
    console.log('恭喜过关!');
    cc.director.loadScene('打砖块');
},
之后在Ball.js中添加如下代码:
// Game.js
cc.Class({
    ...

    init(game) {
        this.game = game;
    },

    onBeginContact (contact, self, other) {
        if (other.tag == 1) {
            cc.audioEngine.playEffect(this.ballAudio);
        }
        else if (other.tag == 2) {
            other.node.opacity = 0;                             // 变透明
            other.node.removeComponent(cc.RigidBody);           // 移出刚体组件,让该砖块无法与球碰撞
            cc.audioEngine.playEffect(this.hitAudio);

            // 根据透明度循环判断砖块是否都被消灭
            let isWin = true;
for (let i=0; i- init方法用于获取Game实例
- 当小球碰到砖块时,循环判断bricksArray中各个小球的透明度,如果透明度都为0,则游戏胜利
好的那本节教程就到这,希望大家有所收获~


