架构学习(1)实例分析:Spring5.0.8+SpringMVC+Hibernate5.3.4
想学习如何实现Activiti Modeler与自己开发的业务系统的整合,因此先把业务系统的框架搭起来。综合考虑目前Web应用开发框架,选择Spring + Spring MVC+Hibernate框架。本文就是搭建这样一个框架的基本流程,期间反复出现了各种莫名的错误,参考了诸多网文和官方文档,终于解决了问题,特此留档,以备后查。
0、主要参考资料
搭建框架和编写文档过程中,重点参考了以下文章,特此致谢。
(1)《框架篇:Spring+SpringMVC+hibernate整合开发》
(2)《spring+springmvc+hibernate整合实例》
(3)《SSH整合(Spring+SpringMVC+Hibernate)注解版》
(4)《spring+springmvc+hibernate 整合》
(5)《理解Spring+SpringMVC+Hibernate开发流程,附一定源码(一)》
1、环境准备
(1)操作系统:Windows7 x64 SP1
(2)Java开发环境JDK:jdk-10.0.2_windows-x64
(3)数据库系统MySQL:mysql-8.0.12-winx64
(4)构建工具Maven: apache-maven-3.5.4
(5)Web服务器Tomcat:Tomcat 9.0.10-64-bit-Windows
(6)集成开发环境Eclipse:Eclipse IDE for Java EE Developers-photon-R-win32-x86_64
2、创建项目
2.1 新建Maven web项目
在Eclipse中新建Maven项目,Archetype的类型选择【maven-archetype-webapp】,包名为【com.seu.liuds】,项目名称命名为【myssh】。设置JRE版本、Tomcat等信息,清除项目中出现的各类Error和Warning,修改index.jsp内容如下:
Hello, this is the welcome page!
加入到Tomcat中运行后结果如下。

2.2 构建MVC项目结构
按照MVC架构在src/main/java下创建controller、entity、reponsitory和service包,用于存放各类Java代码;在src/main/resources目录下创建config目录,用于存放项目配置文件;在src/main/webapp目录下创建views目录,用于存放前端页面,创建resources目录,用于存放页面资源文件。项目的组织结构如下图所示。

3、导入jar包
编辑pom.xml文件,导入项目所需jar包。Eclipse会根据pom.xml文件内容自动到maven的中央仓库去下载相应的包。由于不熟悉框架需要导入什么jar包,在实施过程中先导入核心包,然后根据调试时提示的【NotFoundClass】错误信息,添加相关的依赖。
本文中参考《框架篇:Spring+SpringMVC+hibernate整合开发》一文以及开发过程中不断解决问题增加的jar,最终形成的pom.xml文件如下。
	4.0.0
	com.seu.liuds
	myssh
	war
	0.0.1-SNAPSHOT
	myssh Maven Webapp
	http://maven.apache.org


		UTF-8
		10.0.0.2
		5.0.8.RELEASE
		5.3.4.Final
		1.2
		1.1.2
		4.0.1
		1.9.13
		2.9.6
		8.0.11
		0.9.1.2
		1.2.17
		1.3.3
		1.18.2
		2.3.0
		2.2
		2.0.4.RELEASE


			junit
			junit
			3.8.1
			test


			org.springframework
			spring-orm
			${springVersion}


			org.springframework
			spring-webmvc
			${springVersion}


			org.hibernate
			hibernate-ehcache
			${hibernateVersion}


			jstl
			jstl
			${jstlVersion}


			taglibs
			standard
			${taglibVersion}


			javax.servlet
			javax.servlet-api
			${servletVersion}
			provided


			mysql
			mysql-connector-java
			${mysqlVersion}


			c3p0
			c3p0
			${c3p0Version}


			org.codehaus.jackson
			jackson-mapper-asl
			${jsonVersion}


			com.fasterxml.jackson.core
			jackson-core
			${jacksonVersion}


			com.fasterxml.jackson.core
			jackson-annotations
			${jacksonVersion}


			com.fasterxml.jackson.core
			jackson-databind
			${jacksonVersion}


			javax.xml.bind
			jaxb-api
			${jaxbVersion}


			com.sun.xml.bind
			jaxb-impl
			${jaxbVersion}


			com.sun.xml.bind
			jaxb-core
			${jaxbVersion}


			log4j
			log4j
			${log4jVersion}


			commons-fileupload
			commons-fileupload
			${fileuploadVersion}


			org.projectlombok
			lombok
			${lombokVersion}
			provided


			javax.persistence
			javax.persistence-api
			${persistenceVersion}


			org.springframework.boot
			spring-boot-starter-data-jpa
			${springbootVersion}


		myssh


				org.apache.maven.plugins
				maven-compiler-plugin
				3.1

					${java.version}
					${java.version}
					10
					true
4、配置SpringMVC
4.1 配置spring-mvc.xml
在myssh项目的src/main/resources/config文件夹下新建spring-mvc.xml文件,在文件中加入以下内容,对请求和静态资源映射的配置。
需要注意以下三点:
(1)扫描包时要排除service层的类,不然在整合hibernate后,项目运行时会报错,这里限定只扫描Controller层的类,具体可参考《Spring MVC注解方式service和controller的扫描顺序》;
(2)xml文件中的.xsd文件的版本号要删除,否则容易出现错误。具体参考《为什么在Spring的配置里,最好不要配置xsd文件的版本号》一文。例如原文件中的以下内容
……
xsi:schemaLocation="http://www.springframework.org/schema/beans
        http://www.springframework.org/schema/beans/spring-beans-4.1.xsd
        http://www.springframework.org/schema/context
        http://www.springframework.org/schema/context/spring-context-4.1.xsd
        http://www.springframework.org/schema/mvc
        http://www.springframework.org/schema/mvc/spring-mvc-4.1.xsd">
……
应替换为
……
xsi:schemaLocation="http://www.springframework.org/schema/beans
        http://www.springframework.org/schema/beans/spring-beans.xsd
        http://www.springframework.org/schema/context
        http://www.springframework.org/schema/context/spring-context.xsd
        http://www.springframework.org/schema/mvc
        http://www.springframework.org/schema/mvc/spring-mvc.xsd">
……
4.2 配置web.xml
修改web.xml文件,载入SpringMVC的配置。
	Archetype Created Web Application


		index.jsp


		spring
		org.springframework.web.servlet.DispatcherServlet

			contextConfigLocation
			classpath:config/spring-mvc.xml


		1


		spring
		/
4.3 测试SpringMVC配置
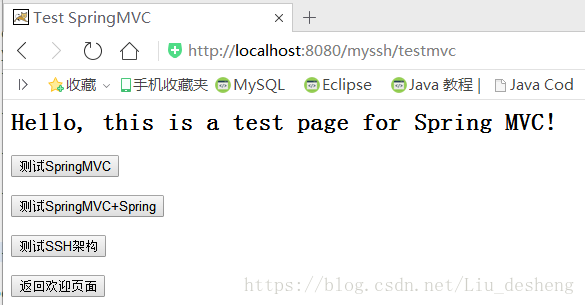
SpringMVC配置完成后,编写代码测试配置是否成功。在类包【com.seu.liuds.myssh.controller】中创建类文件【MainController.java】,代码如下。
package com.seu.liuds.myssh.controller;

import org.springframework.stereotype.Controller;
import org.springframework.web.bind.annotation.RequestMapping;
import org.springframework.web.bind.annotation.RequestMethod;

@Controller
public class MainController {
	@RequestMapping(value = "testmvc", method = RequestMethod.GET)
	public String test() {
		// 实际返回的是views/testmvc.jsp ,spring-mvc.xml中配置过前后缀
		return "testmvc";
	}
}
在src/main/webapp/views文件夹中创建前端页面文件【testmvc.jsp】,代码如下。
Hello, this is a test page for Spring MVC!
在Tomcat中运行项目,访问默认页面http://localhost:8080/myssh/和测试页面http://localhost:8080/myssh/testmvc,后者访问结果如下,说明SpringMVC配置成功。

5、整合Spring
5.1 配置Spring
在src/main/resources/config目录下新建applicationContext.xml文件,向其中加入以下内容。有关SpringMVC和Spring集成过程中可能出现的冲突,参考《Spring和SpringMVC扫描注解类的冲突问题》一文。
注意修改扫描的基础包名称为自己的项目设定。
5.2 修改web.xml
完善web.xml配置,主要包括:
(1)引入Spring配置文件、
(2)Spring的监听器
(3)字符集过滤
更新后的web.xml文件代码如下。
	Archetype Created Web Application


		index.jsp


		contextConfigLocation

                classpath:config/applicationContext.xml


		springMVC
		org.springframework.web.servlet.DispatcherServlet

			contextConfigLocation
			classpath:config/spring-mvc.xml


		1


		springMVC
		/


		org.springframework.web.context.ContextLoaderListener


		encodingFilter
		org.springframework.web.filter.CharacterEncodingFilter

			encoding
			UTF-8


			forceEncoding
			true


			flushMode
			AUTO


		encodingFilter
		/*
5.3 测试SpringMVC+Spring
在包【com.seu.liuds.myssh.service】中创建接口【ITestService.java】,其中包含一个test()方法,代码如下。
package com.seu.liuds.myssh.service;

public interface ITestService {

	String test();

}
在service目录下新建【impl】文件夹,并在其下创建类TestServiceImpl实现TestService接口, 代码如下。返回的“testspring”字符实为testspring.jsp。
package com.seu.liuds.myssh.service.impl;

import org.springframework.stereotype.Service;
import com.seu.liuds.myssh.service.ITestService;

@Service
public class TestServiceImpl implements ITestService {
    public String test() {
        return "testspring";
    }
}
在类包【com.seu.liuds.myssh.controller】中类文件【MainController.java】中添加servlet,代码如下。
package com.seu.liuds.myssh.controller;

import org.springframework.beans.factory.annotation.Autowired;

import org.springframework.stereotype.Controller;
import org.springframework.web.bind.annotation.RequestMapping;
import org.springframework.web.bind.annotation.RequestMethod;

@Controller
public class MainController {
	@RequestMapping(value = "testmvc", method = RequestMethod.GET)
	public String test() {
		// 实际返回的是views/testmvc.jsp ,spring-mvc.xml中配置过前后缀
		return "testmvc";
	}

	@Autowired
	private ITestService testService;

	@RequestMapping(value = "testspring", method = RequestMethod.GET)
	public String springTest() {
		return testService.test();
	}
}
在src/main/webapp/views文件夹中创建前端页面文件【testspring.jsp】,代码如下。
Hello, this is a test page for SpringMVC+Spring!
在Tomcat中运行项目,访问测试页面http://localhost:8080/myssh/testspring,结果如下,说明配置成功。

下面就要进行本次实验中出现问题最多的部分,整合Hibernate。
6、整合Hibernate
6.1 配置Hibernate
参考《通过Hibernate5.3.X连接MySQL8.0.X的基本设定与案例》一文中关于hibernate的设定方式,通过*.properties文件和*.xml文件联合配置hibernate。在项目的src/main/resources/config目录下新建文件hibernate.properties,存放关于数据库连接和hibernate的配置。代码如下。
# MySQL JDBC information
hibernate.connection.driver_class = com.mysql.cj.jdbc.Driver
hibernate.connection.url = jdbc:mysql://localhost:3306/sshdemo?useSSL=false&serverTimezone=GMT%2B8
hibernate.connection.username = root
hibernate.connection.password =

# Hibernate configuration
hibernate.dialect = org.hibernate.dialect.MySQL8Dialect
hibernate.hbm2ddl.auto = update
hibernate.show_sql = false
hibernate.format_sql = true
connection.pool_size = 20
hibernate.current_session_context_class = thread

# Hibernate for c3p0
hibernate.connection.provider_class = org.hibernate.c3p0.internal.C3P0ConnectionProvider
hibernate.c3p0.max_size = 20
hibernate.c3p0.min_size = 5
hibernate.c3p0.timeout = 120
automaticTestTable = Test
hibernate.c3p0.max_statements = 100
hibernate.c3p0.acquire_increment = 1
c3p0.testConnectionOnCheckout = true
c3p0.idleConnectionTestPeriod = 18000
c3p0.idle_test_period = 120
借鉴网文经验,将有关hibernate的配置集成到applicationContext.xml文件中,添加以后的文件内容如下。
				${hibernate.dialect}

				${hibernate.show_sql}
				${hibernate.format_sql}

				${hibernate.hbm2ddl.auto}
				true


				classpath:com/seu/liuds/myssh/entity/
				classpath:com/seu/liuds/myssh/controller/
6.2 修改web.xml
因为有关hibernate的配置已经集成到applicationContext.xml中,因此在web.xml文件中不需要进行专门的修改。
6.3 测试框架
6.3.1 创建实体类
在【com.seu.liuds.myssh.entity】包中新建实体类,文件名命名为【Person.java】,内容如下:
package com.seu.liuds.myssh.entity;

import lombok.Data;

@Data
//@Entity
//@Table(name = "Person")
public class Person {
	public Person() {
	}

//	@Id
//	@GeneratedValue
	private Long id;

//	@Column(name = "created")
	private Long created = System.currentTimeMillis();

//	@Column(name = "username")
	private String username;

//	@Column(name = "address")
	private String address;

//	@Column(name = "phone")
	private String phone;

//	@Column(name = "remark")
	private String remark;
}
代码中采用了@Data注解,简化了代码,详情参考博文《@Data注解的作用》,安装的时候有些麻烦,参考博文《Lombok 安装、入门 - 消除冗长的 java 代码》。
上面代码中,采用了注解@Entity、@Table等,在调用hibernate API对数据库进行操作时,提示如下错误信息:
严重: Servlet.service() for servlet [springMVC] in context with path [/myssh] threw exception [Request processing failed; nested exception is org.hibernate.MappingException: Unknown entity: com.seu.liuds.myssh.entity.Person] with root cause
org.hibernate.MappingException: Unknown entity: com.seu.liuds.myssh.entity.Person
	at org.hibernate.metamodel.internal.MetamodelImpl.entityPersister(MetamodelImpl.java:670)
	at org.hibernate.internal.SessionImpl.getEntityPersister(SessionImpl.java:1692)
……
在网上查了好多相关文章和解决方案,都没成功解决问题,百思不得其解。个人考虑应该是注解没有生效,为此,还是采用了映射配置文件的方式实现实体与表格的映射关系。在实体类相同存放目录下,创建Person.hbm.xml,内容如下:
希望有高手可以指点一下,@Table等注解不生效的原因是什么?该怎样解决?
6.3.2 创建数据访问层
(1)在【com.seu.liuds.myssh.repository】包中创建泛型接口IDomainRepository,代码如下。
package com.seu.liuds.myssh.repository;

import java.io.Serializable;
import java.util.List;

public interface IDomainRepository{
    T load(PK id);

    T get(PK id);

    List findAll();

    void persist(T entity);

    PK save(T entity);

    void saveOrUpdate(T entity);

    void delete(PK id);

    void flush();
}
(2)在【com.seu.liuds.myssh.repository】包中创建接口IPersonRepository,代码如下。
package com.seu.liuds.myssh.repository;

import com.seu.liuds.myssh.entity.Person;

public interface IPersonRepository extends IDomainRepository {
}
(3)在【com.seu.liuds.myssh.repository.impl】包中创建接口实现类PersonRepositoryImpl,代码如下:
package com.seu.liuds.myssh.repository.impl;

import com.seu.liuds.myssh.repository.IPersonRepository;
import com.seu.liuds.myssh.entity.Person;

import org.apache.log4j.Logger;
import org.hibernate.Session;
import org.hibernate.SessionFactory;
import org.hibernate.Transaction;
import org.springframework.beans.factory.annotation.Autowired;
import org.springframework.stereotype.Component;
import org.springframework.stereotype.Repository;

import java.util.List;

@Repository
@Component
public class PersonRepositoryImpl implements IPersonRepository {

	Logger logger = Logger.getLogger(PersonRepositoryImpl.class);

	@Autowired
	private SessionFactory sessionFactory;

	private Session getCurrentSession() {
		logger.info("--[UserInfo]--ssionFactory: " + this.sessionFactory);
		return this.sessionFactory.getCurrentSession();
	}

	public Person load(Long id) {
		logger.info("--[UserInfo]--Loading person with id " + id);
		return (Person) getCurrentSession().load(Person.class, id);
	}

	public Person get(Long id) {
		logger.info("--[UserInfo]--Getting person with id " + id);
		Person res = (Person) getCurrentSession().get(Person.class, id);
		return res;
	}

	public List findAll() {
		logger.info("--[UserInfo]--Finding all person.");
		return null;
	}

	public void persist(Person entity) {
		logger.info("--[UserInfo]--Persisting person " + entity.toString());
		getCurrentSession().persist(entity);
	}

	public Long save(Person entity) {
		logger.info("--[UserInfo]--Saving person " + entity.toString());
		Long res =  (Long) getCurrentSession().save(entity);
		return res;
	}

	public void saveOrUpdate(Person entity) {
		logger.info("--[UserInfo]--SavingOrUpdating person " + entity.toString());
		getCurrentSession().saveOrUpdate(entity);
	}

	public void delete(Long id) {
		logger.info("--[UserInfo]--Deleting person with id " + id);
		Person person = get(id);
		try {
	        getCurrentSession().delete(person);
	        logger.info("delete successful");
	    } catch (RuntimeException re) {
	    	 logger.error("delete failed", re);
	    }
	}

	public void flush() {
		getCurrentSession().flush();
	}
}
这段代码里含有一个巨大的坑洞,我掉在里面爬了3天,查阅了大量的文献,反复DEBUG源代码,才最终搞定。也不算走弯路,毕竟在此期间学了很多不知道的知识,也再次体会到了柳暗花明又一村的惊喜。
问题描述如下:对数据库进行操作的PersonRepositoryImpl类中,借鉴了博园网XRom大大的如下观点:
注意:我这里写的session产生是调用的SessionFactory的openSession()这个方法。之前使用getCurrentSession()一直报错,后来百度了一下才知道,hibernate3版本可以使用getCurrentSession()来创建session,而hibernate4版本则不行。
自作聪明的认为hibernate 4都不行,hibernate 5更不行了,就采用如下代码产生session。
	private Session getCurrentSession() {
		logger.info("--[UserInfo]--ssionFactory: " + this.sessionFactory);
		return this.sessionFactory.openSession();
	}
程序在编译和运行过程都没有出现错误,在测试过程中,对数据库进行查询、读取等操作正常,可以获得指定的信息。但是,插入和更新数据时,没有报错信息,但数据库没有变化;执行删除操作时,出现如下错误:
javax.persistence.PersistenceException: org.hibernate.HibernateException: illegally attempted to associate proxy [com.seu.liuds.myssh.entity.Person#3] with two open Sessions
	at org.hibernate.internal.ExceptionConverterImpl.convert(ExceptionConverterImpl.java:154)
……
关于出现的这个问题,网上各种说法比较多,比较典型的是:
① 没有提交事务,hibernate 必须显示的声明提交事务。《Hibernate 中getSession().save() 保存不到数据库 解决办法》
② service所使用的方法未添加事务管理注解@Transactional。《spring+hibernate事务管理-save时未执行》
③ 没有导入antlr-2.7.6.jar包。《Spring配置Hibernate时hibernatetemplate.save()、find()等方法无法使用》
然而,上述方法对于我们建立的这个项目都没有奏效。在查找有关“删除操作出现两个session的错误提示”的问题时,看到一篇有关产生session的博文《Hibernate4之getCurrentSession和openSession》,便尝试将产生session的代码由openSession修改为getCurrentSession,如下所示。
	private Session getCurrentSession() {
		logger.info("--[UserInfo]--ssionFactory: " + this.sessionFactory);
		return this.sessionFactory.getCurrentSession();
	}
如此一来,所有有关数据库操作的代码全部通过,执行时亦有效。后来在博文《SpringMVC+Hibernate4 导致事务失效不提交的可能原因》中看到同样的解决方案。
6.3.3 创建服务层
(1)在【com.seu.liuds.myssh.service】包中创建服务接口IPersonService,代码如下。
package com.seu.liuds.myssh.service;

import org.springframework.transaction.annotation.Transactional;

import com.seu.liuds.myssh.entity.Person;

@Transactional
public interface IPersonService {
    Long savePerson(Person entity);
    Person getPerson(Long id);
    Person loadPerson(Long id);
    void saveOrUpdatePerson(Person entity);
    void deletePerson(Long id);
}
(2)在【com.seu.liuds.myssh.service.impl】包中创建接口实现类PersonServiceImpl,代码如下:
package com.seu.liuds.myssh.service.impl;

import com.seu.liuds.myssh.entity.Person;
import com.seu.liuds.myssh.repository.IPersonRepository;
import com.seu.liuds.myssh.service.IPersonService;
import org.springframework.beans.factory.annotation.Autowired;
import org.springframework.stereotype.Service;
import org.springframework.transaction.annotation.Transactional;

@Transactional
@Service
public class PersonServiceImpl implements IPersonService {

    @Autowired
    private IPersonRepository personRepository;

    public Long savePerson(Person entity) {
        Long res = personRepository.save(entity);
        System.out.print("-------Save result: "+res+"\n");
        return res;
    }

	public Person getPerson(Long id) {
		Person entity = new Person();
		entity = personRepository.get(id);
        System.out.print("-------Get result: "+entity.toString()+"\n");
		return entity;
	}

	public Person loadPerson(Long id) {
		Person entity = new Person();
		entity = personRepository.load(id);
        System.out.print("-------Load result: "+entity.toString()+"\n");
		return entity;
	}

	public void saveOrUpdatePerson(Person entity) {
		personRepository.saveOrUpdate(entity);
        System.out.print("-------SaveOrUpdate result: "+entity.toString()+"\n");
	}
	public void deletePerson(Long id) {
		personRepository.delete(id);
        System.out.print("-------Delete person with id = "+id+"\n");
	}
}
6.3.4 修改控制层代码
项目的逻辑最终要在控制层实现,本项目中拟对服务层中提供的各项操作都进行测试验证。代码如下:
package com.seu.liuds.myssh.controller;
import org.springframework.beans.factory.annotation.Autowired;
import org.springframework.stereotype.Controller;
import org.springframework.web.bind.annotation.RequestMapping;
import org.springframework.web.bind.annotation.RequestMethod;
import org.springframework.web.bind.annotation.ResponseBody;
import com.seu.liuds.myssh.entity.Person;
import com.seu.liuds.myssh.service.IPersonService;
import com.seu.liuds.myssh.service.ITestService;
@Controller
public class MainController {
@RequestMapping(value = "testmvc", method = RequestMethod.GET)
public String test() {
// 实际返回的是views/testmvc.jsp ,spring-mvc.xml中配置过前后缀
return "testmvc";
}
@Autowired
private ITestService testService;
@RequestMapping(value = "testspring", method = RequestMethod.GET)
public String springTest() {
return testService.test();
}
@Autowired
private IPersonService personService;
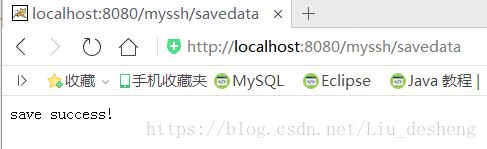
@RequestMapping(value = "savedata", method = RequestMethod.GET)
@ResponseBody
public String saveData() {
Person person = new Person();
person.setUsername("Liuds");
person.setPhone("123456789");
person.setAddress("BeiJing");
person.setRemark("Handsome!");
System.out.println("-------Person information: " + person.toString());
personService.savePerson(person);
return "save success!";
}
@RequestMapping(value = "getdata", method = RequestMethod.GET)
@ResponseBody
public String getData() {
Long id = (long) 5;
// get person with id = 5
String personInfo = personService.getPerson(id).toString();
System.out.println("--Gotten following person information: " + personInfo);
return "get success!";
}
@RequestMapping(value = "loaddata", method = RequestMethod.GET)
@ResponseBody
public String loadData() {
Long id = (long) 5;
// load person with id = 5
String personInfo = personService.loadPerson(id).toString();
System.out.println("--Loaded following person information: " + personInfo);
return "load success!";
}
@RequestMapping(value = "deletedata", method = RequestMethod.GET)
@ResponseBody
public String deletedata() {
Long id = (long) 3;
// delete person with id = 3
personService.deletePerson(id);
System.out.println("--Deleted person with id = 3\n");
return "success!";
}
@RequestMapping(value = "sudata", method = RequestMethod.GET)
@ResponseBody
public String saveOrUpdateData() {
Person person = new Person();
person.setUsername("Gquiet");
person.setPhone("123456789");
person.setAddress("BeiJing");
person.setRemark("Handsome!");
System.out.println("-------Person information: " + person.toString());
// SaveOrUpdate data
personService.saveOrUpdatePerson(person);
return "success!";
}
}6.3.5 修改前端页面
(1)修改欢迎页面,加入如下代码。
<%@ page language="java" contentType="text/html; charset=UTF-8"
    pageEncoding="UTF-8"%>


Hello World

		Hello, this is the welcome page!
(2)修改【testmvc.jsp】、【testspring.jsp】文件,代码如下:
file:testmvc.jsp
<%@ page language="java" contentType="text/html; charset=UTF-8"
    pageEncoding="UTF-8"%>


	Test SpringMVC

		Hello, this is a test page for Spring MVC!
file:testspring.jsp
<%@ page language="java" contentType="text/html; charset=UTF-8"
    pageEncoding="UTF-8"%>


	Test SpringMVC + Spring

		Hello, this is a test page for SpringMVC+Spring!
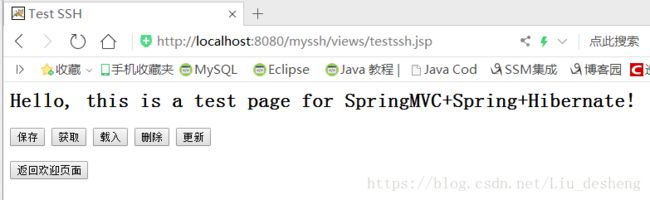
(3)在src/main/webapp/views文件夹中创建前端页面文件【testssh.jsp】,代码如下.
<%@ page language="java" contentType="text/html; charset=UTF-8"
	pageEncoding="UTF-8"%>


	Test SSH

		Hello, this is a test page for SpringMVC+Spring+Hibernate!
6.3.6 测试
在Tomcat中运行项目,访问默认页面http://localhost:8080/myssh/,进入欢迎页面。

测试SpringMVC,在JSP中调用servlet【testmvc】,结果如下。
测试SpringMVC+Spring,在JSP中调用servlet【testspring】,结果如下。

测试SpringMVC+Spring+Hibernate,在JSP中调用页面【testssh.jsp】,结果如下。
分别点击数据库操作按钮,执行相应的操作,后台均可正确执行操作,前端显示成功信息,数据库内容显示正常。以保存操作为例。
控制台信息如下:
20:32:48.584 [http-nio-8080-exec-18] DEBUG org.springframework.web.servlet.DispatcherServlet - DispatcherServlet with name 'springMVC' processing GET request for [/myssh/savedata]
20:32:48.585 [http-nio-8080-exec-18] DEBUG org.springframework.web.servlet.mvc.method.annotation.RequestMappingHandlerMapping - Looking up handler method for path /savedata
20:32:48.586 [http-nio-8080-exec-18] DEBUG org.springframework.web.servlet.mvc.method.annotation.RequestMappingHandlerMapping - Returning handler method [public java.lang.String com.seu.liuds.myssh.controller.MainController.saveData()]
20:32:48.586 [http-nio-8080-exec-18] DEBUG org.springframework.beans.factory.support.DefaultListableBeanFactory - Returning cached instance of singleton bean 'mainController'
20:32:48.586 [http-nio-8080-exec-18] DEBUG org.springframework.web.servlet.DispatcherServlet - Last-Modified value for [/myssh/savedata] is: -1
-------Person information: Person(id=null, created=1534595568587, username=Liuds, address=BeiJing, phone=123456789, remark=Handsome!)
20:32:48.587 [http-nio-8080-exec-18] DEBUG org.springframework.orm.hibernate5.HibernateTransactionManager - Creating new transaction with name [com.seu.liuds.myssh.service.impl.PersonServiceImpl.savePerson]: PROPAGATION_REQUIRED,ISOLATION_DEFAULT; ''
20:32:48.587 [http-nio-8080-exec-18] DEBUG org.springframework.orm.hibernate5.HibernateTransactionManager - Opened new Session [SessionImpl(2029760484)] for Hibernate transaction
20:32:48.587 [http-nio-8080-exec-18] DEBUG org.springframework.orm.hibernate5.HibernateTransactionManager - Preparing JDBC Connection of Hibernate Session [SessionImpl(2029760484)]
08:32:48,588 [http-nio-8080-exec-18] DEBUG com.mchange.v2.resourcepool.BasicResourcePool  - trace com.mchange.v2.resourcepool.BasicResourcePool@78a4c061 [managed: 3, unused: 2, excluded: 0] (e.g. com.mchange.v2.c3p0.impl.NewPooledConnection@15c8a984)
20:32:48.589 [http-nio-8080-exec-18] DEBUG org.hibernate.engine.transaction.internal.TransactionImpl - On TransactionImpl creation, JpaCompliance#isJpaTransactionComplianceEnabled == false
20:32:48.589 [http-nio-8080-exec-18] DEBUG org.hibernate.engine.transaction.internal.TransactionImpl - begin
20:32:48.590 [http-nio-8080-exec-18] DEBUG org.springframework.orm.hibernate5.HibernateTransactionManager - Exposing Hibernate transaction as JDBC transaction [com.mchange.v2.c3p0.impl.NewProxyConnection@507ce6d1]
08:32:48,591 [http-nio-8080-exec-18] INFO  com.seu.liuds.myssh.repository.impl.PersonRepositoryImpl  - --[UserInfo]--Saving person Person(id=null, created=1534595568587, username=Liuds, address=BeiJing, phone=123456789, remark=Handsome!)
08:32:48,591 [http-nio-8080-exec-18] INFO  com.seu.liuds.myssh.repository.impl.PersonRepositoryImpl  - --[UserInfo]--ssionFactory: org.hibernate.internal.SessionFactoryImpl@34463243
20:32:48.591 [http-nio-8080-exec-18] DEBUG org.hibernate.event.internal.AbstractSaveEventListener - Generated identifier: 9, using strategy: org.hibernate.id.IncrementGenerator
-------Save result: 9
20:32:48.592 [http-nio-8080-exec-18] DEBUG org.springframework.orm.hibernate5.HibernateTransactionManager - Initiating transaction commit
20:32:48.592 [http-nio-8080-exec-18] DEBUG org.springframework.orm.hibernate5.HibernateTransactionManager - Committing Hibernate transaction on Session [SessionImpl(2029760484)]
20:32:48.592 [http-nio-8080-exec-18] DEBUG org.hibernate.engine.transaction.internal.TransactionImpl - committing
20:32:48.592 [http-nio-8080-exec-18] DEBUG org.hibernate.event.internal.AbstractFlushingEventListener - Processing flush-time cascades
20:32:48.592 [http-nio-8080-exec-18] DEBUG org.hibernate.event.internal.AbstractFlushingEventListener - Dirty checking collections
20:32:48.593 [http-nio-8080-exec-18] DEBUG org.hibernate.event.internal.AbstractFlushingEventListener - Flushed: 1 insertions, 0 updates, 0 deletions to 1 objects
20:32:48.593 [http-nio-8080-exec-18] DEBUG org.hibernate.event.internal.AbstractFlushingEventListener - Flushed: 0 (re)creations, 0 updates, 0 removals to 0 collections
20:32:48.593 [http-nio-8080-exec-18] DEBUG org.hibernate.internal.util.EntityPrinter - Listing entities:
20:32:48.594 [http-nio-8080-exec-18] DEBUG org.hibernate.internal.util.EntityPrinter - com.seu.liuds.myssh.entity.Person{address=BeiJing, phone=123456789, created=1534595568587, remark=Handsome!, id=9, username=Liuds}
20:32:48.594 [http-nio-8080-exec-18] DEBUG org.hibernate.SQL -
    insert
    into
        person
        (CREATED, NAME, PHONE, REMARK, ADDRESS, ID)
    values
        (?, ?, ?, ?, ?, ?)
Hibernate:
    insert
    into
        person
        (CREATED, NAME, PHONE, REMARK, ADDRESS, ID)
    values
        (?, ?, ?, ?, ?, ?)
08:32:48,594 [http-nio-8080-exec-18] DEBUG com.mchange.v2.c3p0.stmt.GooGooStatementCache  - com.mchange.v2.c3p0.stmt.GlobalMaxOnlyStatementCache ----> CACHE HIT
08:32:48,594 [http-nio-8080-exec-18] DEBUG com.mchange.v2.c3p0.stmt.GooGooStatementCache  - checkoutStatement: com.mchange.v2.c3p0.stmt.GlobalMaxOnlyStatementCache stats -- total size: 3; checked out: 1; num connections: 1; num keys: 3
08:32:48,598 [http-nio-8080-exec-18] DEBUG com.mchange.v2.c3p0.stmt.GooGooStatementCache  - checkinStatement(): com.mchange.v2.c3p0.stmt.GlobalMaxOnlyStatementCache stats -- total size: 3; checked out: 0; num connections: 1; num keys: 3
20:32:48.635 [http-nio-8080-exec-18] DEBUG org.springframework.orm.hibernate5.HibernateTransactionManager - Closing Hibernate Session [SessionImpl(2029760484)] after transaction
08:32:48,635 [http-nio-8080-exec-18] DEBUG com.mchange.v2.c3p0.stmt.GooGooStatementCache  - checkinAll(): com.mchange.v2.c3p0.stmt.GlobalMaxOnlyStatementCache stats -- total size: 3; checked out: 0; num connections: 1; num keys: 3
08:32:48,636 [http-nio-8080-exec-18] DEBUG com.mchange.v2.resourcepool.BasicResourcePool  - trace com.mchange.v2.resourcepool.BasicResourcePool@78a4c061 [managed: 3, unused: 2, excluded: 0] (e.g. com.mchange.v2.c3p0.impl.NewPooledConnection@15c8a984)
08:32:48,636 [com.mchange.v2.async.ThreadPoolAsynchronousRunner$PoolThread-#0] DEBUG com.mchange.v2.c3p0.stmt.GooGooStatementCache  - checkinAll(): com.mchange.v2.c3p0.stmt.GlobalMaxOnlyStatementCache stats -- total size: 3; checked out: 0; num connections: 1; num keys: 3
20:32:48.638 [http-nio-8080-exec-18] DEBUG org.springframework.web.servlet.mvc.method.annotation.RequestResponseBodyMethodProcessor - Written [save success!] as "text/html" using [org.springframework.http.converter.StringHttpMessageConverter@78ee5d27]
20:32:48.638 [http-nio-8080-exec-18] DEBUG org.springframework.web.servlet.DispatcherServlet - Null ModelAndView returned to DispatcherServlet with name 'springMVC': assuming HandlerAdapter completed request handling
20:32:48.638 [http-nio-8080-exec-18] DEBUG org.springframework.web.servlet.DispatcherServlet - Successfully completed request
数据库内容如下:
![]()
测试成功!
说明
项目的所有源代码都原封不动贴上去了,如果有疑问,请留言。需要项目文件的请留邮箱,或者到以下网址下载:
Spring5.0.8+SpringMVC+Hibernate5.3.4框架
祝大家没有BUG。
下一步计划将Activiti的有关内容框架集成到这个框架上来,前端初步打算用EasyUI来做。都是计划,^_^。