版本记录
| 版本号 | 时间 |
|---|---|
| V1.0 | 2018.01.17 |
前言
OpenGL 图形库项目中一直也没用过,最近也想学着使用这个图形库,感觉还是很有意思,也就自然想着好好的总结一下,希望对大家能有所帮助。下面内容来自欢迎来到OpenGL的世界。
1. OpenGL 图形库使用(一) —— 概念基础
2. OpenGL 图形库使用(二) —— 渲染模式、对象、扩展和状态机
3. OpenGL 图形库使用(三) —— 着色器、数据类型与输入输出
4. OpenGL 图形库使用(四) —— Uniform及更多属性
5. OpenGL 图形库使用(五) —— 纹理
6. OpenGL 图形库使用(六) —— 变换
7. OpenGL 图形库的使用(七)—— 坐标系统之五种不同的坐标系统(一)
8. OpenGL 图形库的使用(八)—— 坐标系统之3D效果(二)
9. OpenGL 图形库的使用(九)—— 摄像机(一)
10. OpenGL 图形库的使用(十)—— 摄像机(二)
11. OpenGL 图形库的使用(十一)—— 光照之颜色
12. OpenGL 图形库的使用(十二)—— 光照之基础光照
13. OpenGL 图形库的使用(十三)—— 光照之材质
14. OpenGL 图形库的使用(十四)—— 光照之光照贴图
15. OpenGL 图形库的使用(十五)—— 光照之投光物
16. OpenGL 图形库的使用(十六)—— 光照之多光源
17. OpenGL 图形库的使用(十七)—— 光照之复习总结
18. OpenGL 图形库的使用(十八)—— 模型加载之Assimp
19. OpenGL 图形库的使用(十九)—— 模型加载之网格
20. OpenGL 图形库的使用(二十)—— 模型加载之模型
21. OpenGL 图形库的使用(二十一)—— 高级OpenGL之深度测试
22. OpenGL 图形库的使用(二十二)—— 高级OpenGL之模板测试Stencil testing
23. OpenGL 图形库的使用(二十三)—— 高级OpenGL之混合Blending
24. OpenGL 图形库的使用(二十四)—— 高级OpenGL之面剔除Face culling
25. OpenGL 图形库的使用(二十五)—— 高级OpenGL之帧缓冲Framebuffers
26. OpenGL 图形库的使用(二十六)—— 高级OpenGL之立方体贴图Cubemaps
27. OpenGL 图形库的使用(二十七)—— 高级OpenGL之高级数据Advanced Data
28. OpenGL 图形库的使用(二十八)—— 高级OpenGL之高级GLSL Advanced GLSL
29. OpenGL 图形库的使用(二十九)—— 高级OpenGL之几何着色器Geometry Shader
实例化
假设你有一个绘制了很多模型的场景,而大部分的模型包含的是同一组顶点数据,只不过进行的是不同的世界空间变换。想象一个充满草的场景:每根草都是一个包含几个三角形的小模型。你可能会需要绘制很多根草,最终在每帧中你可能会需要渲染上千或者上万根草。因为每一根草仅仅是由几个三角形构成,渲染几乎是瞬间完成的,但上千个渲染函数调用却会极大地影响性能。
如果我们需要渲染大量物体时,代码看起来会像这样:
for(unsigned int i = 0; i < amount_of_models_to_draw; i++)
{
    DoSomePreparations(); // 绑定VAO,绑定纹理,设置uniform等
    glDrawArrays(GL_TRIANGLES, 0, amount_of_vertices);
}
如果像这样绘制模型的大量实例(Instance),你很快就会因为绘制调用过多而达到性能瓶颈。与绘制顶点本身相比,使用glDrawArrays或glDrawElements函数告诉GPU去绘制你的顶点数据会消耗更多的性能,因为OpenGL在绘制顶点数据之前需要做很多准备工作(比如告诉GPU该从哪个缓冲读取数据,从哪寻找顶点属性,而且这些都是在相对缓慢的CPU到GPU总线(CPU to GPU Bus)上进行的)。所以,即便渲染顶点非常快,命令GPU去渲染却未必。
如果我们能够将数据一次性发送给GPU,然后使用一个绘制函数让OpenGL利用这些数据绘制多个物体,就会更方便了。这就是实例化(Instancing)。
实例化这项技术能够让我们使用一个渲染调用来绘制多个物体,来节省每次绘制物体时CPU -> GPU的通信,它只需要一次即可。如果想使用实例化渲染,我们只需要将glDrawArrays和glDrawElements的渲染调用分别改为glDrawArraysInstanced和glDrawElementsInstanced就可以了。这些渲染函数的实例化版本需要一个额外的参数,叫做实例数量(Instance Count),它能够设置我们需要渲染的实例个数。这样我们只需要将必须的数据发送到GPU一次,然后使用一次函数调用告诉GPU它应该如何绘制这些实例。GPU将会直接渲染这些实例,而不用不断地与CPU进行通信。
这个函数本身并没有什么用。渲染同一个物体一千次对我们并没有什么用处,每个物体都是完全相同的,而且还在同一个位置。我们只能看见一个物体!处于这个原因,GLSL在顶点着色器中嵌入了另一个内建变量,gl_InstanceID。
在使用实例化渲染调用时,gl_InstanceID会从0开始,在每个实例被渲染时递增1。比如说,我们正在渲染第43个实例,那么顶点着色器中它的gl_InstanceID将会是42。因为每个实例都有唯一的ID,我们可以建立一个数组,将ID与位置值对应起来,将每个实例放置在世界的不同位置。
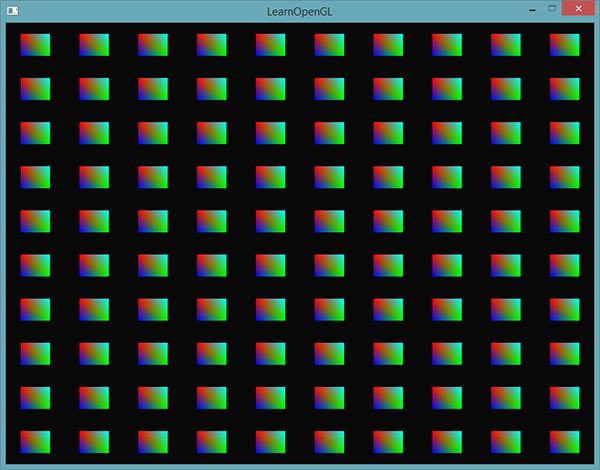
为了体验一下实例化绘制,我们将会在标准化设备坐标系中使用一个渲染调用,绘制100个2D四边形。我们会索引一个包含100个偏移向量的uniform数组,将偏移值加到每个实例化的四边形上。最终的结果是一个排列整齐的四边形网格:
每个四边形由2个三角形所组成,一共有6个顶点。每个顶点包含一个2D的标准化设备坐标位置向量和一个颜色向量。 下面就是这个例子使用的顶点数据,为了大量填充屏幕,每个三角形都很小:
float quadVertices[] = {
    // 位置          // 颜色
    -0.05f,  0.05f,  1.0f, 0.0f, 0.0f,
     0.05f, -0.05f,  0.0f, 1.0f, 0.0f,
    -0.05f, -0.05f,  0.0f, 0.0f, 1.0f,

    -0.05f,  0.05f,  1.0f, 0.0f, 0.0f,
     0.05f, -0.05f,  0.0f, 1.0f, 0.0f,
     0.05f,  0.05f,  0.0f, 1.0f, 1.0f
};
片段着色器会从顶点着色器接受颜色向量,并将其设置为它的颜色输出,来实现四边形的颜色:
#version 330 core
out vec4 FragColor;

in vec3 fColor;

void main()
{
    FragColor = vec4(fColor, 1.0);
}
到现在都没有什么新内容,但从顶点着色器开始就变得很有趣了:
#version 330 core
layout (location = 0) in vec2 aPos;
layout (location = 1) in vec3 aColor;

out vec3 fColor;

uniform vec2 offsets[100];

void main()
{
    vec2 offset = offsets[gl_InstanceID];
    gl_Position = vec4(aPos + offset, 0.0, 1.0);
    fColor = aColor;
}
这里我们定义了一个叫做offsets的数组,它包含100个偏移向量。在顶点着色器中,我们会使用gl_InstanceID来索引offsets数组,获取每个实例的偏移向量。如果我们要实例化绘制100个四边形,仅使用这个顶点着色器我们就能得到100个位于不同位置的四边形。
当前,我们仍要设置这些偏移位置,我们会在进入渲染循环之前使用一个嵌套for循环计算:
glm::vec2 translations[100];
int index = 0;
float offset = 0.1f;
for(int y = -10; y < 10; y += 2)
{
    for(int x = -10; x < 10; x += 2)
    {
        glm::vec2 translation;
        translation.x = (float)x / 10.0f + offset;
        translation.y = (float)y / 10.0f + offset;
        translations[index++] = translation;
    }
}
这里,我们创建100个位移向量,表示10x10网格上的所有位置。除了生成translations数组之外,我们还需要将数据转移到顶点着色器的uniform数组中:
shader.use();
for(unsigned int i = 0; i < 100; i++)
{
    stringstream ss;
    string index;
    ss << i;
    index = ss.str();
    shader.setVec2(("offsets[" + index + "]").c_str(), translations[i]);
}
在这一段代码中,我们将for循环的计数器i转换为一个string,我们可以用它来动态创建位置值的字符串,用于uniform位置值的索引。接下来,我们会对offsets uniform数组中的每一项设置对应的位移向量。
现在所有的准备工作都做完了,我们可以开始渲染四边形了。对于实例化渲染,我们使用glDrawArraysInstanced或glDrawElementsInstanced。因为我们使用的不是索引缓冲,我们会调用glDrawArrays版本的函数:
glBindVertexArray(quadVAO);
glDrawArraysInstanced(GL_TRIANGLES, 0, 6, 100);
glDrawArraysInstanced的参数和glDrawArrays完全一样,除了最后多了个参数用来设置需要绘制的实例数量。因为我们想要在10x10网格中显示100个四边形,我们将它设置为100.运行代码之后,你应该能得到熟悉的100个五彩的四边形。
实例化数组
虽然之前的实现在目前的情况下能够正常工作,但是如果我们要渲染远超过100个实例的时候(这其实非常普遍),我们最终会超过最大能够发送至着色器的uniform数据大小上限。它的一个代替方案是实例化数组(Instanced Array),它被定义为一个顶点属性(能够让我们储存更多的数据),仅在顶点着色器渲染一个新的实例时才会更新。
使用顶点属性时,顶点着色器的每次运行都会让GLSL获取新一组适用于当前顶点的属性。而当我们将顶点属性定义为一个实例化数组时,顶点着色器就只需要对每个实例,而不是每个顶点,更新顶点属性的内容了。这允许我们对逐顶点的数据使用普通的顶点属性,而对逐实例的数据使用实例化数组。
为了给你一个实例化数组的例子,我们将使用之前的例子,并将偏移量uniform数组设置为一个实例化数组。我们需要在顶点着色器中再添加一个顶点属性:
#version 330 core
layout (location = 0) in vec2 aPos;
layout (location = 1) in vec3 aColor;
layout (location = 2) in vec2 aOffset;

out vec3 fColor;

void main()
{
    gl_Position = vec4(aPos + aOffset, 0.0, 1.0);
    fColor = aColor;
}
我们不再使用gl_InstanceID,现在不需要索引一个uniform数组就能够直接使用offset属性了。
因为实例化数组和position与color变量一样,都是顶点属性,我们还需要将它的内容存在顶点缓冲对象中,并且配置它的属性指针。我们首先将(上一部分的)translations数组存到一个新的缓冲对象中:
unsigned int instanceVBO;
glGenBuffers(1, &instanceVBO);
glBindBuffer(GL_ARRAY_BUFFER, instanceVBO);
glBufferData(GL_ARRAY_BUFFER, sizeof(glm::vec2) * 100, &translations[0], GL_STATIC_DRAW);
glBindBuffer(GL_ARRAY_BUFFER, 0);
之后我们还需要设置它的顶点属性指针,并启用顶点属性:
glEnableVertexAttribArray(2);
glBindBuffer(GL_ARRAY_BUFFER, instanceVBO);
glVertexAttribPointer(2, 2, GL_FLOAT, GL_FALSE, 2 * sizeof(float), (void*)0);
glBindBuffer(GL_ARRAY_BUFFER, 0);
glVertexAttribDivisor(2, 1);
这段代码很有意思的地方在于最后一行,我们调用了glVertexAttribDivisor。这个函数告诉了OpenGL该什么时候更新顶点属性的内容至新一组数据。它的第一个参数是需要的顶点属性,第二个参数是属性除数(Attribute Divisor)。默认情况下,属性除数是0,告诉OpenGL我们需要在顶点着色器的每次迭代时更新顶点属性。将它设置为1时,我们告诉OpenGL我们希望在渲染一个新实例的时候更新顶点属性。而设置为2时,我们希望每2个实例更新一次属性,以此类推。我们将属性除数设置为1,是在告诉OpenGL,处于位置值2的顶点属性是一个实例化数组。
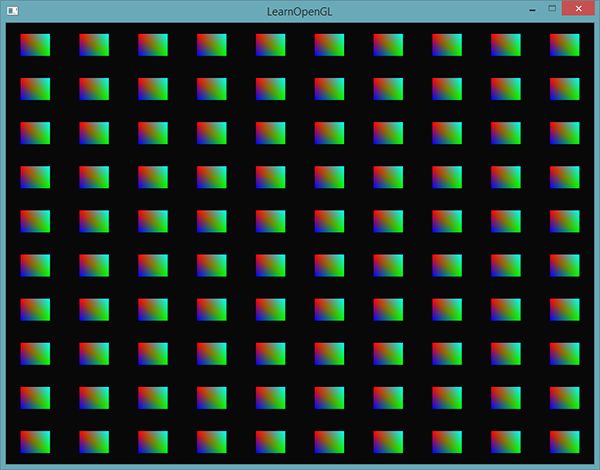
如果我们现在使用glDrawArraysInstanced,再次渲染四边形,会得到以下输出:
这和之前的例子是完全一样的,但这次是使用实例化数组实现的,这让我们能够传递更多的数据到顶点着色器(只要内存允许)来用于实例化绘制。
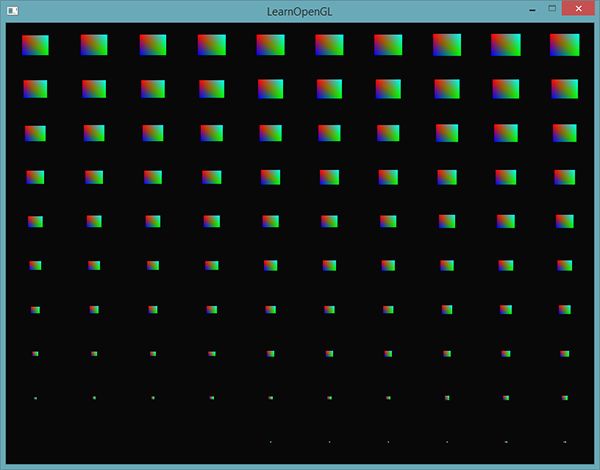
为了更有趣一点,我们也可以使用gl_InstanceID,从右上到左下逐渐缩小四边形:
void main()
{
    vec2 pos = aPos * (gl_InstanceID / 100.0);
    gl_Position = vec4(pos + aOffset, 0.0, 1.0);
    fColor = aColor;
}
结果就是,第一个四边形的实例会非常小,随着绘制实例的增加,gl_InstanceID会越来越接近100,四边形也就越来越接近原始大小。像这样将实例化数组与gl_InstanceID结合使用是完全可行的。
如果你还是不确定实例化渲染是如何工作的,或者想看看所有代码是如何组合起来的,你可以在这里找到程序的源代码。
#include
#include
#include
#include

void framebuffer_size_callback(GLFWwindow* window, int width, int height);

// settings
const unsigned int SCR_WIDTH = 1280;
const unsigned int SCR_HEIGHT = 720;

int main()
{
    // glfw: initialize and configure
    // ------------------------------
    glfwInit();
    glfwWindowHint(GLFW_CONTEXT_VERSION_MAJOR, 3);
    glfwWindowHint(GLFW_CONTEXT_VERSION_MINOR, 3);
    glfwWindowHint(GLFW_OPENGL_PROFILE, GLFW_OPENGL_CORE_PROFILE);

#ifdef __APPLE__
    glfwWindowHint(GLFW_OPENGL_FORWARD_COMPAT, GL_TRUE); // uncomment this statement to fix compilation on OS X
#endif

    // glfw window creation
    // --------------------
    GLFWwindow* window = glfwCreateWindow(SCR_WIDTH, SCR_HEIGHT, "LearnOpenGL", NULL, NULL);
    if (window == NULL)
    {
        std::cout << "Failed to create GLFW window" << std::endl;
        glfwTerminate();
        return -1;
    }
    glfwMakeContextCurrent(window);

    // glad: load all OpenGL function pointers
    // ---------------------------------------
    if (!gladLoadGLLoader((GLADloadproc)glfwGetProcAddress))
    {
        std::cout << "Failed to initialize GLAD" << std::endl;
        return -1;
    }

    // configure global opengl state
    // -----------------------------
    glEnable(GL_DEPTH_TEST);

    // build and compile shaders
    // ---------------
    Shader shader("10.1.instancing.vs", "10.1.instancing.fs");
 // generate a list of 100 quad locations/translation-vectors
    // ---------------------------------------------------------
    glm::vec2 translations[100];
    int index = 0;
    float offset = 0.1f;
    for (int y = -10; y < 10; y += 2)
    {
        for (int x = -10; x < 10; x += 2)
        {
            glm::vec2 translation;
            translation.x = (float)x / 10.0f + offset;
            translation.y = (float)y / 10.0f + offset;
            translations[index++] = translation;
        }
    }

    // store instance data in an array buffer
    // --------------------------------------
    unsigned int instanceVBO;
    glGenBuffers(1, &instanceVBO);
    glBindBuffer(GL_ARRAY_BUFFER, instanceVBO);
    glBufferData(GL_ARRAY_BUFFER, sizeof(glm::vec2) * 100, &translations[0], GL_STATIC_DRAW);
    glBindBuffer(GL_ARRAY_BUFFER, 0);

    // set up vertex data (and buffer(s)) and configure vertex attributes
    // ------------------------------------------------------------------
    float quadVertices[] = {
        // positions     // colors
        -0.05f,  0.05f,  1.0f, 0.0f, 0.0f,
         0.05f, -0.05f,  0.0f, 1.0f, 0.0f,
        -0.05f, -0.05f,  0.0f, 0.0f, 1.0f,

        -0.05f,  0.05f,  1.0f, 0.0f, 0.0f,
         0.05f, -0.05f,  0.0f, 1.0f, 0.0f,
         0.05f,  0.05f,  0.0f, 1.0f, 1.0f
    };
    unsigned int quadVAO, quadVBO;
    glGenVertexArrays(1, &quadVAO);
    glGenBuffers(1, &quadVBO);
    glBindVertexArray(quadVAO);
    glBindBuffer(GL_ARRAY_BUFFER, quadVBO);
    glBufferData(GL_ARRAY_BUFFER, sizeof(quadVertices), quadVertices, GL_STATIC_DRAW);
    glEnableVertexAttribArray(0);
    glVertexAttribPointer(0, 2, GL_FLOAT, GL_FALSE, 5 * sizeof(float), (void*)0);
    glEnableVertexAttribArray(1);
    glVertexAttribPointer(1, 3, GL_FLOAT, GL_FALSE, 5 * sizeof(float), (void*)(2 * sizeof(float)));
    // also set instance data
    glEnableVertexAttribArray(2);
    glBindBuffer(GL_ARRAY_BUFFER, instanceVBO); // this attribute comes from a different vertex buffer
    glVertexAttribPointer(2, 2, GL_FLOAT, GL_FALSE, 2 * sizeof(float), (void*)0);
    glBindBuffer(GL_ARRAY_BUFFER, 0);
    glVertexAttribDivisor(2, 1); // tell OpenGL this is an instanced vertex attribute.


    // render loop
    // -----------
    while (!glfwWindowShouldClose(window))
    {
        // render
        // ------
        glClearColor(0.1f, 0.1f, 0.1f, 1.0f);
        glClear(GL_COLOR_BUFFER_BIT | GL_DEPTH_BUFFER_BIT);

        // draw 100 instanced quads
        shader.use();
        glBindVertexArray(quadVAO);
        glDrawArraysInstanced(GL_TRIANGLES, 0, 6, 100); // 100 triangles of 6 vertices each
        glBindVertexArray(0);

        // glfw: swap buffers and poll IO events (keys pressed/released, mouse moved etc.)
        // -------------------------------------------------------------------------------
        glfwSwapBuffers(window);
        glfwPollEvents();
    }

    // optional: de-allocate all resources once they've outlived their purpose:
    // ------------------------------------------------------------------------
    glDeleteVertexArrays(1, &quadVAO);
    glDeleteBuffers(1, &quadVBO);

    glfwTerminate();
    return 0;
}

// glfw: whenever the window size changed (by OS or user resize) this callback function executes
// ---------------------------------------------------------------------------------------------
void framebuffer_size_callback(GLFWwindow* window, int width, int height)
{
    // make sure the viewport matches the new window dimensions; note that width and
    // height will be significantly larger than specified on retina displays.
    glViewport(0, 0, width, height);
}
虽然很有趣,但是这些例子并不是实例化的好例子。是的,它们的确让你知道实例化是怎么工作的,但是我们还没接触到它最有用的一点,绘制巨大数量的相似物体。出于这个原因,我们将会在下一部分进入太空探险,见识实例化渲染真正的威力。
这些例子不是实例的好例子,不过挺有意思的。它们可以让你对实例的工作方式有一个概括的理解,但是当绘制拥有极大数量的相同物体的时候,它极其有用,现在我们还没有展示呢。出于这个原因,我们将在接下来的部分进入太空来看看实例渲染的威力。
小行星带
想象这样一个场景,在宇宙中有一个大的行星,它位于小行星带的中央。这样的小行星带可能包含成千上万的岩块,在很不错的显卡上也很难完成这样的渲染。实例化渲染正是适用于这样的场景,因为所有的小行星都可以使用一个模型来表示。每个小行星可以再使用不同的变换矩阵来进行少许的变化。
为了展示实例化渲染的作用,我们首先会不使用实例化渲染,来渲染小行星绕着行星飞行的场景。这个场景将会包含一个大的行星模型,它可以在这里下载,以及很多环绕着行星的小行星。小行星的岩石模型可以在这里下载。
在代码例子中,我们将使用在模型加载小节中定义的模型加载器来加载模型。
为了得到想要的效果,我们将会为每个小行星生成一个变换矩阵,用作它们的模型矩阵。变换矩阵首先将小行星位移到小行星带中的某处,我们还会加一个小的随机偏移值到这个偏移量上,让这个圆环看起来更自然一点。接下来,我们应用一个随机的缩放,并且以一个旋转向量为轴进行一个随机的旋转。最终的变换矩阵不仅能将小行星变换到行星的周围,而且会让它看起来更自然,与其它小行星不同。最终的结果是一个布满小行星的圆环,其中每一个小行星都与众不同。
unsigned int amount = 1000;
glm::mat4 *modelMatrices;
modelMatrices = new glm::mat4[amount];
srand(glfwGetTime()); // 初始化随机种子
float radius = 50.0;
float offset = 2.5f;
for(unsigned int i = 0; i < amount; i++)
{
    glm::mat4 model;
    // 1. 位移:分布在半径为 'radius' 的圆形上,偏移的范围是 [-offset, offset]
    float angle = (float)i / (float)amount * 360.0f;
    float displacement = (rand() % (int)(2 * offset * 100)) / 100.0f - offset;
    float x = sin(angle) * radius + displacement;
    displacement = (rand() % (int)(2 * offset * 100)) / 100.0f - offset;
    float y = displacement * 0.4f; // 让行星带的高度比x和z的宽度要小
    displacement = (rand() % (int)(2 * offset * 100)) / 100.0f - offset;
    float z = cos(angle) * radius + displacement;
    model = glm::translate(model, glm::vec3(x, y, z));

    // 2. 缩放:在 0.05 和 0.25f 之间缩放
    float scale = (rand() % 20) / 100.0f + 0.05;
    model = glm::scale(model, glm::vec3(scale));

    // 3. 旋转:绕着一个(半)随机选择的旋转轴向量进行随机的旋转
    float rotAngle = (rand() % 360);
    model = glm::rotate(model, rotAngle, glm::vec3(0.4f, 0.6f, 0.8f));

    // 4. 添加到矩阵的数组中
    modelMatrices[i] = model;
}
这段代码看起来可能有点吓人,但我们只是将小行星的x和z位置变换到了一个半径为radius的圆形上,并且在半径的基础上偏移了-offset到offset。我们让y偏移的影响更小一点,让小行星带更扁平一点。接下来,我们应用了缩放和旋转变换,并将最终的变换矩阵储存在modelMatrices中,这个数组的大小是amount。这里,我们一共生成1000个模型矩阵,每个小行星一个。
在加载完行星和岩石模型,并编译完着色器之后,渲染的代码看起来是这样的:
// 绘制行星
shader.use();
glm::mat4 model;
model = glm::translate(model, glm::vec3(0.0f, -3.0f, 0.0f));
model = glm::scale(model, glm::vec3(4.0f, 4.0f, 4.0f));
shader.setMat4("model", model);
planet.Draw(shader);

// 绘制小行星
for(unsigned int i = 0; i < amount; i++)
{
    shader.setMat4("model", modelMatrices[i]);
    rock.Draw(shader);
}
我们首先绘制了行星的模型,并对它进行位移和缩放,以适应场景,接下来,我们绘制amount数量的岩石模型。在绘制每个岩石之前,我们首先需要在着色器内设置对应的模型变换矩阵。
最终的结果是一个看起来像是太空的场景,环绕着行星的是看起来很自然的小行星带:
这个场景每帧包含1001次渲染调用,其中1000个是岩石模型。你可以在这里找到源代码。
#include
#include
#include
#include
#include
#include
#include <[learnopengl/shader.h](https://learnopengl.com/code_viewer_gh.php?code=includes/learnopengl/shader.h)>
#include <[learnopengl/camera.h](https://learnopengl.com/code_viewer_gh.php?code=includes/learnopengl/camera.h)>
#include <[learnopengl/model.h](https://learnopengl.com/code_viewer_gh.php?code=includes/learnopengl/model.h)>
#include

void framebuffer_size_callback(GLFWwindow* window, int width, int height);
void mouse_callback(GLFWwindow* window, double xpos, double ypos);
void scroll_callback(GLFWwindow* window, double xoffset, double yoffset);
void processInput(GLFWwindow *window);

// settings
const unsigned int SCR_WIDTH = 1280;
const unsigned int SCR_HEIGHT = 720;

// camera
Camera camera(glm::vec3(0.0f, 0.0f, 55.0f));
float lastX = (float)SCR_WIDTH / 2.0;
float lastY = (float)SCR_HEIGHT / 2.0;
bool firstMouse = true;

// timing
float deltaTime = 0.0f;
float lastFrame = 0.0f;

int main()
{
    // glfw: initialize and configure
    // ------------------------------
    glfwInit();
    glfwWindowHint(GLFW_CONTEXT_VERSION_MAJOR, 3);
    glfwWindowHint(GLFW_CONTEXT_VERSION_MINOR, 3);
    glfwWindowHint(GLFW_OPENGL_PROFILE, GLFW_OPENGL_CORE_PROFILE);

#ifdef __APPLE__
    glfwWindowHint(GLFW_OPENGL_FORWARD_COMPAT, GL_TRUE); // uncomment this statement to fix compilation on OS X
#endif

    // glfw window creation
    // --------------------
    GLFWwindow* window = glfwCreateWindow(SCR_WIDTH, SCR_HEIGHT, "LearnOpenGL", NULL, NULL);
    if (window == NULL)
    {
        std::cout << "Failed to create GLFW window" << std::endl;
        glfwTerminate();
        return -1;
    }
    glfwMakeContextCurrent(window);
    glfwSetFramebufferSizeCallback(window, framebuffer_size_callback);
    glfwSetCursorPosCallback(window, mouse_callback);
    glfwSetScrollCallback(window, scroll_callback);

    // tell GLFW to capture our mouse
    glfwSetInputMode(window, GLFW_CURSOR, GLFW_CURSOR_DISABLED);

    // glad: load all OpenGL function pointers
    // ---------------------------------------
    if (!gladLoadGLLoader((GLADloadproc)glfwGetProcAddress))
    {
        std::cout << "Failed to initialize GLAD" << std::endl;
        return -1;
    }

    // configure global opengl state
    // -----------------------------
    glEnable(GL_DEPTH_TEST);

    // build and compile shaders
    // -------------------------
    Shader shader("10.2.instancing.vs", "10.2.instancing.fs");
    // load models
    // -----------
    Model rock(FileSystem::getPath("resources/objects/rock/rock.obj"));
    Model planet(FileSystem::getPath("resources/objects/planet/planet.obj"));

    // generate a large list of semi-random model transformation matrices
    // ------------------------------------------------------------------
    unsigned int amount = 1000;
    glm::mat4* modelMatrices;
    modelMatrices = new glm::mat4[amount];
    srand(glfwGetTime()); // initialize random seed
    float radius = 50.0;
    float offset = 2.5f;
    for (unsigned int i = 0; i < amount; i++)
    {
        glm::mat4 model;
        // 1. translation: displace along circle with 'radius' in range [-offset, offset]
        float angle = (float)i / (float)amount * 360.0f;
        float displacement = (rand() % (int)(2 * offset * 100)) / 100.0f - offset;
        float x = sin(angle) * radius + displacement;
        displacement = (rand() % (int)(2 * offset * 100)) / 100.0f - offset;
        float y = displacement * 0.4f; // keep height of asteroid field smaller compared to width of x and z
        displacement = (rand() % (int)(2 * offset * 100)) / 100.0f - offset;
        float z = cos(angle) * radius + displacement;
        model = glm::translate(model, glm::vec3(x, y, z));

        // 2. scale: Scale between 0.05 and 0.25f
        float scale = (rand() % 20) / 100.0f + 0.05;
        model = glm::scale(model, glm::vec3(scale));

        // 3. rotation: add random rotation around a (semi)randomly picked rotation axis vector
        float rotAngle = (rand() % 360);
        model = glm::rotate(model, rotAngle, glm::vec3(0.4f, 0.6f, 0.8f));

        // 4. now add to list of matrices
        modelMatrices[i] = model;
    }

    // render loop
    // -----------
    while (!glfwWindowShouldClose(window))
    {
        // per-frame time logic
        // --------------------
        float currentFrame = glfwGetTime();
        deltaTime = currentFrame - lastFrame;
        lastFrame = currentFrame;

        // input
        // -----
        processInput(window);

        // render
        // ------
        glClearColor(0.1f, 0.1f, 0.1f, 1.0f);
        glClear(GL_COLOR_BUFFER_BIT | GL_DEPTH_BUFFER_BIT);

        // configure transformation matrices
        glm::mat4 projection = glm::perspective(glm::radians(45.0f), (float)SCR_WIDTH / (float)SCR_HEIGHT, 0.1f, 1000.0f);
        glm::mat4 view = camera.GetViewMatrix();;
        shader.use();
        shader.setMat4("projection", projection);
        shader.setMat4("view", view);

        // draw planet
        glm::mat4 model;
        model = glm::translate(model, glm::vec3(0.0f, -3.0f, 0.0f));
        model = glm::scale(model, glm::vec3(4.0f, 4.0f, 4.0f));
        shader.setMat4("model", model);
        planet.Draw(shader);

        // draw meteorites
        for (unsigned int i = 0; i < amount; i++)
        {
            shader.setMat4("model", modelMatrices[i]);
            rock.Draw(shader);
        }

        // glfw: swap buffers and poll IO events (keys pressed/released, mouse moved etc.)
        // -------------------------------------------------------------------------------
        glfwSwapBuffers(window);
        glfwPollEvents();
    }

    glfwTerminate();
    return 0;
}

// process all input: query GLFW whether relevant keys are pressed/released this frame and react accordingly
// ---------------------------------------------------------------------------------------------------------
void processInput(GLFWwindow *window)
{
    if (glfwGetKey(window, GLFW_KEY_ESCAPE) == GLFW_PRESS)
        glfwSetWindowShouldClose(window, true);

    if (glfwGetKey(window, GLFW_KEY_W) == GLFW_PRESS)
        camera.ProcessKeyboard(FORWARD, deltaTime);
    if (glfwGetKey(window, GLFW_KEY_S) == GLFW_PRESS)
        camera.ProcessKeyboard(BACKWARD, deltaTime);
    if (glfwGetKey(window, GLFW_KEY_A) == GLFW_PRESS)
        camera.ProcessKeyboard(LEFT, deltaTime);
    if (glfwGetKey(window, GLFW_KEY_D) == GLFW_PRESS)
        camera.ProcessKeyboard(RIGHT, deltaTime);
}

// glfw: whenever the window size changed (by OS or user resize) this callback function executes
// ---------------------------------------------------------------------------------------------
void framebuffer_size_callback(GLFWwindow* window, int width, int height)
{
    // make sure the viewport matches the new window dimensions; note that width and
    // height will be significantly larger than specified on retina displays.
    glViewport(0, 0, width, height);
}

// glfw: whenever the mouse moves, this callback is called
// -------------------------------------------------------
void mouse_callback(GLFWwindow* window, double xpos, double ypos)
{
    if (firstMouse)
    {
        lastX = xpos;
        lastY = ypos;
        firstMouse = false;
    }

    float xoffset = xpos - lastX;
    float yoffset = lastY - ypos; // reversed since y-coordinates go from bottom to top

    lastX = xpos;
    lastY = ypos;

    camera.ProcessMouseMovement(xoffset, yoffset);
}

// glfw: whenever the mouse scroll wheel scrolls, this callback is called
// ----------------------------------------------------------------------
void scroll_callback(GLFWwindow* window, double xoffset, double yoffset)
{
    camera.ProcessMouseScroll(yoffset);
}
当我们开始增加这个数字的时候,你很快就会发现场景不再能够流畅运行了,帧数也下降很厉害。当我们将amount设置为2000的时候,场景就已经慢到移动都很困难的程度了。
现在,我们来尝试使用实例化渲染来渲染相同的场景。我们首先对顶点着色器进行一点修改:
#version 330 core
layout (location = 0) in vec3 aPos;
layout (location = 2) in vec2 aTexCoords;
layout (location = 3) in mat4 instanceMatrix;

out vec2 TexCoords;

uniform mat4 projection;
uniform mat4 view;

void main()
{
    gl_Position = projection * view * instanceMatrix * vec4(aPos, 1.0);
    TexCoords = aTexCoords;
}
我们不再使用模型uniform变量,改为一个mat4的顶点属性,让我们能够存储一个实例化数组的变换矩阵。然而,当我们顶点属性的类型大于vec4时,就要多进行一步处理了。顶点属性最大允许的数据大小等于一个vec4。因为一个mat4本质上是4个vec4,我们需要为这个矩阵预留4个顶点属性。因为我们将它的位置值设置为3,矩阵每一列的顶点属性位置值就是3、4、5和6。
接下来,我们需要为这4个顶点属性设置属性指针,并将它们设置为实例化数组:
// 顶点缓冲对象
unsigned int buffer;
glGenBuffers(1, &buffer);
glBindBuffer(GL_ARRAY_BUFFER, buffer);
glBufferData(GL_ARRAY_BUFFER, amount * sizeof(glm::mat4), &modelMatrices[0], GL_STATIC_DRAW);

for(unsigned int i = 0; i < rock.meshes.size(); i++)
{
    unsigned int VAO = rock.meshes[i].VAO;
    glBindVertexArray(VAO);
    // 顶点属性
    GLsizei vec4Size = sizeof(glm::vec4);
    glEnableVertexAttribArray(3);
    glVertexAttribPointer(3, 4, GL_FLOAT, GL_FALSE, 4 * vec4Size, (void*)0);
    glEnableVertexAttribArray(4);
    glVertexAttribPointer(4, 4, GL_FLOAT, GL_FALSE, 4 * vec4Size, (void*)(vec4Size));
    glEnableVertexAttribArray(5);
    glVertexAttribPointer(5, 4, GL_FLOAT, GL_FALSE, 4 * vec4Size, (void*)(2 * vec4Size));
    glEnableVertexAttribArray(6);
    glVertexAttribPointer(6, 4, GL_FLOAT, GL_FALSE, 4 * vec4Size, (void*)(3 * vec4Size));

    glVertexAttribDivisor(3, 1);
    glVertexAttribDivisor(4, 1);
    glVertexAttribDivisor(5, 1);
    glVertexAttribDivisor(6, 1);

    glBindVertexArray(0);
}
注意这里我们将Mesh的VAO从私有变量改为了公有变量,让我们能够访问它的顶点数组对象。这并不是最好的解决方案,只是为了配合本小节的一个简单的改动。除此之外代码就应该很清楚了。我们告诉了OpenGL应该如何解释每个缓冲顶点属性的缓冲,并且告诉它这些顶点属性是实例化数组。
接下来,我们再次使用网格的VAO,这一次使用glDrawElementsInstanced进行绘制:
// 绘制小行星
instanceShader.use();
for(unsigned int i = 0; i < rock.meshes.size(); i++)
{
    glBindVertexArray(rock.meshes[i].VAO);
    glDrawElementsInstanced(
        GL_TRIANGLES, rock.meshes[i].indices.size(), GL_UNSIGNED_INT, 0, amount
    );
}
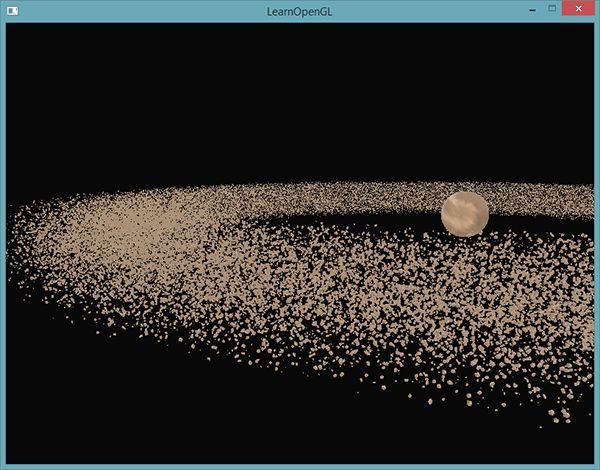
这里,我们绘制与之前相同数量amount的小行星,但是使用的是实例渲染。结果应该是非常相似的,但如果你开始增加amount变量,你就能看见实例化渲染的效果了。没有实例化渲染的时候,我们只能流畅渲染1000到1500个小行星。而使用了实例化渲染之后,我们可以将这个值设置为100000,每个岩石模型有576个顶点,每帧加起来大概要绘制5700万个顶点,但性能却没有受到任何影响!
上面这幅图渲染了10万个小行星,半径为150.0f,偏移量等于25.0f。你可以在这里找到实例化渲染的代码。
#include
#include
#include
#include
#include
#include
#include <[learnopengl/shader.h](https://learnopengl.com/code_viewer_gh.php?code=includes/learnopengl/shader.h)>
#include <[learnopengl/camera.h](https://learnopengl.com/code_viewer_gh.php?code=includes/learnopengl/camera.h)>
#include <[learnopengl/model.h](https://learnopengl.com/code_viewer_gh.php?code=includes/learnopengl/model.h)>
#include

void framebuffer_size_callback(GLFWwindow* window, int width, int height);
void mouse_callback(GLFWwindow* window, double xpos, double ypos);
void scroll_callback(GLFWwindow* window, double xoffset, double yoffset);
void processInput(GLFWwindow *window);

// settings
const unsigned int SCR_WIDTH = 1280;
const unsigned int SCR_HEIGHT = 720;

// camera
Camera camera(glm::vec3(0.0f, 0.0f, 155.0f));
float lastX = (float)SCR_WIDTH / 2.0;
float lastY = (float)SCR_HEIGHT / 2.0;
bool firstMouse = true;

// timing
float deltaTime = 0.0f;
float lastFrame = 0.0f;

int main()
{
    // glfw: initialize and configure
    // ------------------------------
    glfwInit();
    glfwWindowHint(GLFW_CONTEXT_VERSION_MAJOR, 3);
    glfwWindowHint(GLFW_CONTEXT_VERSION_MINOR, 3);
    glfwWindowHint(GLFW_OPENGL_PROFILE, GLFW_OPENGL_CORE_PROFILE);

#ifdef __APPLE__
    glfwWindowHint(GLFW_OPENGL_FORWARD_COMPAT, GL_TRUE); // uncomment this statement to fix compilation on OS X
#endif

    // glfw window creation
    // --------------------
    GLFWwindow* window = glfwCreateWindow(SCR_WIDTH, SCR_HEIGHT, "LearnOpenGL", NULL, NULL);
    if (window == NULL)
    {
        std::cout << "Failed to create GLFW window" << std::endl;
        glfwTerminate();
        return -1;
    }
    glfwMakeContextCurrent(window);
    glfwSetFramebufferSizeCallback(window, framebuffer_size_callback);
    glfwSetCursorPosCallback(window, mouse_callback);
    glfwSetScrollCallback(window, scroll_callback);

    // tell GLFW to capture our mouse
    glfwSetInputMode(window, GLFW_CURSOR, GLFW_CURSOR_DISABLED);

    // glad: load all OpenGL function pointers
    // ---------------------------------------
    if (!gladLoadGLLoader((GLADloadproc)glfwGetProcAddress))
    {
        std::cout << "Failed to initialize GLAD" << std::endl;
        return -1;
    }

    // configure global opengl state
    // -----------------------------
    glEnable(GL_DEPTH_TEST);

    // build and compile shaders
    // -------------------------
    Shader asteroidShader("[10.3.asteroids.vs](https://learnopengl.com/code_viewer_gh.php?code=src/4.advanced_opengl/10.3.asteroids_instanced/10.3.asteroids.vs)", "[10.3.asteroids.fs](https://learnopengl.com/code_viewer_gh.php?code=src/4.advanced_opengl/10.3.asteroids_instanced/10.3.asteroids.fs)");
    Shader planetShader("[10.3.planet.vs](https://learnopengl.com/code_viewer_gh.php?code=src/4.advanced_opengl/10.3.asteroids_instanced/10.3.planet.vs)", "[10.3.planet.fs](https://learnopengl.com/code_viewer_gh.php?code=src/4.advanced_opengl/10.3.asteroids_instanced/10.3.planet.fs)");
   // load models
    // -----------
    Model rock(FileSystem::getPath("resources/objects/rock/rock.obj"));
    Model planet(FileSystem::getPath("resources/objects/planet/planet.obj"));

    // generate a large list of semi-random model transformation matrices
    // ------------------------------------------------------------------
    unsigned int amount = 100000;
    glm::mat4* modelMatrices;
    modelMatrices = new glm::mat4[amount];
    srand(glfwGetTime()); // initialize random seed
    float radius = 150.0;
    float offset = 25.0f;
    for (unsigned int i = 0; i < amount; i++)
    {
        glm::mat4 model;
        // 1. translation: displace along circle with 'radius' in range [-offset, offset]
        float angle = (float)i / (float)amount * 360.0f;
        float displacement = (rand() % (int)(2 * offset * 100)) / 100.0f - offset;
        float x = sin(angle) * radius + displacement;
        displacement = (rand() % (int)(2 * offset * 100)) / 100.0f - offset;
        float y = displacement * 0.4f; // keep height of asteroid field smaller compared to width of x and z
        displacement = (rand() % (int)(2 * offset * 100)) / 100.0f - offset;
        float z = cos(angle) * radius + displacement;
        model = glm::translate(model, glm::vec3(x, y, z));

        // 2. scale: Scale between 0.05 and 0.25f
        float scale = (rand() % 20) / 100.0f + 0.05;
        model = glm::scale(model, glm::vec3(scale));

        // 3. rotation: add random rotation around a (semi)randomly picked rotation axis vector
        float rotAngle = (rand() % 360);
        model = glm::rotate(model, rotAngle, glm::vec3(0.4f, 0.6f, 0.8f));

        // 4. now add to list of matrices
        modelMatrices[i] = model;
    }

    // configure instanced array
    // -------------------------
    unsigned int buffer;
    glGenBuffers(1, &buffer);
    glBindBuffer(GL_ARRAY_BUFFER, buffer);
    glBufferData(GL_ARRAY_BUFFER, amount * sizeof(glm::mat4), &modelMatrices[0], GL_STATIC_DRAW);

    // set transformation matrices as an instance vertex attribute (with divisor 1)
    // note: we're cheating a little by taking the, now publicly declared, VAO of the model's mesh(es) and adding new vertexAttribPointers
    // normally you'd want to do this in a more organized fashion, but for learning purposes this will do.
    // -----------------------------------------------------------------------------------------------------------------------------------
    for (unsigned int i = 0; i < rock.meshes.size(); i++)
    {
        unsigned int VAO = rock.meshes[i].VAO;
        glBindVertexArray(VAO);
        // set attribute pointers for matrix (4 times vec4)
        glEnableVertexAttribArray(3);
        glVertexAttribPointer(3, 4, GL_FLOAT, GL_FALSE, sizeof(glm::mat4), (void*)0);
        glEnableVertexAttribArray(4);
        glVertexAttribPointer(4, 4, GL_FLOAT, GL_FALSE, sizeof(glm::mat4), (void*)(sizeof(glm::vec4)));
        glEnableVertexAttribArray(5);
        glVertexAttribPointer(5, 4, GL_FLOAT, GL_FALSE, sizeof(glm::mat4), (void*)(2 * sizeof(glm::vec4)));
        glEnableVertexAttribArray(6);
        glVertexAttribPointer(6, 4, GL_FLOAT, GL_FALSE, sizeof(glm::mat4), (void*)(3 * sizeof(glm::vec4)));

        glVertexAttribDivisor(3, 1);
        glVertexAttribDivisor(4, 1);
        glVertexAttribDivisor(5, 1);
        glVertexAttribDivisor(6, 1);

        glBindVertexArray(0);
    }

    // render loop
    // -----------
    while (!glfwWindowShouldClose(window))
    {
        // per-frame time logic
        // --------------------
        float currentFrame = glfwGetTime();
        deltaTime = currentFrame - lastFrame;
        lastFrame = currentFrame;

        // input
        // -----
        processInput(window);

        // render
        // ------
        glClearColor(0.1f, 0.1f, 0.1f, 1.0f);
        glClear(GL_COLOR_BUFFER_BIT | GL_DEPTH_BUFFER_BIT);

        // configure transformation matrices
        glm::mat4 projection = glm::perspective(glm::radians(45.0f), (float)SCR_WIDTH / (float)SCR_HEIGHT, 0.1f, 1000.0f);
        glm::mat4 view = camera.GetViewMatrix();
        asteroidShader.use();
        asteroidShader.setMat4("projection", projection);
        asteroidShader.setMat4("view", view);
        planetShader.use();
        planetShader.setMat4("projection", projection);
        planetShader.setMat4("view", view);

        // draw planet
        glm::mat4 model;
        model = glm::translate(model, glm::vec3(0.0f, -3.0f, 0.0f));
        model = glm::scale(model, glm::vec3(4.0f, 4.0f, 4.0f));
        planetShader.setMat4("model", model);
        planet.Draw(planetShader);

        // draw meteorites
        asteroidShader.use();
        asteroidShader.setInt("texture_diffuse1", 0);
        glActiveTexture(GL_TEXTURE0);
        glBindTexture(GL_TEXTURE_2D, rock.textures_loaded[0].id); // note: we also made the textures_loaded vector public (instead of private) from the model class.
        for (unsigned int i = 0; i < rock.meshes.size(); i++)
        {
            glBindVertexArray(rock.meshes[i].VAO);
            glDrawElementsInstanced(GL_TRIANGLES, rock.meshes[i].indices.size(), GL_UNSIGNED_INT, 0, amount);
            glBindVertexArray(0);
        }

        // glfw: swap buffers and poll IO events (keys pressed/released, mouse moved etc.)
        // -------------------------------------------------------------------------------
        glfwSwapBuffers(window);
        glfwPollEvents();
    }

    glfwTerminate();
    return 0;
}

// process all input: query GLFW whether relevant keys are pressed/released this frame and react accordingly
// ---------------------------------------------------------------------------------------------------------
void processInput(GLFWwindow *window)
{
    if (glfwGetKey(window, GLFW_KEY_ESCAPE) == GLFW_PRESS)
        glfwSetWindowShouldClose(window, true);

    if (glfwGetKey(window, GLFW_KEY_W) == GLFW_PRESS)
        camera.ProcessKeyboard(FORWARD, deltaTime);
    if (glfwGetKey(window, GLFW_KEY_S) == GLFW_PRESS)
        camera.ProcessKeyboard(BACKWARD, deltaTime);
    if (glfwGetKey(window, GLFW_KEY_A) == GLFW_PRESS)
        camera.ProcessKeyboard(LEFT, deltaTime);
    if (glfwGetKey(window, GLFW_KEY_D) == GLFW_PRESS)
        camera.ProcessKeyboard(RIGHT, deltaTime);
}

// glfw: whenever the window size changed (by OS or user resize) this callback function executes
// ---------------------------------------------------------------------------------------------
void framebuffer_size_callback(GLFWwindow* window, int width, int height)
{
    // make sure the viewport matches the new window dimensions; note that width and
    // height will be significantly larger than specified on retina displays.
    glViewport(0, 0, width, height);
}

// glfw: whenever the mouse moves, this callback is called
// -------------------------------------------------------
void mouse_callback(GLFWwindow* window, double xpos, double ypos)
{
    if (firstMouse)
    {
        lastX = xpos;
        lastY = ypos;
        firstMouse = false;
    }

    float xoffset = xpos - lastX;
    float yoffset = lastY - ypos; // reversed since y-coordinates go from bottom to top

    lastX = xpos;
    lastY = ypos;

    camera.ProcessMouseMovement(xoffset, yoffset);
}

// glfw: whenever the mouse scroll wheel scrolls, this callback is called
// ----------------------------------------------------------------------
void scroll_callback(GLFWwindow* window, double xoffset, double yoffset)
{
    camera.ProcessMouseScroll(yoffset);
}
在某些机器上,10万个小行星可能会太多了,所以尝试修改这个值,直到达到一个你能接受的帧率。
可以看到,在合适的环境下,实例化渲染能够大大增加显卡的渲染能力。正是出于这个原因,实例化渲染通常会用于渲染草、植被、粒子,以及上面这样的场景,基本上只要场景中有很多重复的形状,都能够使用实例化渲染来提高性能。
后记
本篇结束,下一篇与抗锯齿有关。
