D3.js 绘制柱状图
使用D3 V4版本绘制
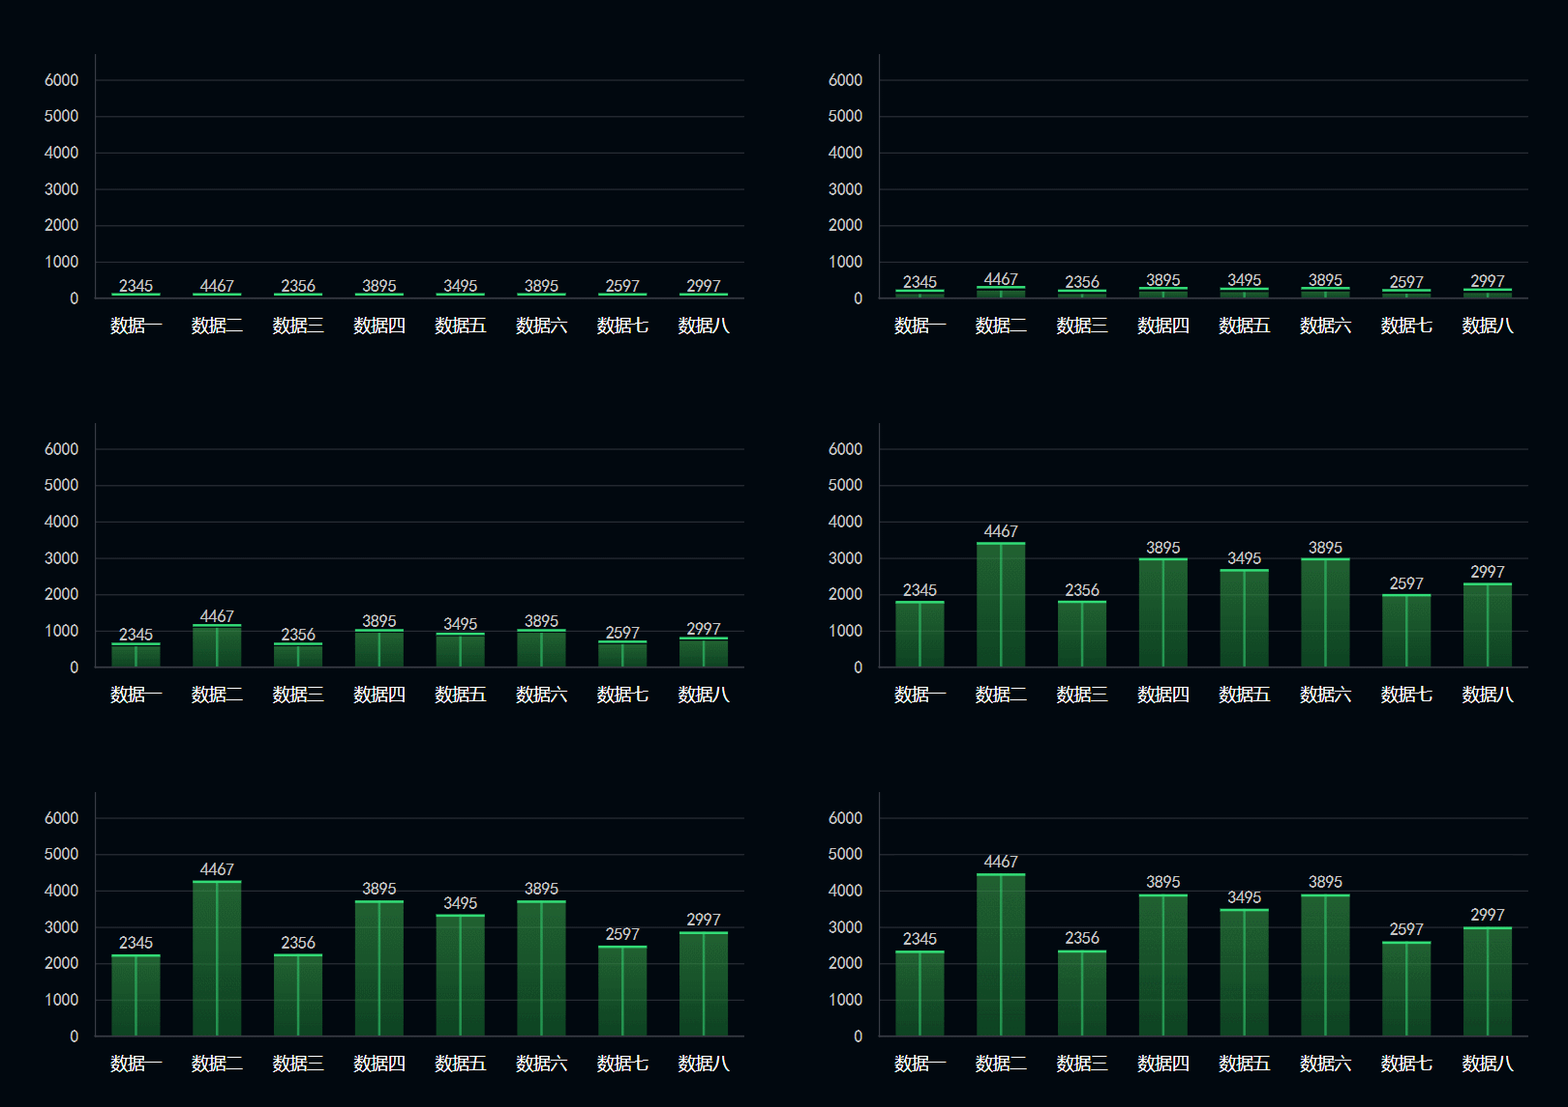
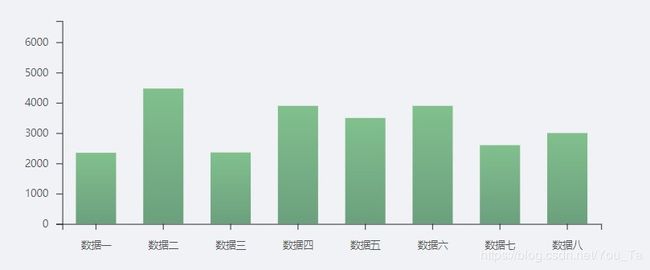
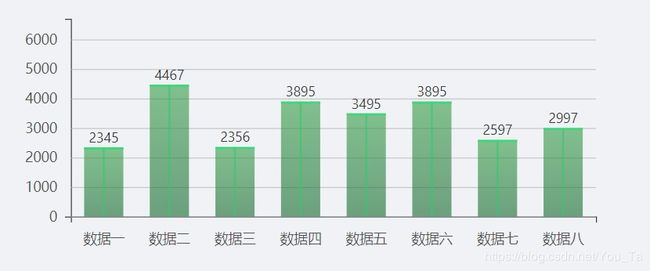
使用D3绘制柱状图,绘制效果如下:
使用D3绘制柱状图,先对需要绘制的图形拆解,主要分为以下几个部分:
1. 比例尺的定义
2. 坐标轴的绘制
3. 添加矩形
4. 修改坐标轴样式
5. 柱状图装饰效果添加
首先,先定义data
this.graphData = [
  { id:1, name: '数据一', value: 2345 },
  { id:2, name: '数据二', value: 4467 },
  { id:3, name: '数据三', value: 2356 },
  { id:4, name: '数据四', value: 3895 },
  { id:5, name: '数据五', value: 3495 },
  { id:6, name: '数据六', value: 3895 },
  { id:7, name: '数据七', value: 2597 },
  { id:8, name: '数据八', value: 2997 },
];
柱状图X轴展示的数据:
const xData = dataset.map((item) => item.name);
绘制过程如下:
添加画布
首先,图形要添加到画布上:
const width = 650;
const height = 420;
const svg = d3.select(node).append('svg')
    .attr('width', width)
    .attr('height', height);
定义比例尺
const xScale = d3.scaleBand()
    .domain(xData)
    .rangeRound([0, width - paddingLeft - paddingRight])
const yScale = d3.scaleLinear()
    .domain([0, max * 1.5])
    .range([height - paddingTop - paddingBottom, 0]);
scale定义方式不同,则使用方式也是不同。此处xData为离散型数据,对应连续区间,所以使用d3.scaleBand();
关于几种常用比例尺的区别:
1. d3.scaleLinear() 线性比例尺
domain:连续型
range:连续型
使用:scale_l = d3.scaleLinear().domain([1,10]).range([0,100])
2. d3.scaleOrdinal() 序数比例尺
domain: 离散型
range:离散型
可以简单理解为map映射
使用:scale_o = d3.scaleOrdinal().domain(['a', 'b', 'c']).range([10, 20, 30])
3. d3.scaleBand() 序数比例尺
domain: 离散型
range:连续型
可以理解为用domain将range平均分割
使用:scale_b= d3.scaleBand().domain([1,2,3,4]).range([0,100])
4. d3.scalePoint() 序数比例尺
domain: 离散型
range:连续型
与scaleBand()不同的地方在于带宽为零
使用:scale_p= d3.scalePoint().domain([1,2,3,4]).range([0,100])
关于 Band Scales :

关于 Point Scales :

添加坐标轴
// 定义X坐标轴
const xAxis = d3.axisBottom(xScale)
   .ticks(0)
   .tickPadding(12);
// 定义Y坐标轴
const yAxis = d3.axisLeft(yScaleAxis)
   .ticks(5)
   .tickPadding(8)
   .tickFormat(d3.format('d'));
// 添加
svg.append('g')
   .attr('class', 'r-xAxis')
   .attr('transform', `translate(${paddingLeft},${height - paddingBottom})`)
   .call(xAxis);
svg.append('g')
   .attr('class', 'r-yAxis')
   .attr('transform', `translate(${paddingLeft},${paddingTop})`)
   .call(yAxis);
svg 坐标轴原点 (0, 0) 在左上角, y 坐标轴最大值在上方,最小值展示在下方,故yScale domain([0, max * 1.5]) 对应 range([height - paddingTop - paddingBottom, 0]);
y 轴使用了d3.tickFormat,使用请参考 d3.format
添加矩形
yScale.range([0, height - paddingTop - paddingBottom]);

const rectGroup = svg.selectAll('.rectItem')
  .data(dataset)
  .enter()
  .append('g')
  .attr('class', 'rectItem');
rectGroup.append('rect')
  .attr('width', rectWidth)
  .attr('height', (d) => yScale(d.value))
  .attr('y', (d) => height - paddingTop - paddingBottom - yScale(d.value))
  .attr('fill', 'url(#rbGraphsColor)')
  .attr('transform', `translate(${paddingLeft},${paddingTop})`)
  .attr('x', (d) => xScale(d.name) + ((xScale.bandwidth() - rectWidth) / 2));
添加矩形后效果展示
关于坐标轴的构成
<g>

	<g>
		<line>line>
		<text>text>
	g>

	<g>
		<line>line>
		<text>text>
	g>
	...

	<path>path>
g>
本例中css样式设置:
.r-xAxis, .r-yAxis {
	line {
     	display: none;
    }
    path {
      stroke: #393c45;
    }
    text {
      font-size: 14px;
    }
}
其他
- 添加柱状图后面网格线
- 添加数据文字
- 添加柱状图装饰效果
- 添加动效
此处只介绍如何添加网格线
svg.selectAll('.r-yAxis .tick')
   .append('line')
   .attr('class', 'row-grid')
   .attr('x1', 0)
   .attr('x2', width - paddingLeft - paddingRight)
   .attr('y1', 0)
   .attr('y2', 0);
 .row-grid {
   display: block;
   stroke: #b4b5b5;
   /* shape-rendering: crispedges;*/
   stroke-width: 1;
   opacity: 0.7;
 }
最后,附上完整代码:
JS
import * as d3 from 'd3';
export default function graphs(node, dataset) {
    (() => {
        d3.select(node).selectAll('svg').remove();
    })();

    // ***************数据初始化*******************
    const width = node.offsetWidth;
    const height = node.offsetHeight;
    const paddingTop = 60;
    const paddingBottom = 98;
    const paddingLeft = 90;
    const paddingRight = 24;
    const rectWidth = 40;
    const decoRectWidth = 2;
    const delay = 0;
    const duration = 2000;
    const max = Math.max(...dataset.map((item) => item.value));

    const xData = dataset.map((item) => item.name); // 对接数据时根据name名创建

    /****************************** 比例尺 ***************************************/
    const xScale = d3.scaleBand()
        .domain(xData)
        .rangeRound([0, width - paddingLeft - paddingRight])
    const yScale = d3.scaleLinear()
        .domain([0, max * 1.5])
        .range([height - paddingTop - paddingBottom, 0]);

    // 绘制
    const svg = d3.select(node).append('svg')
        .attr('width', width)
        .attr('height', height);
    // 坐标轴
    const xAxis = d3.axisBottom(xScale)
        .ticks(0)
        .tickPadding(12);
    const yAxis = d3.axisLeft(yScale)
        .ticks(5)
        .tickPadding(8)
        .tickFormat(d3.format('d'));
    // ***************坐标轴***************
    svg.append('g')
        .attr('class', 'r-xAxis')
        .attr('transform', `translate(${paddingLeft},${height - paddingBottom})`)
        .call(xAxis);

    svg.append('g')
        .attr('class', 'r-yAxis')
        .attr('transform', `translate(${paddingLeft},${paddingTop})`)
        .call(yAxis);
    // 添加横向网格线
    svg.selectAll('.r-yAxis .tick')
        .append('line')
        .attr('class', 'row-grid')
        .attr('x1', 0)
        .attr('x2', width - paddingLeft - paddingRight)
        .attr('y1', 0)
        .attr('y2', 0);

    // ***************矩形图******************
    yScale.range([0, height - paddingTop - paddingBottom]);

    const rectGroup = svg.selectAll('.rectItem')
        .data(dataset)
        .enter()
        .append('g')
        .attr('class', 'rectItem');

    rectGroup.append('rect')
        .attr('width', rectWidth)
        .attr('height', 0)
        .attr('y', height - paddingTop - paddingBottom)
        .attr('fill', 'url(#rbGraphsColor)')
        .attr('transform', `translate(${paddingLeft},${paddingTop})`)
        .attr('x', (d) => xScale(d.name) + ((xScale.bandwidth() - rectWidth) / 2))
        .transition()
        .delay(delay)
        .duration(duration)
        .attr('height', (d) => yScale(d.value))
        .attr('y', (d) => height - paddingTop - paddingBottom - yScale(d.value));
    // 中间装饰矩形
    rectGroup.append('rect')
        .attr('width', decoRectWidth)
        .attr('height', 0)
        .attr('y', height - paddingTop - paddingBottom)
        .attr('fill', '#30ca6e')
        .attr('opacity', 0.6)
        .attr('transform', `translate(${paddingLeft},${paddingTop})`)
        .attr('x', (d) => xScale(d.name) + ((xScale.bandwidth() - decoRectWidth) / 2))
        .transition()
        .delay(delay)
        .duration(duration)
        .attr('height', (d) => yScale(d.value))
        .attr('y', (d) => height - paddingTop - paddingBottom - yScale(d.value));
    // 上方装饰矩形
    rectGroup.append('rect')
        .attr('width', rectWidth)
        .attr('height', 2)
        .attr('y', height - paddingTop - paddingBottom - 4)
        .attr('fill', '#32dd77')
        .attr('transform', `translate(${paddingLeft},${paddingTop})`)
        .attr('x', (d) => xScale(d.name) + ((xScale.bandwidth() - rectWidth) / 2))
        .transition()
        .delay(delay)
        .duration(duration)
        .attr('y', (d) => height - paddingTop - paddingBottom - yScale(d.value));

    rectGroup.append('text')
        .text((d) => d.value)
        .attr('y', height - paddingTop - paddingBottom)
        .attr('class', 'valueDes')
        .attr('transform', `translate(${20},${paddingTop - 5})`)
        .attr('x', (d) => xScale(d.name) + ((xScale.bandwidth() - rectWidth) / 2) + paddingLeft)
        .transition()
        .delay(delay)
        .duration(duration)
        .attr('y', (d) => height - paddingTop - paddingBottom - yScale(d.value));

    const xyLine = svg.append('g')
        .attr('class', 'lineGroup');
    // x
    xyLine.append('line')
        .attr('class', 'xyLine')
        .attr('x1', paddingLeft - 1)
        .attr('x2', width - paddingRight)
        .attr('y1', height - paddingBottom)
        .attr('y2', height - paddingBottom);
    // y
    xyLine.append('line')
        .attr('class', 'xyLine')
        .attr('x1', paddingLeft)
        .attr('x2', paddingLeft)
        .attr('y1', paddingTop)
        .attr('y2', (height - paddingBottom) + 1);
}
CSS
svg {
  .valueDes {
    text-anchor: middle;
    font-size: 14px;
    fill: #c4c4c4;
  }
  .r-xAxis {
    path, line {
      display: none;
    }
    text {
      font-size: 14px;
      color: #fdfdfd;
    }
  }
  .r-yAxis {
    path, line {
      display: none;
    }
    text {
      font-size: 14px;
      color: #c4c4c4;
    }
    .row-grid {
      display: block;
      stroke: #393c45;
      stroke-width: 1;
      opacity: 0.7;
    }
  }
  .xyLine {
    stroke: #393c45;
    stroke-width: 1;
  }
}
参考文章 :
- D3 API Reference
- d3 scale详解
- 学习d3时遇到的v3 v4 接口变化记录
- 十二月咖啡馆 – 坐标轴


