在Bluemix 使用OpenWhisk 开发Dark Vision应用系统
在Bluemix 使用OpenWhisk 开发Dark Vision应用系统
作者:陳兆麟 Email:[email protected]
黑暗视觉 (Dark Vision) App用来侦测视频 (video ) 内的隐藏数据 (dark data), 视频经由IBM Watson Visual Recognition及 Alchemy Vision 的分析后,可建立名人或建筑物的摘要,有利于视频后续的搜索及分类;此App它也可处理一般影像 (images) 信息视频来源可分两种,iphone手机或video档案,以下范例是在 local 透过 Chrome 浏览器 UI接口读取 video 文件,可分 2 阶段, (1) 当 user 上传video 至 Cloudant 数据库时, OpenWhisk 会侦测到新来的视频讯号并启动 video extractor, 它会将抽取出的 images 处存于数据库;(2) 此时数据库会将此一改变的event 信号送至 OpenWhisk, 由它启动相应的 Action 分析此images,并输出结果。
開發環境: Win7 (64 bit), Docker Toolbox, Bluemix, OpenWhisk, AlchemyAPI
1.安裝 Docker Toolbox (https://www.docker.com/products/docker-toolbox)
桌面點選
$ docker-machine ls (Docker Quickstart Terminal介面執行,確認虛擬機default 已安裝)
NAME ACTIVE DRIVER STATE URL SWARM DOCKER ERRORS
default virtualbox Running tcp://192.168.99.101:2376 v1.10.3
$ docker-machine env default
export DOCKER_TLS_VERIFY="1"
export DOCKER_HOST="tcp://192.168.99.100:2376"
export DOCKER_CERT_PATH="C:\Users\slim1.docker\machine\machines\default"
export DOCKER_MACHINE_NAME="default"
Run this command to configure your shell:
eval $("C:\Program Files\Docker Toolbox\docker-machine.exe" env default)
$eval $("C:\Program Files\Docker Toolbox\docker-machine.exe" env default)
$ docker-machine ls
NAME ACTIVE DRIVER STATE URL SWARM DOCKER ERRORS
default * virtualbox Running tcp://192.168.99.100:2376 v1.10.3
2.進入IBM Bluemix: https://console.ng.bluemix.net/ 點選 Sign Up 註冊後登錄 (30天試用期免費) 將 username 及 password 記錄。
建立 Organization 名稱
建立 Space 名稱
確認 Organization, Space名稱
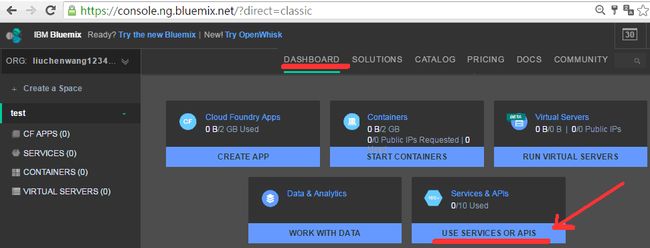
3.登錄 (login) 後顯示如下,點選 DASHBOARD -> USE SERVICES OR APIS
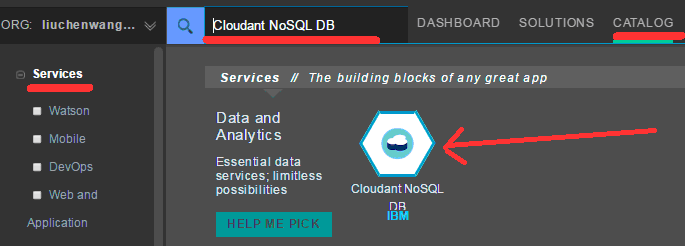
點選 CATALOG => SERVICES=> 搜尋 Cloudant NoSQL DB
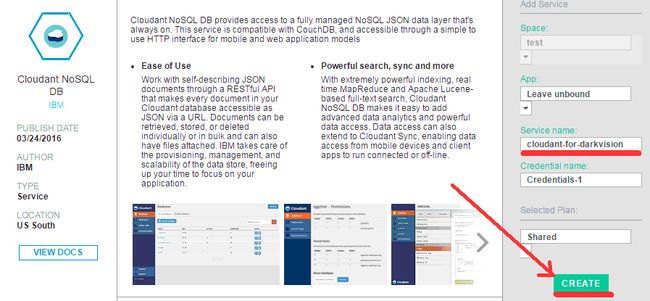
Service name: cloudant-for-darkvision => [CREATE]
點選: Service Credentials
將username, password記錄
點選 Manage => Launch
點選 Create Database => openwhisk-darkvision => Create
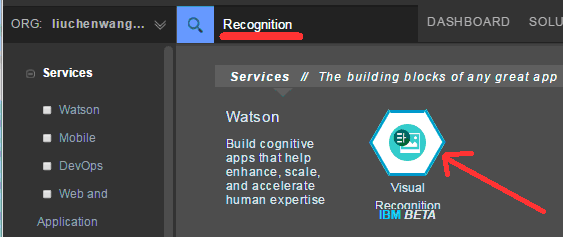
4. 重覆步驟 3 點選 USE SERVICES OR APIS=>CATALOG => SERVICES=> Recognition (2016/6 起已無 Beta 版,standard 版需收費)
Service name: visual recognition-for-darkvision => [CREATE]
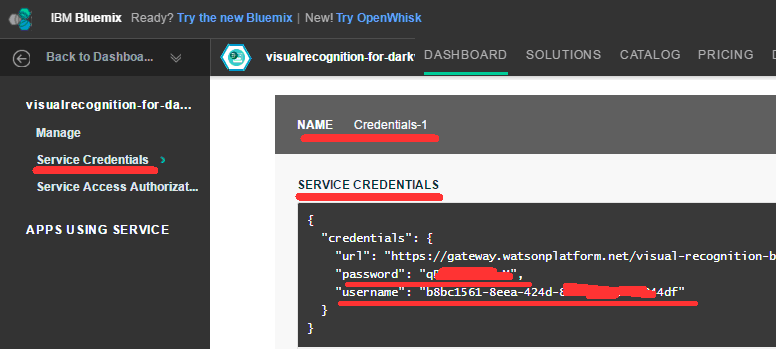
點選 Service Credentials, 將 username , password記錄
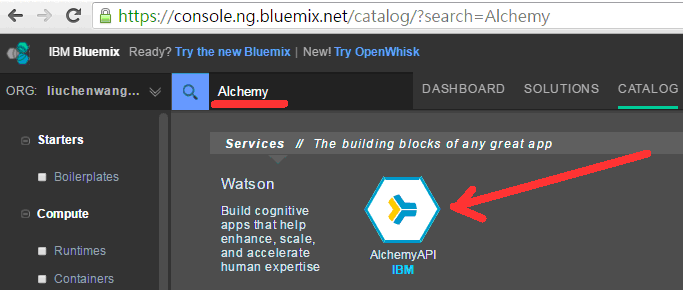
重覆步驟 3 點選 USE SERVICES OR APIS=>CATALOG => SERVICES=> Alchemy
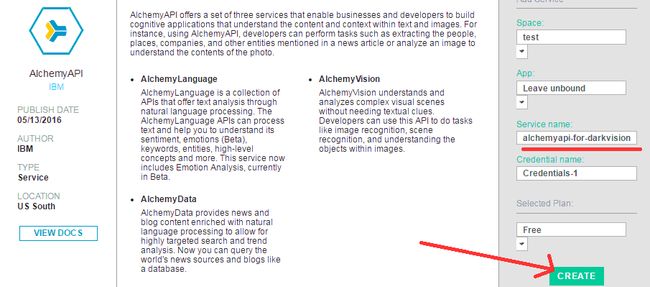
Service name: alchemyapi-for-darkvision => [CREATE]
點選 Service Credentials,記錄 apikey
5. 根據以下網址: 安裝 python, pip (for win 7)
(python-2.7.11.amd64.msi)
(https://www.python.org/downloads/release/python-2711/)
將 C:\Python27\Scripts 及 C:\Python27\ 存於控制台->環境變數->path
$ python --version
Python 2.7.11
$ pip --version
pip 8.1.2
根據以下網址安裝 curl (for win 7),要在環境變數 path 設置路徑
http://www.paehl.com/open_source/?download=curl_748_0.zip
根據以下網址安裝 git (for win 7),要在環境變數 path 設置路徑
https://git-for-windows.github.io/
根據以下網址安裝 cf (for win 7), 要在環境變數 path 設置路徑
https://github.com/cloudfoundry/cli/releases
根據以下網址安裝 node.js (for win 7 node-v4.4.4-x64.msi)
https://nodejs.org/en/#download
6. 下載 dark vision App源碼
$git clone https://github.com/IBM-Bluemix/openwhisk-darkvisionapp.git
$cd openwhisk-darkvisionapp
7. 進入 bluemix OpenWhisk:
https://new-console.ng.bluemix.net/openwhisk/
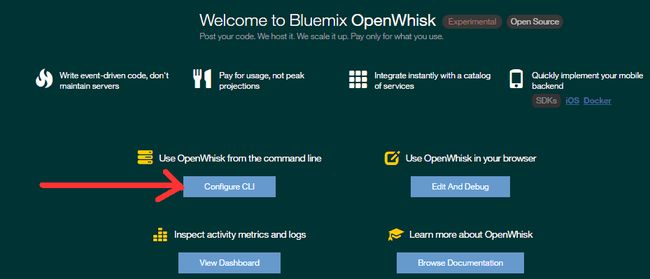
點選 Configure CLI
8. 根據以下順序將指令在 window 命令提示執行
9. 依據編號 1 的指令 (安裝 wsk 套件)
$pip install --upgrade https://new-console.ng.bluemix.net/openwhisk/cli/download
10. 執行編號 2 指令 (設定Namespace and Authorization Key )
$wsk property set --apihost openwhisk.ng.bluemix.net –auth xxxxxxxxxx –namespace “xxxxxxxxxxxxxxxxxxx”
ok: whisk auth set
ok: whisk API host set
ok: namespace set to [email protected]_test
11. 執行編號 3 指令 (檢驗步驟 7 是否有效設定)
以下 command 直接啟動 OpenWhisk 內的範例event, 然後列印執行結果
$ wsk action invoke /whisk.system/samples/echo -p message hello --blocking --result
{
"message": "hello"
}
12. 在openwhisk-darkvisionapp 工作目錄下:
$ cf login -a https://api.ng.bluemix.net -u [email protected] -o [email protected] -s test
Password>XXXXXXXXX (登錄 bluemix 密碼)
$cd web
$cf push
state since cpu memory disk
running 2016-05-16 10:06:23 AM 0.7% 107.7M of 256M 116.4M of 1G
13. 設定密碼限制使用者上傳 images
$cf set-env openwhisk-darkvision ADMIN_USERNAME admin
$cf set-env openwhisk-darkvision ADMIN_PASSWORD aNotTooSimplePassword
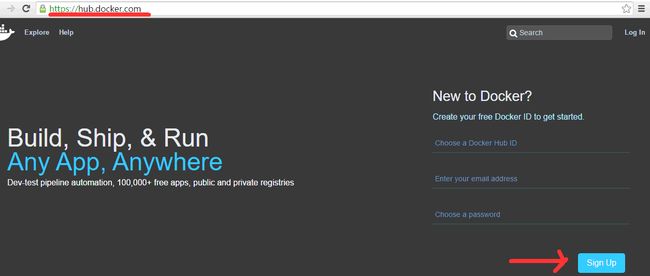
14. 登錄至 docker hub: https://hub.docker.com/ 建立 darkvision repository
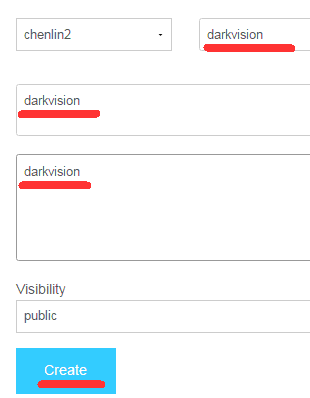
點選 [Create Repository]
點選 [Create]
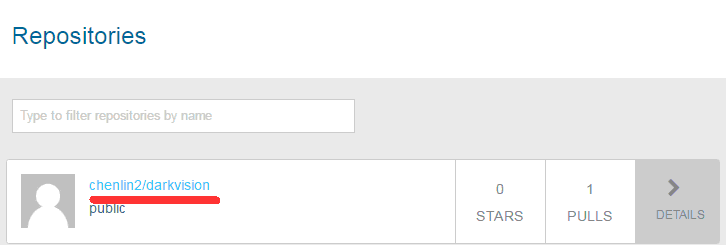
顯示已建立的 Repository
15. 將 video 內容抽取出的工具為 ffmpeg,但在 OpenWhisk 使用 javascript or swift 開發,ffmpeg則無法有效工作,但卻可以 docker container 方式執行
16. 切換至 processing/extractor 子目錄,依據 Dockefile 在docker hub建立 Docker images 名為 chenlin2/darkvision (用來抽取 video 內的 frame)
$ cd processing/extractor (要在 Docker quickstart terminal 執行)
$./buildAndPush.sh chenlin2/darkvision (以下用來檢視是否上傳成功)
17.切換至processing子目錄
$copy template-local.env local.env
編輯 local.env (將步驟 3, 4 記錄值填入以下參數)
CLOUDANT_username=
CLOUDANT_password=
CLOUDANT_host=
CLOUDANT_db=openwhisk-darkvision
ALCHEMY_key=
WATSON_username=
WATSON_password=
DOCKER_EXTRACTOR_NAME=chenlin2/dakvision
18. 使用以下 script 在 OpenWhisk 建立 Action,Rule,Trigger
$deploy-darkvision.sh --install
19.驗證上項 deploy 是否完成
$wsk list
entities in namespace: [email protected]_test
packages actions
/[email protected]_test/vision private
/[email protected]_test/vision-cloudant-changelistener private
/[email protected]_test/vision/analysis private
/[email protected]_test/vision/extractor private
triggers
rules
20. 執行本地 (local) 模式透過 web 使用介面將 video 或 images 上傳至 local.env所定義後的 cloudant database,由 OpenWhisk 處理 videos,並將處理的變化顯示於網頁
切換至 web 目錄
$cd openwhisk-darkvisionapp\web
$npm install
$npm start
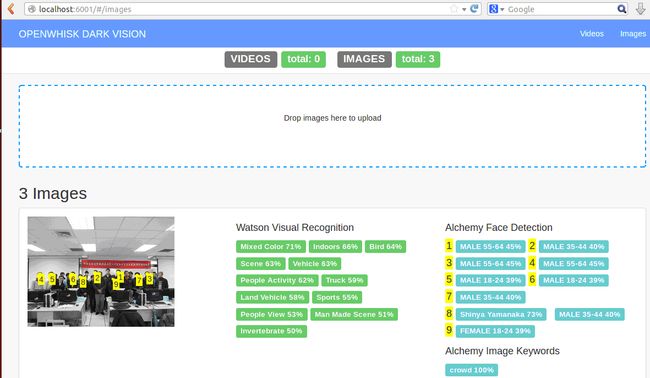
21. 啟動 chrome 瀏覽器 http://localhost:6001
至檔案管理員點選images (例如 xxx.jpg) 拖曳至瀏覽器
OpenWhist分析後顯示其結果
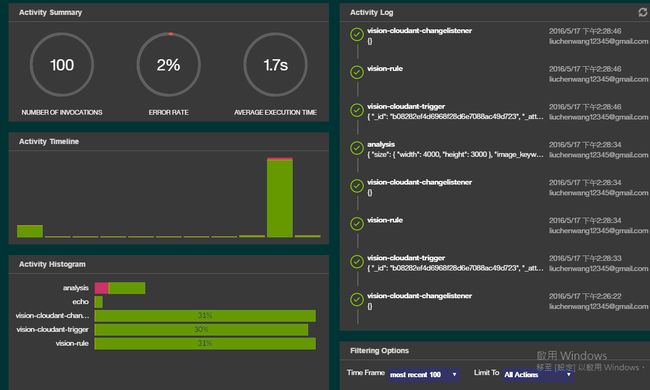
22.根據步驟 7 點選 [View Dashboard] 顯示 OpenWhisk 處理過程
參考文獻:
1.http://www.ithome.com.tw/review/104198
2.https://github.com/IBM-Bluemix/openwhisk-darkvisionapp?cm_mc_uid=81298041763014574761397&cm_mc_sid_50200000=1463294707
3.http://czech0923.pixnet.net/blog/post/90327326-watson-%E2%80%93-visual-recognition-%E4%BB%8B%E7%B4%B9
4.https://rockq.org/topic/37/ibm-watson-visual-recognition-%E6%88%91%E7%9A%84%E5%9B%BE%E5%83%8F%E8%AF%86%E5%88%AB-%E4%B8%8D-%E6%98%AF%E4%BD%A0%E7%9A%84%E5%9B%BE%E5%83%8F%E8%AF%86%E5%88%AB-%E4%B8%80
5.http://www.infoq.com/cn/news/2016/05/bluemix-ibm-interconnect
6.https://github.com/IBM-Bluemix/openwhisk-visionapp
7.https://dzone.com/articles/how-to-write-javascript-actions-for-openwhisk-on-b
8.http://www.slideshare.net/HsuanJuLin/bluemixopenwhisk
9.https://www.youtube.com/watch?v=1teIMpkI_Sg&feature=youtu.be
10.https://visual-recognition-demo.mybluemix.net/
11.https://www.ibm.com/developerworks/cn/cognitive/library/cc-analyze-notes-alchemyapi-trs-bluemix/
12.http://wechat.kanfb.com/archives/3857
13.https://drive.google.com/folderview?id=0B7_CUSsY2cbnbm90UTNDWmcwaGs&usp=sharing


