spring security实现表单登录以及自定义URL权限认证
本文主要介绍怎么快速搭建一个带spring security安全认证的应用,其他基础介绍,基本操作,内容原理略过,着重介绍实现步骤,如需详细了解请阅读相关文档。
0.环境
- jdk 1.8
- spring boot
- MySQL 5
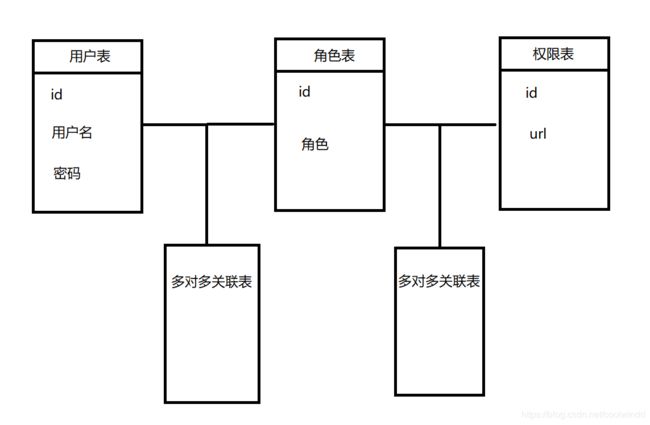
需要准备5张表:
以上为5张表需要的字段,可根据实际需求变更
1.引入spring security
创建一个spring boot工程,在pom.xml里加入spring security的依赖
            org.springframework.boot
            spring-boot-starter-security
2.实现表单登录
不做任何配置的话,spring security采用默认的账号密码登录,账号user,密码在项目启动时会在控制台打印出来。
按照实际需求我们需要读取数据库的用户进行登录:
2.1自定义WebSecurityConfigurerAdapter
创建 MySecurityConfig 并且继承WebSecurityConfigurerAdapter,重写它的configure(HttpSecurity http)
@EnableWebSecurity
public class MySecurityConfig extends WebSecurityConfigurerAdapter {

 @Override
    protected void configure(HttpSecurity http) throws Exception {
        http.authorizeRequests()
                .anyRequest().authenticated()//所有请求需登录
                .and()
                .formLogin()
                .and()
                .logout().logoutUrl("/logout");
    }


}
2.2从数据库读取用户数据
创建一个服务实现UserDetailsService里的loadUserByUsername即可
@Service
public class UserAuthService implements UserDetailsService {
    @Autowired
    private UserService userService;

    @Override
    public UserDetails loadUserByUsername(String username) throws UsernameNotFoundException {
        UserEntity userEntity = userService.getByUsername(username);
        if (userEntity == null) {
            throw new UsernameNotFoundException("用户不存在!");
        }

        return new User(userEntity.getUsername(), userEntity.getPassword(), new ArrayList<>());
    }
}
userService.getByUsername(username);为根据用户名从数据库中读取用户信息,自行实现,这里不做详细介绍。
把这个服务加入2.1创建的配置里:
最后MySecurityConfig配置为:
@EnableWebSecurity
public class MySecurityConfig extends WebSecurityConfigurerAdapter {

    @Autowired
    private UserAuthService userAuthService;

    @Override
    protected void configure(HttpSecurity http) throws Exception {
        http.authorizeRequests()
                .anyRequest().authenticated()//所有请求需登录
                .and()
                .formLogin()
                .and()
                .logout().logoutUrl("/logout");
    }

    @Override
    protected void configure(AuthenticationManagerBuilder auth) throws Exception {
        auth.userDetailsService(userAuthService).passwordEncoder(new BCryptPasswordEncoder());
    }
}
spring security需要对密码进行加密,这里使用BCryptPasswordEncoder:
String password = new BCryptPasswordEncoder().encode("要加密的密码");可以用上面的方式将密码加密并存入数据库。
至此,所有配置已完成,启动项目即可。
2.3自定义登录页
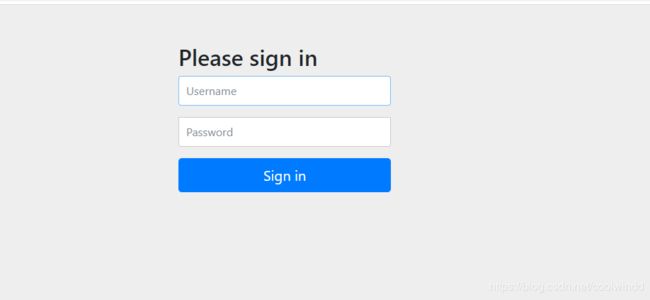
启动项目后,spring security有默认的登录页:
如需修改在2.1的配置里加入loginPage即可:
3.自定义授权
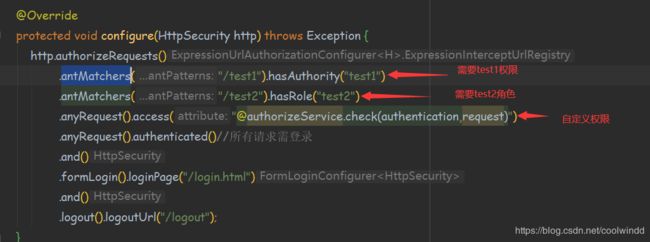
spring security的权限认证在2.1的configure里加入antMatchers("路径").需要权限()来实现,它有个access()方法可以自定义表达式来实现权限验证,因此我们可以写个方法来实现自己需要的权限验证。如图所示:
以下为实现步骤:
3.1将权限信息加入用户数据里
在2.2的UserAuthService 获取到用户信息后,查询其拥有的权限,并将允许访问的url加入用户信息里,最后UserAuthService 变为:
@Service
public class UserAuthService implements UserDetailsService {
    @Autowired
    private UserService userService;

    @Override
    public UserDetails loadUserByUsername(String username) throws UsernameNotFoundException {
        UserEntity userEntity = userService.getByUsername(username);
        if (userEntity == null) {
            throw new UsernameNotFoundException("用户不存在!");
        }
        //根据用户ID获取其拥有的权限,并将其url加入用户的权限里
        List permissionList = userService.getPermissionByUserId(userEntity.getId())
        .stream()
        .map(PermissionEntity::getUrl)
        .map(SimpleGrantedAuthority::new)
        .collect(Collectors.toList());
        return new User(userEntity.getUsername(), userEntity.getPassword(), permissionList);
    }
}
userService.getPermissionByUserId(userEntity.getId())为根据用户id从数据库中连表查询用户拥有的权限列表,自行实现,这里不做详细介绍。
3.2 自定义URL认证方法
之前说过用.access("@authorizeService.check(authentication,request)")来实现,创建一个authorizeService,编写一个认证方法check(authentication,request),authentication为用户的认证信息,request为请求,在3.1中我们已经将用户可以访问的url放入了authentication,因此只要authentication的权限信息里包含有request请求的url,那么就认证通过。
@Service("authorizeService")
public class AuthorizeService {

    public boolean check(Authentication authentication, HttpServletRequest request) {
        Object principal = authentication.getPrincipal();
        //判断是否是认证的用户
        if (principal != null && principal instanceof UserDetails) {
            UserDetails user = (UserDetails) principal;
            //获取认证用户里的url列表
            Set authorities = (Set) user.getAuthorities();
            //判断url列表里是否包含request请求的url
            boolean contains = authorities.stream()
                    .map(SimpleGrantedAuthority::getAuthority)
                    .anyMatch(request.getRequestURI()::equals);
            return contains;
        }
        return false;
    }
}
3.3 配置需要自定义认证的地方
在2.1的configure里加入链接.access("@authorizeService.check(authentication,request)")即可,如:
.antMatchers("/admin/**").access("@authorizeService.check(authentication,request)")
.anyRequest().access("@authorizeService.check(authentication,request)")
至此,所有的配置已完成。


