Spring boot+Mybatis+Freemarker整合(IDEA版+Maven)
目录
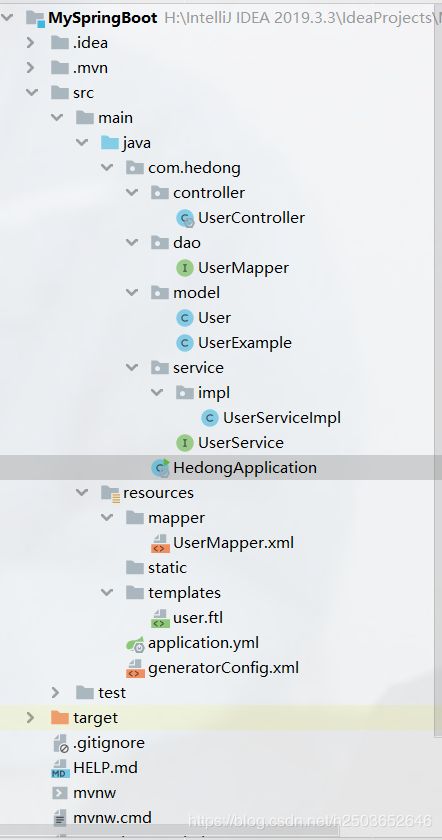
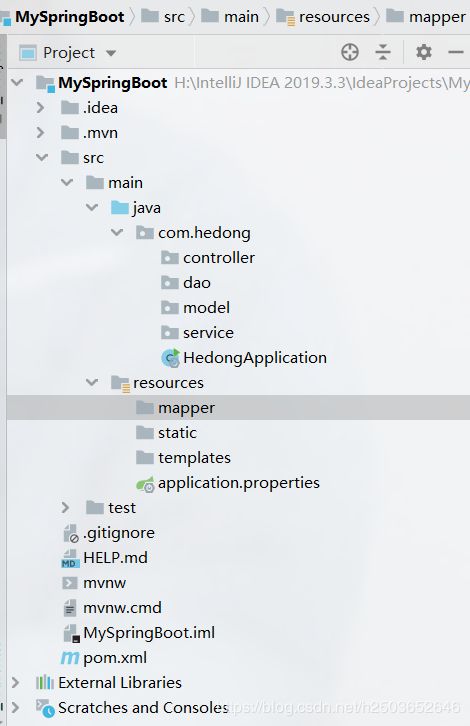
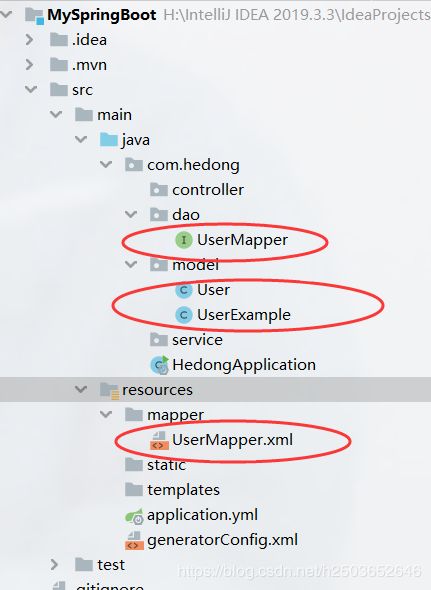
整个项目结构预览
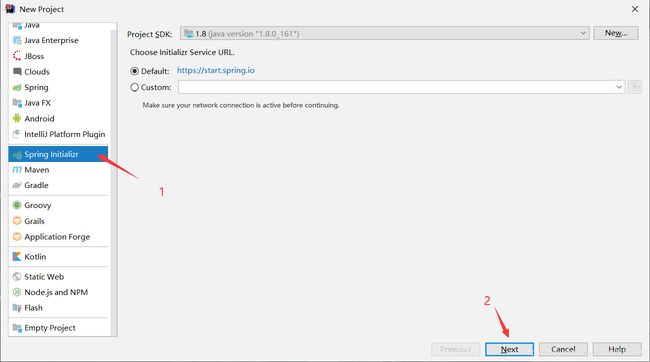
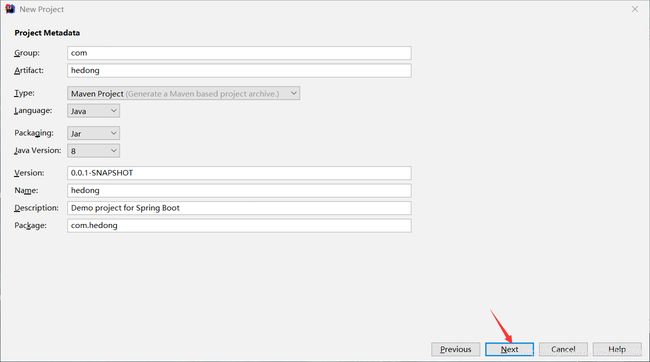
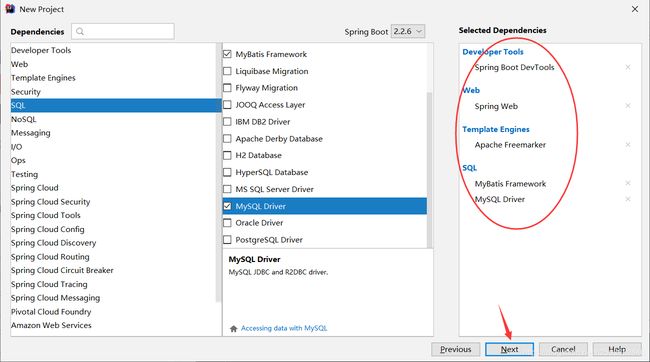
一、通过Spring Initializr创建项目
二、修改pom.xml文件
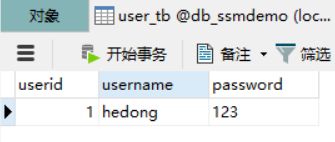
三、数据库准备
四、将application.properties改成yml文件,并且配置相关参数
五、配置generatorConfig.xml
六、逆向生成Model实体以及映射文件
七、完成controller、service以及页面代码
八、启动
整个项目结构预览
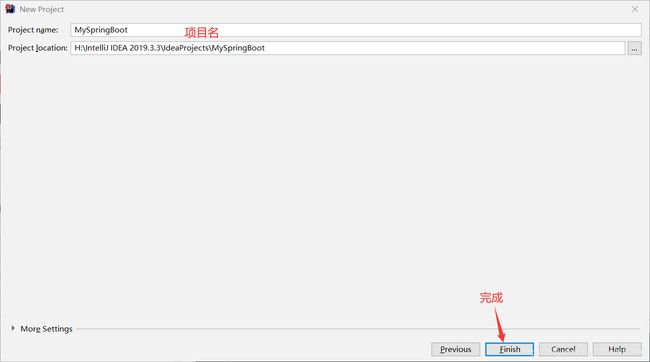
一、通过Spring Initializr创建项目
| 如图创建项目 | |
|
|
|
|
|
|
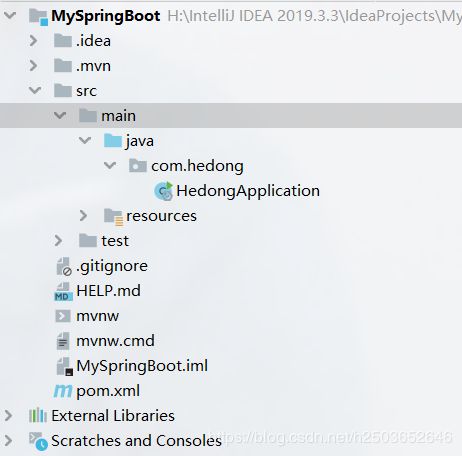
| 完成后项目结构如下 |
|
|
|
|
| 完善项目目录结构如下 | |
|
|
|
二、修改pom.xml文件
pom.xml文件我们需要将mysql驱动指定一个具体的版本,并且在最后添加mybatis逆向生成插件,完整内容如下
pom.xml
    4.0.0

        org.springframework.boot
        spring-boot-starter-parent
        2.2.6.RELEASE


    com
    hedong
    0.0.1-SNAPSHOT
    hedong
    Demo project for Spring Boot


        1.8


            org.springframework.boot
            spring-boot-starter-freemarker


            org.springframework.boot
            spring-boot-starter-web


            org.mybatis.spring.boot
            mybatis-spring-boot-starter
            2.1.2


            org.springframework.boot
            spring-boot-devtools
            runtime
            true


            mysql
            mysql-connector-java
            5.1.29


            com.alibaba
            druid
            1.1.8


            org.springframework.boot
            spring-boot-starter-test
            test


                    org.junit.vintage
                    junit-vintage-engine


                org.springframework.boot
                spring-boot-maven-plugin


                org.mybatis.generator
                mybatis-generator-maven-plugin
                1.3.6


                    src/main/resources/generatorConfig.xml
                    true
                    true


                        mysql
                        mysql-connector-java
                        5.1.29


                        org.mybatis.generator
                        mybatis-generator-core
                        1.3.6
                        compile
                        true
三、数据库准备
在MySQL中创建一个名为db_ssmdemo数据库,并创建一张user_tb表,往表中添加一条数据
DROP TABLE IF EXISTS `user_tb`;
CREATE TABLE `user_tb` (
  `userid` int(11) NOT NULL AUTO_INCREMENT,
  `username` varchar(255) DEFAULT NULL,
  `password` varchar(255) DEFAULT NULL,
  PRIMARY KEY (`userid`)
) ENGINE=InnoDB DEFAULT CHARSET=utf8;
四、将application.properties改成yml文件,并且配置相关参数
application.yml
spring:
  # freemarker 配置
  freemarker:
    template-loader-path: classpath:/templates/
    cache: false
    charset: utf-8
    check-template-location: true
    content-type: text/html
    expose-request-attributes: false
    expose-session-attributes: false
    request-context-attribute: request
    suffix: .ftl
  # mysql 数据源
  datasource:
    url: jdbc:mysql://localhost/db_ssmdemo?useUnicode=true&characterEncoding=UTF-8
    username: root
    password: hd2503652646.
    driverClassName: com.mysql.jdbc.Driver
mybatis:
  mapper-locations: classpath:/mapper/*.xml
  type-aliases-package: com.hedong.model
五、配置generatorConfig.xml
在resources目录下创建generatorConfig.xml
六、逆向生成Model实体以及映射文件
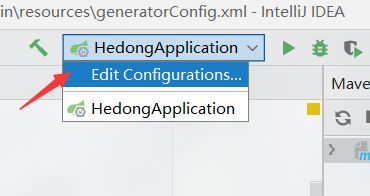
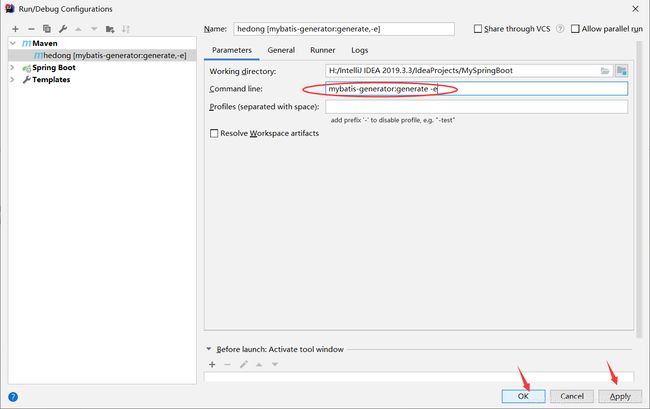
| 第一步:如图点击右上角Edit Configuration,在弹出的界面中点击左上角+号,并在下拉框中选择Maven。在新弹出的界面中输入指令:mybatis-generator:generate -e -e的目的是为了输入log,最后Apply→OK | |
|
|
|
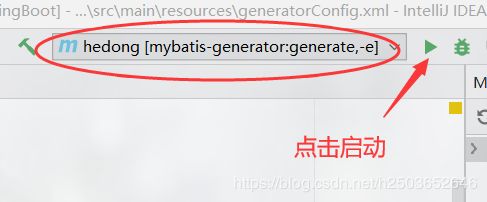
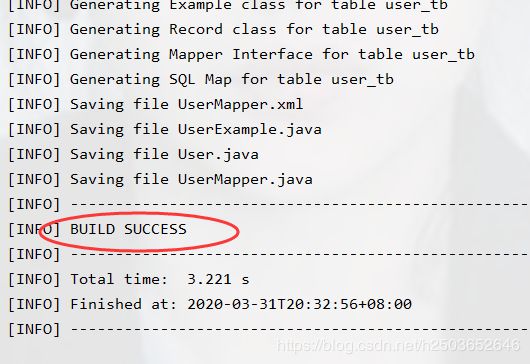
| 第二步:点击如图三角形,注意左边显示的是刚刚的配置。稍等片刻,界面下方出现 BUILD SUCCESS。代表生成成功。 | |
|
|
|
| 第三步:此时可以看到目录下已经生成了相关代码以及配置文件 | |
|
|
|
七、完成controller、service以及页面代码
UserController.java
package com.hedong.controller;

import com.hedong.model.User;
import com.hedong.service.UserService;
import org.springframework.beans.factory.annotation.Autowired;
import org.springframework.boot.autoconfigure.EnableAutoConfiguration;
import org.springframework.stereotype.Controller;
import org.springframework.ui.Model;
import org.springframework.web.bind.annotation.RequestMapping;

//在controller类中加注释,表明这是控制类,且设置请求路径
@Controller
@EnableAutoConfiguration //自动配置,不需要写spring的配置文件
@RequestMapping("/user")
public class UserController {
    @Autowired
    private UserService userService;

    @RequestMapping("/getUser")
    public String getUser(Model model){
        User user=userService.getUser(1);
        model.addAttribute("user",user);
        return "user";//返回页面
    }
}
UserService.java
package com.hedong.service;

import com.hedong.model.User;

public interface UserService {
    //查询用户
    User getUser(int id);
}
UserServiceImpl.java
package com.hedong.service.impl;

import com.hedong.dao.UserMapper;
import com.hedong.model.User;
import com.hedong.service.UserService;
import org.springframework.beans.factory.annotation.Autowired;
import org.springframework.stereotype.Service;
import org.springframework.transaction.annotation.Transactional;

//需要加Service注解表示是服务类
// 以及Transactional注解处理事务
@Service
@Transactional(rollbackFor = Exception.class)
public class UserServiceImpl implements UserService {
    @Autowired
    private UserMapper userDao;

    @Override
    public User getUser(int id) {
        return userDao.selectByPrimaryKey(id);
    }
}
在templates目录下创建一个html文件,然后修改为user.ftl文件
user.ftl
    Title


账号:${user.username}

密码:${user.password}
八、启动
在启动之前打开xxxApplication.java文件,添加@MapperScan("com.hedong.dao"),如下
HedongApplication.java
package com.hedong;

import org.mybatis.spring.annotation.MapperScan;
import org.springframework.boot.SpringApplication;
import org.springframework.boot.autoconfigure.SpringBootApplication;

@MapperScan("com.hedong.dao")
@SpringBootApplication
public class HedongApplication {

    public static void main(String[] args) {
        SpringApplication.run(HedongApplication.class, args);
    }

}
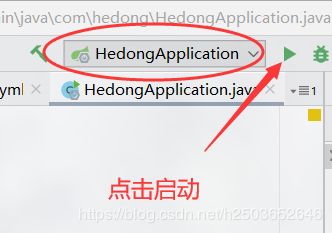
右上角切换到启动程序,点击三角形启动
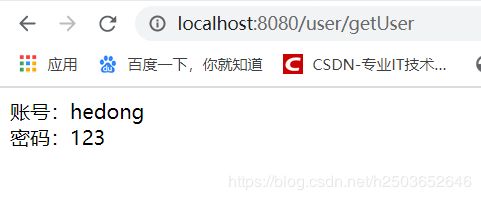
浏览器输入地址,测试结果
至此,Spring Boot +Mybatis+freemarker整合完毕!
