OpenStack学习笔记(三)---------- 安装与部署
一、OpenStack中网络的比较
1、nova网络: 客户端直接访问实例所在的运算节点。(nova是openstack中最核心的组件,用于维护实例的生命周期,安全组、密钥对、套餐、自带网络)
优点 :简单、流量分摊到各个运算节点上
缺点 :不方便做流量统计、功能统一
2、openstack网络(neutron):是由neutron组件做提供的网络,客户端直接访问管理节点,通过管理节点集中的做数据转发,流量监控通过访问控制节点进行访问实例,实例再将数据包转发给客户端。
优点 :功能强大(FWAAS防火墙即服务,LBAAS负载均衡即服务,VPNAAS VPN功能即服务),监控统计准确。
缺点 :在单控制节点的集群中,控制节点的网卡成为了数据通信瓶颈。
二、Openstack安装部署(实际生产)
openstack的官网:https://dosc.openstack.org
centos的官网:https://www.centos.org/
redhat安装openstack的帮助文档:http://rdoproject.org/
实验环境
软件要求:
红帽企业Linux(RHEL)7是推荐的最低版本,或者是基于RHEL的Linux发行版之一(如centOS,scientific Linux等)的等价版本。X86_64是目前唯一受支持的体系结构
硬件要求:
拥有至少16GB RAM的计算机,带有硬件虚拟化扩展的处理器以及至少一个网络适配器。
两块硬盘,一块系统,一块cinder-volume逻辑卷
| 控制节点(一台) | 运算节点(两台) |
|---|---|
| controller.example.com 192.168.201.136 | compute1.example.com 192.168.201.137 |
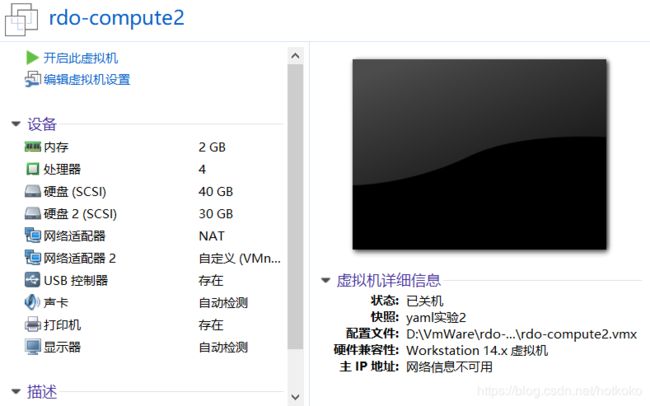
| compute2.example.com 192.168.201.138 |
controller节点(可做参考)
 compute节点 (可做参考)

1、模板机的封装(可省略此步骤)
[root@localhost ~]# mkdir  /root/yum.bake
[root@localhost ~]# mv  /etc/yum.repos.d/*   /root/yum.bake/
[root@localhost ~]# vi  /etc/yum.repos.d/dvd.repo
[dvd]
name=local  dvd
enable=1
gpgcheck=0
baseurl=file:///media
[root@localhost ~]# mount  /dev/sr0  /media/
[root@localhost ~]# yum  install  net-tools  vim  bash-com*  -y
[root@localhost ~]# mv  /root/yum.bake/*  /etc/yum.repos.d/
[root@localhost ~]# mv  /etc/yum.repos.d/dvd.repo   /root/yum.bake/
[root@localhost ~]# firewall-cmd  --set-default-zone=trusted
[root@localhost ~]# vim  /etc/sysconfig/selinux
SELINUX=permissive
[root@localhost ~]# setenforce  0
[root@localhost ~]# fdisk  /dev/sdb
Welcome to fdisk (util-linux 2.23.2).

Changes will remain in memory only, until you decide to write them.
Be careful before using the write command.

Device does not contain a recognized partition table
Building a new DOS disklabel with disk identifier 0xc44e6568.

Command (m for help): n
Partition type:
   p   primary (0 primary, 0 extended, 4 free)
   e   extended
Select (default p): p
Partition number (1-4, default 1): 1
First sector (2048-62914559, default 2048):
Using default value 2048
Last sector, +sectors or +size{K,M,G} (2048-62914559, default 62914559):
Using default value 62914559
Partition 1 of type Linux and of size 30 GiB is set

Command (m for help): w
The partition table has been altered!

Calling ioctl() to re-read partition table.
Syncing disks.
[root@localhost ~]# pvcreate  /dev/sdb1                      //创建一个物理卷
[root@localhost ~]# vgcreate  cinder-volumes  /dev/sdb1      //创建一个卷组
[root@localhost ~]# systemctl  stop  NetworkManager
[root@localhost ~]# systemctl  disable  NetworkManager
[root@localhost ~]# cd  /etc/sysconfig/network-scripts/        //修改网卡名称

[root@localhost network-scripts]# vim  ifcfg-ens33
TYPE=Ethernet
BOOTPROTO=none
DEVICE=eth0
IPADDR=192.168.201.136    //换成你的NAT网卡所在的网段
NETMASK=255.255.255.0
GATEWAY=192.168.201.2
DNS1=192.168.201.2
ONBOOT=yes
[root@localhost network-scripts]# mv  ifcfg-ens33 ifcfg-eth0
[root@localhost network-scripts]# vim  ifcfg-ens34       //修改网卡信息文件
TYPE=Ethernet
BOOTPROTO=none
DEVICE=eth1
ONBOOT=yes
IPADDR=10.0.0.1
NETMASK=255.255.255.0
[root@localhost network-scripts]# mv  ifcfg-ens34 ifcfg-eth1
[root@localhost network-scripts]# vim  /etc/default/grub            //引导文件(需要加的是 net.ifnames=0 biosdevname=0 )
GRUB_CMDLINE_LINUX="crashkernel=auto rd.lvm.lv=centos/root net.ifnames=0 biosdevname=0 rd.lvm.lv=centos/swap rhgb quiet"
[root@localhost network-scripts]# grub2-mkconfig  -o  /boot/grub2/grub.cfg
[root@localhost network-scripts]# systemctl  enable  network
[root@localhost ~]# hostnamectl  set-hostname  controller.lab.example.com
[root@localhost ~]# vim  /etc/hosts        //相当于域名解析
192.168.201.136  controller.exmaple.com  controller  //做控制节点
192.168.201.137  compute1.example.com  compute1      //做计算节点
192.168.201.138  compute2.example.com  compute2
[root@localhost ~]# yum  install  -y  centos-release-openstack-rocky
//rocky是openstack的18代最新版本
[root@localhost ~]# yum  install  -y  openstack-packstack
[root@localhost ~]# rm  -f  /etc/ssh/ssh_host_*   //删除有关远程控制的一些命令
[root@localhost ~]# history  -c              //清除历史记录
[root@localhost ~]# sys-unconfig     //关机
2、克隆模板机三台虚拟机
一台作为控制(controller)节点,两台作为计算(compute1,compute2)节点,
都需要修改一下IP地址以及主机名,此时需要与hosts文件中的域名解析保持一致。
3、在控制节点(controller)节点如下操作:
[root@controller ~]# yum  install  openstack-packstack   -y    //下载packstack包
[root@controller ~]# packstack --gen-answer-file /root/answers.txt  //生成应答文件
[root@controller ~]# openssl req -x509 -sha256 -newkey rsa:2048 -keyout /etc/pki/tls/private/selfkey.key  -out /etc/pki/tls/certs/selfcert.crt  -days  365  -nodes
                                //自建生成两个证书 -nodes不需要密码
[root@controller ~]# ll  /etc/pki/tls/certs/selfcert.crt
-rw-r--r--. 1 root root 1448 Feb 26 21:17 /etc/pki/tls/certs/selfcert.crt
[root@controller ~]# ll  /etc/pki/tls/private/selfkey.key
-rw-r--r--. 1 root root 1704 Feb 26 21:17 /etc/pki/tls/private/selfkey.key
##修改应答文件##
需要注意的是两种网络的设置,两选一即可。
[root@controller ~]# vim answers.txt     //修改应答文件
CONFIG_DEFAULT_PASSWORD=redhat
CONFIG_HEAT_INSTALL=y
CONFIG_COMPUTE_HOSTS=192.168.201.136,192.168.201.137
CONFIG_SSL_CACERT_FILE=/etc/pki/tls/certs/selfcert.crt
CONFIG_SSL_CACERT_KEY_FILE=/etc/pki/tls/private/selfkey.key
CONFIG_SSL_CERT_DIR=/root/packstackca
CONFIG_KEYSTONE_ADMIN_PW=redhat
CONFIG_CINDER_VOLUMES_CREATE=n
CONFIG_VNC_SSL_CERT=/etc/pki/tls/certs/selfcert.crt
CONFIG_VNC_SSL_KEY=/etc/pki/tls/private/selfkey.key
CONFIG_LBAAS_INSTALL=y
CONFIG_NEUTRON_FWAAS=y

//以下使用VXLAN
CONFIG_NEUTRON_L3_EXT_BRIDGE=
CONFIG_NEUTRON_ML2_TYPE_DRIVERS=flat,vxlan
CONFIG_NEUTRON_ML2_VXLAN_GROUP=239.1.1.2
CONFIG_NEUTRON_ML2_VNI_RANGES=1001:2000
CONFIG_NEUTRON_OVS_BRIDGE_MAPPINGS=physnet1:br-ex
CONFIG_NEUTRON_OVS_TUNNEL_IF=eth1

//以下使用vlan
CONFIG_NEUTRON_L3_EXT_BRIDGE=br-ex
CONFIG_NEUTRON_ML2_TYPE_DRIVERS=vlan
CONFIG_NEUTRON_ML2_TENANT_NETWORK_TYPES=vlan
CONFIG_NEUTRON_ML2_VLAN_RANGES=physnet1:1:1000
CONFIG_NEUTRON_OVS_BRIDGE_MAPPINGS=physnet1:br-eth1
CONFIG_NEUTRON_OVS_BRIDGE_IFACES=br-eth1:eth1
//以上两种网络而选一

CONFIG_HORIZON_SSL=y
CONFIG_HORIZON_SSL_CERT=/etc/pki/tls/certs/selfcert.crt
CONFIG_HORIZON_SSL_KEY=/etc/pki/tls/private/selfkey.key
CONFIG_HORIZON_SSL_CACERT=/etc/pki/tls/certs/selfcert.crt
CONFIG_PROVISION_DEMO=n
##进行安装##
如果报错为存储不足,则需将机器的运行内存提高,最小为8GB
[root@controller ~]# packstack --answer-file /root/answers.txt
##设置be-ex网桥##
[root@controller ~]# cd  /etc/sysconfig/network-scripts/
[root@controller network-scripts]# cp  ifcfg-eth0  ifcfg-br-ex  //配置be-ex网桥
[root@controller network-scripts]# vim  ifcfg-br-ex
DEVICE=br-ex
TYPE=OVSBridge
DEVICETYPE=ovs
BOOTPROTO=none
IPADDR=192.168.201.136
NETMASK=255.255.255.0
GATEWAY=192.168.201.2
DNS1=192.168.201.2
ONBOOT=yes

[root@controller network-scripts]# vim ifcfg-eth0
DEVICE=eth0
ONBOOT=yes
TYPE=OVSPort
DEVICETYPE=ovs
OVS_BRIDGE=br-ex
[root@controller network-scripts]# systemctl  restart  network
[root@controller network-scripts]# ovs-vsctl show
 Bridge br-ex
        Controller "tcp:127.0.0.1:6633"
            is_connected: true
        fail_mode: secure
        Port br-ex
            Interface br-ex
                type: internal
        Port "eth0"
            Interface "eth0"
##安装包并查看openstack状态,组件是否为active状态##
[root@controller ~]# yum  install  openstack-utils  -y
[root@controller ~]# openstack-status
1、以上操作只是实现了一个运算节点(compute1)
2、实现两个运算节点只需将应答文件中修改此句
CONFIG_COMPUTE_HOSTS=192.168.126.151,192.168.126.152
在此句后新添加compute2的IP即可
3、修改应答文件之后,需重新执行
#packstack --answer-file /root/answers.txt