VSCode + Latex 配置
1. 安装VSCode
VSCode下载
next,next就安装好了。
2. 配置VSCode
2.1 安装LaTeX Workshop插件
install,安装LaTeX Workshop插件
2.2 修改 user setting
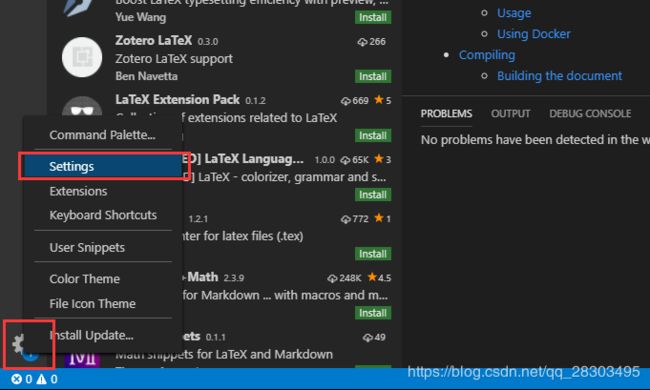
点击左下角,进入用户设置
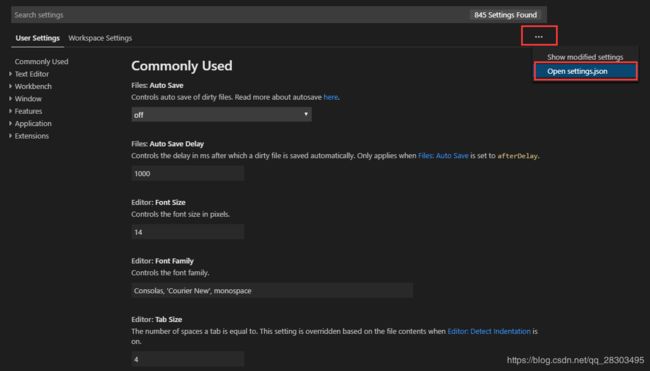
点击上图标记的部分,选择
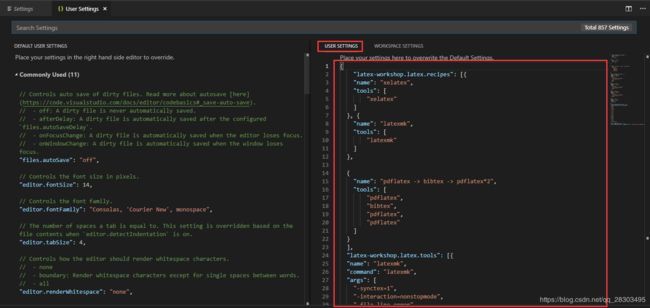
打开settings.json
具体配置文件如下:
{
    "latex-workshop.latex.recipes": [{
    "name": "xelatex",
    "tools": [
        "xelatex"
    ]
  }, {
    "name": "latexmk",
    "tools": [
        "latexmk"
    ]
  },

  {
    "name": "pdflatex -> bibtex -> pdflatex*2",
    "tools": [
        "pdflatex",
        "bibtex",
        "pdflatex",
        "pdflatex"
    ]
  }
  ],
  "latex-workshop.latex.tools": [{
  "name": "latexmk",
  "command": "latexmk",
  "args": [
    "-synctex=1",
    "-interaction=nonstopmode",
    "-file-line-error",
    "-pdf",
    "%DOC%"
  ]
  }, {
  "name": "xelatex",
  "command": "xelatex",
  "args": [
    "-synctex=1",
    "-interaction=nonstopmode",
    "-file-line-error",
    "%DOC%"
  ]
  }, {
  "name": "pdflatex",
  "command": "pdflatex",
  "args": [
    "-synctex=1",
    "-interaction=nonstopmode",
    "-file-line-error",
    "%DOC%"
  ]
  }, {
  "name": "bibtex",
  "command": "bibtex",
  "args": [
    "%DOCFILE%"
  ]
  }],
  "latex-workshop.view.pdf.viewer": "tab",
  "latex-workshop.latex.clean.fileTypes": [
  "*.aux",
  "*.bbl",
  "*.blg",
  "*.idx",
  "*.ind",
  "*.lof",
  "*.lot",
  "*.out",
  "*.toc",
  "*.acn",
  "*.acr",
  "*.alg",
  "*.glg",
  "*.glo",
  "*.gls",
  "*.ist",
  "*.fls",
  "*.log",
  "*.fdb_latexmk"
  ],
  }
重启VSCode。
3. 测试
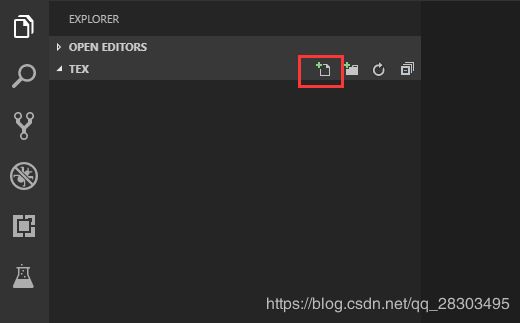
(1)新建并打开文件夹,之后所有产生的文件都在此文件夹下
(2)新建tex文件
扩展名是 .tex
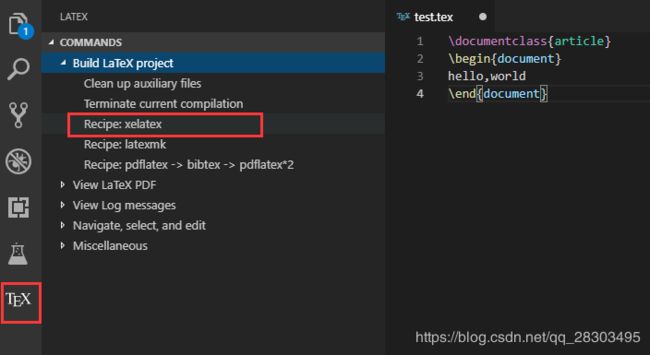
(3)编写tex文档
在 test.tex 中输入:
\documentclass{article}
\begin{document}
hello,world
\end{document}
单击"Recipe:xelatex",使用xelatex编译,
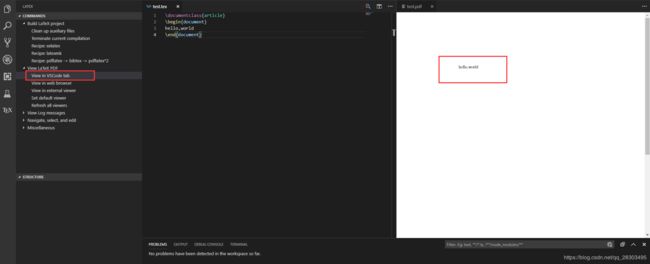
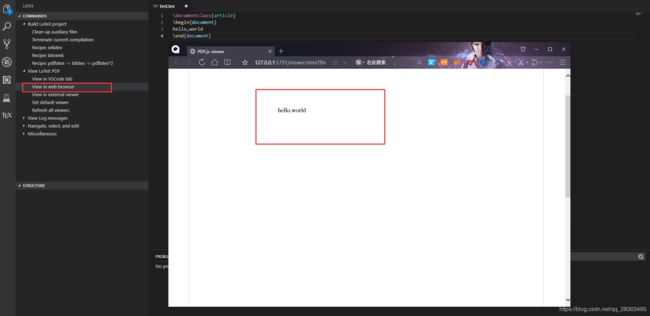
预览可以选择在VSCode的标签页中打开,也可以选择在浏览器中打开。或者点击右上角的预览按钮。
注意:当你更改了tex文档的时候,需要先进行编译,然后才能预览,否则内容还是修改之前的内容
在vs界面中的预览效果:
在浏览器上的预览效果:
4. 使用 texlive 编辑tex 文档
Windows系统下latex:texlive2016和texstudio
texstudio 相当于编程时的IDE,可以使用这个经验贴安装texstudio,然后在texstudio中编写tex文档。所以如果你准备用VSCode来编写tex文档的话,可以不用安装texstudio。

