Netty作为当前最流行的网络通讯框架。从一个最简单的实例去了解他无非是最好的方式。
在这里,使用最常见的IM消息的方式去熟悉和使用Netty框架。
在这里我们需要定义三个类,第一个就是启动类(Server),然后就是配置初始化类(Initializer),然后是处理响应(Handler)的类。
首先我们在pom文件中引入我们需要的netty包
	io.netty
	netty-all
	4.1.17.Final
然后创建我们的启动类WebSocketServer:
public class WebSocketServer {
	public static void main(String[] args) throws Exception {
		EventLoopGroup bossGroup = new NioEventLoopGroup();
		EventLoopGroup workerGroup = new NioEventLoopGroup();
		try {
			ServerBootstrap b = new ServerBootstrap();
			b.group(bossGroup, workerGroup).channel(NioServerSocketChannel.class)
					.childHandler(new WebSocketServerInitializer()).option(ChannelOption.SO_BACKLOG, 128)
					.childOption(ChannelOption.SO_KEEPALIVE, true);

			System.out.println("WebsocketChatServer 启动了  来自LLL丶blog");
			// 绑定端口,开始接收进来的连接
			ChannelFuture f = b.bind(8080).sync();
			// 让服务器不会立马关闭
			f.channel().closeFuture().sync();
		} finally {
			workerGroup.shutdownGracefully();
			bossGroup.shutdownGracefully();
			System.out.println("WebsocketChatServer 关闭了 来自LLL丶blog");
		}
	}
}
然后需要建立我们的初始化类WebSocketServerInitializer,在这里必须继承至ChannelInitializer类,并传入SocketChannel接口:
public class WebSocketServerInitializer extends ChannelInitializer {
	@Override
	public void initChannel(SocketChannel ch) throws Exception {
		// 管道配置
		ChannelPipeline pipeline = ch.pipeline();
		pipeline.addLast(new HttpServerCodec());
		pipeline.addLast(new HttpObjectAggregator(64 * 1024));
		pipeline.addLast(new ChunkedWriteHandler());
		pipeline.addLast(new WebSocketServerProtocolHandler("/ws"));
		pipeline.addLast(new TextWebSocketFrameHandler());

	}
}
然后创建具体的处理程序类TextWebSocketFrameHandler并且继承至SimpleChannelInboundHandler类:
public class TextWebSocketFrameHandler extends SimpleChannelInboundHandler {

	public static ChannelGroup channels = new DefaultChannelGroup(GlobalEventExecutor.INSTANCE);

	// 处理从客户端发来的消息,核心方法
	@Override
	protected void channelRead0(ChannelHandlerContext ctx, TextWebSocketFrame msg) throws Exception {
		Channel incoming = ctx.channel();
		for (Channel channel : channels) {
			if (channel != incoming) {
				channel.writeAndFlush(new TextWebSocketFrame("[" + incoming.remoteAddress() + "]" + msg.text()));
			} else {
				channel.writeAndFlush(new TextWebSocketFrame("[本地发送]:" + msg.text()));
				// Console打印,可以删除
				StringBuffer sb = new StringBuffer();
				sb.append(incoming.remoteAddress()).append("->").append(msg.text());
				System.out.println(sb.toString());
			}
		}
	}

	// 有新通道加入的时候响应
	@Override
	public void handlerAdded(ChannelHandlerContext ctx) throws Exception {
		Channel incoming = ctx.channel();
		for (Channel channel : channels) {
			channel.writeAndFlush(new TextWebSocketFrame("[SERVER] - " + incoming.remoteAddress() + " 加入"));
		}
		channels.add(ctx.channel());
		System.out.println("Client:" + incoming.remoteAddress() + "加入");
	}

	// 有通道关闭时响应
	@Override
	public void handlerRemoved(ChannelHandlerContext ctx) throws Exception {
		Channel incoming = ctx.channel();
		for (Channel channel : channels) {
			channel.writeAndFlush(new TextWebSocketFrame("[SERVER] - " + incoming.remoteAddress() + " 离开"));
		}
		System.out.println("Client:" + incoming.remoteAddress() + "离开");
		channels.remove(ctx.channel());
	}

	// 通道激活时响应
	@Override
	public void channelActive(ChannelHandlerContext ctx) throws Exception {
		Channel incoming = ctx.channel();
		System.out.println("Client:" + incoming.remoteAddress() + "在线");
	}

	// 通道关闭时响应
	@Override
	public void channelInactive(ChannelHandlerContext ctx) throws Exception {
		Channel incoming = ctx.channel();
		System.out.println("Client:" + incoming.remoteAddress() + "掉线");
	}

	// 异常时响应
	@Override
	public void exceptionCaught(ChannelHandlerContext ctx, Throwable cause) throws Exception {
		Channel incoming = ctx.channel();
		System.out.println("Client:" + incoming.remoteAddress() + "异常");

		// 当出现异常就关闭连接
		cause.printStackTrace();
		ctx.close();
	}
}
到这里服务端就创建完毕了,基本上在实际中,我们只需要更改Handler中的代码做出不一样的响应就可以完成其他的一些操作。启动服务端可以看到控制台如图所示,表示成功。 
下面我们只需要在本地建一个html文件去连接到我们的服务端就好了
Netty-WebSocket聊天
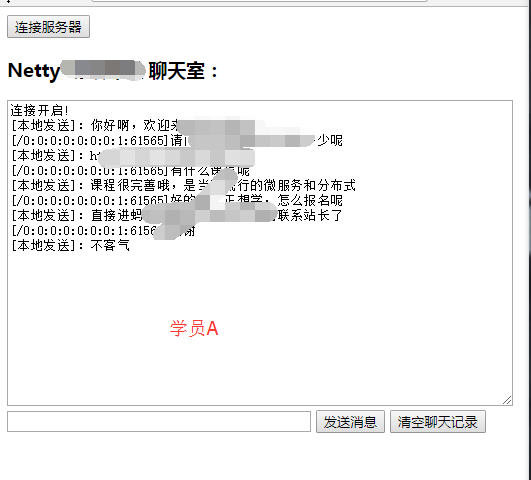
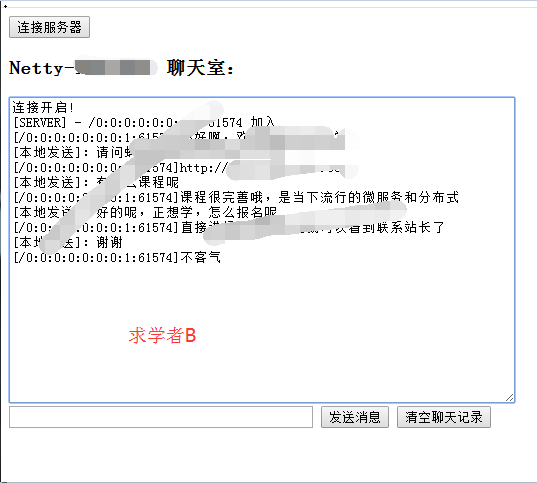
然后用两个不同的浏览器打开,点击左上角连接到服务器,就可以看到自己连接到服务器成功了。 在聊天中可以看到两个浏览器窗口都能同时输出信息,如图所示 

有了这个简单的示例之后,简单改造改造就可以形成一个简单的聊天工具了
Netty的强大之处远远不止这些。需要自己去探讨,这里只是做个简单的示例

