目录
- python爬虫学习-day1
- python爬虫学习-day2正则表达式
- python爬虫学习-day3-BeautifulSoup
- python爬虫学习-day4-使用lxml+xpath提取内容
- python爬虫学习-day5-selenium
- python爬虫学习-day6-ip池
- python爬虫学习-day7-实战
查考python爬虫学习-day1
环境变量
python 3.7
pycharm 2018.3
1.1 学习get与post请求
通过requests实现
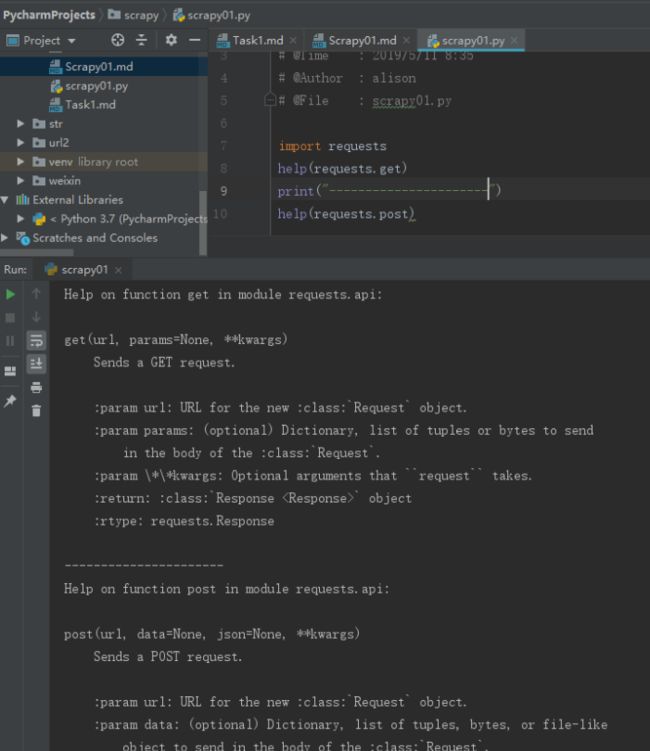
requests的get与post函数:
get(url, params=None, **kwargs)
    Sends a GET request.

    :param url: URL for the new :class:`Request` object.
    :param params: (optional) Dictionary, list of tuples or bytes to send
        in the body of the :class:`Request`.
    :param \*\*kwargs: Optional arguments that ``request`` takes.
    :return: :class:`Response ` object
    :rtype: requests.Response

 post(url, data=None, json=None, **kwargs)
    Sends a POST request.

    :param url: URL for the new :class:`Request` object.
    :param data: (optional) Dictionary, list of tuples, bytes, or file-like
        object to send in the body of the :class:`Request`.
    :param json: (optional) json data to send in the body of the :class:`Request`.
    :param \*\*kwargs: Optional arguments that ``request`` takes.
    :return: :class:`Response ` object
    :rtype: requests.Response
示例
import requests
# get请求
url = 'https://www.baidu.com'
response = requests.get(url)
print(response.text)

print('--------------分割线--------------')
# post 请求
data = {
    "name": "aa",
    "school": 'linan'
}

response = requests.post(url, data=data)
print(response.text)
结果
get结果
post结果
json的处理模块 json
json
json模块提供了一种简单的方式来编码和解码JSON数据,其主要函数是json.dumps()和json.loads()
import json

data = {
    "name": "aa",
    "school": 'linan'
}
#  将json对象转换成json字符串
json_str = json.dumps(data)
print(json_str)
# 将json字符串转换成json对象
data = json.loads(json_str)
print(data)
结果
{"name": "aa", "school": "linan"}
{'name': 'aa', 'school': 'linan'}
解释:print输出json字符串,没问题,注意是的print(data),与输出字符串结果一致,因为python解释器底层实现的(这块猜测,无法得知)
通过urllib实现
函数
urlopen(url, data=None, timeout=urlopen可以进行get和post访问
示例
import urllib.request as ur
print('--------get')
# get
url = 'https://www.baidu.com'
res = ur.urlopen(url)
#  read first line
fristline = res.readline()
print(fristline)

print('-------post')
# post
req = ur.Request(url=url, data=b'the first day of web crawler')
res_data = ur.urlopen(req)
res = res_data.read()
print(res)
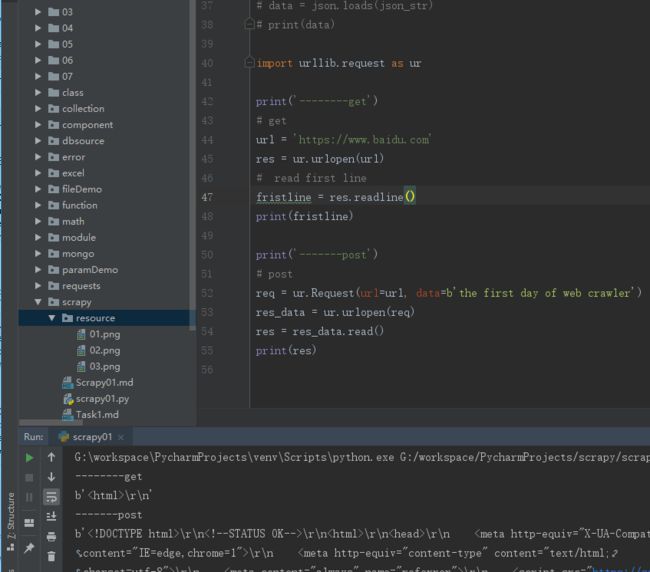
结果
示例2
import urllib.request, urllib
from urllib.request import URLError

basic_url = 'https://www.cnblogs.com/billyzh/p/5819957.html'
# 由str 转换成byte
"".encode('utf-8')


# 获取URLs
# 简单的使用
# get_url_1
def get_url():
    response = urllib.request.urlopen('https://www.cnblogs.com/billyzh/p/5819957.html')
    html = response.read().decode('utf-8')
    print(html)

# HTTP是基于请求和响应---客户端发出请求和服务器端发送响应。Urllib2 对应Request对象表示你做出HTTP请求,最简单的形式,创建一个指定要获取的网址的Request对象。这个Request对象调用urlopen,返回URL请求的Response对象。Response对象是一个类似于文件对象,你可以在Response中使用 .read()。
# get_url_2
def get_url_2():
    request = urllib.request.Request('https://www.cnblogs.com/billyzh/p/5819957.html')
    response = urllib.request.urlopen(request)
    html = response.read().decode('utf-8')
    print(html)

# url_info
# 查看请求的信息
def url_info():
    request = urllib.request.Request('https://www.cnblogs.com/billyzh/p/5819957.html')
    response = urllib.request.urlopen(request)
    info = response.info()
    url = response.geturl()
    print(info)
    print('---------url---------')
    print(url)
    html = response.read().decode('utf-8')
    # print(html)

 # Data  -post
def data_post():
    url = 'http://www.someserver.com/cgi-bin/register.cgi'
    values = {}
    values['name'] = 'Alison'
    values['password'] = 'Alison'

    data = urllib.parse.urlencode(values)
    request = urllib.request.Request(url, data)
    response = urllib.request.urlopen(request)
    this_page = response.read().decode('utf-8')
    print(this_page)

# Data -get
def data_post():
    url = 'http://user.51sole.com/'
    values = {}
    values['txtUserName'] = '1'
    values['txtPwd'] = '1'

    data = urllib.parse.urlencode(values).encode('utf-8')
    request = urllib.request.Request(url, data)
    response = urllib.request.urlopen(request)
    this_page = response.read().decode('utf-8')
    print(this_page)
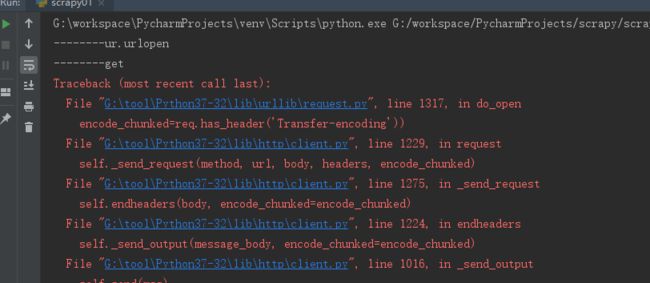
断开网络后发出申请
这里继承上面的urllib.request.urlopen()
发送请求之后,出现如下图的结果
请求头
请求头的作用,通俗来讲,就是能够告诉被请求的服务器需要传送什么样的格式的信息。由于时间关系,这里就贴一下从百度百科看来的一些我认为比较重要的请求头类型:
Accept:浏览器可接受的MIME类型。
Accept-Charset:浏览器可接受的字符集。
Accept-Language:浏览器所希望的语言种类,当服务器能够提供一种以上的语言版本时要用到。
Authorization:授权信息,通常出现在对服务器发送的WWW-Authenticate头的应答中。
Connection:表示是否需要持久连接。
Content-Length:表示请求消息正文的长度。
Cookie:这是最重要的请求头信息之一。
User-Agent:浏览器类型,如果Servlet返回的内容与浏览器类型有关则该值非常有用。
…
如何添加请求头?
在爬虫的时候,如果不添加请求头,可能网站会阻止一个用户的登陆,此时我们就需要添加请求头来进行模拟伪装,使用python添加请求头方法如下。
import urllib.request, urllib
from urllib.request import URLError
from io import BytesIO
import gzip
# Headers
# 用户代理(User-Agent)头
def header_demo():
    user_agent = 'Mozilla/5.0 (Windows NT 10.0; WOW64) AppleWebKit/537.36 (KHTML, like Gecko) Chrome/74.0.3729.108 Safari/537.36'
    values = {}
    values['name'] = 'alison'
    values['passwd'] = '123'
    data = urllib.parse.urlencode(values).encode('utf-8')
    headers = {'user-agent': user_agent}
    headers[
        'accept'] = 'text/html,application/xhtml+xml,application/xml;q=0.9,image/webp,image/apng,*/*;q=0.8,application/signed-exchange;v=b3'
    headers['accept-encoding'] = 'gzip, deflate, br'
    headers['accept-language'] = 'zh-CN,zh;q=0.9,en;q=0.8'
    headers['Connection'] = 'keep-alive'
    req = urllib.request.Request(basic_url, data, headers)
    response = urllib.request.urlopen(req)
    print('---------response.geturl')
    print(response.geturl())
    # 以“b'\x1f\x8b\x08”开头的数据是经过gzip压缩过的数据,这里当然需要进行解压了
    buff = BytesIO(response.read())
    f = gzip.GzipFile(fileobj=buff)
    page = f.read().decode('UTF-8')
    print('----------page')
    print(page)
    print('------------info')
    print(response.info())
    print('------------req.data')
    print(req.data)
后期调用的话,直接调用方法即可
PS: 若你觉得可以、还行、过得去、甚至不太差的话,可以“关注或点赞”一下,就此谢过!


