上传并在地图中显示Shp文件
前段时间参与了一个项目,客户有一个功能需求是上传SHP文件并在地图上显示,然后在此基础上做缓冲区处理。经过对比测试,最终选择了shapefile.js工具,在此做个记录。
shapfe.js能够将Esri的Shapefile文件转换为GeoJSON,它能够以Shapefile文件zip的压缩文件和单独的.shp文件作为输入参数。
shapefile.js安装
项目是基于Vue开发的,因此选择了npm的安装方式,安装非常简单,执行下面的命令就可以了。
npm install shpjs
获取上传的SHP文件
在HTML中可使用type为file的input标签获取上传的.shp文件或者压缩后的Shapefile文件。
selectShpFile: function() {
  this.shpFile = document.getElementById("uploadFileInput").files[0];
}
使用FileReader处理上传后的SHP文件
JavaScript中的FileReader用来读取Blob或者File的内容。
FileReader共包含4个方法,其中三个用来读取文件内容,一个用来打断读取。
| 方法名称 | 方法参数 | 方法描述 |
|---|---|---|
| abort | – | 中断文件读取 |
| readAsBinaryString | File | 将文件读取为二级制码 |
| readAsDataURL | File | 将文件读取为DataURL |
| readAsText | File, [encoding] | 将文件读取为文本 |
FileReader处理事件共有6个,具体描述如下:
| 事件名称 | 事件描述 |
|---|---|
| onabort | 中断时触发 |
| onerror | 出错时触发 |
| onload | 文件读取成功时触发 |
| onloadend | 读取完成时触发,无论成功或失败 |
| onloadstart | 读取开始时触发 |
| onprogress | 读取中 |
这里需要注意的一点是,文件一旦开始读取,无论成功还是失败,实例的result属性都会被填充,也就是说如果读取失败,result的值为null,读取成功则为读取的结果。
在本项目中,我们使用了readAsBinaryString方法,并且监听onload事件获取文件的读取内容。
let fileReader = new FileReader();

fileReader.readAsArrayBuffer(shpFile);
fileReader.onload = function() {
    // 获取读取的结果
    console.log(this.result);
}
使用shapefile.js将SHP文件读取为GeoJSON
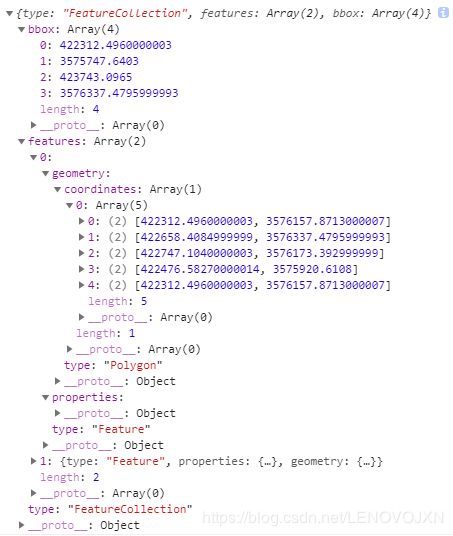
shapefile.js使用也非常简单,我们使用其read方法,并将上一步的文件的二进制读取结果作为read方法的参数,然后在其回调函数中获取GeoJson。
这一步和上一步的整合后的代码如下:
let fileReader = new FileReader();

fileReader.readAsArrayBuffer(shpFile);
fileReader.onload = function() {
    let shapefile = require("shapefile");
    shapefile
      .read(this.result)
      .then(geoJson => {
        console.log(geoJson);
      }
}
在地图中加载GeoJson
在地图中加载GeoJson需要遍历其features属性,将其中的每个feature转为对应的几何对象(点、线或者面),然后将转换的几何对象构建成一个Graphic,最后将Graphic添加到GraphicLayer中。
遍历features,构建Polygon对象
geoJson.features.map(feature => {
  const polygon = new EsriPolygon({
    spatialReference: new EsriSpatialReference({ wkid: 2380 })
  });

  feature.geometry.coordinates.forEach(function(coord) {
    const coordinates =
      feature.geometry.type === "MultiPolygon" ? coord[0] : coord;
    polygon.addRing(coordinates);
  });
}
Polygon构建Graphic,并添加到GraphicLayer
let graphics = [];
let graphicsExtent = null;

geoJson.features.map(feature => {
  const polygon = new EsriPolygon({
    spatialReference: new EsriSpatialReference({ wkid: 2380 })
  });

  feature.geometry.coordinates.forEach(function(coord) {
    const coordinates =
      feature.geometry.type === "MultiPolygon" ? coord[0] : coord;
    polygon.addRing(coordinates);
  });

  const graphic = new EsriGraphic({
    geometry: polygon,
    attributes: feature.properties,
    symbol: {
      type: "simple-fill", // autocasts as new SimpleFillSymbol()
      color: [51, 51, 204, 0.9],
      style: "solid",
      outline: {
        color: "white",
        width: 1
      }
    }
  });

  graphics.push(graphic);
});

graphicLayer.addMany(graphics);
至此,我们已经完成了上传并在地图中展示SHP文件的整个流程,下一步就可以调用相应的API函数创建缓冲区,并执行接下来的各种功能。
