Java:GUI综合设计
Java:GUI综合设计目录
Java:GUI综合设计
一、内容回顾
二、典型实例
三、实验设计
实验一
实验二
实验三
实验四
Java:GUI综合设计
一、内容回顾
(一)常用组件
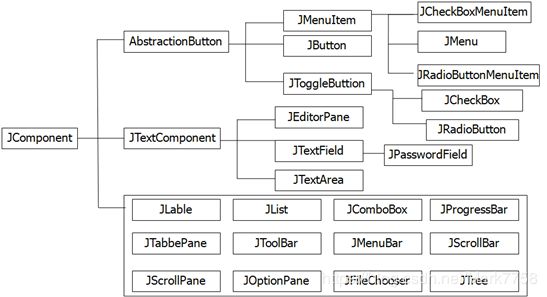
Swing基于AWT架构,提供了能力更加强大的用户界面组件,其组件类结构图如图13-1所示。
下面对一些常用swing 组件做简单的介绍。
(1) JButton:按钮组件,用于接收用户的命令,如图所示。
(2)JCheckBox: 复选框组件,用于接收用户的多选输入,可以被选定和取消选定,如图所示。
(3)JRadioButton: 单选按钮组件,用于接收用户的单选输入,此按钮项可被选择或取消选择。JRadioButton与 ButtonGroup 对象配合使用可创建一组按钮,一次只能选择其中的一个按钮,如图所示。
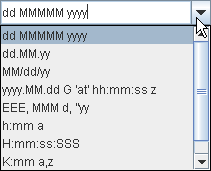
(4)JComboBox: 组合框组件,可供用户从项目列表中选择一个或多个项目,用于限制用户选择范围以及避免复杂数据的输入。如图所示。
(5)JMenuBar, JMenu ,JMenuItem:菜单相关组件。其中JMenuBar为菜单栏组件, JMenu为菜单组件,JMenuItem为菜单项组件。它们的关系为将 JMenu 添加到JMenuBar中以构造菜单。将JMenuItem添加到JMenu中以构造每个JMenu的弹出窗口选项。如图所示。
(6)JTextField,JTextArea:JTextField为单行文本框组件,JTextArea为多行文本域组件。JTextField允许用户编辑单行文本,JTextArea则允许用户输入多行文本。如图所示。
(7)JLable:标签组件,JLable为不可选的文本或图象显示区域,如图所示。
(8)ImageIcon:图像图标组件,用于装饰标签,按钮等组件。如图所示。
(二)事件处理
(1) 事件处理基础
Java采用一种事件委托模型来进行事件处理。这个模型涉及三种基本概念
①事件源:产生事件的组件,能够注册监听器对象并发送事件对象。
②事件:描述事件源状态改变的对象。例如点击按钮,通过键盘输入等。
③监听器:实现了特定监听器接口的类的实例,该对象负责处理事件的方法。
Java事件委托模型机制为:每个事件源可以发出若干种不同类型的事件;为每个事件源指定一个或多个事件监听器,利用监听器对某种事件进行监听。如果发生某种事件,就调用相应监听器中的方法。 如图所示。
(2)不同类型事件所对应的监听器
对于程序员而言,在事件处理过程中最关键的工作就是实现事件处理方法,即实现监听器接口。在Java中,对不同的事件源施加不同的用户动作可以触发不同类型的事件。而每种类型的事件都有对应的不同类型的监听器接口,在这些不同类型的监听器接口中规定了接收处理某种类型的事件所需要实现的方法。表13-1,13-2分别表述了常用的不同事件源产生的不同类型事件以及针对不同类型的事件所对应的监听器接口和需要实现的方法。
表 1 不同事件源所触发的不同类型事件
| 用户动作 |
事件源 |
触发的事件类型 |
| 在文本框中按回车 |
JTextField |
ActionEvent |
| 单击按钮 |
JButton |
ActionEvent |
| 选择一个新项目 |
JComboBox |
ItemEvent |
| 单击复选框 |
JCheckBox |
ItemEvent |
| 单击单选框 |
JRadioButtion |
ItemEvent |
| 选择菜单项 |
JMenuItem |
ActionEvent |
| 移动滚动条 |
JScrollBar |
AdjustmentEvent |
| 打开、关闭、图标化、非图标化窗口或关闭 |
Window |
WindowEvent |
| 释放或按下按键 |
Component |
KeyEvent |
| 移动、拖动和点击鼠标 |
Component |
MouseEvent |
表 2 针对不同类型的事件所对应的监听器接口和需要实现的方法
| 事件类型 |
相应监听器接口 |
监听器接口中的方法 |
| ActionEvent |
ActionListener |
actionPerformed(ActionEvent e) |
| ItemEvent |
ItemListener |
itemStateChanged(ItemEvent e) |
| MouseEvent
|
MouseListener |
mousePressed(MouseEvent e) mouseReleased(MouseEvent e) mouseEntered(MouseEvent e) mouseExited(MouseEvent e) mouseClicked(MouseEvent e) |
| MouseMotionListener |
mouseDragged(MouseEvent e) mouseMoved(MouseEvent e) |
|
| KeyEvent |
KeyListener |
keyPressed(KeyEvent e) keyReleased(KeyEvent e) keyTyped(KeyEvent e) |
| AdjustmentEvent
|
AdjustmentListener
|
adjustmentValueChanged (AdjustmentEvent e) |
| WindowEvent |
WindowListener
|
windowClosing(WindowEvent e) windowOpened(WindowEvent e) windowIconified(WindowEvent e) windowDeiconified(WindowEvent e) windowClosed(WindowEvent e) windowActivated(WindowEvent e) windowDeactivated(WindowEvent e) |
需要说明的是,Java AWT将事件分为低级事件和语义事件。语义事件是指表达用户动作的事件,例如点击按钮。而低级事件则是形成那些事件的事件。例如点击按钮时,包含了按下鼠标,连续移动鼠标,抬起鼠标事件。最常见的语义事件有ActionEvent,ItemEvent,AdjustmenEvent等,低级事件则包括KeyEvent,MouseEvent等。
(3)监听器实现方式
对于实现监听器接口有如下四种方式:
①自身类作为事件监听器。
②外部类作为事件监听器。
③匿名内部类作为事件监听器。
④内部类作为事件监听器。
下面有实例对这四种方式做详细介绍。
(三)Graphics,Graphics2D
(1)Graphics
虽然在GUI开发中,通过将窗口和组件本身作为对象来表达,但仍然需要另一个接口来执行实际的绘制、着色以及文本输出。Java语言中提供这些功能的基类称作Graphics。事实上,从java.awt.Component类继承来的类都提供了一个paint方法(在JComponent类中,这个方法为paintComponent),在需要重新绘制组件的时候,该方法被调用。paint(或者paintComponent)方法只有一个参数,就是Graphics类型的实例。
Graphics类是所有图形上下文的抽象基类,允许应用程序在组件(已经在各种设备上实现)以及闭屏图像上进行绘制。Graphics对象封装了 Java 支持的基本呈现操作所需的状态信息。此状态信息包括要在其上绘制的Component对象,呈现和剪贴坐标的转换原点,当前剪贴区,当前颜色,当前字体,当前的逻辑像素操作函数,当前 XOR 交替颜色等属性。
Graphics 类绘制方法主要包括:
①跟踪形状轮廓的绘制方法:
draw3DRect() ;drawArc() ;drawBytes(); drawChars() ;drawImage() ;drawLine(); drawOval(); drawPolygon() ;drawPolyline() ;drawRect() ;drawRoundRect() ;drawString() 。
②填充形状轮廓的绘制方法:
fill3DRect(); fillArc(); fillOval(); fillPolygon(); fillRect() fillRoundRect()。
(2) Graphics2D
自JDK1.0以来,Graphics类就拥有绘制直线、矩形和椭圆等方法。但是这些绘制图形的操作能力非常有限,例如不能改变线条的粗细,不能旋转这些图形等。在JDK1.2引入了Java 2D库,这个库实现了一组功能强大的图形操作。想要利用Java 2D库绘制图形,需要获得一个Graphics2D对象。Graphics2D 类扩展了 Graphics 类,提供了对几何形状、坐标转换、颜色管理和文本布局更为复杂的控制。如果使用的是支持Java 2D的JDK版本,paintComponent方法就会自动获得一个Graphics2D类对象,只需要进行一个类型转换就可以了。
我们可以对Graphics2D类进行多项设置。实际上,渲染引擎在绘制Graphics2D图形前会查看 6个主要属性:
①Paint
Paint控制填充效果,同时作用在边线和填充上, 其可以是单色,渐变和图案。 可以通过 setPaint和getPaint方法设置获取Paint属性。
②Stroke
Stroke控制线条的宽度、笔形样式、线段连接方式或短划线图案。 可以通过 setStroke和getStroke方法设置获取Stroke属性。在Java 2D出现以前,Graphics的描绘方法产生一个1像素宽的实线边,Graphics2D赋予了更灵活的描边选择。
③Font
Font控制字体的形状。可以通过 setFont和getFont方法设置获取Font属性。Graphics2D为文本描绘提供了丰富的选择。
④Transform
Transform属性用来实现常用的图形平移、缩放和斜切等变换操作。可以通过 setTransform和getTransform方法设置获取Transformation属性。Graphics2D提供很多方便的方法帮助实现变形。
⑤Clip
Clip属性用于实现剪裁效果。setClip方法确定剪裁区的Shape,即将当前的剪裁区设置为任意的剪贴形状。getClip方法则可获取当前剪裁区。
⑥Composite
Composite设置图形重叠区域的效果,决定图形之间颜色的相互影响,例如图片或图形的不透明度等。可以通过 setComposite和getComposite方法设置获取Composite属性。
二、典型实例
例1 本例通过四个程序分别测试实现监听器接口的四种方式。
// TestEvent1.java
import javax.swing.*;
import java.awt.*;
import java.awt.event.*;
  class TestEvent1 extends JFrame implements ActionListener{
    JButton btn;
    public TestEvent1(){
        setLayout(new FlowLayout());
        setDefaultCloseOperation(JFrame.EXIT_ON_CLOSE);
        btn=new JButton("点击");
        btn.addActionListener(this);
        getContentPane().add(btn);
        setBounds(200,200,300,160);
        setVisible(true);
    }
    public void actionPerformed (ActionEvent e){
        Container c=getContentPane();
        c.setBackground(Color.red);
    }
    public static void main(String args[]){
        new TestEvent1();
    }
}
// TestEvent2.java
import java.awt.*;
import java.awt.event.*;
import javax.swing.*;
class TestEvent2 extends JFrame{
JButton btn;
public TestEvent2(){
setLayout(new FlowLayout());
setDefaultCloseOperation(JFrame.EXIT_ON_CLOSE);
btn=new JButton("点击");
btn.addActionListener(new OuterClass(this));
getContentPane().add(btn);
setBounds(200,200,300,160);
setVisible(true);
}
public static void main(String args[]){
new TestEvent2();
}
}
class OuterClass implements ActionListener{
TestEvent2 oce;
public OuterClass(TestEvent2 oce){
this.oce = oce;
}
public void actionPerformed(ActionEvent e){
Container c=oce.getContentPane();
c.setBackground(Color.red);
}
} // TestEvent3.java
import java.awt.*;
import java.awt.event.*;
import javax.swing.*;
class TestEvent3 extends JFrame{
JButton btn;
public TestEvent3(){
setLayout(new FlowLayout());
setDefaultCloseOperation(JFrame.EXIT_ON_CLOSE);
btn=new JButton("点击");
btn.addActionListener(
new ActionListener(){
public void actionPerformed(ActionEvent e){
Container c=getContentPane();
c.setBackground(Color.red);
}
}
);
getContentPane().add(btn);
setBounds(200,200,300,160);
setVisible(true);
}
public static void main(String args[]){
new TestEvent3();
}
} // TestEvent4.java
import java.awt.*;
import java.awt.event.*;
import javax.swing.*;
class TestEvent4 extends JFrame{
JButton btn;
public TestEvent4(){
setLayout(new FlowLayout());
setDefaultCloseOperation(JFrame.EXIT_ON_CLOSE);
btn=new JButton("点击");
btn.addActionListener(new InnerClass());
getContentPane().add(btn);
setBounds(200,200,300,160);
setVisible(true);
}
class InnerClass implements ActionListener{
public void actionPerformed (ActionEvent e){
Container c=getContentPane();
c.setBackground(Color.red);
}
}
public static void main(String args[]){
new TestEvent4();
}
} 程序执行结果如图1、2所示。
说明:
① 本例使用TestEvent1测试自身类作为事件监听器,使用TestEvent2测试外部类作为事件监听器,使用TestEvent3测试匿名内部类作为事件监听器,使用TestEvent4测试内部类作为事件监听器。这四个程序以不同的方式实现同一个功能,即当点击按钮的时候,将界面背景设置为红色。
自身类作为事件监听器这种方式可以省去监听器类的编写,但程序整体结构和可读性较差;外部类作为事件监听器这种方式需要单独编写监听器类,但程序整体结构和可读性较好;匿名内部类作为事件监听器这种方式主要用在程序只需要一个某种监听器对象,可以使得代码结构紧凑,但可读性较差;内部类作为事件监听器可以使监听器方法更容易的访问到外部类的属性,程序整体结构和可读性较好。
例2 本例测试组件JRadioButton的用法。
// JRadioButtonTest.java
import java.awt.*;
import java.awt.event.*;
import javax.swing.*;
public class JRadioButtonTest extends JFrame implements ActionListener{
   static String birdString = "鸟";
   static String catString = "猫";
   static String dogString = "狗";
   static String rabbitString = "兔";
   private Container container = getContentPane();
   private JLabel display = new JLabel("");;
   private JRadioButton birdButton,catButton,dogButton,rabbitButton;
   private ButtonGroup group;
public void setLayout() {
// 创建单选按钮对象
    birdButton = new JRadioButton(birdString);
    birdButton.setActionCommand(birdString);
    catButton = new JRadioButton(catString);
    catButton.setActionCommand(catString);
    dogButton = new JRadioButton(dogString);
    dogButton.setActionCommand(dogString);
    rabbitButton = new JRadioButton(rabbitString);
    rabbitButton.setActionCommand(rabbitString);
    group = new ButtonGroup();
    group.add(birdButton);
    group.add(catButton);
    group.add(dogButton);
    group.add(rabbitButton);
    JPanel radioPanel = new JPanel( );
    radioPanel.setLayout(new GridLayout(0, 1));
    radioPanel.add(birdButton);
    radioPanel.add(catButton);
    radioPanel.add(dogButton);
    radioPanel.add(rabbitButton);
    container.setLayout(new BorderLayout( ));
    container.add(radioPanel, BorderLayout.WEST);
    container.add(display, BorderLayout.CENTER);

// 为单选按钮添加事件监听器
    birdButton.addActionListener(this);
    catButton.addActionListener(this);
    dogButton.addActionListener(this);
    rabbitButton.addActionListener(this);
    }
    public void actionPerformed(ActionEvent e) {
    display.setText(" 你选中了" + e.getActionCommand() + "。");
    }
    public static void main(String[] args){
    JRadioButtonTest frame=new JRadioButtonTest();
    frame.setLayout();
    frame.setVisible(true);
    }
}
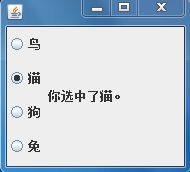
程序执行结果如图13-,13-所示。
说明:
①本例主要利用JRadioButton实现当点击某个单选按钮就在JLable组件中显示所作出的选择的功能。本例采用了自身类作为事件监听器的方式实现ActionListener。
例3 本例测试组件JCheckBoxTest用法。
// JCheckBoxTest.java
import java.awt.*;
import java.awt.event.*;
import javax.swing.*;
public class JCheckBoxTest extends JFrame implements ItemListener {
    private JCheckBox right1;
    private JCheckBox right2;
    private JCheckBox right4;
    private JCheckBox right8;
    private char[] choices={'0','0','0','0'};
    private Container container=getContentPane();;
    JLabel displayLabel;
    public void setLayout() {
        right1 = new JCheckBox("1");
        right1.setSelected(false);
        right2 = new JCheckBox("2");
        right2.setSelected(false);
        right4 = new JCheckBox("4");
        right4.setSelected(false);
        right8 = new JCheckBox("8");
        right8.setSelected(false);
        right1.addItemListener(this);
        right2.addItemListener(this);
        right4.addItemListener(this);
        right8.addItemListener(this);
       displayLabel = new JLabel("0000");

        //创建面板对象checkPanel
        JPanel checkPanel = new JPanel( );
        //将复选框按钮添加到checkPanel的同一列
        checkPanel.setLayout(new GridLayout(0, 1));
        checkPanel.add(right1);
        checkPanel.add(right2);
        checkPanel.add(right4);
        checkPanel.add(right8);
        container.setLayout(new BorderLayout( ));
        container.add(checkPanel, BorderLayout.WEST);
        container.add(displayLabel, BorderLayout.CENTER);
    }

    public void itemStateChanged(ItemEvent e) {
            int index = 0;
            Object source = e.getItemSelectable( );
            if (source == right8) {
            index=0;
                choices[index]='8';
            }
            else if (source == right4) {
            index=1;
                choices[index]='4';
            }
           else if (source == right2) {
            index=2;
                choices[index]='2';
            }
            else if (source == right1){
            index=3;
                choices[index]='1';
            }
           if (e.getStateChange( ) == ItemEvent.DESELECTED)
           choices[index]= '-';
           displayLabel.setText(new String(choices));
        }

       public static void main(String[] args){
          JCheckBoxTest frame=new JCheckBoxTest();
          frame.setLayout();
          frame.setVisible(true);
        }
    }
说明:
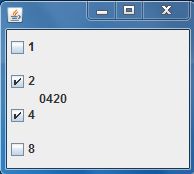
①本例实现的功能为:通过选择某些复选框选项,使得JLable中的四位数的相应位置作出相应变化,而取消选择某些复选框选项则将Lable中的四位数的相应位置置“-”。本例采用了自身类作为事件监听器的方式实现ItemListener。
例4 本例测试组件JComboBox用法。
// JComboBoxTest.java
import javax.swing.border.EmptyBorder;
import java.awt.*;
import java.awt.event.*;
import javax.swing.*;
public class JComboBoxTest extends JFrame {
    private JPanel contentPane;
    public static void main(String[] args) {
         JComboBoxTest frame = new JComboBoxTest();
         frame.setVisible(true);
    }
    public JComboBoxTest() {
        setDefaultCloseOperation(JFrame.EXIT_ON_CLOSE);
        setBounds(100, 100, 250, 100);
        contentPane = new JPanel();
        contentPane.setBorder(new EmptyBorder(5, 5, 5, 5));
        setContentPane(contentPane);
        contentPane.setLayout(new FlowLayout
(FlowLayout.CENTER, 5, 5));
        JLabel label = new JLabel("证件类型:");
        contentPane.add(label);
        itemListener lis = new itemListener();
        JComboBox comboBox = new JComboBox();
        comboBox.addItemListener(lis);
        comboBox.addItem("身份证");
        comboBox.addItem("学生证");
        comboBox.addItem("结婚证");
        contentPane.add(comboBox);
    }
}

class itemListener implements ItemListener {
    public void itemStateChanged(ItemEvent e) {
       if (e.getStateChange() == ItemEvent.SELECTED) {
          JComboBox jcb = (JComboBox) e.getSource();
          System.out.println((String) (jcb.getSelectedItem()));
          System.out.println(jcb.getSelectedIndex());
       }
    }
}
说明:
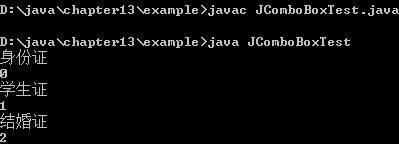
①本例实现的功能为将下拉框中作出的选择(包括选项和选项索引)输出到控制台。本例采用外部类作为事件监听器的方式实现ItemListener。
例5 本例测试组件JTextField和JTextArea的用法。
// JTextFieldAreaTest.java
import java.awt.*;
import java.awt.event.*;
import javax.swing.*;
public class JTextFieldAreaTest extends JPanel implements
ActionListener {
    protected JTextField textField;
    protected JTextArea textArea;
    private final static String newline = "\n";
    public JTextFieldAreaTest() {
        super(new GridBagLayout());
        textField = new JTextField(20);
        textField.addActionListener(this);
        textArea = new JTextArea(5, 20);
        textArea.setEditable(false);
        JScrollPane scrollPane = new JScrollPane(textArea);
        GridBagConstraints c = new GridBagConstraints();
        c.gridwidth = GridBagConstraints.REMAINDER;
        c.fill = GridBagConstraints.HORIZONTAL;
        add(textField, c);
        c.fill = GridBagConstraints.BOTH;
        c.weightx = 1.0;
        c.weighty = 1.0;
        add(scrollPane, c);
    }

    public void actionPerformed(ActionEvent evt) {
        String text = textField.getText();
        textArea.append(text + newline);
        textField.selectAll();
        textArea.setCaretPosition(
textArea.getDocument().getLength());
    }

  private static void createAndShowGUI() {
      JFrame frame = new JFrame();
      frame.setDefaultCloseOperation(JFrame.EXIT_ON_CLOSE);
      frame.add(new JTextFieldAreaTest());
      frame.pack();
      frame.setVisible(true);
    }

  public static void main(String[] args) {
      javax.swing.SwingUtilities.invokeLater(new Runnable() {
            public void run() {
                createAndShowGUI();
            }
        });
    }
}
说明:
①本例的功能为:在界面上方JTextFiled中输入,然后按回车键,则组件JTextFiled中的内容输出到界面下方的JTextArea中。本例采用了自身类作为事件监听器的方式实现ActionListener。
例6 本例测试组件JMenu的用法。
// JMenuTest.java
import java.awt.*;
import javax.swing.*;
import java.awt.event.*;
public class JMenuTest extends JFrame{
   Container con;
   public JMenuTest(){
      con=getContentPane();
      JMenuBar menubar=new JMenuBar();
      JMenu filemenu=new JMenu("文件");
      JMenu editmenu=new JMenu("编辑");
      JMenu helpmenu=new JMenu("帮助");
      JMenuItem item1=new JMenuItem("打开");
      filemenu.add(item1);
      menubar.add(filemenu);
      menubar.add(editmenu);
      menubar.add(helpmenu);
      item1.addActionListener(new ActionListener(){
          public void actionPerformed(ActionEvent e) {
          JFileChooser chooser=new JFileChooser();
          int returnVal=chooser.showOpenDialog(JMenuTest.this);
          if(returnVal==JFileChooser.APPROVE_OPTION){
          String str="You chose to open"+
" this file:"+chooser.getSelectedFile().getName();
          JOptionPane.showMessageDialog(null, str);
        }
     }
   });
    setJMenuBar(menubar);
    setDefaultCloseOperation(JFrame.EXIT_ON_CLOSE);
    setSize(400,300);
    setVisible(true);
    }

    public static void main(String[] args) {
       new JMenuTest();
    }
}
说明:
① 本例实现了一个菜单界面。当点击菜单项“文件”下的“打开”项时,程序将利用组件JFileChooser弹出打开文件对话框,当在对话框中双击选中某个文件时,将弹出一个对话框,显示你选中的文件名称。本例采用匿名内部类作为事件监听器的方式实现ActionListener。
例7 本例测试MouseEvent的用法。
// MouseEventTest.java
import java.awt.event.*;
import javax.swing.*;
public class MouseEventTest {
    JFrame f = new JFrame( );
    JTextField tf = new JTextField(30);
    public MouseEventTest(){
       f.add(new JLabel("请按下鼠标左键并拖动"), "North");
       f.add(tf, "South");
       InnerMonitor im = new InnerMonitor();
       f.addMouseMotionListener(im);
       f.addMouseListener(im);
       f.setSize(300, 200);
       f.setVisible(true);
    }
    public static void main(String args[]) {
       MouseEventTest mt = new MouseEventTest();
    }
    class InnerMonitor implements MouseMotionListener,MouseListener {
       public void mouseDragged(MouseEvent e) {
           String s = "鼠标位置(" + e.getX() + "," + e.getY() + ")";
           tf.setText(s);
       }
       public void mouseEntered(MouseEvent e) {
           String s = "鼠标已进入窗体";
           tf.setText(s);
       }
       public void mouseExited(MouseEvent e) {
           String s = "鼠标已移出窗体";
           tf.setText(s);
       }
       public void mouseMoved(MouseEvent e) { }
       public void mousePressed(MouseEvent e) { }
       public void mouseClicked(MouseEvent e) { }
       public void mouseReleased(MouseEvent e) { }
     }
 }
说明:
①本例实现的功能为:当鼠标在程序主界面窗体范围内时,界面下方的JTextField显示“鼠标已进入窗体”,反之则显示“鼠标已移出窗体”。当在程序主界面窗体范围内任何一个地方点击鼠标并拖动时,界面下方的JTextField显示当前鼠标位置的坐标。本例采用内部类作为事件监听器的方式实现MouseMotionListener和MouseListener。
例8 本例测试Graphics2D的用法。
// Graphics2DTest.java
import java.awt.Graphics;
import java.awt.Graphics2D;
import java.awt.geom.Ellipse2D;
import java.awt.geom.Line2D;
import java.awt.geom.Rectangle2D;
import javax.swing.JFrame;
import javax.swing.JPanel;
public class Graphics2DTest extends JFrame {
    public Graphics2DTest() {
        setSize(400, 400);
        DrawPanel panel = new DrawPanel();
        add(panel);
        }
    public static void main(String[] args) {
        Graphics2DTest frame = new Graphics2DTest();
        frame.setDefaultCloseOperation(JFrame.EXIT_ON_CLOSE);
        frame.setVisible(true);
        }
    }
    class DrawPanel extends JPanel {
        public void paintComponent(Graphics g) {
        super.paintComponent(g);
        Graphics2D g2 = (Graphics2D) g;
        //绘制矩形
        double leftX = 100;
        double topY = 100;
        double width = 200;
        double height = 150;
        Rectangle2D rect = new Rectangle2D.Double(leftX, topY, width, height);
        g2.draw(rect);
        //绘制椭圆
        Ellipse2D ellipse = new Ellipse2D.Double();
        ellipse.setFrame(rect);
        g2.draw(ellipse);
        //绘制线条
        Line2D line = new Line2D.Double(leftX, topY, leftX + width, topY + height);
        g2.draw(line);
        //绘制圆
        double centerX = rect.getCenterX();
        double centerY = rect.getCenterY();
        double radius = 150;
        Ellipse2D circle = new Ellipse2D.Double();
        circle.setFrameFromCenter(centerX, centerY, centerX + radius, centerY + radius);
        g2.draw(circle);
    }
}
说明:
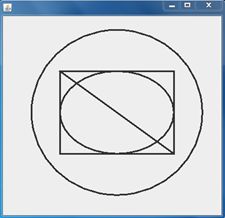
① 本例实现了利用Graphics2D在界面窗体的面板上绘制直线,矩形,椭圆和圆形的功能。
三、实验设计
实验一
(1)实验目的
让学生掌握体会Button,JLable,JtextField和JPasswordField的用法。
(2)实验要求
实现如下图所示界面,其中“密码”一栏为JpasswordField,即录入显示为“*”。当点击“登陆”按钮时通过弹出消息对话框显示输入的用户名和密码信息,当点击“退出”按钮时退出程序。
(3)实验效果展示
(4)实验指导
①弹出消息对话框使用JoptionPane的showMessageDialog方法。
参考实验代码
import java.awt.*;
import javax.swing.*;
import java.awt.event.*;

public class MyUserPassword extends JFrame{
	public MyUserPassword(){ //构造函数,类被创建时调用
		setBounds(300,300,300,300); //设置窗体大小
		setVisible(true);
		setTitle("登录窗口");
		Container c = getContentPane(); //获取容器以装载组件
		JLabel id1 = new JLabel("用户名");
		JLabel key1 = new JLabel("密 码");
		JTextField id2 = new JTextField(15);
		JPasswordField key2 = new JPasswordField(15);
		key2.setEchoChar('*');//将输入的密码以*显示
		JButton confirm = new JButton("确认");
		JButton quit = new JButton("退出");
		//将组件添加到容器内
		c.add(id1);
		c.add(key1);
		c.add(id2);
		c.add(key2);
		c.add(confirm);
		c.add(quit);
		//组件位置
        id1.setBounds(10,40,50,20);
        key1.setBounds(10,80,50,20);
        id2.setBounds(60,40,200,20);
        key2.setBounds(60,80,200,20);
        confirm.setBounds(30,120,60,30);
        quit.setBounds(190,120,60,30);
        //对各个按钮添加监听事件
        confirm.addActionListener(new ActionListener() {
            public void actionPerformed(ActionEvent e) {
                    JOptionPane.showMessageDialog(null,"用户名:"+id2.getText()+"\n"+"密码:"+ new String(key2.getPassword()),"输入确认",JOptionPane.PLAIN_MESSAGE);
            }
        });
        quit.addActionListener(new ActionListener() {
            @Override
            public void actionPerformed(ActionEvent e) {
                System.exit(0);//退出程序
            }
        });
    }

    public static void main(String args[])
    {
        new MyUserPassword();
    }
}
这个实验考察的组件使用方法,用到了Button,JLable,JtextField和JpasswordField以及showMessageDialog组件。在进行组件添加之前应该先获取容器来装载组件,然后将不同组件(Jlabel、JtextField、JpasswordField、JButton)设置大小,并添加到容器内。然后对各个组件添加监听事件即可。这个过程中用到了新的知识showMessageDialog用于消息弹出窗口,同时JpasswordField组件可以用setEchoChar方法将输入的字符一“*”显示。
实验二
(1)实验目的
让学生掌握体验JComboBox、JcheckBox、JTextArea的用法。
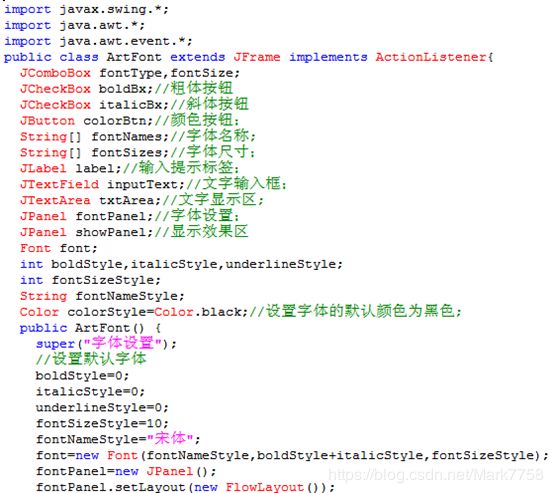
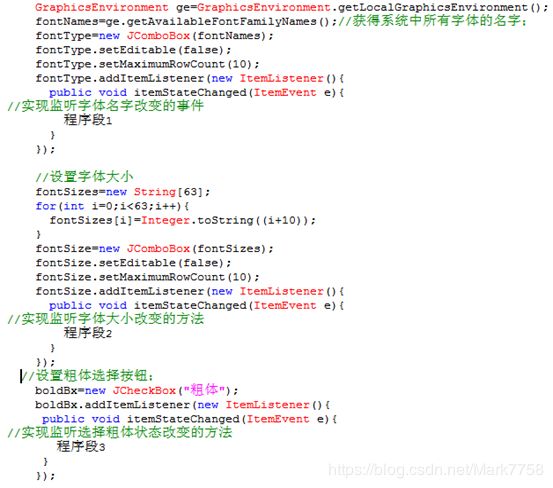
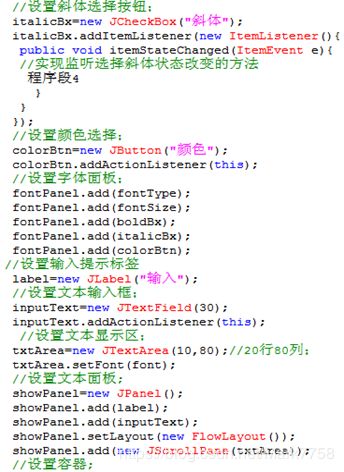
(2)实验要求完善以下代码中的程序段1,2,3,4部分。要求实现的功能为,通过下拉框,复选框等组件选择字体,大小,颜色等属性,然后在文本框中进行录入,敲击回车键将录入的内容以选定属性显示在文本域中。
(3)实验效果展示
(4)实验指导
①参考例3,4,5。
参考实验代码
import java.awt.*;
import java.awt.event.*;
import java.awt.font.*;
import javax.swing.*;

public class ArtFont extends JFrame implements ActionListener {
	JComboBox fontType;
	JComboBox fontSize;
	JCheckBox boldBx;// 粗体按钮
	JCheckBox italicBx;// 斜体按钮
	JButton colorBtn; // 颜色按钮
	String[] fontNames;// 字体名称
	String[] fontSizes;// 字体尺寸
	JLabel label;// 输入提示标签
	JTextField inputText;// 文字输入框
	JTextArea txtArea;// 文字显示区
	JPanel fontPanel;// 字体设置
	JPanel showPanel;// 显示效果区
	Font font;
	int boldStyle, italicStyle, underlineStyle;
	int fontSizeStyle;
	String fontNameStyle;
	Color colorStyle = Color.black;// 设置字体的默认颜色为黑色;

	public ArtFont() {
		super("字体设置");
		// 设置默认字体
		boldStyle = 0;
		italicStyle = 0;
		underlineStyle = 0;
		fontSizeStyle = 10;
		fontNameStyle = "宋体";

		fontPanel = new JPanel();
		fontPanel.setLayout(new FlowLayout());

		GraphicsEnvironment ge = GraphicsEnvironment.getLocalGraphicsEnvironment();
		fontNames = ge.getAvailableFontFamilyNames();// 获得系统中所有字体的名字
		font = new Font(fontNameStyle, boldStyle + italicStyle, fontSizeStyle);
		fontType = new JComboBox(fontNames);
		fontType.setEditable(false);
		fontType.setMaximumRowCount(10);

		fontType.addItemListener(new ItemListener() {
			public void itemStateChanged(ItemEvent e) {
				fontNameStyle = fontType.getSelectedItem().toString();
				 txtArea.setFont(new Font(fontNameStyle,boldStyle+italicStyle,fontSizeStyle));//实现监听字体名字改变的事件
			}
		});

		// 设置字体大小
		fontSizes = new String[63];
		for (int i = 0; i < 63; i++) {
			fontSizes[i] = Integer.toString((i + 10));
		}
		fontSize = new JComboBox(fontSizes);
		fontSize.setEditable(false);
		fontSize.setMaximumRowCount(10);
		fontSize.addItemListener(new ItemListener() {
			public void itemStateChanged(ItemEvent e) {
				fontSizeStyle = Integer.parseInt(fontSize.getSelectedItem().toString());
				 txtArea .setFont(new Font("宋体",boldStyle+italicStyle,fontSizeStyle));//实现监听字体大小改变的方法
			}
		});
		// 设置粗体选择按钮;
		boldBx = new JCheckBox("粗体");
		boldBx.addItemListener(new ItemListener() {
			public void itemStateChanged(ItemEvent e) {
				if(e.getStateChange()==ItemEvent.SELECTED) {
					boldStyle = 1;//选择
				}else {
					boldStyle = 0;//去选择
				}
				 txtArea.setFont(new Font("宋体",boldStyle+italicStyle,fontSizeStyle));//实现监听选择粗体状态改变的方法
			}
		});

		// 实现斜体选择按钮
		italicBx = new JCheckBox("斜体");
		italicBx.addItemListener(new ItemListener() {
			public void itemStateChanged(ItemEvent e) {
				if(e.getStateChange()==ItemEvent.SELECTED) {
					italicStyle = 2;//选择
				}else {
					italicStyle=0;//去选择
				}
				 txtArea.setFont(new Font("宋体",boldStyle+italicStyle,fontSizeStyle));//实现监听选择斜体状态改变的方法
			}
		});
		// 实现颜色选择
		colorBtn = new JButton("颜色");
		colorBtn.addActionListener(this);
		// 设置字体面板
		fontPanel.add(fontType);
		fontPanel.add(fontSize);
		fontPanel.add(boldBx);
		fontPanel.add(italicBx);
		fontPanel.add(colorBtn);
		// 设置输入提示标签
		label = new JLabel("输入");
		// 设置文本输入框
		inputText = new JTextField(30);
		inputText.addActionListener(this);
		// 设置文本显示区
		txtArea = new JTextArea(10, 80);
		txtArea.setFont(font);
		// 设置文本面板
		showPanel = new JPanel();
		showPanel.add(label);
		showPanel.add(inputText);
		showPanel.setLayout(new FlowLayout());
		showPanel.add(new JScrollPane(txtArea));
		// 设置容器
		Container container = getContentPane();
		container.setLayout(new BorderLayout());
		container.add(fontPanel, BorderLayout.NORTH);
		container.add(showPanel, BorderLayout.CENTER);
		setSize(500, 300);
		setVisible(true);
	}

	public void actionPerformed(ActionEvent e) {
		if (e.getSource() == colorBtn) {// 改变颜色
			colorStyle = JColorChooser.showDialog(this, "选择字体颜色", colorStyle);
			colorBtn.setForeground(colorStyle);
			txtArea.setForeground(colorStyle);
		} else if (e.getSource() == inputText) {// 将输入的文字在文字显示区表示
			txtArea.setText(inputText.getText());
		}
	}

	public static void main(String[] args) {
		ArtFont artFont = new ArtFont();
		System.out.println(Font.ITALIC);
		artFont.setDefaultCloseOperation(JFrame.EXIT_ON_CLOSE);
	}
}
这个实验主要练习写监听函数的内容。通过对代码的分析,看到这是一个自身类作为监听器的实例。在给出代码中已经设置了字体的默认值,并且将颜色的实现已经给出。
在设置字体的样式、大小、加粗、斜体时,在监听函数中将构造Font的参数fontNameStyle、boldStyle、italicStyle、fontSizeStyle相应的进行改变。但是在结果中,并没有改变字体的粗体和斜体。
尝试了在监听函数中直接设置字体样式的方法,发现不能改变字体的样式,于是在监听函数输出了fontSizeStyle等参数的值,发现的确已被修改。
通过查询Font构造函数的参数Font(String,int,int), 查到样式参数是整数位掩码,可以为 PLAIN,或 BOLD 和 ITALIC 的按位或(例如,ITALIC 或 BOLD|ITALIC)。如果样式参数不符合任何一个期望的整数位掩码,则将样式设置为 PLAIN。
实验三
(1)实验目的
让学生掌握体验JMenu的用法。
(2)实验要求
在例13-6的基础上,添加两个菜单选项“颜色”和“退出”。要求点击“颜色”菜单项时,弹出选色器组件,选择颜色点击“确定”后,界面背景设置成相应颜色。点击“退出”菜单项时退出程序。
(3)实验效果展示
(4)实验指导
①选色器组件为JColorChooser。
参考实验代码
import java.awt.*;
import javax.swing.*;
import java.awt.event.*;

public class MyJMenu extends JFrame{
    Container con;
    public MyJMenu(){
		con=getContentPane();
        JMenuBar menubar = new JMenuBar();
        JMenu filemenu = new JMenu("文件");
        JMenu editmenu = new JMenu("编辑");
        JMenu helpmenu = new JMenu("帮助");
        JMenuItem item1 = new JMenuItem("打开");
		JMenuItem item2 = new JMenuItem("颜色"); //创建菜单项”颜色“
		JMenuItem item3 = new JMenuItem("退出"); //创建菜单项”退出“

        filemenu.add(item1);
		filemenu.add(item2); //将新建的菜单项添加到菜单中
		filemenu.add(item3);//将新建的菜单项添加到菜单中
        menubar.add(filemenu);
        menubar.add(editmenu);
        menubar.add(helpmenu);
        item1.addActionListener(new ActionListener(){
			public void actionPerformed(ActionEvent e) {
			   JFileChooser chooser=new JFileChooser();
				int returnVal=chooser.showOpenDialog(MyJMenu.this);
				if(returnVal==JFileChooser.APPROVE_OPTION){
				String str="You chose to open"+" this file:"+chooser.getSelectedFile().getName();
				JOptionPane.showMessageDialog(null, str);
				}
			}
		});

		item2.addActionListener(new ActionListener(){
			public void actionPerformed(ActionEvent e){ //对当前的控件添加一个监听器,点击控件时就会触发监听函数里面的内容
				JColorChooser.showDialog(null,"选色器",Color.black);
			}
		});

		item3.addActionListener(new ActionListener(){
			public void actionPerformed(ActionEvent e) { //对当前的控件添加一个监听器,点击控件时就会触发监听函数里面的内容
				System.exit(0);
			}
		});
    setJMenuBar(menubar);
    setDefaultCloseOperation(JFrame.EXIT_ON_CLOSE);
    setSize(400,300);
    setVisible(true);
	}
	public static void main(String[] args) {
       new MyJMenu();
	}
}
实验主要考察下拉菜单Jmenu的用法。重要的是搞清楚JMenuBar(菜单栏)、JMenu(菜单)、JmenuItem(菜单项)三者之间关系,以及添加菜单项的方法。
首先要创建一个JmenuBar,创建若干个JMenu、JMenuItem,将JMenuItem添加到JMenu,将JMenu添加到JMenuBar。对于每一个JmenuItem要添加监听器,使得点击控件时,执行监听函数。还需要注意到,JmenuItem注册监听器,但是不能对JMenuBar和JMenu注册监听器。
实验四
(1)实验目的
让学生掌握体验鼠标事件和Graphics2D的用法。
(2)实验要求
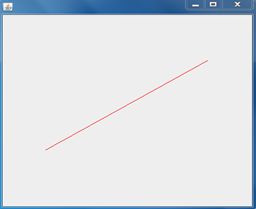
要求能够在界面上通过拖动鼠标划出红色线条。
(3)实验效果展示
(4)实验指导
①参考例7和8。
import java.awt.*;
import java.awt.event.*;
import javax.swing.*;

public class MouseDrawLine extends JPanel implements MouseListener{
	Point start,end;
	public MouseDrawLine(){
		JFrame frame = new JFrame("MouseDrawLine");
		frame.setSize(400,300); //设置窗口大小
		frame.add(this,BorderLayout.CENTER);
		addMouseListener(this); //自身类作为事件监听器
		frame.setDefaultCloseOperation(JFrame.EXIT_ON_CLOSE);
		new PaintThread().start();
		frame.setVisible(true);
	}

	public void mousePressed(MouseEvent e){
		start = new Point(e.getX(),e.getY()); //获取起始坐标
		end = null;
	}

	public void mouseReleased(MouseEvent e){
		end = new Point(e.getX(),e.getY()); //获取终点坐标
	}

	public void mouseEntered(MouseEvent e){}
	public void mouseExited(MouseEvent e){}
	public void mouseClicked(MouseEvent e){}

	public void paintComponent(Graphics g){
		super.paintComponent(g);
		if(start == null || end == null)
			return ;
		Color c = g.getColor();
		g.setColor(Color.red); //设置颜色为红色
		g.drawLine(start.x,start.y,end.x,end.y); //按照要求画线
	}
	public static void main(String[] args){
		new MouseDrawLine();
	}

	private class PaintThread extends Thread{
		public void run(){
			while(true){
				repaint();
				try{
					Thread.sleep(100);
				}
				catch(InterruptedException ex){
				}
			}
		}
	}
}
这个实验通过采用自身类作为事件监听器完成。
首先写出这个界面的主窗口的框架。然后通过对于MouseListener接口的实现,获取到鼠标拖动的起始坐标和终点坐标。需要注意,实现接口的类,必须实现接口中的所有方法。按照从起点到终点的方法画出直线,设置颜色为红色。画线使用paintComponent方法实现。完成之后程序可以运行,但是画线画不出。
使用Thread类中的start方法和run方法解决这个问题。通过调用Thread类的start()方法来启动一个线程,这时此线程处于就绪(可运行)状态,并没有运行;得到CPU时间片,就开始执行run()方法。这部分涉及到多线程的知识。
