「macOS」iTerm2+Oh My Zsh:打造好看高效的终端工具
iTerm2 brings the terminal into the modern age with features you never knew you always wanted.
Your terminal never felt this good before.
iTerm2 官网
Oh My Zsh 官网
前言
iTerm2 是 macOS 上终端的替代软件,它有着比自带终端更为强大的功能。Oh My Zsh 是一款开源的 zsh管理软件,它拥有丰富的 zsh 助手和插件。通过使用 iTerm2+Oh My Zsh 这一组合,我们可以得到一个既美观又高效的 macOS 终端工具,毕竟颜值是第一生产力!
安装
安装 iTerm2
EVAN强烈推荐使用 Homebrew 管理 macOS 的软件,详情可以参考「macOS」提高效率的包管理工具:Homebrew的安装与使用。
使用 Homebrew 安装 iTerm2 只需要一条命令:brew cask install iterm2。
当然也可以自行前往iTerm2 官网下载安装包,将下载的压缩包解压即可。
由于 Mojave 及以下版本的 macOS默认使用bash作为终端命令模式,因此还需要手动切换至zsh:
chsh -s /bin/zsh
zsh 可以完美代替 bash,具体区别可查看:Zsh和Bash,究竟有何不同
安装 Oh My Zsh
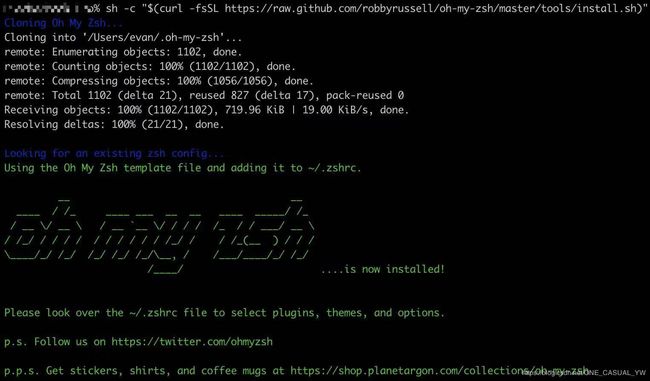
安装 Oh My Zsh 只需要在终端运行如下命令即可(两种方式任选其一):
# curl 安装方式
sh -c "$(curl -fsSL https://raw.githubusercontent.com/robbyrussell/oh-my-zsh/master/tools/install.sh)"
# wget 安装方式
sh -c "$(wget https://raw.githubusercontent.com/robbyrussell/oh-my-zsh/master/tools/install.sh -O -)"
美化
更换背景
iTerm2 -> Preferences -> Profiles -> window -> Background Image,勾选enable然后选择一张自己喜欢的壁纸即可。
安装Powerline
Powerline是一款可以提供状态线和提示的插件,根据Powerline 官网给出的教程,只需要运行如下命令即可完成安装:
sudo pip install powerline-status
如果电脑没有安装pip指令则需要先安装pip:
sudo easy_install pip
安装PowerFonts
选择自己常用的文件夹,从 GitHub 上下载 PowerFonts。然后进入下载好的 fonts 文件夹,执行安装脚本即可。
git clone https://github.com/powerline/fonts.git --depth=1
cd fonts
./install.sh

安装成功后可以设置 iTerm2 字体了:iTerm2 -> Preferences -> Profiles -> Text,在 Font 区域选择自己喜欢的字体即可。
安装配色方案
这里以 Solarized 为例,更多配色可以去Iterm Themes下载。
选择自己常用的文件夹,从 GitHub 上下载配色方案。进入./solarized /iterm2-colors-solarized文件夹,运行两个 itermcolors 文件即可安装配色。
git clone https://github.com/altercation/solarized

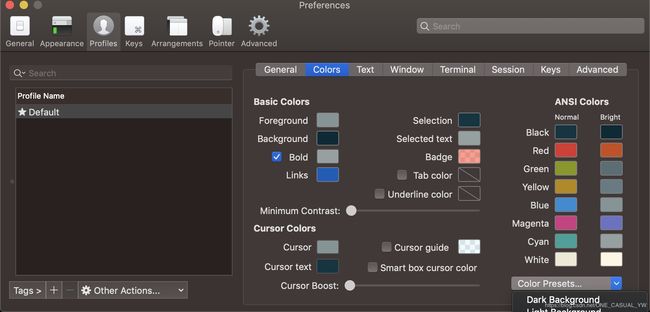
安装完成后进入iTerm2 -> Preferences -> Profiles -> Colors -> Color Presets选择自己喜欢的配色即可。
安装主题
选择自己常用的文件夹,从 GitHub 上下载主题方案,这里以 Agnoster 为例。进入下载好的文件夹,执行安装脚本即可。
git clone https://github.com/fcamblor/oh-my-zsh-agnoster-fcamblor.git
cd oh-my-zsh-agnoster-fcamblor/
./install
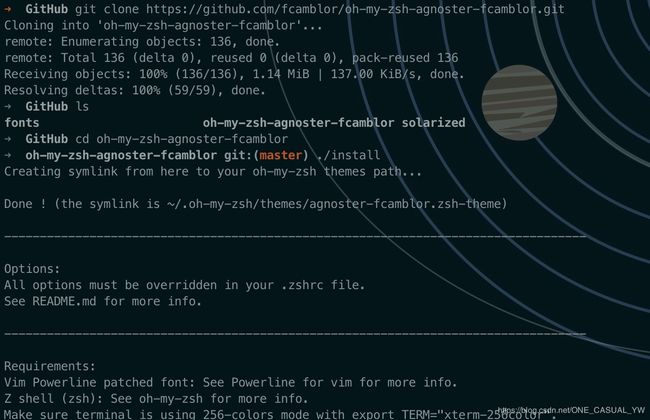
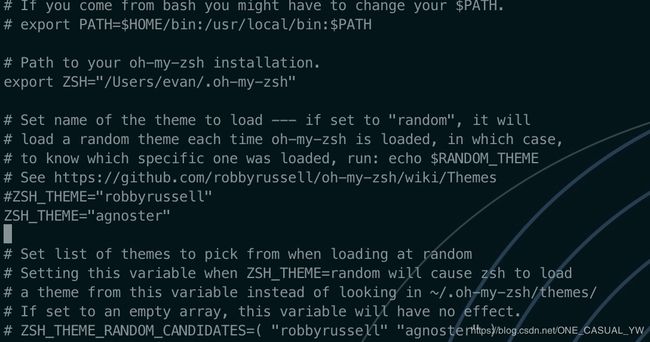
安装脚本会自动将主题拷贝到 Oh My Zsh的 themes 中,然后需要修改 zsh 的配置文件,将ZSH_THEME后面的字段改为agnoster。
vi ~/.zshrc
source ~/.zshrc
安装插件
安装高亮插件 zsh-syntax-highlighting 和命令补全 zsh-autosuggestions插件,方法和安装主题类似。首先进入~/.oh-my-zsh/custon/plugins/文件夹,然后从 GitHub 上下载插件。
cd ~/.oh-my-zsh/custom/plugins/
git clone https://github.com/zsh-users/zsh-syntax-highlighting.git
git clone https://github.com/zsh-users/zsh-autosuggestions

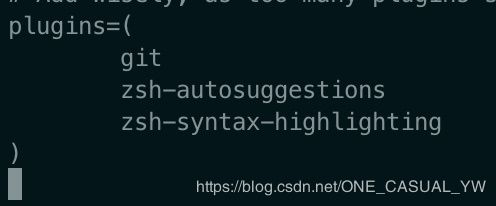
然后修改配置文件,找到 plugins 字段,将其修改为如下内容:
plugins = (
git
zsh-autosuggestions
zsh-syntax-highlighting
)
source ~/.zshrc
如果补全命令的字体的颜色与背景颜色太过相近,可以调整一下字体颜色。进入iTerm -> Preferences -> Profiles -> Colors 中, Foreground 是标准字体颜色,ANSI Colors 中 Bright 的第一个是补全的字体颜色。
