Python的一些常见内置函数说明
背景
最近,碰到了一些Python的内置函数,有些呢网上说的很清楚,有些网上就说的不怎么清楚了(个人觉得),所以打算按照自己的理解,把一些常见的内置函数,记下来,持续更新哈,=_=。
一些常见的python内置函数
1、np.digitize(x, bins, right=False)
函数原型:
def digitize(x, bins, right=False):
函数源码如下:
def digitize(x, bins, right=False):
	x = _nx.asarray(x)
    bins = _nx.asarray(bins)

    # here for compatibility, searchsorted below is happy to take this
    if np.issubdtype(x.dtype, _nx.complexfloating):
        raise TypeError("x may not be complex")

    mono = _monotonicity(bins)
    if mono == 0:
        raise ValueError("bins must be monotonically increasing or decreasing")

    # this is backwards because the arguments below are swapped
    side = 'left' if right else 'right'
    if mono == -1:
        # reverse the bins, and invert the results
        return len(bins) - _nx.searchsorted(bins[::-1], x, side=side)
    else:
        return _nx.searchsorted(bins, x, side=side)
(这里不打算分析源码,因为笔者是Python小白,刚入坑哈,=_=,附上源码主要是为了有兴趣的大佬可以康康,嘻嘻)
np.digitize(x, bins, right=False)
—输入参数:(中文自己理解,英文摘自源码):
x :输入预统计数组 /矩阵,可以为浮点型/整型混合
array_like
Input array to be binned. Prior to NumPy 1.10.0, this array had to
be 1-dimensional, but can now have any shape.
bins : 输入升序或降序数组, 注意:必须为升序或降序,否则会报错。可以为浮点型/整型混合
array_like
Array of bins. It has to be 1-dimensional and monotonic.
right=False:a<=x
x同维度的[0,len(bins)]中的整数数组/矩阵(看不懂没关系,后面会有解释)
returns
indices : ndarray of ints
Output array of indices, of same shape as ‘x’.
只说下功能,如何使用,自己做个记录,方便以后查阅。
使用说明例子如下:
import cv2
import numpy as np

num = np.array([2,6,2,1,3,7,9,8,12,15,-1])
bins = np.array([0.0,1.0,2.5,4.0,12])
inds = np.digitize(num,bins)
print(inds)

if cv2.waitKey(0) & 0xFF ==ord('q'):
    cv2.destroyAllWindows()
代码运行后,打印结果如下:

可以看出,
打印的结果,和num的维度是一样的,1×11
接下来,再依次解释结果[2 4 2 2 3 4 4 4 5 5 0]中的值是怎么来的:
2:是num=[2,6,2,1,3,7,9,8,12,15,-1]中的第一个2,因为1.0<=2<2.5,这个[1.0,2.5)(默认right=False,左闭右开)是bins = [0.0,1.0,2.5,4.0,12]的第二个区间,所以第一个数为2;
4:同理,4.0<=4<12,在bins = [0.0,1.0,2.5,4.0,12]的第四个区间[4.0,12),所以第二个数为4;
…(依次同理)
再说一下,特殊一点的,比如,
num=[2,6,2,1,3,7,9,8,12,15,-1]中的15:因为12<=15,位于(12,+∞)的第5区间,所以15对应的结果为5;
num=[2,6,2,1,3,7,9,8,12,15,-1]中的-1:因为-1<2,位于(-∞,0.0)的第0区间,所以-1对应的结果为0。
最后,得出结论,np.digitize(x, bins, right=False)也就是将数组/矩阵x按照bins的区间,将x转为相同维度的整数,整数取值为[0,len(bins)],具体取哪个整数值,取决于你定的bins区间和x对应位置的值的大小关系。
所以,在做图像处理的时候,np.digitize(x, bins, right=False)有一个很好的用途就是它可以对灰度级数进行一个降级:
import cv2
import numpy as np
bins = np.array([0, 16, 32, 48, 64, 80, 96, 112, 128, 144, 160, 176, 192, 208, 224, 240, 255])
inds = np.digitize(grayImage,bins)
输入的是256级的灰度图像,使用np.digitize通过bins区间进行区分,可将其降为0-16级的灰度,减少后续的图像计算,我也是在做图像处理这一块儿的时候碰到的,=。=。
2、np.flatten()
碰到这个函数的原因,主要是用Python绘图的时候,多维数组(不知道是不是这么说,反正是很多个括号,下面例子里有),会报错,不能绘图,所以网上查了下,找到了这个函数,能用,暂时先说如何使用,不深究其源码实现。
例子如下:
import cv2
import numpy as np
import matplotlib.pyplot as plt

a = [[[1]],[[1]],[[1]],[[1]],[[1]],[[1]],[[1]]]
plt.plot(a,'k--')
plt.show()

if cv2.waitKey(0) & 0xFF ==ord('q'):
    cv2.destroyAllWindows()
这样直接绘图,是要报错的,报错如下:

报错原因就是方括号多了(不知道是不是叫多维数组)的原因,然后我就从网上找到去除方括号的办法,就是用python的内置函数np.flatten(),代码如下:
import cv2
import numpy as np
import matplotlib.pyplot as plt

a = [[[1]],[[1]],[[1]],[[1]],[[1]],[[1]],[[1]]]
#np.flatten()不能直接作用于list,只能作用于array,所以需转换一下类型
a = np.array(a).flatten()
#再把类型转换回来
a = list(a)
print(a)
print(type(a))

plt.plot(a,'k--')
plt.show()

if cv2.waitKey(0) & 0xFF ==ord('q'):
    cv2.destroyAllWindows()
代码执行结果:

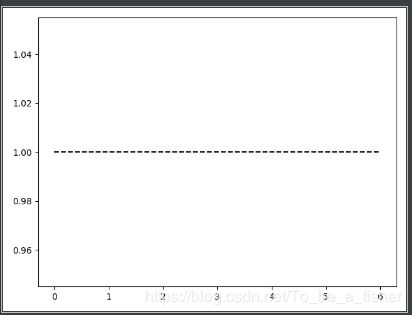
去除方括号后,运行就没问题。
需要注意的是,np.flatten()不能直接作用于list,只能作用于array,所以再使用前需要进行类型转换,代码注释中也有说明。
另外,从网上也查到,np.ravel()也有类似功能,区别在于使用np.ravel()返回的是视图,会对原数据修改;使用np.flatten()返回的是拷贝,不会对原数据修改。
两者区别详见:https://blog.csdn.net/hanshuobest/article/details/78882425,就不另外验证了。
3、Python数据的强制类型转换:data = data.astype(np.uint8)
查看数据类型:
print(type(test_result))
print(test_result.dtype)
type(var)表示var是list、tuple还是np.array的那种数据类型;
var.dtype表示var是int、float的那种数据类型。
强制类型转换
1、data = data.astype(np.uint8)的格式,括号内为你想强制转换为的数据类型。
lbp = local_binary_pattern(grayImage, n_points, radius, method='default')
# 类型转换,lbp为int32,将其转为uint8,为了符合cv2.calcHist()的数据类型要求
lbpInt = lbp.astype(np.uint8)
2、data = int(data)
data = float(data)
data = np.float32(data)
第二种方法没试过,但估计可以。
4、保留矩阵数据的小数点位数设置:mat= np.around(mat,4)
opencv_hist = originLBP(grayImage,radius = 1,n_points = 8)
opencv_hist = opencv_hist.flatten()#np.array(opencv_hist).flatten()
print(opencv_hist)
原始数据打印如下(部分):
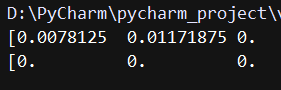
加入opencv_hist = np.around(opencv_hist,4)后:
opencv_hist = originLBP(grayImage,radius = 1,n_points = 8)
opencv_hist = opencv_hist.flatten()#np.array(opencv_hist).flatten()
#只保留小数点后四位
# opencv_hist = np.around(opencv_hist,4)
print(opencv_hist)
打印数据如下(部分):

mat= np.around(mat,4),括号内的数字为矩阵元素打算保留的小数点位数。
mat= np.around(mat,num)和一般数据保留小数点位数的方法一致:data=round(data,num)。