树莓派4b安装人脸识别face_recognition、opencv、opencv_contrib
首先是face_recognition安装
一、到github上面查找中文资料,然后查看树莓派安装教程
https://github.com/ageitgey/face_recognition
树莓派安装的教程路径是下面这个(中间有些地方和我不一样,我照这个链接,没成功过,安装那个face_rec网速太慢,根本没下载下来过)
https://gist.github.com/ageitgey/1ac8dbe8572f3f533df6269dab35df65
二、需要更正的步骤
1、libatlas-dev 无法候选,这里安装替换的 libatlas-base-dev
2、dlib安装按照例子如下,但是这里需要更改
我是按照这样安装,网上查资料听说这个版本才般配
sudo pip3 install dlib==19.7.0然后直接开始安装就好了
sudo pip3 install face_recognition三、进行测试face_recognition
然后按照原链接还原更换交换区大小,不用下载示例代码,我下载了之后好像不能用啥的,你可以参考这个链接直接使用
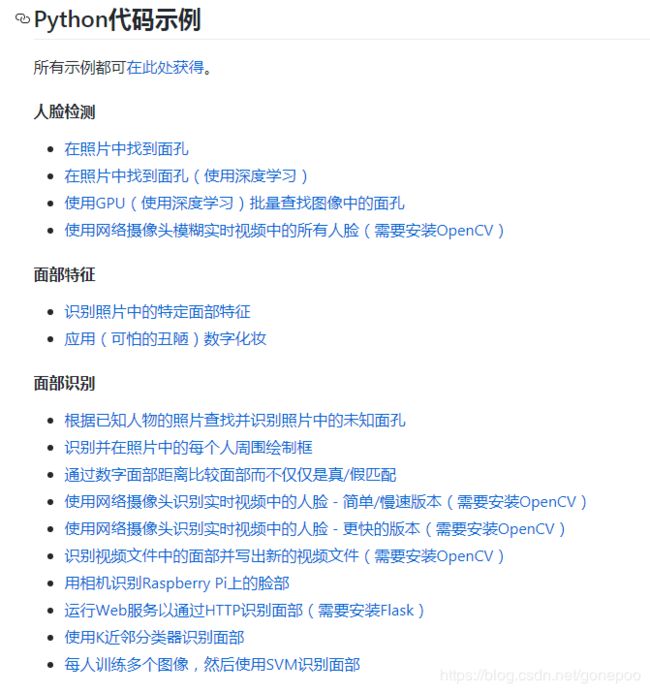
https://github.com/ageitgey/face_recognition/blob/master/README_Simplified_Chinese.md
主要使用就是这句话,中间那个文件夹是你知道的人照片文件夹,名字是图片的文件名,后面那个文件夹放的是你不认识的人的图片,然后会识别出名字并且打印出来,但是经过测试,速度真慢,而且只是单纯的图片识别,你难道不想玩玩在线摄像头实时识别吗?
face_recognition ./pictures_of_people_i_know/ ./unknown_pictures/如果有摄像头的小朋友,可以开始安装openCV开始摄像头识别了。
最后是安装opencv、opencv_contrib
一、配置树莓派并打开摄像头
打开摄像头设置,启用摄像头
sudo raspi-config ![]()
![]()
![]() 选择是就好了
选择是就好了
更新树莓派软件
sudo apt-get update

sudo apt-get upgrade
二、安装OpenCV的相关工具
sudo apt-get install build-essential cmake git pkg-config三、安装OpenCV的图像工具包
sudo apt-get install libjpeg8-dev
sudo apt-get install libtiff5-dev
sudo apt-get install libjasper-dev
sudo apt-get install libpng12-dev 四、安装视频I/O包
sudo apt-get install libavcodec-dev libavformat-dev libswscale-dev libv4l-dev五、安装gtk2.0和优化函数包
sudo apt-get install libgtk2.0-dev
sudo apt-get install libatlas-base-dev gfortran
六、下载OpenCV源码
git clone https://github.com/opencv/opencv.git七、下载OpenCV_contrib
git clone https://github.com/opencv/opencv_contrib.git八、安装OpenCV
// 根据下载的版本而定
cd opencv
// 创建release文件夹
mkdir release
// 进入release目录下
cd release
// cmake读入所有源文件之后,自动生成makefile,复制下面所有(更改第三行的路径),粘贴回车
cmake -D CMAKE_BUILD_TYPE=RELEASE \
-D CMAKE_INSTALL_PREFIX=/usr/local \
-D OPENCV_EXTRA_MODULES_PATH=/home/pi/software/opencv_contrib/modules \
-D ENABLE_NEON=ON \
-D ENABLE_VFPV3=ON \
-D BUILD_TESTS=OFF \
-D OPENCV_ENABLE_NONFREE=ON \
-D INSTALL_PYTHON_EXAMPLES=OFF \
-DCMAKE_SHARED_LINKER_FLAGS='-latomic' \
-D BUILD_EXAMPLES=OFF ..
// 编译(建议 sudo make -j4 速度快呀)
sudo make -j4
// 安装
sudo make install
//更新动态链接库
sudo ldconfig
九、测试代码来了
https://github.com/ageitgey/face_recognition/blob/master/examples/facerec_from_webcam_faster.py
这个链接,就是测试代码,速度比较快
import face_recognition
import cv2
import numpy as np

# This is a demo of running face recognition on live video from your webcam. It's a little more complicated than the
# other example, but it includes some basic performance tweaks to make things run a lot faster:
#   1. Process each video frame at 1/4 resolution (though still display it at full resolution)
#   2. Only detect faces in every other frame of video.

# PLEASE NOTE: This example requires OpenCV (the `cv2` library) to be installed only to read from your webcam.
# OpenCV is *not* required to use the face_recognition library. It's only required if you want to run this
# specific demo. If you have trouble installing it, try any of the other demos that don't require it instead.

# Get a reference to webcam #0 (the default one)
video_capture = cv2.VideoCapture(0)

# Load a sample picture and learn how to recognize it.
obama_image = face_recognition.load_image_file("obama.jpg")
obama_face_encoding = face_recognition.face_encodings(obama_image)[0]

# Load a second sample picture and learn how to recognize it.
biden_image = face_recognition.load_image_file("biden.jpg")
biden_face_encoding = face_recognition.face_encodings(biden_image)[0]

# Create arrays of known face encodings and their names
known_face_encodings = [
    obama_face_encoding,
    biden_face_encoding
]
known_face_names = [
    "Barack Obama",
    "Joe Biden"
]

# Initialize some variables
face_locations = []
face_encodings = []
face_names = []
process_this_frame = True

while True:
    # Grab a single frame of video
    ret, frame = video_capture.read()

    # Resize frame of video to 1/4 size for faster face recognition processing
    small_frame = cv2.resize(frame, (0, 0), fx=0.25, fy=0.25)

    # Convert the image from BGR color (which OpenCV uses) to RGB color (which face_recognition uses)
    rgb_small_frame = small_frame[:, :, ::-1]

    # Only process every other frame of video to save time
    if process_this_frame:
        # Find all the faces and face encodings in the current frame of video
        face_locations = face_recognition.face_locations(rgb_small_frame)
        face_encodings = face_recognition.face_encodings(rgb_small_frame, face_locations)

        face_names = []
        for face_encoding in face_encodings:
            # See if the face is a match for the known face(s)
            matches = face_recognition.compare_faces(known_face_encodings, face_encoding)
            name = "Unknown"

            # # If a match was found in known_face_encodings, just use the first one.
            # if True in matches:
            #     first_match_index = matches.index(True)
            #     name = known_face_names[first_match_index]

            # Or instead, use the known face with the smallest distance to the new face
            face_distances = face_recognition.face_distance(known_face_encodings, face_encoding)
            best_match_index = np.argmin(face_distances)
            if matches[best_match_index]:
                name = known_face_names[best_match_index]

            face_names.append(name)

    process_this_frame = not process_this_frame


    # Display the results
    for (top, right, bottom, left), name in zip(face_locations, face_names):
        # Scale back up face locations since the frame we detected in was scaled to 1/4 size
        top *= 4
        right *= 4
        bottom *= 4
        left *= 4

        # Draw a box around the face
        cv2.rectangle(frame, (left, top), (right, bottom), (0, 0, 255), 2)

        # Draw a label with a name below the face
        cv2.rectangle(frame, (left, bottom - 35), (right, bottom), (0, 0, 255), cv2.FILLED)
        font = cv2.FONT_HERSHEY_DUPLEX
        cv2.putText(frame, name, (left + 6, bottom - 6), font, 1.0, (255, 255, 255), 1)

    # Display the resulting image
    cv2.imshow('Video', frame)

    # Hit 'q' on the keyboard to quit!
    if cv2.waitKey(1) & 0xFF == ord('q'):
        break

# Release handle to the webcam
video_capture.release()
cv2.destroyAllWindows()
//下载一下奥巴马和拜登两个人的照片各一张放到路径下
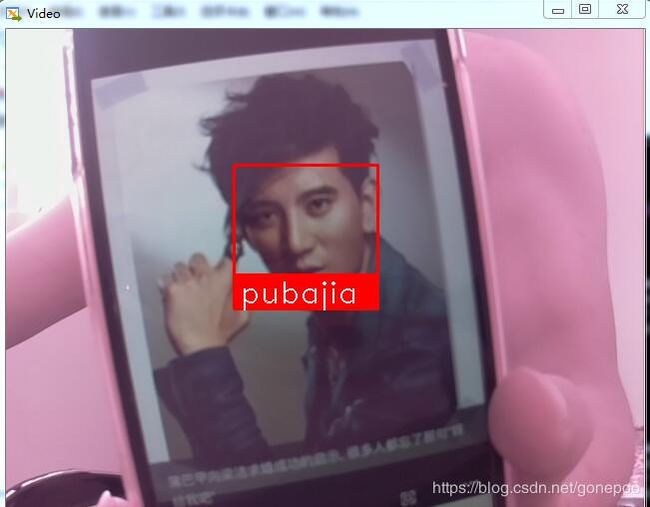
python3 python3 facerec_from_webcam_faster.py这里没有屏幕的兄弟姐妹们,下载个Xmanager,然后就可以了,会显示一个图相框来,我这里识别王力宏和蒲巴甲
十、测试demo下载
速度还比较快速,比直接对比两张图片快得多,demo下载的路径是这个
https://github.com/ageitgey/face_recognition
我用的那个网络摄像头识别实时视频中的人脸,更快的版本,大家装好了以上三个,就可以开启自己人脸识别旅程了。
打赏二维码,多谢支持
![]()
![]()


