netty4 学习入门1-netty作为http服务器
1. 首先下载gradle然后配置到环境变量中,gradle下载地址:https://gradle.org/
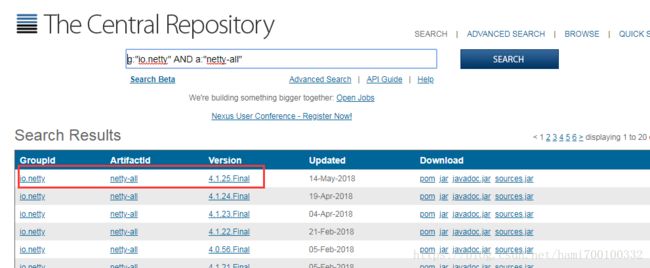
2. 使用gradle下载netty所需要的jar包(搜索网址:http://search.maven.org/)
选择all
在选择最新的版本(ps最新的版本不是5.x,netty的5.x已经被废弃掉了,原因是netty5做了大量的工作以后发现并没有提高netty的便利和性能):
复制gradle地址
导入成功:
3. 编写netty的服务器端代码
package com.baidu.netty.firstExample;

import io.netty.bootstrap.ServerBootstrap;
import io.netty.channel.ChannelFuture;
import io.netty.channel.EventLoopGroup;
import io.netty.channel.nio.NioEventLoopGroup;
import io.netty.channel.socket.nio.NioServerSocketChannel;

public class TestHttpServer {
    public static void main(String[] args)  throws Exception{
        //1. 定义2个线程池 一个是boss 一个是worker, boss负责接收请求,然后传递给worker处理
        EventLoopGroup bossGroup = new NioEventLoopGroup();
        EventLoopGroup workerGroup = new NioEventLoopGroup();
        try {
            //2. 创建netty给我们提供的用来简化服务器端启动的ServerBootstrap 对象
            ServerBootstrap serverBootstrap = new ServerBootstrap();
            //3. 设置组、通道、事件流
            serverBootstrap.group(bossGroup,workerGroup).channel(NioServerSocketChannel.class).childHandler(new TestHttpServerInitializer());
            //4. 绑定端口等数据
            ChannelFuture future = serverBootstrap.bind(8899).sync();
            future.channel().closeFuture().sync();
        }finally {
            // 5. 调用netty的优雅关闭
            bossGroup.shutdownGracefully();
            workerGroup.shutdownGracefully();
        }
    }
}
4. 编写netty事件流对象(netty主要是使用事件回调的方式来工作的,所以事件对象在netty中是非常重要的,可以理解为struts2中的Interceptor)
package com.baidu.netty.firstExample;

import io.netty.channel.ChannelInitializer;
import io.netty.channel.ChannelPipeline;
import io.netty.channel.socket.SocketChannel;
import io.netty.handler.codec.http.HttpServerCodec;

public class TestHttpServerInitializer extends ChannelInitializer {
    @Override
    protected void initChannel(SocketChannel ch) throws Exception {
        ChannelPipeline pipeline = ch.pipeline();
        //HttpServerCodec是netty中非常重要的一个类,用来设置http的编码和解码,
        pipeline.addLast("httpServerCodec", new HttpServerCodec());
        //添加自己的处理器
        pipeline.addLast(new TestHttpHandler());
    }
}
5. 编写自己的处理器对象
package com.baidu.netty.firstExample;

import io.netty.buffer.ByteBuf;
import io.netty.buffer.Unpooled;
import io.netty.channel.ChannelHandlerContext;
import io.netty.channel.SimpleChannelInboundHandler;
import io.netty.handler.codec.http.*;
import io.netty.util.CharsetUtil;

public class TestHttpHandler extends SimpleChannelInboundHandler {

    /**
     * 该方法在5.0中被命名为messageReceived,估计后期还是会对该方法进行重命名
     * 该方法的主要作用是读取客户端的请求,并生产相应数据,我们在该处返回一个helloworld
     */
    @Override
    protected void channelRead0(ChannelHandlerContext ctx, HttpObject msg) throws Exception {
        //1.定义返回对象
        ByteBuf content = Unpooled.copiedBuffer("hello world", CharsetUtil.UTF_8);
        //2. 定义response返回对象,注意该处的response对象不是servlet中的HttpResponse,他是netty自己封装的返回数据,跟http没有任何关系
        FullHttpResponse response = new DefaultFullHttpResponse(HttpVersion.HTTP_1_1,HttpResponseStatus.OK, content);
        //3. 设置返回的数据头信息
        response.headers().set(HttpHeaderNames.CONTENT_TYPE, "text/plain");
        response.headers().set(HttpHeaderNames.CONTENT_LENGTH, content.readableBytes());
        //4. 调用ctx返回response对象
        ctx.writeAndFlush(response);
    }
}
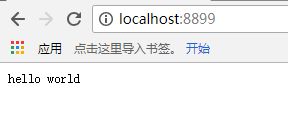
6. 启动服务器,完成测试
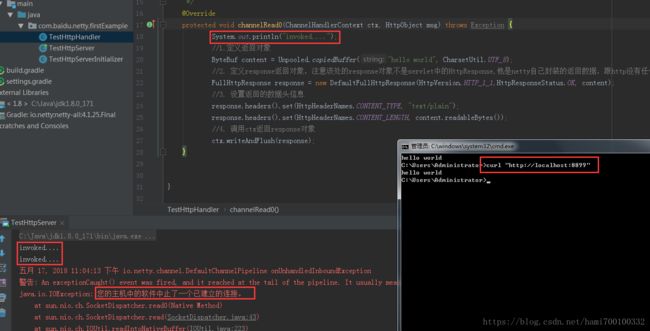
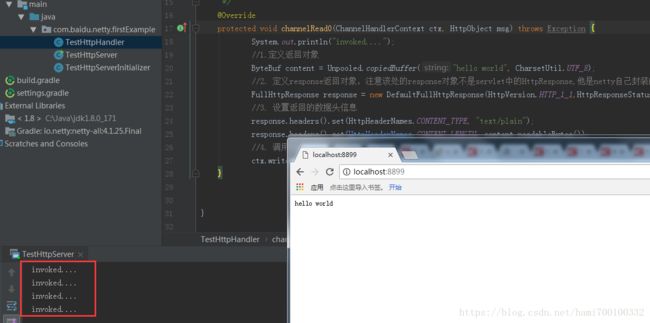
7. 在TestHttpHandler 的channelRead0中添加一行打印,然后使用浏览器和crul再次访问会发现curl执行了2次,浏览器执行了4次
为何会出现这种情况呢?
我们可以对我们的代码在进行一次修改,然后在使用curl进行访问
我们发现其实有2个http请求,但是真正有意思的是第一个,第二个属于空请求,参考Servlet的做法,我们可以对http请求进行过滤
package com.baidu.netty.firstExample;

import io.netty.buffer.ByteBuf;
import io.netty.buffer.Unpooled;
import io.netty.channel.ChannelHandlerContext;
import io.netty.channel.SimpleChannelInboundHandler;
import io.netty.handler.codec.http.*;
import io.netty.util.CharsetUtil;

public class TestHttpHandler extends SimpleChannelInboundHandler {

    /**
     * 该方法在5.0中被命名为messageReceived,估计后期还是会对该方法进行重命名
     * 该方法的主要作用是读取客户端的请求,并生产相应数据,我们在该处返回一个helloworld
     */
    @Override
    protected void channelRead0(ChannelHandlerContext ctx, HttpObject msg) throws Exception {
            System.out.println(msg);
            if (msg instanceof HttpRequest) //过滤非HTTP的请求和垃圾请求
            {
                System.out.println("invoked....");
                //1.定义返回对象
                ByteBuf content = Unpooled.copiedBuffer("hello world", CharsetUtil.UTF_8);
                //2. 定义response返回对象,注意该处的response对象不是servlet中的HttpResponse,他是netty自己封装的返回数据,跟http没有任何关系
                FullHttpResponse response = new DefaultFullHttpResponse(HttpVersion.HTTP_1_1,HttpResponseStatus.OK, content);
                //3. 设置返回的数据头信息
                response.headers().set(HttpHeaderNames.CONTENT_TYPE, "text/plain");
                response.headers().set(HttpHeaderNames.CONTENT_LENGTH, content.readableBytes());
                //4. 调用ctx返回response对象
                ctx.writeAndFlush(response);
            }
    }


}
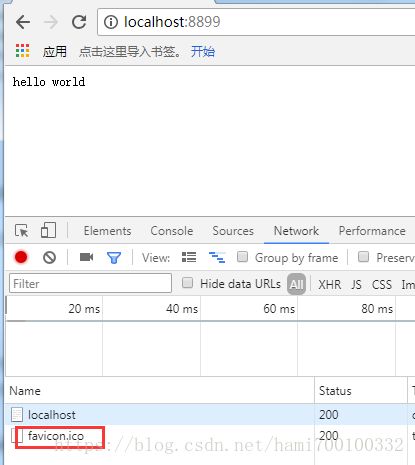
那么为何浏览器是4次呢?我们打开浏览器的F12看network发现其实请求了2次
其中有一次是图标,所以我们应该把图标这个请求也过滤掉,
package com.baidu.netty.firstExample;

import io.netty.buffer.ByteBuf;
import io.netty.buffer.Unpooled;
import io.netty.channel.ChannelHandlerContext;
import io.netty.channel.SimpleChannelInboundHandler;
import io.netty.handler.codec.http.*;
import io.netty.util.CharsetUtil;

import java.net.URI;

public class TestHttpHandler extends SimpleChannelInboundHandler {

    /**
     * 该方法在5.0中被命名为messageReceived,估计后期还是会对该方法进行重命名
     * 该方法的主要作用是读取客户端的请求,并生产相应数据,我们在该处返回一个helloworld
     */
    @Override
    protected void channelRead0(ChannelHandlerContext ctx, HttpObject msg) throws Exception {
            if (msg instanceof HttpRequest) //过滤非HTTP的请求和垃圾请求
            {
                HttpRequest req = (HttpRequest)msg; //将对象强制类型转换为HttpRequest的对象
                URI uri = new URI(req.uri()); //注意不要引错了包,是java.net下的
                if ("/favicon.ico".equals(uri.getPath())) //过滤掉图标请求
                {
                    System.out.println("get favicon.icon");
                    return;
                }
                System.out.println("invoked....");
                //1.定义返回对象
                ByteBuf content = Unpooled.copiedBuffer("hello world", CharsetUtil.UTF_8);
                //2. 定义response返回对象,注意该处的response对象不是servlet中的HttpResponse,他是netty自己封装的返回数据,跟http没有任何关系
                FullHttpResponse response = new DefaultFullHttpResponse(HttpVersion.HTTP_1_1,HttpResponseStatus.OK, content);
                //3. 设置返回的数据头信息
                response.headers().set(HttpHeaderNames.CONTENT_TYPE, "text/plain");
                response.headers().set(HttpHeaderNames.CONTENT_LENGTH, content.readableBytes());
                //4. 调用ctx返回response对象
                ctx.writeAndFlush(response);
            }
    }


}
结果就自己测试了
总结
作为netty的第一个程序而已,还是有很多的api不熟悉,耐心写完第一个helloworld程序,发现netty程序基本都是这个套路来编写了,而且千万不要将HttpServerCodec写成了HttpClientCodec,同时访问的时候需要使用netty绑定的端口来进行访问。


