深度学习之 人脸识别(3) 摄像头识别人脸 实例
继续介绍人脸识别实例,先训练模型(可以用已训练好的模型),SVM 人脸分类训练,预测USB摄像头捕捉的人脸。
1. 下载代码及数据集
开源工程下载,
https://github.com/davidsandberg/facenet
下载后解压出facenet-master文件夹
打开requirements.txt文件,删除tensorflow==1.7,执行命令,
pip3 install -r requirements.txt
下载数据集,
数据解压后放在和facenet-master同集目录下
CASIA-WebFace : 比较大,用于训练模型,读者可自行搜索下载。
lfw : 比较小用于验证模型,下载地址如下:
http://vis-www.cs.umass.edu/lfw/lfw.tgz
下载已训练好的模型,
下载链接:
https://drive.google.com/open?id=1EXPBSXwTaqrSC0OhUdXNmKSh9qJUQ55-
如果不能,请用下面链接进行下载:
https://download.csdn.net/download/hemro/11862096
2. 训练模型
2.1 使用已训练好的模型
1、下载已训练好的模型
2、人脸对齐
上上一篇已说明,在目标数据集上运行如下命令,会得到lfw_align_160目录:
python src/align/align_dataset_mtcnn.py …/lfw …/lfw_align_160 --image_size 160 --margin 32 --random_order
3、验证模型
在facenet-master目录下运行,20181205-090556为下载的训练好的模型:
python src/validate_on_lfw.py …/lfw_align_160/ …/models/20181205-090556
结果如下,准确率为0.998:
Model directory: …/models/20181205-090556
Metagraph file: model-20180402-114759.meta
Checkpoint file: model-20180402-114759.ckpt-275
Runnning forward pass on LFW images
…
Accuracy: 0.98467±0.00407
Validation rate: 0.90567±0.01995 @ FAR=0.00067
Area Under Curve (AUC): 0.998
Equal Error Rate (EER): 0.015
如果没有训练资源或先不想自己训练模型,直接跳到 “3. SVM分类训练及预测”
2.2 训练模型
1、人脸对齐
上上一篇已说明,在目标数据集上运行如下命令,会得到CASIA-WebFace_align_182目录:
python src/align/align_dataset_mtcnn.py …/CASIA-WebFace …/CASIA-WebFace_align_182 --image_size 182 --margin 44 --random_order
2、训练模型
万事已备只欠东风, 可以开始训练模型了,输入如下命令
python src/train_softmax.py --logs_base_dir …/log --models_base_dir …/models --data_dir …/CASIA-WebFace_align_182/ --model_def models.inception_resnet_v1 --image_size 160 --lfw_dir …/lfw_align_160/ --optimizer RMSPROP --learning_rate -1 --max_nrof_epochs 80 --random_crop --random_flip --learning_rate_schedule_file data/learning_rate_schedule_classifier_casia.txt --weight_decay 5e-5 --center_loss_factor 1e-2 --center_loss_alfa 0.9
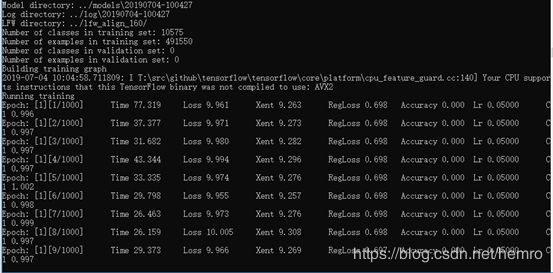
看到如下界面,恭喜你,模型训练开始正常工作了。
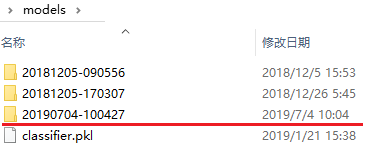
在facenet-master同一级models目录下创建要一个将要保存模型的目录:
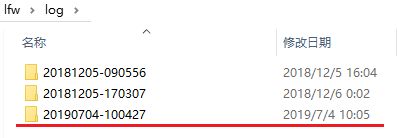
在log目录下看到相关日志:
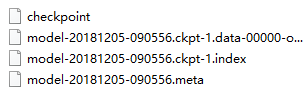
模型训练运行n小时后结束,在20190704-100427下看到如下类似模型数据:
3、验证模型
和上面一样,模型换成训练出来的新mode即可:
python src/validate_on_lfw.py …/lfw_align_160/ …/models/20190704-100427
3. SVM分类训练及预测
模型已训练好,要排上用场了,用模型计算目标图片的向量,并使用SVM训练分类模型:
1、SVM分类训练
使用已训练好的模型在目标数据库上进行计算,得到每张图片的向量。因为图片都标量好,
所以通过SVM进行分类,得到分类超平面,保存
2、SVM分类验证
在目标数据集上验证其分类效果
下面开始实际操作
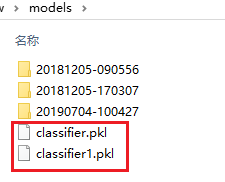
1)分类训练,训练好的模型保存到…/models/classifier.pkl
python src\classifier.py TRAIN …/test_images_align_160 …/models/20181205-170307 …/models/classifier.pkl
运行结果
Number of classes: 5
Number of images: 19
Loading feature extraction model
Model directory: …/models/20181205-170307
Metagraph file: model-20181205-170307.meta
Checkpoint file: model-20181205-170307.ckpt-79
Calculating features for images
Training classifier
Saved classifier model to file “…/models/classifier.pkl”
2)训练好的SVM模型分类验证
python src\classifier.py CLASSIFY …/test_images_align_160 …/models/20181205-170307 …/models/classifier.pkl
看到运行结果,分类准确率为100%
Loading feature extraction model
Model directory: …/models/20181205-170307
Metagraph file: model-20180402-114759.meta
Checkpoint file: model-20180402-114759.ckpt-275
Calculating features for images
Testing classifier
… …
14 Liuyifei: 0.910
15 Liuyifei: 0.886
… …
Accuracy: 1.000、
4. USB摄像头捕捉的人脸
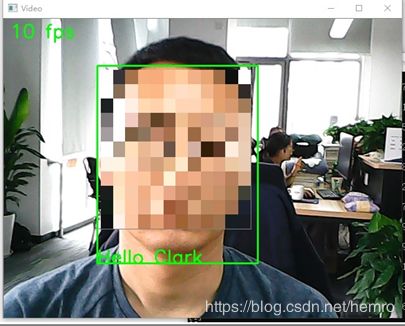
USB 捕捉人脸并识别标出对应的姓名
1、构造预测人脸数据集和SVM分类器
其实每个步骤上面已经都做过了:
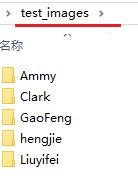
1)需要预测的人脸图像按名字建立文件夹,并放入相应的人脸照片,
2)人脸对其

3)训练SVM分类器
python src\classifier.py CLASSIFY …/test_images_align_160 …/models/20181205-170307 …/models/classifier.pkl
2、USB捕捉人脸并识别
一切就绪,开始应用了
插上USB摄像头,安装好驱动。
运行:
python contributed\real_time_face_recognition.py --debug
5. 代码导读
inception_resnet_v1.py、inception_resnet_v2.py
— 模型,上一篇已经详细说明,按照模型图读非常好理解。
train_softmax.py
— 使用中心损失训练的模型
Loss计算
L= L_softmax + λL_cneter = Softmax(W_i + b_yj) + λ1/2||f(x_i) - c_yj ||_2^2
prelogits_center_loss, _ = facenet.center_loss(prelogits, label_batch, args.center_loss_alfa, nrof_classes)
tf.add_to_collection(tf.GraphKeys.REGULARIZATION_LOSSES, prelogits_center_loss * args.center_loss_factor)
classifier.py
— SVM人脸分类训练
TRAIN
对提供的图片(目标目录下,每个目录为一个人脸图片)进行分类。这里分类时使用inception模型中输出的embeddings,
然后使用SVM进行分类。
两种模式:
CLASSIFY
目标图片计算embeddings,然后分类好的SVM模型进行分类,取最大概率值对应的类型。
predict.py
— 人脸判别
判断输入图片的人脸判别,这里先用人脸对其(即mtcnn来找到人脸,并把它提取出来),
然后使用classifier判断
train_tripletloss.py
— 三元组损失来训练模型
compare.py
— 计算算图片之间的“距离”
real_time_face_recognition.py
— 捕捉摄像头图片的中人脸并识别
通过网络摄像头捕捉的图片进行人脸判别,再使用classifier判断