利用Editor.md构建Markdown富文本编辑器
Markdown是一种可以使用普通文本编辑器编写的标记语言,通过简单的标记语法,它可以使普通文本内容具有一定的格式,就像我们使用的CSDN Markdown编辑器一样。下面我们利用开源的Editor.md来构建属于我们自己的Markdown编辑器。
0x01 下载文件
官网:http://pandao.github.io/editor.md
其中最关键的两个文件是editormd.css和editormd.js。同时文件夹lib和plugins也需要在工程中引入。如果发现有图标显示不正常,还要引入font文件夹,最终的结构如下图:
0x02 配置模板
引入文件:
{%block styles%}
{{super()}}
    <link rel="stylesheet" href="{{url_for('static',filename='css/editormd.min.css')}}">
{%endblock%}
{%block scripts%}
{{super()}}
    <script src="{{url_for('static',filename='js/editormd.min.js')}}">script>
{%endblock%}
添加如下的js代码:
<script>
        var testEditor;
        $(function(){
            testEditor=editormd("test-editormd",{
                width:'500px',
                height:'300px',
                syncScrolling : "single",
                path:"{{url_for('static',filename='editormd/lib/')}}",
                //启动本地图片上传功能
                imageUpload:true,
                imageFormats   : ["jpg", "jpeg", "gif", "png", "bmp", "webp"],
                imageUploadURL : "{{url_for('main.upload')}}"
            });
        })
    script>
在模板中添加关联的textarea:
<form method="post">
    {{form.hidden_tag()}}
    <div id="test-editormd" class="form-control">
        {{form.body(class="form-control",style="display:none;",id="ts")}}
    div>
    <button type="submit" class="btn btn-primary form-control">提交button>
form>
这样,我们就完成了客户端的配置。
0x03 服务端实现
首先我们在对应的数据表中添加一个新的字段,用来记忆Markdown格式转换为html后的内容,这样做可以方便客户端显示。
…
body_html=db.Column(db.Text)
…
#处理body字段变化的函数
@staticmethod
def on_changed_post(target,value,oldvalue,initiaor):
allow_tags=['a','abbr','acronym','b','blockquote','code',
'em','i','li','ol','pre','strong','ul',
'h1','h2','h3','p','img']
#转换markdown为html,并清洗html标签
target.body_html=bleach.linkify(bleach.clean(
markdown(value,output_form='html'),
tags=allow_tags,strip=True,
attributes={
'*': ['class'],
'a': ['href', 'rel'],
'img': ['src', 'alt'],#支持![]() 标签和属性
}
))
#注册监听事件
db.event.listen(Posts.body,'set',Posts.on_changed_post)
标签和属性
}
))
#注册监听事件
db.event.listen(Posts.body,'set',Posts.on_changed_post)on_changed_post函数注册在body字段上,作为SQLAlchemy的”set”时间监听程序,当body字段发生变化时,将触发函数,从而完成对应的body_html字段的更新。这样可以高效地完成markdown格式到html格式的转换。
上面的函数中还使用了bleach来过滤html标签,只允许指定的标签存在,这样是为了防止出现恶意的代码,避免XSS等漏洞的出现。
对应的路由处理代码没有什么特别的地方,和前面讲解分页过程差不多(参见:利用SQLAlchemy和Bootstrap实现数据分页显示),下面补充讲下图片上传的处理问题。
0x04 补充:图片上传
上面提到了Editor.md客户端启动图片上传的做法:
//启动本地图片上传功能
imageUpload:true,
imageFormats   : ["jpg", "jpeg", "gif", "png", "bmp", "webp"],
imageUploadURL : "{{url_for('main.upload')}}"
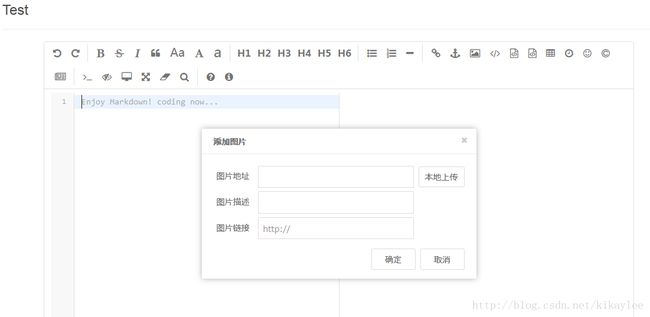
在Editor.md中,启动图片上传功能后,相应的对话框采用Ajax发送图片信息,并接收特定格式的Json字符串作为合法的返回结果:
{
    success : 0 | 1,           // 0 表示上传失败,1 表示上传成功
    message : "提示的信息,上传成功或上传失败及错误信息等。",
    url     : "图片地址"        // 上传成功时才返回
}
上面的处理过程指定需要main.upload来进行图片上传处理,相应的代码如下:
# 图片上传处理
@main.route('/upload/',methods=['POST'])
def upload():
    file=request.files.get('editormd-image-file')
    if not file:
        res={
            'success':0,
            'message':u'图片格式异常'
        }
    else:
        ex=os.path.splitext(file.filename)[1]
        filename=datetime.now().strftime('%Y%m%d%H%M%S')+ex
        from app import app
        file.save(os.path.join(app.config['SAVEPIC'],filename))
        #返回
        res={
            'success':1,
            'message':u'图片上传成功',
            'url':url_for('.image',name=filename)
        }
    return jsonify(res)

#编辑器上传图片处理
@main.route('/image/')
def image(name):
    with open(os.path.join(app.config['SAVEPIC'],name),'rb') as f:
        resp=Response(f.read(),mimetype="image/jpeg")
    return resp
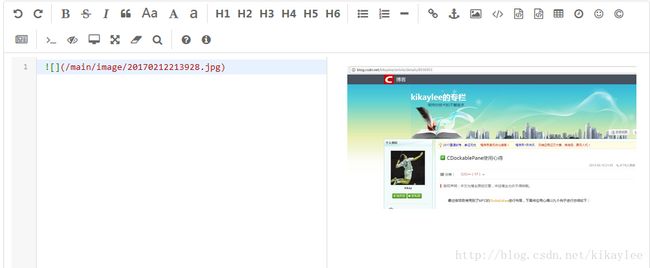
效果如下:
同时图片也被保存到服务器了。
这样,我们就可以构建一个比较完整的Markdown编辑器了。先就讲到这里吧,以后有时间在慢慢改进!


