原文可在我博客上看,会有目录结构:http://data2art.com/iOSDevRecord.html
半个月前,完成了个人App的2.0版本,也在普天同庆的六一儿童节这天上架了。因为是个人开发,很多实现都是边探索边做。现在完成之后再回顾,发现自己走了些弯路。所以写了这篇总结,概览了从想法、设计、开发到最终发布的过程。希望读者参考本文,可以少走一些弯路;另外,本文也给列出了开发中具体思路和资源列表。
知识从何而来?
Apple的知识又是从何而来?是哪些人在创造这些机制,又是哪些人在传播这些机制?为什么要这样设计呢?为什么要这样编码呢?
iOS开发是在询问什么问题?技术的实现,究竟是在问什么?为什么要这样做?那样做?评价的标准为何?
资源
我在开发过程中常使用的资源:
- 相关书籍
寻找大致实现方向,我有庞大的电子书库,在此感谢学校提供的优质资源。很多书,都会先检视阅读一遍,这样心中有地图,开发时就可快速定位。
书本是理论的简单系统化表示。
- Apple 官方文档 视频 示例代码
系统化的概览,具体可使用内容的查找。
- StackOverflow
主要是查找一些细节问题。
- Github上的相关项目
看具体的代码实现,分析不同实现的优缺点,取其精华去其糟粕。
- Raywenderlich
可以很快上手入门新知识点。
- 博客
- 论文
对于想深入理解的知识,会参考相关论文。
搜索时使用google或者bing,绝对可以节约你的时间。时间即是生命。
我选择的简单是易用SS,我的推介链接。
想法
- 目标:简洁优雅易用节拍器
- 用户:学习乐器演奏的群体
- 使用场景:乐器演奏
- 做什么:小而美。好看,好用,占内存小。
- 不做什么:不做专业程度极高,功能十分完备的节拍器。
设计
我一般使用Sketch进行快速原型设计。
同时思考,是否可实现?
开发
我使用的是coding的仓库,git进行版本管理。
主要介绍2.0版本中的一些开发过程。
你可以免费下载,看看有哪些基本功能。
多主题设计
配色
参考网站:
- https://coolors.co/browser
- http://uigradients.com/#Jonquil
- http://www.rocket-design.fr/color-template/
- http://www.shejidaren.com/examples/tools/color-scheme/
- http://www.shejidaren.com/mbe-style.html
- http://www.peise.net/
扁平化颜色库:
Chameleonis a lightweight, yet powerful, color framework for iOS (Objective-C & Swift). It is built on the idea that software applications should function effortlessly while simultaneously maintaining their beautiful interfaces.
https://github.com/ViccAlexander/Chameleon
多主题实现
OC版:
https://github.com/Draveness/DKNightVersion
Swift版:
http://www.jianshu.com/p/a5cd0176bcf5
https://github.com/zhangbozhb/ChameleonSwift
- theme
- view
部分配色表:
Name | defaultColor | SeaColor | GreenColor | CoffeeColor|
------- | -------| ------- | ------- | ------- | ------- |
backgroundColor| | | | |
BlockColor | rgba(184, 184, 184, 1)| #D5EBE9|#F4ADA2|#D4C38F|
BlockColorFill| rgba(251, 251, 251, 1)|#F5FAF9|#F07973|#EFDFAF|
BlockBdrColor| rgba(57, 57, 57, 1)|#38465F|#38465F|#272727|
shadowColor| rgba(41, 44, 48, 1)|#38465F|#A0785C|#5D4531|
Sliderstart| rgba(184, 184, 184, 1)|#F5FAF9|#F2F2F2|#88DEF2|
Sliderend| rgba(185, 200, 245, 1)|#B0D5C2|#F4ADA2|#FAD199|
SliderBackground| Black|#364960|#3A4C39|#2B2B2B|
nameIncDecTextColor|Black|White|Black|Black|
labelColor|Black|white|Black|Black|
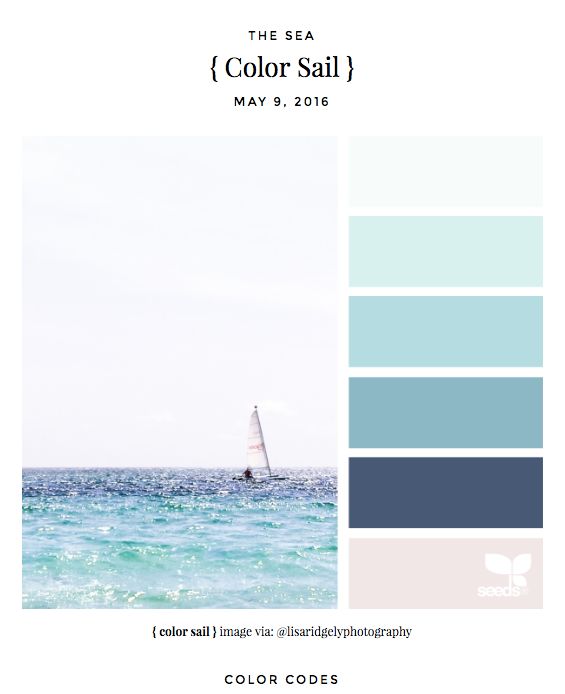
根据图片配色举例:
seaColor:
代码实现:
- Struct方式
  public protocol YXYTheme {
    // MetreView
    var blockColor              : UIColor { get set }
    var blockFillColor          : UIColor { get set }
    var blockBdrColor           : UIColor { get set }
    var blockShadowColor        : UIColor { get set }
    // View
    var backgroundColor         : UIColor { get set }
    var nameIncDecTextColor     : UIColor { get set }
    var labelColor              : UIColor { get set }
    var incAndDecLabelTextColor : UIColor { get set }
    // Slider
    var sliderBackgroundColor   : UIColor { get set }
    var sliderStartColor        : UIColor { get set }
    var sliderEndColor          : UIColor { get set }
    var sliderHandleColor       : UIColor { get set }
}

struct DarkTheme : YXYTheme, AnyObjectConvertible {
    var blockColor              = UIColor(red:0.72, green:0.72, blue:0.72, alpha:1)
    var blockFillColor          = UIColor(red:0.95, green:0.95, blue:0.95, alpha:1)
    var blockBdrColor           = UIColor(red:0.21, green:0.21, blue:0.21, alpha:1)
    var blockShadowColor        = UIColor(red:0.16, green:0.17, blue:0.19, alpha:1)
    var backgroundColor         = UIColor(red:0.34, green:0.34, blue:0.34, alpha:1)
    var nameIncDecTextColor     = UIColor(red:0.95, green:0.95, blue:0.95, alpha:1)

    var labelColor              = UIColor.whiteColor()
    var incAndDecLabelTextColor = UIColor.whiteColor()
    var sliderBackgroundColor   = UIColor.lightGrayColor()
    var sliderStartColor        = UIColor.grayColor()
    var sliderEndColor          = UIColor.greenColor()
    var sliderHandleColor       = UIColor.greenColor()
}
- class 方式
//
//  LightTheme.swift
//  GuitarFere
//
//  Created by youxinyu on 16/3/10.
//  Copyright © 2016年 yogayu.github.io. All rights reserved.
//

import UIKit

class LightTheme : NSObject, YXYTheme, AnyObjectConvertible
{
    var blockColor              = UIColor(red:0.72, green:0.72, blue:0.72, alpha:1)
    var blockFillColor          = UIColor(red:0.95, green:0.95, blue:0.95, alpha:1)
    var blockBdrColor           = UIColor(red:0.21, green:0.21, blue:0.21, alpha:1)
    var blockShadowColor        = UIColor(red:0.16, green:0.17, blue:0.19, alpha:1)
    var backgroundColor         = UIColor.whiteColor()
    var nameIncDecTextColor     = UIColor(red:0.95, green:0.95, blue:0.95, alpha:1)
    var labelColor              = UIColor.whiteColor()
    var incAndDecLabelTextColor = UIColor.whiteColor()
    var sliderBackgroundColor   = UIColor.lightGrayColor()
    var sliderStartColor        = UIColor.grayColor()
    var sliderEndColor          = UIColor.redColor()
    var sliderHandleColor       = UIColor.greenColor()

   init( blockColor:UIColor, blockFillColor:UIColor, blockBdrColor:UIColor, blockShadowColor:UIColor,
     backgroundColor:UIColor, nameIncDecTextColor:UIColor, labelColor:UIColor, incAndDecLabelTextColor:UIColor,
     sliderBackgroundColor:UIColor, sliderStartColor:UIColor, sliderEndColor:UIColor, sliderHandleColor:UIColor){

       self.blockColor = blockColor
       self.blockFillColor = blockFillColor
       self.blockBdrColor = blockBdrColor
       self.blockShadowColor = blockShadowColor
       self.backgroundColor = backgroundColor
       self.nameIncDecTextColor = nameIncDecTextColor
       self.labelColor = labelColor
       self.incAndDecLabelTextColor = incAndDecLabelTextColor
       self.sliderBackgroundColor = sliderBackgroundColor
       self.sliderStartColor = sliderStartColor
       self.sliderEndColor = sliderEndColor
       self.sliderHandleColor = sliderHandleColor

    }
}
本地化
参见我之前博文:
http://www.jianshu.com/p/782aaf3bf7da
或
http://azureyu.com/2016-05-14-iOS-Localizable.html
保持用户设置
 let userDefaultsLastTempoKey = "DefaultsTempoKey"

 let defaults = NSUserDefaults.standardUserDefaults()

 func saveTempo(tempo:Int){
     defaults.setInteger(tempo, forKey: userDefaultsLastTempoKey)
     defaults.synchronize()
 }
读取:
 func initialTempo(){
      let savedTempo = NSUserDefaults.standardUserDefaults().objectForKey( userDefaultsLastTempoKey) as? Int
      if let tempo = savedTempo {
          metronome.tempo = tempo
          tempoLabel.text = "\(metronome.tempo)"
      }else {
          tempoLabel.text = "\(metronome.tempo)"
      }
Struct如何转为AnyObject?
参考:
https://github.com/tarunon/AnyObjectConvertible
class Box {
    let value: T
    init(value: T) {
    self.value = value
 }
}

  NSNotificationCenter.defaultCenter().postNotificationName("foo", object: Box(value: YourOwnStruct())) // OK
But Box
let value = (notification.object as? Box)?.value
You can cast your struct/enum directory if implement AnyObjectConvertible at that type.
extension YourOwnStruct: AnyObjectConvertible {}
 NSNotificationCenter.defaultCenter().postNotificationName("foo", object: YourOwnStruct()) // OK

  let value = notification.object as? YourOw
存储用户当前主题设置
初始显示,无法使用函数更改,为什么?
解决:因为存的内容不对,主题是一个Struct或Class。
   func initTheme() {
          let savedTheme = retrieveTheme()

          if let theme = savedTheme {
              UIApplication.ch_switchTheme(lightTheme)
          }else{
              // ...
          }
      }
转化Struct为AnyObject之后存储:AnyObject, BOX(Theme)
取:AnyObject。传给UIApplication.ch_switchTheme(theme)的是YXYTheme,需要将AnyObject转为YXYTheme。
GuitarFere[20074:736310] *** Terminating app due to uncaught exception 'NSInvalidArgumentException', reason: 'Attempt to insert non-property list object GuitarFere.Box
The code you posted tries to save an array of custom objects to NSUserDefaults. You can't do that. Implementing the NSCoding methods doesn't help. You can only store things like NSArray, NSDictionary, NSString, NSData, NSNumber, and NSDate in NSUserDefaults.
You need to convert the object to NSData (like you have in some of the code) and store that NSData in NSUserDefaults. You can even store an NSArray of NSData if you need to.
When you read back the array you need to unarchive the NSData to get back your BC_Personobjects.
http://stackoverflow.com/questions/19720611/attempt-to-set-a-non-property-list-object-as-an-nsuserdefaults
   func saveTheme(theme:LightTheme){

   //    let archivedObject = NSKeyedArchiver.archivedDataWithRootObject((theme as? NSObject)!)
       let archivedObject = NSKeyedArchiver.archiveRootObject(theme as NSObject, toFile: userDefaultsLastThemeKey)

       defaults.setObject(archivedObject, forKey: userDefaultsLastThemeKey)
       defaults.synchronize()
   }
存:
    func saveTheme(theme:LightTheme){

    //    let archivedObject = NSKeyedArchiver.archivedDataWithRootObject((theme as? NSObject)!)
        let archivedObject = NSKeyedArchiver.archiveRootObject(theme as NSObject, toFile: userDefaultsLastThemeKey)

        defaults.setObject(archivedObject, forKey: userDefaultsLastThemeKey)
        defaults.synchronize()
    }
上面解决方式还是有问题。
突然想到,不用保存主题本身,直接保存是第几个(Int)主题就好。
问题就这样解决了。
摇一摇换肤
   override func canBecomeFirstResponder() -> Bool {
          return true
      }

override func motionBegan(motion: UIEventSubtype, withEvent event: UIEvent?) {
    if(event?.subtype == UIEventSubtype.MotionShake) {
        randomTheme()
        print("shacked")
        self.setNeedsStatusBarAppearanceUpdate()
    }
}

func randomTheme() {
    let max = themes.count - 1
    let index = randomIn(min: 0, max: max)
    let randomTheme = themes[index]
    saveTheme(index)
    UIApplication.ch_switchTheme(randomTheme)
}
钟摆绘制
主要使用图像绘制。
例如绘制三角形:
func drawTriangle()  {
     //1.获得图形上下文
     let context = UIGraphicsGetCurrentContext()

     //绘制三角形
     let height = self.frame.height
     let width = self.frame.width

     CGContextMoveToPoint(context, 0, 0)
     CGContextAddLineToPoint(context, width, height/2)
     CGContextAddLineToPoint(context, 0, height)

     //关闭路径,闭环,(连接起点和最后一个点)
     powerOffColor.setFill()
     CGContextClosePath(context)
     //显示在view上
     CGContextFillPath(context)
 }
侧边菜单栏
查看Github上相关实现,一开始选择的是SlideMenuControllerSwift,后来决定更改为自定义,使用更简洁的方式。
分离
分离之前的SliderMeanController,再添加动画。
- MainViewController
remove:
  extension MainViewController:SlideMenuControllerDelegate{

   func leftWillOpen() {
      print("SlideMenuControllerDelegate: leftWillOpen")
       OnceOpened = true
   }

   func leftDidOpen() {
       print("SlideMenuControllerDelegate: leftDidOpen")
   }

   func leftWillClose() {
       print("SlideMenuControllerDelegate: leftWillClose")

       noteLabel.text = "\(metronome.noteNum)"
       metreLabel.text = "\(metronome.metreView.numMetre)"
       tempoLabel.text = "\(metronome.tempo)"
       tempoItalianName(italianName)
       initialHandelPoint()
       metronome.metreView.setNeedsDisplay()

       print("subview count:")
       print(view.subviews.count)
       self.ball.setNeedsDisplay()
   }

   func leftDidClose() {
       print("SlideMenuControllerDelegate: leftDidClose")
   }
   }
- LeftViewController
remove:
wiilappear:
initialMenu()
class里面:
      weak var delegate: LeftMenuProtocol?

     func initialMenu() {

      let storyboard = UIStoryboard(name: "Main", bundle: nil)
      let nonMenuController = storyboard.instantiateViewControllerWithIdentifier("purchaseViewController") as! PurchaseViewController
      nonMenuController.delegate = self
      self.nonMenuViewController = UINavigationController(rootViewController: nonMenuController)
       }
class 前:
      enum LeftMenu: Int {
            case Main = 0
        }
        protocol LeftMenuProtocol : class {
            func changeViewController(menu: LeftMenu)
        }

       class extension:

        // MARK: - LeftMenuProtocol
        extension LeftViewController: LeftMenuProtocol{
            func changeViewController(menu: LeftMenu) {
                switch menu {
                case .Main:
                    self.slideMenuController()?.changeMainViewController(self.mainViewController,          close: true)
                }
            }
        }
alert 转场:
        self.slideMenuController()?.
        changeMainViewController(self.nonMenuViewController, close: true)
App delegate里面:
        private func createMenuView() {

      // create viewController code...
      let storyboard = UIStoryboard(name: "Main", bundle: nil)

      let mainViewController = storyboard.instantiateViewControllerWithIdentifier("MainViewController") as! MainViewController
      let leftViewController = storyboard.instantiateViewControllerWithIdentifier("LeftViewController") as! LeftViewController

      let mvc: UINavigationController = UINavigationController(rootViewController: mainViewController)

      UINavigationBar.appearance().tintColor = UIColor(hex: "689F38")

      leftViewController.mainViewController = mvc

      let slideMenuController = ExSlideMenuController(mainViewController:mvc, leftMenuViewController: leftViewController)
      slideMenuController.automaticallyAdjustsScrollViewInsets = true
      slideMenuController.delegate = mainViewController
      //        self.window?.backgroundColor = UIColor(red: 236.0, green: 238.0, blue: 241.0, alpha: 1.0)
      self.window?.rootViewController = slideMenuController
      self.window?.makeKeyAndVisible()
  }
purchaseViewCont:
class 里面:
        weak var delegate: LeftMenuProtocol?

        func done() {
      delegate?.changeViewController(LeftMenu.Main)
  }


        override func viewWillAppear(animated: Bool) {
      super.viewWillAppear(animated)
      self.removeNavigationBarItem()

      let doneTitle = NSLocalizedString("doneTitle", comment: "Purchase done title")
      let rightButton: UIBarButtonItem = UIBarButtonItem(title: doneTitle, style: .Plain, target: self, action: #selector(done))
      navigationItem.rightBarButtonItem = rightButton
动画Spring Animation
我使用的是MengTo的Spring动画库。
内购
技术参考:
https://developer.apple.com/in-app-purchase/
https://www.raywenderlich.com/122144/in-app-purchase-tutorial
https://www.raywenderlich.com/121218/video-tutorial-in-app-purchase-series-introduction
https://github.com/mattt/Ono
https://github.com/awseeley/Swift-In-App-Purchase-Tutorial
页面实现:
How to make a beautiful page for the purchase?
使用Collection View,使用卡片展示。
声音
Where to find the good sound?
推荐网站:
- https://www.freesound.org/people/toiletrolltube/sounds/345691/
- http://www.findsounds.com/ISAPI/search.dll?keywords=drum+solo
声音下载之后需要自己进行一些细化处理,推荐Sound Studio,它小而简洁,进行简单的处理足够了。
后台播放
参考书籍:iOS8 Programming
Appledelegate:
      func application(application: UIApplication,didFinishLaunchingWithOptions launchOptions: [NSObject: AnyObject]?) -> Bool  {

    // paly on the background
    _ = try? AVAudioSession.sharedInstance().setCategory(AVAudioSessionCategoryAmbient, withOptions: [])
    // others
  }

      func applicationWillResignActive(application: UIApplication) {

    _ = try? AVAudioSession.sharedInstance().setActive(true, withOptions: [])
}

func applicationDidBecomeActive(application: UIApplication) {

    _ = try? AVAudioSession.sharedInstance().setActive(true, withOptions: [])
  }
细节问题
问题:
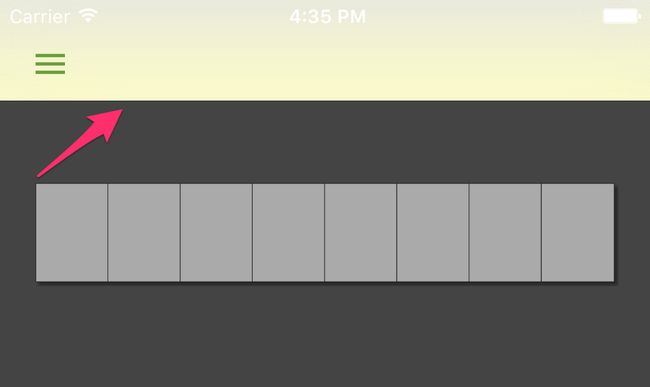
为什么nav颜色无法更改,感觉蒙上了一层影?
解决:
参考:
- Swift: https://github.com/DanisFabric/RainbowNavigation
p.p1 {margin: 0.0px 0.0px 0.0px 60.0px; font: 16.0px 'Helvetica Neue'; color: #999999}p.p2 {margin: 0.0px 0.0px 0.0px 60.0px; font: 16.0px 'Helvetica Neue'; color: #999999; min-height: 18.0px}span.s1 {font: 16.0px 'PingFang SC'}span.Apple-tab-span {white-space:pre}
Swift: https://github.com/DanisFabric/RainbowNavigation
 //
 //  UINavigationBarExtension.swift
 //  GuitarFere
 //
 //  Created by youxinyu on 16/5/9.
 //  Copyright © 2016年 yogayu.github.io. All rights reserved.
 //

 import UIKit

 private var kBackgroundViewKey = "kBackgroundViewKey"
 private var kStatusBarMaskKey  = "kStatusBarMaskKey"

 extension UINavigationBar {

     public func df_setStatusBarMaskColor(color: UIColor) {
         if statusBarMask == nil {
             statusBarMask = UIView(frame: CGRect(x: 0, y: -20, width: UIScreen.mainScreen().bounds.width, height: 20))
             statusBarMask?.autoresizingMask = [.FlexibleWidth,.FlexibleHeight]
             if let tempBackgroundView = backgroundView {
                 insertSubview(statusBarMask!, aboveSubview: tempBackgroundView)
             }else {
                 insertSubview(statusBarMask!, atIndex: 0)
             }
         }
         statusBarMask?.backgroundColor = color
     }
     public func df_setBackgroundColor(color: UIColor) {
         if backgroundView == nil {
             setBackgroundImage(UIImage(), forBarMetrics: UIBarMetrics.Default)
             shadowImage = UIImage()
             backgroundView = UIView(frame: CGRect(x: 0, y: -20, width: UIScreen.mainScreen().bounds.width, height: 64))
             backgroundView?.userInteractionEnabled = false
             backgroundView?.autoresizingMask = [.FlexibleHeight,.FlexibleWidth]
             insertSubview(backgroundView!, atIndex: 0)
         }
         backgroundView?.backgroundColor = color

     }

     public func df_reset() {
         setBackgroundImage(nil, forBarMetrics: .Default)
         shadowImage = nil

         backgroundView?.removeFromSuperview()
         backgroundView = nil
     }

     // MARK: Properties
     private var backgroundView:UIView? {
         get {
             return objc_getAssociatedObject(self, &kBackgroundViewKey) as? UIView
         }
         set {
             objc_setAssociatedObject(self, &kBackgroundViewKey, newValue, .OBJC_ASSOCIATION_RETAIN)

         }
     }
     private var statusBarMask:UIView? {
         get {
             return objc_getAssociatedObject(self, &kStatusBarMaskKey) as? UIView
         }
         set {
             objc_setAssociatedObject(self, &kStatusBarMaskKey, newValue, .OBJC_ASSOCIATION_RETAIN)
         }
     }
}
在MainViewController中添加:
self.navigationController?.navigationBar.df_setBackgroundColor(UIColor.clearColor())
为什么点击按钮之后,图片位置会改变?
改变UIButton的image之后,它的位置也会改变,需要将之前的先存储,改变图片之后再赋给它。
CGPoint currentLoc = self.imageButton.center;
[self.imageButton setImage:[UIImage imageNamed:@"face"] forState:UIControlStateNormal];
self.imageButton.center = currentLoc;
好像不是这个问题。我把外面的View去掉一层就OK了。
UIScrollerView
UIScrollerView的contentSize是取决于其子视图的,所以一定要通过子视图来限制其大小。
UIScrollerView需要探索的地方还很多,比如像相册这样的应用,是两个scrollerView,一个用来zoom,一个用来左右切换。
测试
- TestFlight测试 (外部测试需审核)
- 其他第三方测试 (无需审核)
发布
- 如何取好App名字?
- 如何写好App介绍?
- 制作App简短视频?
网站
因为也做过一些网站,用Bootstrap写过前端,PHP写过后台。基本的HTML/CSS,JS都会些,所以做网站对我来说没什么问题。不过,你不需要那么多知识,你可以在直接使用模板,再进行修改即可。
- 选择模板
- 准备内容素材(图片、文字、链接)
最终效果:http://azureyu.com/pulse
截图
素材:
- 在设备上运行,同时按home+电源键进行截图
- 或者使用模拟器运行之后按Command+S,即可保持截图
AppStore介绍截图制作:
- 使用Sketch
- 推荐模板:https://github.com/LaunchKit/SketchToAppStore
- 思考介绍内容,编辑,修改,再修改,再修改
- 导出
视频
录制步骤:
- 连接设备
- 打开QuickTime Player
- 进行文件影片录制
- 使用iMovie进行剪辑,iMove中可直接新建应用商店预览视频。
Tips:
- 视频上传需使用Safair浏览器,最好用iMovie中直接选择导出为应用商店预览视频。这样不会出现视屏帧数太多等问题。
- 如何旋转视频?使用QuickTime Player打开,然后在菜单中选择编辑,向左选择即可。
最好将所有素材放在同一个文件夹中,按照一定的命名方式进行整理。
上传
- https://developer.apple.com/app-store/cn/
- https://itunespartner.apple.com/cn/apps/videos
- https://app.grammarly.com/ 避免英语文法错误
介绍
English:
Pulse is a clean and beautiful Metronome. It helps you better your music feeling and skill. With Pulse, your play time will be much more joyful.
Features:
- Colorful Themes. There are ten attractive themes that you can choose: night, tree, coffee, pink, azure, blue, purple...... make your play time more colorful.
- Nice Sounds. You can hear the different kinds of sounds: wood, ping, claves, triangle, shaker, blocks......choice the one suit your ear.
- Save setlist. You can save the setlist that you often play, it's easy to use.
- Swing. You can visualize the time passing, see the movements. In Pulse, there are 7 swing types: none, small, medium, large, ball, square, diamond. It always has the one you want.
Others:
- Play on the lock mood and background.
- Universal app, available on you iPod touch、iPhone and iPad.
Support :
- E-mail: [email protected]
- Website: http://azureyu.com/pulse
- Twitter: https://twitter.com/yxydiscovery
- Weibo: http://weibo.com/yxydiscovery
中文:
律动是一款简洁而美观的节拍器。它能够帮助你提升乐感和技能。缤纷的主题,悦耳的音色,可视化时间流逝的钟摆都能让你的练习更为多彩。
特点:
- 十种主题缤纷主题任你选择:碳黑、咖啡、森林、粉红、蔚蓝、紫藤、翠绿等。
- 十余种悦耳音色舒适双耳:实木、沙铃、三角铁、铃环、木鱼、鼓、钢琴、铁、铛等。
- 一键保存演出列表:一键保持你的演出列表,节约你的时间,方便你的练习。
- 7种钟摆模式:无, 小, 中, 长, 球, 方, 菱。可视化时间流逝的最佳选择。
其他:
- 支持锁屏播放和后台播放
- 支持屏幕常量
- 支持所有iPod Touch、iPhone和iPad设备
反馈:
- E-mail: [email protected]
- Website: http://azureyu.com/pulse
- Twitter: https://twitter.com/yxydiscovery
- Weibo: http://weibo.com/yxydiscovery
被拒5-24
版本上传错误。
再次被拒
Apple审核团队说App会在iPad Air下点击菜单按钮会crash,可是测试了很多次之后,我都没能重现crash,和他们沟通无果。等了两天,我在代码原封不动的情况下,重新build了一个版本,再上传,就通过了。
审核通过 6-1
Market
- 产品推荐网站 :例如36NEXT,MindStore之类。
- Weibo Twitter BBS
用户会去哪些地方?
麻雀虽小,五脏俱全。虽只是一个简单的节拍器,也没用到复杂的算法和很难的技术。
但学习本就是从易到难的吧。重要的是有想法并去实现,然后不断去完善。
作者「AzureYu」于 2016/6/2 更新本文
文章声明:自由转载-非商用-非衍生-保持署名 | BY-NC-SA


