⑬HTML5 canvas的一系列使用方法(1)
Html5
- canvas初次使用
- 绘制矩形
- 绘制路径(三角形为例)
- lineCap、save、restore
- 例:用canvas实现页面签名
- 绘制圆形
- 贝塞尔
- 变换
- 例:时钟
本人是个新手,写下博客用于自我复习、自我总结。
如有错误之处,请各位大佬指出。
学习资料来源于:尚硅谷
canvas初次使用
什么是canvas(画布) ?
是 HTML5 新增的元素,可用于通过使用JavaScript中的脚本来绘制图形,创建动画。我们可以使用标签来定义一个canvas元素。
使用标签时,建议要成对出现,不要使用闭合的形式。
在使用时,定义一些替代内容也是必要的。因为某些较老的浏览器(尤其是IE9之前的IE浏览器),不支持canvas。那可以预料到的是,在这些较老的浏览器上你应该要给用户展示些替代内容。比较好的点就是,这个替代内容,在支持的浏览器中将会忽略这部分内容,然后正常渲染canvas。不支持的浏览器才会显示替代内容。
canvas标签中只有两个属性:width和height。这些都是可选的。
当没有设置宽度和高度的时候,canvas会初始化width: 300px 和 height:150px。
需要说明的是canvas的宽高:
如果是在html属性设置width height时,只影响画布本身不影画布内容
如果是在css属性设置width height时,不但会影响画布本身的高宽,还会使画布中的内容等比例缩放(缩放参照于画布默认的尺寸)
元素只是创造了一个固定大小的画布,要想在它上面去绘制内容,我们需要找到它的渲染上下文。 元素有一个叫做 getContext() 的方法,这个方法是用来获得渲染上下文和它的绘画功能。
getContext()只有一个参数:上下文的格式
获取方式:
var canvas = document.getElementById('box');
if (canvas.getContext){
	var ctx = canvas.getContext('2d');
}
相关代码:
<html>
	<head>
		<meta charset="UTF-8">
		<title>title>
		<style type="text/css">
			*{
				margin: 0;
				padding: 0;
			}
			html,body{
				height: 100%;
				overflow: hidden;
			}
			body{
				background: pink;
			}
			#test{
				background: gray;
				position: absolute;
				left: 0;
				top: 0;
				right: 0;
				bottom: 0;
				margin: auto;
			}
		style>
	head>
	<body>
		<canvas id="test" width="300" height="300">
			<span>您的浏览器不支持画布元素span>
		canvas>
	body>
	<script type="text/javascript">
		window.onload=function(){
			//拿到画布
			//var canvas = document.querySelector("#test");
			var canvas = test;
			if(canvas.getContext){
				var ctx = canvas.getContext("2d");
			}
		}
	script>
html>
绘制矩形
元素canvas只支持一种原生的图形绘制:矩形。所有其他的图形的绘制都至少需要生成一条路径。
canvas提供了三种方法:
绘制一个填充的矩形(填充色默认为黑色)
fillRect(x, y, width, height)
绘制一个矩形的边框(默认边框为:一像素实心黑色)
strokeRect(x, y, width, height)
清除指定矩形区域,让清除部分完全透明。
clearRect(x, y, width, height)
x与y指定了在canvas画布上所绘制的矩形的左上角(相对于原点)的坐标。
width和height设置矩形的尺寸。
(存在边框的话,边框会在width上占据一个边框的宽度,height同理)
canvas在渲染矩形边框时,需要注意:边框宽度是平均分在偏移位置的两侧的。
比如context.strokeRect(10,10,50,50),边框会渲染在10.5 和 9.5之间。但是浏览器不让一个像素只用自己的一半,相当于边框会渲染在9到11之间。
因此,context.strokeRect(10.5,10.5,50,50),边框才会渲染在10到11之间。
<html>
	<head>
		<meta charset="UTF-8">
		<title>title>
		<style type="text/css">
			*{
				margin: 0;
				padding: 0;
			}
			html,body{
				height: 100%;
				overflow: hidden;
			}
			body{
				background: pink;
			}
			#test{
				background: gray;
				position: absolute;
				left: 0;
				top: 0;
				right: 0;
				bottom: 0;
				margin: auto;
			}
		style>
	head>
	<body>
		<canvas id="test" width="300" height="300">
			<span>您的浏览器不支持画布元素span>
		canvas>
	body>
	<script type="text/javascript">
		window.onload=function(){
			//拿到画布
			var canvas = test;
			if(canvas.getContext){
				var ctx = canvas.getContext("2d");
				//注意不加单位
				//填充的矩形
				ctx.fillRect(0,0,100,100)
				//带边框的矩形
				//如果x,y设置为100  : 边框占据的是99.5到100.5
				//如果x,y设置为100.5: 边框占据的才是100到101
				ctx.strokeRect(100.5,100.5,100,100)
			}
		}
	script>
html>
fillStyle 设置图形的填充颜色。
strokeStyle 设置图形轮廓的颜色。默认情况下,线条和填充颜色都是黑色。
lineWidth 这个属性设置当前绘线的粗细。属性值必须为正数, 0、 负数、 Infinity 和 NaN 会被忽略。它的默认值是1.0。
lineJoin设定线条与线条间接合处的样式(默认是 miter)
- round : 圆角
- bevel : 斜角
- miter : 直角
<html>
	<head>
		<meta charset="UTF-8">
		<title>title>
		<style type="text/css">
			*{
				margin: 0;
				padding: 0;
			}
			html,body{
				height: 100%;
				overflow: hidden;
			}
			body{
				background: pink;
			}
			#test{
				background: gray;
				position: absolute;
				left: 0;
				top: 0;
				right: 0;
				bottom: 0;
				margin: auto;
			}
		style>
	head>
	<body>
		<canvas id="test" width="300" height="300">
			<span>您的浏览器不支持画布元素span>
		canvas>
	body>
	<script type="text/javascript">
		window.onload=function(){
			//拿到画布
			var canvas = test;
			if(canvas.getContext){
				var ctx = canvas.getContext("2d");

				ctx.fillStyle="deeppink";
				ctx.strokeStyle="pink";
				ctx.lineWidth=10;
				ctx.lineJoin="round";
				ctx.shadowBlur=10;
				ctx.shadowColor="pink";

				ctx.fillRect(100,100,100,100)
				ctx.strokeRect(100.5,100.5,100,100)
			}
		}
	script>
html>
绘制路径(三角形为例)
图形的基本元素是路径。路径是通过不同颜色和宽度的线段或曲线相连形成的不同形状的点的集合。
步骤:
1. 首先,你需要创建路径起始点。
2. 然后你使用画图命令去画出路径
3. 之后你把路径封闭。
4. 一旦路径生成,你就能通过描边或填充路径区域来渲染图形。
比如要绘制一个图形会涉及到如下方法:
beginPath()
新建一条路径,生成之后,图形绘制命令被指向到路径上准备生成路径。
生成路径的第一步叫做beginPath()。本质上,路径是由很多子路径构成,这些子路径都是在一个列表中,所有的子路径(线、弧形等等)构成图形。而每次这个方法调用之后,列表清空重置,然后我们就可以重新绘制新的图形。
moveTo(x, y)
将笔触移动到指定的坐标x以及y上(只是设置起点,移动过程不会绘图)
当canvas初始化或者beginPath()调用后,你通常会使用moveTo()函数设置起点
lineTo(x, y)
将笔触移动到指定的坐标x以及y上(移动过程会绘图)
绘制一条从当前位置到指定x以及y位置的直线。
stroke()
通过线条来绘制图形轮廓。
fill()
通过填充路径的内容区域生成实心的图形。
closePath()
闭合路径之后图形绘制命令又重新指向到上下文中。
闭合路径closePath()不是必需的。这个方法会通过绘制一条从当前点到开始点的直线来闭合图形。如果图形已经闭合,即当前点为开始点,该函数就什么也不做。
除此以外,当你调用fill()函数时,所有没有闭合的形状都会自动闭合,所以你也可以不去调用closePath()函数。但是调用stroke()时不会自动闭合
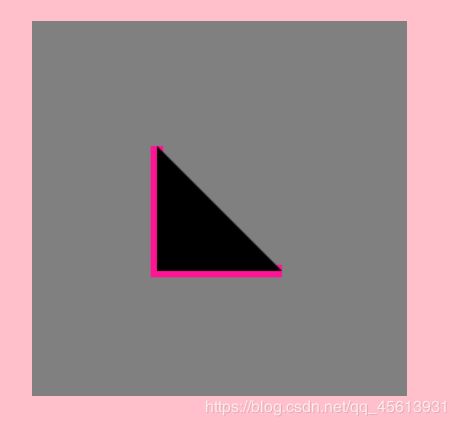
以三角形为例:
<html>
	<head>
		<meta charset="UTF-8">
		<title>title>
		<style type="text/css">
			*{
				margin: 0;
				padding: 0;
			}
			html,body{
				height: 100%;
				overflow: hidden;
			}
			body{
				background: pink;
			}
			#test{
				background: gray;
				position: absolute;
				left: 0;
				top: 0;
				right: 0;
				bottom: 0;
				margin: auto;
			}
		style>
	head>
	<body>
		<canvas id="test" width="300" height="300">
			<span>您的浏览器不支持画布元素span>
		canvas>
	body>
	<script type="text/javascript">
		window.onload=function(){
			//拿到画布
			var canvas = test;
			if(canvas.getContext){
				var ctx = canvas.getContext("2d");
				// 设置轮廓颜色
				ctx.strokeStyle="deeppink";
				// 设置轮廓粗细
				ctx.lineWidth=10;
				// 画笔的起始点
				ctx.moveTo(100,100);
				// 进行绘制,但是画笔没有回到起始点
				ctx.lineTo(100,200);
				ctx.lineTo(200,200);

				// closePath 闭合路径
				// ctx.closePath();
				// stroke方法不会自动闭合路径
				ctx.stroke();
				// fill方法会自动闭合路径
				ctx.fill();
			}
		}
	script>
html>
<html>
	<head>
		<meta charset="UTF-8">
		<title>title>
		<style type="text/css">
			*{
				margin: 0;
				padding: 0;
			}
			html,body{
				height: 100%;
				overflow: hidden;
			}
			body{
				background: pink;
			}
			#test{
				background: gray;
				position: absolute;
				left: 0;
				top: 0;
				right: 0;
				bottom: 0;
				margin: auto;
			}
		style>
	head>
	<body>
		<canvas id="test" width="300" height="300">
			<span>您的浏览器不支持画布元素span>
		canvas>
	body>
	<script type="text/javascript">
		window.onload=function(){
			//拿到画布
			var canvas = test;
			if(canvas.getContext){
				var ctx = canvas.getContext("2d");

				ctx.strokeStyle="deeppink";
				ctx.fillStyle="green"
				ctx.lineWidth=4;

				ctx.moveTo(100,100);
				ctx.lineTo(100,200);
				ctx.lineTo(200,200);
				ctx.closePath();
				ctx.fill();

				//清空路径容器
				ctx.beginPath();

				ctx.moveTo(200,200);
				ctx.lineTo(200,300);
				ctx.lineTo(300,300);
				ctx.closePath();
				ctx.stroke();
			}
		}
	script>
html>
lineCap、save、restore
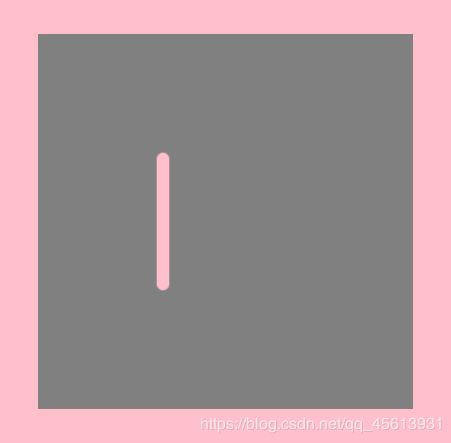
lineCap 是 Canvas 2D API 指定 如何绘制每一条线段末端的属性。
有3个可能的值,分别是:
butt :线段末端以方形结束。 (默认值)
round :线段末端以圆形结束
square:线段末端以方形结束,但是增加了一个宽度和线段相同,高度是线段厚度一半的矩形区域
<html>
	<head>
		<meta charset="UTF-8">
		<title>title>
		<style type="text/css">
			*{
				margin: 0;
				padding: 0;
			}
			html,body{
				height: 100%;
				overflow: hidden;
			}
			body{
				background: pink;
			}
			#test{
				background: gray;
				position: absolute;
				left: 0;
				top: 0;
				right: 0;
				bottom: 0;
				margin: auto;
			}
		style>
	head>
	<body>
		<canvas id="test" width="300" height="300">
			<span>您的浏览器不支持画布元素span>
		canvas>
	body>
	<script type="text/javascript">
		window.onload=function(){
			//拿到画布
			var canvas = test;
			if(canvas.getContext){
				var ctx = canvas.getContext("2d");

				ctx.strokeStyle="pink";
				ctx.lineWidth=10;
				ctx.lineCap="round";

				ctx.moveTo(100,100);
				ctx.lineTo(100,200);
				ctx.stroke();
			}
		}
	script>
html>
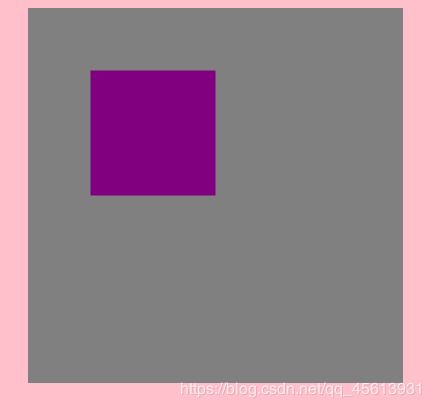
save() 是 Canvas 2D API 通过将当前状态放入栈中,保存 canvas 全部状态的方法。
保存到栈中的绘制状态有下面部分组成:
当前的变换矩阵、当前的剪切区域、当前的虚线列表、
以下属性当前的值: strokeStyle, fillStyle, lineWidth, lineCap, lineJoin…
restore() 是 Canvas 2D API 通过在绘图状态栈中弹出顶端的状态,将 canvas 恢复到最近的保存状态的方法。
如果没有保存状态,此方法不做任何改变。
<html>
	<head>
		<meta charset="UTF-8">
		<title>title>
		<style type="text/css">
			*{
				margin: 0;
				padding: 0;
			}
			html,body{
				height: 100%;
				overflow: hidden;
			}
			body{
				background: pink;
			}
			#test{
				background: gray;
				position: absolute;
				left: 0;
				top: 0;
				right: 0;
				bottom: 0;
				margin: auto;
			}
		style>
	head>
	<body>
		<canvas id="test" width="300" height="300">
			<span>您的浏览器不支持画布元素span>
		canvas>
	body>
	<script type="text/javascript">
		window.onload=function(){
			var canvas = test;
			if(canvas.getContext){
				var ctx = canvas.getContext("2d");

				ctx.save();
				ctx.fillStyle="purple";
				ctx.save();
				ctx.fillStyle="deeppink";
				ctx.fillStyle="blue";
				ctx.save();
				ctx.fillStyle="red";
				ctx.save();
				ctx.fillStyle="green";
				ctx.save();
				ctx.beginPath();

				ctx.restore();
				ctx.restore();
				ctx.restore();
				ctx.restore();
				ctx.fillRect(50,50,100,100);
			}
		}
	script>
html>
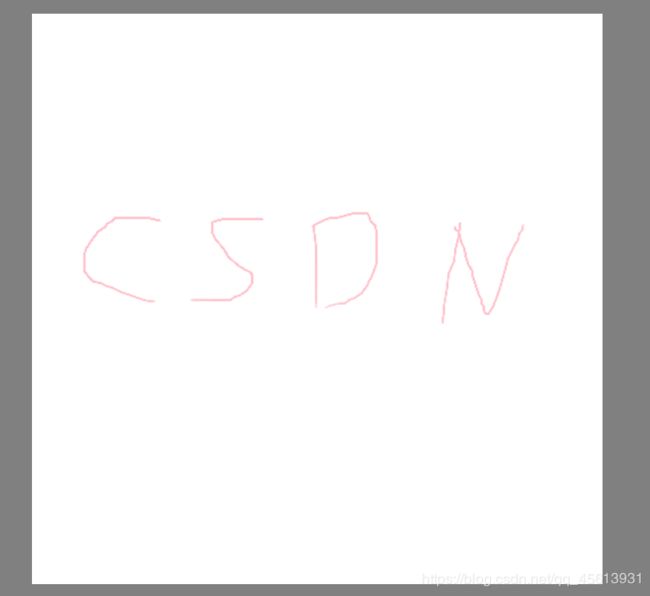
例:用canvas实现页面签名
<html>
	<head>
		<meta charset="UTF-8">
		<title>title>
		<style type="text/css">
			*{
				margin: 0;
				padding: 0;
			}
			body{
				background: gray;
			}
			#test{
				position: absolute;
				left: 0;
				right: 0;
				top: 0;
				bottom: 0;
				margin: auto;
				background:white;
			}
		style>
	head>
	<body>
		<canvas id="test" width="500" height="500">canvas>
	body>
	<script type="text/javascript">
		window.onload=function(){
			var canvas = test;
			if(canvas.getContext){
				var ctx = canvas.getContext("2d");
			}
			canvas.onmousedown = function(ev){
				ev = ev || window.event;
				// setCapture在属于当前线程的指定窗口里设置鼠标捕获
				if(canvas.setCapture){
					canvas.setCapture();
				}
				ctx.beginPath(); // 很重要 一定要清空路径
				ctx.moveTo(ev.clientX - canvas.offsetLeft, ev.clientY - canvas.offsetTop);
				document.onmousemove=function(ev){
					ctx.save();
					ctx.strokeStyle="pink";
					ev = ev || event;
					ctx.lineTo(ev.clientX - canvas.offsetLeft, ev.clientY - canvas.offsetTop);
					ctx.stroke();
					ctx.restore();
				}
				document.onmouseup=function(){
					document.onmousemove = document.onmouseup = null;
					if(document.releaseCapture){
						document.releaseCapture();
					}
				}
				return false;
			}
		}
	script>
html>
绘制圆形
角度与弧度的js表达式 radians=(Math.PI/180)*degrees
canvas绘制圆形用到的方法:
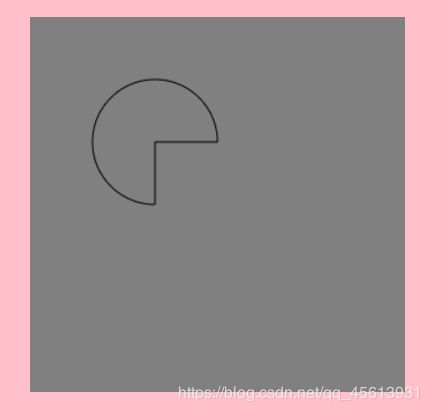
arc(x, y, radius, startAngle, endAngle, anticlockwise)
画一个以(x,y)为圆心的以radius为半径的圆弧(圆),从startAngle开始到endAngle结束(startAngle以及endAngle参数用弧度定义。这些都是以x轴为基准),按照anticlockwise给定的方向(默认为顺时针)来生成。
ture: 逆时针
false:顺时针
<html>
	<head>
		<meta charset="UTF-8">
		<title>title>
		<style type="text/css">
			*{
				margin: 0;
				padding: 0;
			}
			html,body{
				height: 100%;
				overflow: hidden;
			}
			body{
				background: pink;
			}
			#test{
				background: gray;
				position: absolute;
				left: 0;
				top: 0;
				right: 0;
				bottom: 0;
				margin: auto;
			}
		style>
	head>
	<body>
		<canvas id="test" width="300" height="300">
			<span>您的浏览器不支持画布元素span>
		canvas>
	body>
	<script type="text/javascript">
		window.onload=function(){
			var canvas = test;
			if(canvas.getContext){
				var ctx = canvas.getContext("2d");
				ctx.beginPath();
				ctx.moveTo(100,100);
				ctx.arc(100,100,50,0,90*Math.PI/180,true);
				ctx.closePath();
				ctx.stroke();
			}
		}
	script>
html>
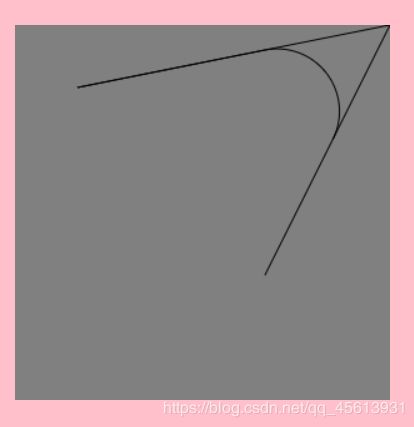
arcTo(x1, y1, x2, y2, radius)
根据给定的控制点和半径画一段圆弧
<html>
	<head>
		<meta charset="UTF-8">
		<title>title>
		<style type="text/css">
			*{
				margin: 0;
				padding: 0;
			}
			html,body{
				height: 100%;
				overflow: hidden;
			}
			body{
				background: pink;
			}
			#test{
				background: gray;
				position: absolute;
				left: 0;
				top: 0;
				right: 0;
				bottom: 0;
				margin: auto;
			}
		style>
	head>
	<body>
		<canvas id="test" width="300" height="300">
			<span>您的浏览器不支持画布元素span>
		canvas>
	body>
	<script type="text/javascript">
		window.onload=function(){
			var canvas = test;
			if(canvas.getContext){
				var ctx = canvas.getContext("2d");
				ctx.beginPath();
				ctx.moveTo(50,50);
				ctx.lineTo(300,0);
				ctx.lineTo(200,200);
				ctx.stroke();

				ctx.beginPath();
				ctx.moveTo(50,50)
				ctx.arcTo(300,0,200,200,50);
				ctx.stroke();
			}
		}
	script>
html>
贝塞尔
二次贝塞尔
quadraticCurveTo(cp1x, cp1y, x, y)
绘制二次贝塞尔曲线,cp1x,cp1y为一个控制点,x,y为结束点。
起始点为moveto时指定的点
三次贝塞尔
bezierCurveTo(cp1x, cp1y, cp2x, cp2y, x, y)
绘制三次贝塞尔曲线,cp1x,cp1y为控制点一,cp2x,cp2y为控制点二,x,y为结束点。
起始点为moveto时指定的点
  window.onload = function () {
    var canvas = test;
    if (canvas.getContext) {
      var ctx = canvas.getContext("2d");
      ctx.beginPath();
      ctx.moveTo(50, 50);
      ctx.lineTo(300, 0);
      ctx.lineTo(200, 200);
      ctx.stroke();

      ctx.beginPath();
      ctx.moveTo(50, 50)
      ctx.quadraticCurveTo(300, 0, 200, 200);
      ctx.stroke();
    }
  }
  window.onload = function () {
    var canvas = test;
    if (canvas.getContext) {
      var ctx = canvas.getContext("2d");
      ctx.beginPath();
      ctx.moveTo(50, 50);
      ctx.lineTo(300, 0);
      ctx.lineTo(0, 300);
      ctx.lineTo(300, 300);
      ctx.stroke();

      ctx.beginPath();
      ctx.moveTo(50, 50)
      ctx.bezierCurveTo(300, 0, 0, 300, 300, 300);
      ctx.stroke();
    }
  }
变换
canvas中的变换
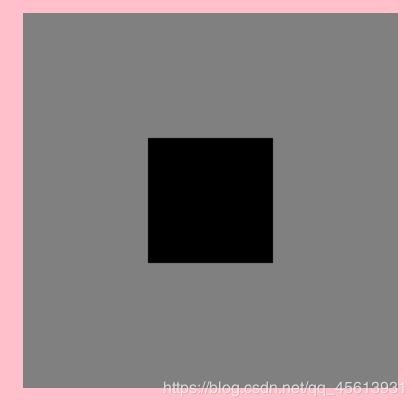
translate(x, y)
它用来移动canvas的原点到一个不同的位置。
translate 方法接受两个参数。x 是左右偏移量,y 是上下偏移量,
在canvas中translate是累加的
  window.onload = function () {
    var canvas = test;
    if (canvas.getContext) {
      var ctx = canvas.getContext("2d");
      /*ctx.translate(50,50);
      ctx.translate(50,50);*/
      ctx.translate(100, 100);
      ctx.beginPath();
      ctx.fillRect(0, 0, 100, 100);
    }
  }
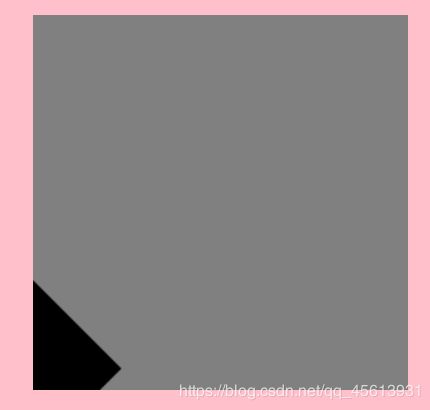
rotate(angle)
这个方法只接受一个参数:旋转的角度(angle),它是顺时针方向的,以弧度为单位的值。旋转的中心点始终是 canvas 的原点,如果要改变它,我们需要用到 translate 方法
在canvas中rotate也是累加的
  window.onload = function () {
    var canvas = test;
    if (canvas.getContext) {
      var ctx = canvas.getContext("2d");
      //ctx.translate(50,50);
      //ctx.rotate(45*Math.PI/180)
      ctx.rotate(22.1 * Math.PI / 180)
      ctx.rotate(22.9 * Math.PI / 180)
      ctx.beginPath();
      ctx.fillRect(150, 150, 100, 100);
    }
  }
scale(x, y)
scale 方法接受两个参数。x,y 分别是横轴和纵轴的缩放因子,它们都必须是正值。
值比 1.0 小表示缩小,比 1.0 大则表示放大,值为 1.0 时什么效果都没有。
缩放一般我们用它来增减图形在 canvas 中的像素数目,对形状,位图进行缩小或者放大。
在canvas中scale是累乘的
  window.onload = function () {
    var canvas = test;
    if (canvas.getContext) {
      var ctx = canvas.getContext("2d");
      ctx.scale(2, 2)
      ctx.scale(2, 2)

      /*
      css像素是一个抽象单位
        放大:
          使画布内css像素的个数变少,单个css像素所占据的实际物理尺寸变大
        缩小:
          使画布内css像素的个数变多,单个css像素所占据的实际物理尺寸变小
      * */

      ctx.beginPath();
      ctx.fillRect(50, 50, 100, 100);
    }
  }
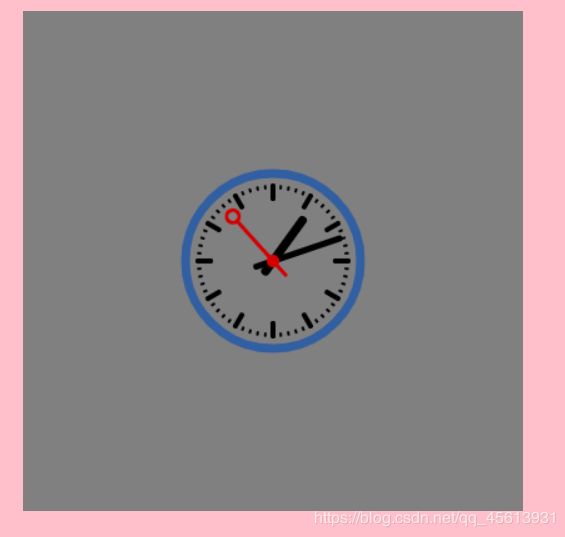
例:时钟
<html>
<head>
  <meta charset="UTF-8">
  <title>title>
  <style type="text/css">
    * {
      margin: 0;
      padding: 0;
    }

    html, body {
      height: 100%;
      overflow: hidden;
      background: pink;
    }

    #clock {
      background: gray;
      position: absolute;
      left: 50%;
      top: 50%;
      transform: translate3d(-50%, -50%, 0);
    }


  style>
head>
<body>
<canvas id="clock" width="400" height="400">canvas>
body>
<script type="text/javascript">

  window.onload = function () {
    var clock = document.querySelector("#clock");
    if (clock.getContext) {
      var ctx = clock.getContext("2d");
      setInterval(function () {
        ctx.clearRect(0, 0, clock.width, clock.height);
        move();
      }, 1000);

      move();

      function move() {
        ctx.save();
        ctx.lineWidth = 8;
        ctx.strokeStyle = "black";
        ctx.lineCap = "round";
        ctx.translate(200, 200);
        ctx.scale(.5, .5)
        ctx.rotate(-90 * Math.PI / 180);
        ctx.beginPath();

        //外层空心圆盘
        ctx.save();
        ctx.strokeStyle = "#325FA2";
        ctx.lineWidth = 14;
        ctx.beginPath();
        ctx.arc(0, 0, 140, 0, 360 * Math.PI / 180);
        ctx.stroke();
        ctx.restore();

        //时针刻度
        ctx.save();
        for (var i = 0; i < 12; i++) {
          ctx.rotate(30 * Math.PI / 180);
          ctx.beginPath();
          ctx.moveTo(100, 0)
          ctx.lineTo(120, 0);
          ctx.stroke();
        }
        ctx.restore();

        //分针刻度
        ctx.save();
        ctx.lineWidth = 4;
        for (var i = 0; i < 60; i++) {
          ctx.rotate(6 * Math.PI / 180);
          if ((i + 1) % 5 != 0) {
            ctx.beginPath();
            ctx.moveTo(117, 0)
            ctx.lineTo(120, 0);
            ctx.stroke();
          }
        }
        ctx.restore();

        //时针 分针 秒针 表座
        var date = new Date();
        var s = date.getSeconds();
        var m = date.getMinutes() + s / 60;
        var h = date.getHours() + m / 60;
        h = h > 12 ? h - 12 : h;

        //时针
        ctx.save()
        ctx.lineWidth = 14;
        ctx.rotate(h * 30 * Math.PI / 180)
        ctx.beginPath()
        ctx.moveTo(-20, 0);
        ctx.lineTo(80, 0);
        ctx.stroke();
        ctx.restore()

        //分针
        ctx.save()
        ctx.lineWidth = 10;
        ctx.rotate(m * 6 * Math.PI / 180)
        ctx.beginPath()
        ctx.moveTo(-28, 0);
        ctx.lineTo(112, 0);
        ctx.stroke();
        ctx.restore()


        //秒针
        ctx.save()
        ctx.lineWidth = 6;
        ctx.strokeStyle = "#D40000";
        ctx.fillStyle = "#D40000";
        ctx.rotate(s * 6 * Math.PI / 180)
        ctx.beginPath();
        ctx.moveTo(-30, 0);
        ctx.lineTo(83, 0);
        ctx.stroke();
        //表座
        ctx.beginPath();
        ctx.arc(0, 0, 10, 0, 360 * Math.PI / 180);
        ctx.fill();
        //秒头
        ctx.beginPath();
        ctx.arc(96, 0, 10, 0, 360 * Math.PI / 180);
        ctx.stroke();
        ctx.restore()
        ctx.restore();
      }
    }
  }
script>
html>


