【XRT Vitis-Tutorials】图像并行计算
1 前言
前面文章导航:
ZCU106 XRT环境搭建
ZCU106 XRT Vivado工程分析
ZCU106 XRT PetaLinux工程分析
【XRT Vitis-Tutorials】RTL Kernels测试
【XRT Vitis-Tutorials】C++/RTL Kernel混合编程测试
官方文档:
2019.2 Vitis™ Application Acceleration Development Flow Tutorials
Vitis Unified Software Platform Documentation Application Acceleration Development
Vitis Unified Software Platform Documentation Embedded Software Development
Vitis ZCU106 Platform
ZCU106 Vitis Platform
pre-built,直接下载并复制到SD卡即可测试:
ZCU106 Test Image
2 创建Vitis工程
本篇文章来测试Tutorials中的第3个例子:Using Multiple Compute Units
该例子中进行了两个步骤的实验,分别是hw_emu和增加cu个数提高,我会继续在硬件上直接测试。
本例子将会进行如下测试:
- 使用hw_emu cu*1,顺序执行
- 使用hw_emu cu*1,并发队列
- 使用hw_emu cu*3,3x并发
- 使用hardware实测方法,直接使用hw_emu cu*3
2.1 工程创建
我为了方便还是使用GUI的方法吧。
2.1.1 新建工程
在Vitis中创建一个新的Application Project,平台选择zcu106vcu_base。
2.1.2 添加源代码
我们将需要编译的内容直接添加到src目录下,包括:
src/host
src/kernel
最终的工程目录结构如下图:

2.1.3 代码分析
host_ooo.cpp
该例子中的主要功能如下:
- 解析输入参数,可以设置图片名称、测试次数、滤波器类型
- 根据输入的图片名称,打开图片(OpenCV的方法)
- 根据输入的滤波器类型,选择滤波器(有0:原图,1:blur,2:motion blur,3:emboss)
- 将图像的三个通道进行分离,分离成YUV
- 3个通道并发调用filter2d的C++ kernel
- 将三个通道的计算结果合并成新的图像并保存
- 使用软件方法进行filter2d,并与硬件方法的计算结果进行比对
OpenCL
该例子将前面两个例子中对于opencl接口的掉用,使用一个类进行了实现。
意思就是针对3个通道的颜色各自创建一个opencl接口的对象,然后分别调用其中的运行方法。
代码如下:
class Filter2DDispatcher {

public:

  Filter2DDispatcher(
  	cl_device_id     &Device,
    cl_context       &Context,
  	cl_program       &Program )
  {
	mKernel  = clCreateKernel(Program, "Filter2DKernel", &mErr);
	mQueue   = clCreateCommandQueue(Context, Device, CL_QUEUE_PROFILING_ENABLE|CL_QUEUE_OUT_OF_ORDER_EXEC_MODE_ENABLE, &mErr);
	mContext = Context;
	mCounter = 0;
  }

  Filter2DRequest* operator() (
  	short            *coeffs,
	unsigned char    *src,
	unsigned int      width,
	unsigned int      height,
	unsigned int      stride,
	unsigned char    *dst )
  {

  	Filter2DRequest* req = new Filter2DRequest(mCounter++);

	unsigned nbytes = (stride*height);

	// Create input buffers for coefficients (host to device)
	mSrcExt[0].flags = XCL_MEM_DDR_BANK0;
	mSrcExt[0].param = 0;
	mSrcExt[0].obj   = coeffs;
  	mSrcBuf[0] = clCreateBuffer(mContext, CL_MEM_EXT_PTR_XILINX | CL_MEM_USE_HOST_PTR | CL_MEM_READ_ONLY,  (FILTER2D_KERNEL_V_SIZE*FILTER2D_KERNEL_V_SIZE)*sizeof(short), &mSrcExt[0], &mErr);

  	// Create input buffer for src (host to device)
	mSrcExt[1].flags = XCL_MEM_DDR_BANK0;
	mSrcExt[1].param = 0;
	mSrcExt[1].obj   = src;
	mSrcBuf[1] = clCreateBuffer(mContext, CL_MEM_EXT_PTR_XILINX | CL_MEM_USE_HOST_PTR | CL_MEM_READ_ONLY,  nbytes, &mSrcExt[1], &mErr);

	// Create output buffer for dst (device to host)
	mDstExt[0].flags = XCL_MEM_DDR_BANK0;
	mDstExt[0].param = 0;
	mDstExt[0].obj   = dst;
	mDstBuf[0] = clCreateBuffer(mContext, CL_MEM_EXT_PTR_XILINX | CL_MEM_USE_HOST_PTR | CL_MEM_WRITE_ONLY, nbytes, &mDstExt[0], &mErr);

	// Schedule the writing of the inputs
	clEnqueueMigrateMemObjects(mQueue, 1, mSrcBuf, 0, 0, nullptr,  &req->mEvent[0]);

  	// Set the kernel arguments
  	clSetKernelArg(mKernel, 0, sizeof(cl_mem),       &mSrcBuf[0]);
  	clSetKernelArg(mKernel, 1, sizeof(cl_mem),       &mSrcBuf[1]);
  	clSetKernelArg(mKernel, 2, sizeof(unsigned int), &width);
  	clSetKernelArg(mKernel, 3, sizeof(unsigned int), &height);
  	clSetKernelArg(mKernel, 4, sizeof(unsigned int), &stride);
  	clSetKernelArg(mKernel, 5, sizeof(cl_mem),       &mDstBuf[0]);

	// Schedule the execution of the kernel
	clEnqueueTask(mQueue, mKernel, 1,  &req->mEvent[0], &req->mEvent[1]);

	// Schedule the reading of the outputs
  	clEnqueueMigrateMemObjects(mQueue, 1, mDstBuf, CL_MIGRATE_MEM_OBJECT_HOST, 1, &req->mEvent[1], &req->mEvent[2]);

	// Register call back to notify of kernel completion
	clSetEventCallback(req->mEvent[1], CL_COMPLETE, event_cb, &req->mId);

	return req;
  };

  ~Filter2DDispatcher()
  {
	clReleaseCommandQueue(mQueue);
	clReleaseKernel(mKernel);
  };

private:
  cl_kernel         mKernel;
  cl_command_queue  mQueue;
  cl_context        mContext;
  cl_mem_ext_ptr_t  mSrcExt[2];
  cl_mem_ext_ptr_t  mDstExt[1];
  cl_mem            mSrcBuf[2];
  cl_mem            mDstBuf[1];
  cl_int            mErr;
  int               mCounter;
};
OpenCV
在创建ZCU106的platform时,选择了opencv相关的库,在这里就会使用到。
测试中发现如下问题,需要一一解决,否则无法完成编译、或是上板后无法测试。
include设置
使用XRT生成的platform没有包含opencv的头文件,很奇怪,所以这里手动将include相关文件复制到zcu106 platform中。
将/src/runtime_src/tools/scripts/zcu106vcu_base/build/tmp/sysroots-components/aarch64/opencv/usr/lib下的所有文件,复制到/Vitis/2019.2/platforms/zcu106vcu_base/sw/zcu106vcu_base/xrt/sysroot/aarch64-xilinx-linux/usr/lib
将/src/runtime_src/tools/scripts/zcu106vcu_base/build/tmp/sysroots-components/aarch64/opencv/usr/include下的opencv和opencv2文件夹,复制到/Vitis/2019.2/platforms/zcu106vcu_base/sw/zcu106vcu_base/xrt/sysroot/aarch64-xilinx-linux/usr/include
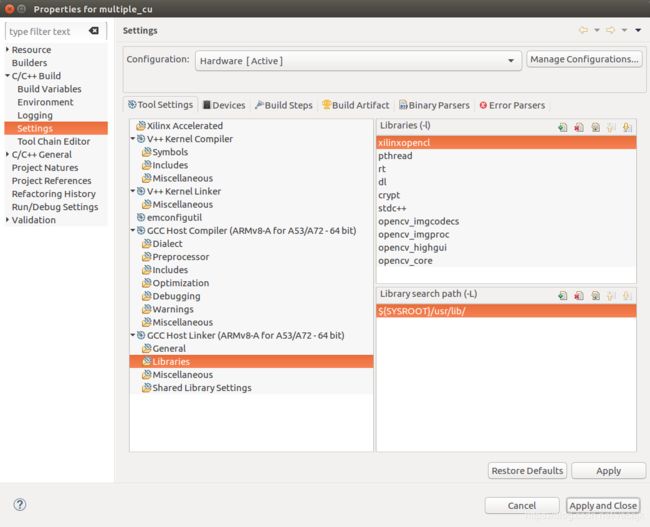
library设置
Filter
一共有4种2D滤波器,都是15×15大小
const short filterCoeffs[][15][15] = {
	{
		// filterCoeffs[0] -> Identity
		{0, 0, 0, 0, 0, 0, 0, 0, 0, 0, 0, 0, 0, 0, 0},
		{0, 0, 0, 0, 0, 0, 0, 0, 0, 0, 0, 0, 0, 0, 0},
		{0, 0, 0, 0, 0, 0, 0, 0, 0, 0, 0, 0, 0, 0, 0},
		{0, 0, 0, 0, 0, 0, 0, 0, 0, 0, 0, 0, 0, 0, 0},
		{0, 0, 0, 0, 0, 0, 0, 0, 0, 0, 0, 0, 0, 0, 0},
		{0, 0, 0, 0, 0, 0, 0, 0, 0, 0, 0, 0, 0, 0, 0},
		{0, 0, 0, 0, 0, 0, 0, 0, 0, 0, 0, 0, 0, 0, 0},
		{0, 0, 0, 0, 0, 0, 0, 225, 0, 0, 0, 0, 0, 0, 0},
		{0, 0, 0, 0, 0, 0, 0, 0, 0, 0, 0, 0, 0, 0, 0},
		{0, 0, 0, 0, 0, 0, 0, 0, 0, 0, 0, 0, 0, 0, 0},
		{0, 0, 0, 0, 0, 0, 0, 0, 0, 0, 0, 0, 0, 0, 0},
		{0, 0, 0, 0, 0, 0, 0, 0, 0, 0, 0, 0, 0, 0, 0},
		{0, 0, 0, 0, 0, 0, 0, 0, 0, 0, 0, 0, 0, 0, 0},
		{0, 0, 0, 0, 0, 0, 0, 0, 0, 0, 0, 0, 0, 0, 0},
		{0, 0, 0, 0, 0, 0, 0, 0, 0, 0, 0, 0, 0, 0, 0}
	},
	{
		// filterCoeffs[1] -> Blur
		{1, 1, 1, 1, 1, 1, 1, 1, 1, 1, 1, 1, 1, 1, 1},
		{1, 1, 1, 1, 1, 1, 1, 1, 1, 1, 1, 1, 1, 1, 1},
		{1, 1, 1, 1, 1, 1, 1, 1, 1, 1, 1, 1, 1, 1, 1},
		{1, 1, 1, 1, 1, 1, 1, 1, 1, 1, 1, 1, 1, 1, 1},
		{1, 1, 1, 1, 1, 1, 1, 1, 1, 1, 1, 1, 1, 1, 1},
		{1, 1, 1, 1, 1, 1, 1, 1, 1, 1, 1, 1, 1, 1, 1},
		{1, 1, 1, 1, 1, 1, 1, 1, 1, 1, 1, 1, 1, 1, 1},
		{1, 1, 1, 1, 1, 1, 1, 1, 1, 1, 1, 1, 1, 1, 1},
		{1, 1, 1, 1, 1, 1, 1, 1, 1, 1, 1, 1, 1, 1, 1},
		{1, 1, 1, 1, 1, 1, 1, 1, 1, 1, 1, 1, 1, 1, 1},
		{1, 1, 1, 1, 1, 1, 1, 1, 1, 1, 1, 1, 1, 1, 1},
		{1, 1, 1, 1, 1, 1, 1, 1, 1, 1, 1, 1, 1, 1, 1},
		{1, 1, 1, 1, 1, 1, 1, 1, 1, 1, 1, 1, 1, 1, 1},
		{1, 1, 1, 1, 1, 1, 1, 1, 1, 1, 1, 1, 1, 1, 1},
		{1, 1, 1, 1, 1, 1, 1, 1, 1, 1, 1, 1, 1, 1, 1}
	},
	{
		// filterCoeffs[2] -> Motion Blur
		{15, 0, 0, 0, 0, 0, 0, 0, 0, 0, 0, 0, 0, 0, 0},
		{0, 15, 0, 0, 0, 0, 0, 0, 0, 0, 0, 0, 0, 0, 0},
		{0, 0, 15, 0, 0, 0, 0, 0, 0, 0, 0, 0, 0, 0, 0},
		{0, 0, 0, 15, 0, 0, 0, 0, 0, 0, 0, 0, 0, 0, 0},
		{0, 0, 0, 0, 15, 0, 0, 0, 0, 0, 0, 0, 0, 0, 0},
		{0, 0, 0, 0, 0, 15, 0, 0, 0, 0, 0, 0, 0, 0, 0},
		{0, 0, 0, 0, 0, 0, 15, 0, 0, 0, 0, 0, 0, 0, 0},
		{0, 0, 0, 0, 0, 0, 0, 15, 0, 0, 0, 0, 0, 0, 0},
		{0, 0, 0, 0, 0, 0, 0, 0, 15, 0, 0, 0, 0, 0, 0},
		{0, 0, 0, 0, 0, 0, 0, 0, 0, 15, 0, 0, 0, 0, 0},
		{0, 0, 0, 0, 0, 0, 0, 0, 0, 0, 15, 0, 0, 0, 0},
		{0, 0, 0, 0, 0, 0, 0, 0, 0, 0, 0, 15, 0, 0, 0},
		{0, 0, 0, 0, 0, 0, 0, 0, 0, 0, 0, 0, 15, 0, 0},
		{0, 0, 0, 0, 0, 0, 0, 0, 0, 0, 0, 0, 0, 15, 0},
		{0, 0, 0, 0, 0, 0, 0, 0, 0, 0, 0, 0, 0, 0, 15}
	},
	{
		// filterCoeffs[3] -> Emboss
		{-1,-1,-1,-1,-1,-1,-1,-1,-1,-1,-1,-1,-1,-1, 0},
		{-1,-1,-1,-1,-1,-1,-1,-1,-1,-1,-1,-1,-1, 0, 1},
		{-1,-1,-1,-1,-1,-1,-1,-1,-1,-1,-1,-1, 0, 1, 1},
		{-1,-1,-1,-1,-1,-1,-1,-1,-1,-1,-1, 0, 1, 1, 1},
		{-1,-1,-1,-1,-1,-1,-1,-1,-1,-1, 0, 1, 1, 1, 1},
		{-1,-1,-1,-1,-1,-1,-1,-1,-1, 0, 1, 1, 1, 1, 1},
		{-1,-1,-1,-1,-1,-1,-1,-1, 0, 1, 1, 1, 1, 1, 1},
		{-1,-1,-1,-1,-1,-1,-1, 0, 1, 1, 1, 1, 1, 1, 1},
		{-1,-1,-1,-1,-1,-1, 0, 1, 1, 1, 1, 1, 1, 1, 1},
		{-1,-1,-1,-1,-1, 0, 1, 1, 1, 1, 1, 1, 1, 1, 1},
		{-1,-1,-1,-1, 0, 1, 1, 1, 1, 1, 1, 1, 1, 1, 1},
		{-1,-1,-1, 0, 1, 1, 1, 1, 1, 1, 1, 1, 1, 1, 1},
		{-1,-1, 0, 1, 1, 1, 1, 1, 1, 1, 1, 1, 1, 1, 1},
		{-1, 0, 1, 1, 1, 1, 1, 1, 1, 1, 1, 1, 1, 1, 1},
		{ 0, 1, 1, 1, 1, 1, 1, 1, 1, 1, 1, 1, 1, 1, 1}
	},
};
2.2 仿真测试
其中仿真的三个测试方法我就不进行说明了,按照Tutorials的说明来做即可。
引用github上的仿真测试图:
顺序执行:
并发顺序执行:
并发执行:
通过上面的处理时序,可以看到通过将调用方式改为并发模式,并将CU数量提升到本例子需要的3后,即可极大的提高整体运行速度。
2.3 上板测试
2.3.1 编译
该工程中直接选择Hardware进行编译即可,container将cu数量改为3
如下图:
 设置完成后即可编译
2.3.2 Vivado工程
编译完成后,可以打开Vivado查看一下内部的结构。如下图:

可以看到有3个相同的filter2d,这样就能针对每一个颜色通道同时进行滤波运算了。
这里没有约束该kernel的时钟,默认使用了150MHz的时钟。
2.3.3 测试验证
将固件复制到SD卡,然后运行命令进行测试
板子上的opencv lib连接有问题,因此得手动连接一下:
root@zcu106vcu_base:~# ln -s /usr/lib/libopencv_core.so.3.4 /usr/lib/libopencv_core.so
root@zcu106vcu_base:~# ln -s /usr/lib/libopencv_highgui.so.3.4 /usr/lib/libopencv_highgui.so
root@zcu106vcu_base:~# ln -s /usr/lib/libopencv_imgcodecs.so.3.4 /usr/lib/libopencv_imgcodecs.so
root@zcu106vcu_base:~# ln -s /usr/lib/libopencv_imgproc.so.3.4 /usr/lib/libopencv_imgproc.so
运行测试:
root@zcu106vcu_base:~# /mnt/multiple_cu.exe -x /mnt/multiple_cu_container.xclbin -i /mnt/img/ov.bmp -f 1 -n 5

Xilinx 2D Filter Example Application

FPGA binary    : /mnt/multiple_cu_container.xclbin
Input image    : /mnt/img/ov.bmp
Number of runs : 5
Filter type    : 1

Programming FPGA

 Debug platform vendorXilinx

 Debug platform NameXilinx
src size 1920 1080 8 3

Running FPGA version
Convert Image Format

Running Software version

*******************************************************
MATCH PASS: Output matches reference
*******************************************************
FPGA Time:       0.148503 s
FPGA Throughput: 199.748 MB/s
CPU Time:        85.1083 s
CPU Throughput:  0.348534 MB/s
FPGA Speedup:    573.11 x
root@zcu106vcu_base:~#
可以看到使用硬件加速,计算5张1920×1080的图像滤波使用了148.5毫秒,平均一张照片不到30ms。比使用CPU未经优化直接进行计算快了573倍。
按照150MHz, 1920×1080来计算,假如一个clock处理一个像素,理论消耗时间为13.8毫秒。
TODO:分析一下30毫秒的原因。
- 原始数据读取
- RTL计算
- 结果数据保存
2.3.4 测试图片
原图Filter0
Filter1
Filter2
Filter3

3 总结
使用Vitis和自定义的ZCU106 XRT平台完成了Vitis-Tutorials中的Using Multiple Compute Units功能测试。