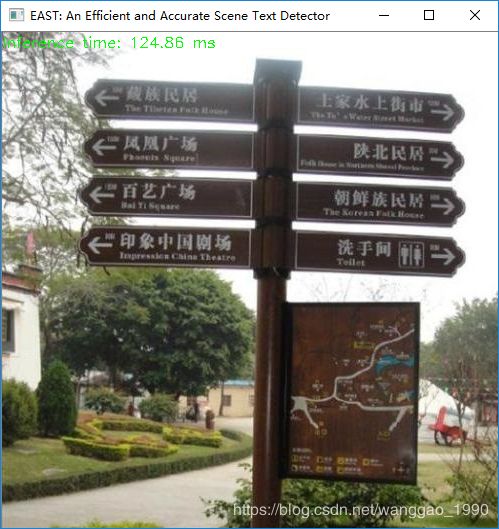
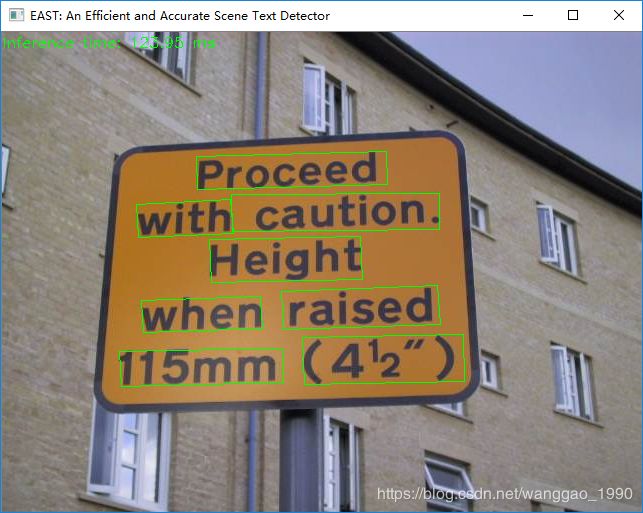
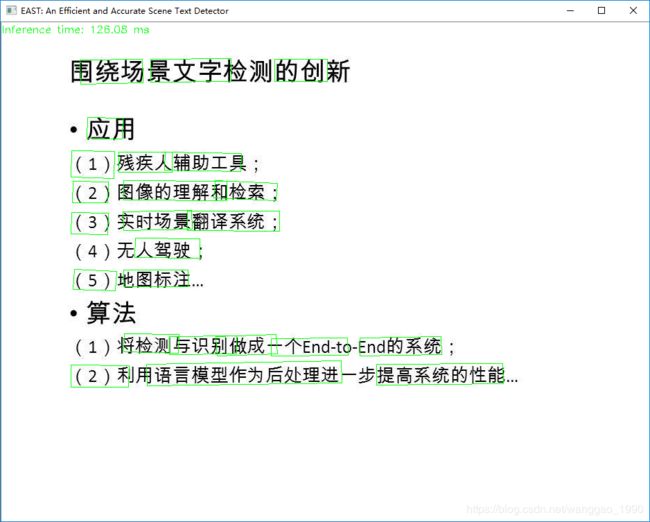
opencv dnn模块 示例(13) 自然场景文本检测 Scene Text Detector-EAST
一、opencv的示例模型文件
使用tensorflow实现模型frozen_east_text_detection.pb,下载地址:https://www.dropbox.com/s/r2ingd0l3zt8hxs/frozen_east_text_detection.tar.gz?dl=1 。
参考论文和开源代码如下:EAST: An Efficient and Accurate Scene Text Detector ,github EAST 。
使用数据库为ICDAR。
相比已有模型
该模型直接预测全图像中任意方向和四边形形状的单词或文本行,消除不必要的中间步骤(例如,候选聚合和单词分割)。通过下图它与一些其他方式的步骤对比,可以发现该模型的步骤比较简单,去除了中间一些复杂的步骤,所以符合它的特点,EAST, since it is an Efficient and Accuracy Scene Text detection pipeline.

网络结构

(1) 特征提取层:使用的基础网络结构是PVANet,分别从stage1,stage2,stage3,stage4抽出特征,一种FPN(feature pyramid network)的思想。
(2) 特征融合层:第一步抽出的特征层从后向前做上采样,然后concat
(3) 输出层:输出一个score map和4个回归的框+1个角度信息(RBOX),或者输出,一个scoremap和8个坐标信息(QUAD)。
这里的程序代码实现的基础网络不是pvanet网络,而是resnet50-v1。
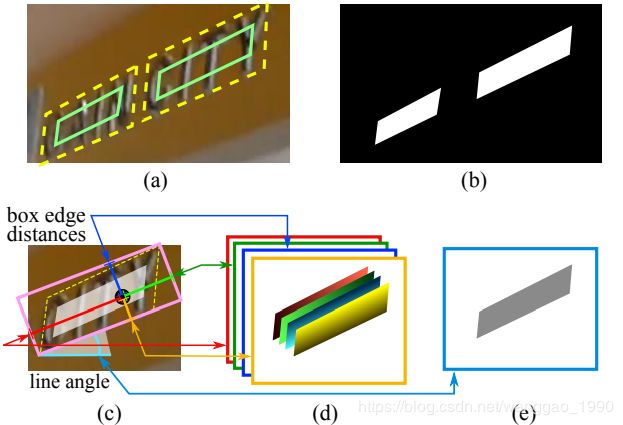
下图是标签生的处理,(a)黄色虚线四边形为文本边框,绿色实线是收缩后的标注框(b)文本检测score map(c)RBOX几何关系图(d)各像素到矩形框四个边界的距离,四通道表示。(e)矩形框旋转角度
二、示例代码
#include 3、演示