ssm框架学习笔记
文章目录
- ssm框架学习笔记
- maven
- 什么是maven
- pom
- 创建一个maven项目
- 创建一个servlet的maven项目
- MyBatis
- MyBatis环境配置
- 编写MyBatis代码
- MyBatis核心配置文件详细解释
- MyBatis的参数问题
- 动态SQL
- 缓存
- 关系映射
- Spring框架
- 简介
- 基础环境搭建
- 两大基本思想
- 容器
- 值的注入
- bean元素的探讨
- ApplicationContext对象与BeanFactory对象的区别
- 资源的引入
- 注解
- Spring AOP
- AOP简介
- 使用配置文件实现AOP
- 使用注解实现AOP
- Spring MVC
- 简介
- 原理分析
- spring mvc环境配置
- 注解开发模式
- 转发与重定向
- 关于Spring MVC访问web元素的问题
- 注解的研究
- 常见问题的解决
- LayUI工具的使用
- Json数据交互
- json数据返回前台以及如何解析
- json数据使用ajax提交到后台进行解析
- 使用layui改善表单的显示
- xml数据交互
- 文件上传
- 文件下载
- 拦截器
- 案例一:通过拦截器实现方法耗时统计
- 案例二:通过拦截器实现方法耗时统计
- 拦截器的注意事项
- SSM整合
整理自@深圳邱道长 的视频课件,侵立删
ssm框架学习笔记
maven
什么是maven
maven是由apache公司开发的一个项目管理工具
pom
project object model,工程对象模型
核心配置文件pom.xml
修改settings.xml,设置默认依赖项本地存放路径,设置镜像地址
<localRepository>D:\local_repositorylocalRepository>
...
<mirrors>
	<mirror>
		<id>nexus-aliyunid>
		<mirrorOf>*mirrorOf>
		<name>Nexus aliyunname>
		<url>http://maven.aliyun.com/nexus/content/groups/publicurl>
	mirror>
mirors>
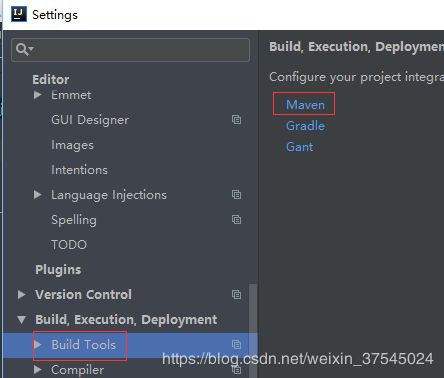
在idea中配置maven,设置maven home directory和User settings file,勾选override。

创建一个maven项目


点击import changes

修改pom.xml
<project xmlns="http://maven.apache.org/POM/4.0.0" xmlns:xsi="http://www.w3.org/2001/XMLSchema-instance"
  xsi:schemaLocation="http://maven.apache.org/POM/4.0.0 http://maven.apache.org/xsd/maven-4.0.0.xsd">
  <modelVersion>4.0.0modelVersion>


  <groupId>cn.edu.chdgroupId>

  <artifactId>helloworldartifactId>

  <version>1.0-SNAPSHOTversion>


  <name>helloworldname>

  <url>http://www.example.comurl>


  <properties>

    <project.build.sourceEncoding>UTF-8project.build.sourceEncoding>

    <maven.compiler.source>1.8maven.compiler.source>

    <maven.compiler.target>1.8maven.compiler.target>
  properties>


  <dependencies>
    <dependency>
      <groupId>junitgroupId>
      <artifactId>junitartifactId>
      <version>4.12version>
      <scope>testscope>
    dependency>

    <dependency>
      <groupId>mysqlgroupId>
      <artifactId>mysql-connector-javaartifactId>
      <version>5.1.38version>
    dependency>
  dependencies>

  <build>
    <pluginManagement>
      <plugins>

        <plugin>
          <artifactId>maven-clean-pluginartifactId>
          <version>3.1.0version>
        plugin>

        <plugin>
          <artifactId>maven-resources-pluginartifactId>
          <version>3.0.2version>
        plugin>
        <plugin>
          <artifactId>maven-compiler-pluginartifactId>
          <version>3.8.0version>
        plugin>
        <plugin>
          <artifactId>maven-surefire-pluginartifactId>
          <version>2.22.1version>
        plugin>
        <plugin>
          <artifactId>maven-jar-pluginartifactId>
          <version>3.0.2version>
        plugin>
        <plugin>
          <artifactId>maven-install-pluginartifactId>
          <version>2.5.2version>
        plugin>
        <plugin>
          <artifactId>maven-deploy-pluginartifactId>
          <version>2.8.2version>
        plugin>

        <plugin>
          <artifactId>maven-site-pluginartifactId>
          <version>3.7.1version>
        plugin>
        <plugin>
          <artifactId>maven-project-info-reports-pluginartifactId>
          <version>3.0.0version>
        plugin>
      plugins>
    pluginManagement>
  build>
project>
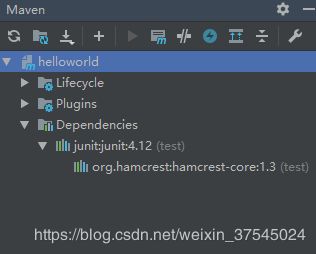
点击右下角的按钮,选择Maven,打开Maven项目依赖包的管理器

标准的maven项目文件结构如下图所示
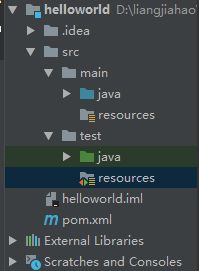
手动创建resources文件夹并右键选择标记为resources root和test resources root
在浏览器搜索maven repository,搜索想要的框架,选择对应依赖项的版本,直接将依赖项的xml语句复制到pom.xml中,点击import changes即可。
创建一个servlet的maven项目
基本步骤相同,创建一个maven项目,选择webapp,编辑项目信息完成项目的创建。src/main目录下只有一个webapp文件夹,手动创建java文件夹并标记为源代码文件夹,手动创建resources文件夹并标记为资源文件夹。在maven中央仓库搜索并选择servlet API并依赖信息复制到pom.xml文件中。修改web.xml文件的dtd声明。

配置tomcat server


MyBatis
MyBatis环境配置
file->settings->plugins,搜索并安装mybatis plugin和mybatis tools
导入mysql和mybatis依赖项
利用mybatis插件在src/resources路径下右键选择new->mybatis->new Configuration File,命名为mybatis.cfg.xml
修改mybatis.cfg.xml,配置数据库的url、驱动类、用户名、密码等信息
<configuration>

    <environments default="dev">
        <environment id="dev">
            <transactionManager type="JDBC">transactionManager>
            <dataSource type="UNPOOLED">
                <property name="url" value="jdbc:mysql:///mybatis"/>
                <property name="driver" value="com.mysql.jdbc.Driver"/>
                <property name="username" value="root"/>
                <property name="password" value="ljh_5098_CHD"/>
            dataSource>
        environment>
    environments>

configuration>
编写MyBatis代码
创建MyBatisUtils类
package cn.edu.chd.util;

import org.apache.ibatis.io.Resources;
import org.apache.ibatis.session.SqlSession;
import org.apache.ibatis.session.SqlSessionFactory;
import org.apache.ibatis.session.SqlSessionFactoryBuilder;

import java.io.IOException;
import java.io.InputStream;

public class MyBatisUtil {

    private static SqlSessionFactory sqlSessionFactory;

    static{
        String resource="mybatis.cfg.xml";//mybatis核心配置文件的相对路径
        InputStream in=null;
        try {
            in = Resources.getResourceAsStream(resource);//获得配置文件输入流
            sqlSessionFactory = new SqlSessionFactoryBuilder().build(in);//创建sessionFactory对象
        } catch (IOException e) {
            e.printStackTrace();
        } finally{
            if(in != null){
                try {
                    in.close();//关闭文件输入流
                } catch (IOException e) {
                    e.printStackTrace();
                }
            }
        }
    }

    //返回session对象,开启会话
    public static SqlSession getSession(){
        return sqlSessionFactory.openSession();
    }
}
创建数据库与数据库表,不再赘述
创建实体类,生成get/set方法
package cn.edu.chd.entity;

import java.util.Date;

public class Girl {
    private Long id;
    private String name;
    private String flower;
    private Date birthday;
    public Long getId() {
        return id;
    }
    public void setId(Long id) {
        this.id = id;
    }
    public String getName() {
        return name;
    }
    public void setName(String name) {
        this.name = name;
    }
    public String getFlower() {
        return flower;
    }
    public void setFlower(String flower) {
        this.flower = flower;
    }
    public Date getBirthday() {
        return birthday;
    }
    public void setBirthday(Date birthday) {
        this.birthday = birthday;
    }
}
创建mapper接口
package cn.edu.chd.mapper;

import cn.edu.chd.entity.Girl;

public interface GirlMapper {
    Integer insert(Girl girl);
}
创建mapper配置文件
<mapper namespace="cn.edu.chd.mapper.GirlMapper">

    <insert id="insert" parameterType="cn.edu.chd.entity.Girl">
        insert into girl(name,flower,birthday)
        values(#{name},#{flower},#{birthday})
    insert>
mapper>
在mybatis核心配置文件中添加配置xml文件与接口的映射关系
<mappers>

    <mapper resource="cn/edu/chd/mapper/GirlMapper.xml">mapper>
mappers>
MyBatis核心配置文件详细解释
-
environments
- dataSource:用于配置数据源信息,包括数据库的url、driver、username、password
- transactionManager:用于配置事务管理器
-
properties
-
作用:用于引入键值对,再配置文件的其他地方,可以通过${}引用键值。
-
property子标签:具有name和value属性,引入键值对。
-
resource属性:引入配置文件,注意配置文件的属性值优先于property子标签中定义的属性值。
-
<properties resource="db.properties">
	<property name="username" value="123"/>
properties>
- typeAliases
- 作用:配置mybatis时,类型要写全路径,typeAliases标签用于创建别名,在mapper配置文件中可以引用,以便简化类型的书写。
- typeAlias子标签:用于配置一个类名的别名,type表示类型的全路径,alias表示命名的别名
- package子标签:用于直接引入包下的所有类型。
<typeAliases>

    <typeAlias type="cn.edu.chd.entity.Girl" alias="girl"/>

    <package name="cn.edu.chd.entity"/>
typeAliases>
-
typeHandlers
- 一般情况下不需要额外添加,特殊情况再考虑
-
settings
- 直接查询官方文档进行配置即可
- mapUnderscoreToCamelCase:数据库命名一般采用下划线风格,而实体类属性的命名一般采用驼峰命名风格,该选项用于设置两种风格的自动转换。
- 注意settings标签的位置是固定的,位于properties标签之后,typeAliases标签之前。
<settings>
  <setting name="cacheEnabled" value="true"/>
  <setting name="lazyLoadingEnabled" value="true"/>
  <setting name="multipleResultSetsEnabled" value="true"/>
  <setting name="useColumnLabel" value="true"/>
  <setting name="useGeneratedKeys" value="false"/>
  <setting name="autoMappingBehavior" value="PARTIAL"/>
  <setting name="autoMappingUnknownColumnBehavior" value="WARNING"/>
  <setting name="defaultExecutorType" value="SIMPLE"/>
  <setting name="defaultStatementTimeout" value="25"/>
  <setting name="defaultFetchSize" value="100"/>
  <setting name="safeRowBoundsEnabled" value="false"/>
  <setting name="mapUnderscoreToCamelCase" value="false"/>
  <setting name="localCacheScope" value="SESSION"/>
  <setting name="jdbcTypeForNull" value="OTHER"/>
  <setting name="lazyLoadTriggerMethods" value="equals,clone,hashCode,toString"/>
settings>
- mappers
- 配置mapper接口与mapper配置文件之间的关联
- 四种方式:相对路径、url、类型全限定名、引入包
<mappers>


    <package name="cn.edu.chd.mapper"/>
mappers>
MyBatis的参数问题
-
单个基本数据类型
如果仅仅是简单的一个单值传入,那么#{}表达式里面写什么都可以,只有一个参数,MyBatis没有入参绑定的烦恼。建议还是写有含义的名称。
-
单个非基本数据类型
String。仍然没有入参绑定。
-
多个基本类型或非基本类型传入参数问题
关于
Cause: org.apache.ibatis.binding.BindingException: Parameter ‘name’ not found. Available parameters are [arg1, arg0, param1, param2]
问题的解决:
方法一:报错为参数绑定错误,参数name找不到,可用的参数只有arg1,arg0,param1,param2。将#{}表达式改为#{param1}和#{param2},或者修改为#{arg0}和#{arg1},能够解决这一问题。
MyBatis会采用arg0、arg1、arg2……和param1、param2、param3……来命名传入的参数。
方法二:方法一参数命名没有具体的含义,代码的可读性不好。方法二采用给mapper接口方法的参数添加注解的形式完成参数的绑定,在xml文件中直接使用绑定的名称引用对应的参数即可。
Girl queryByNameAndFlower(@Param("name") String name, @Param("flower") String flower); -
单个JavaBean
如果传入参数是单个实体类对象,那么在xml文件中直接引用实体类对象的属性名称即可,MyBatis能够在实体类下自动寻找匹配的属性。
注意,传入的实体类对象不需要加@Param,也不要在#{}表达式中写“对象名.属性名”的形式。
-
MAP
Girl queryByNameAndFlower3(Map<String,Object> map);
按照这种方式进行封装,就是根据键的名称查找属性值
java Map
-
多个JavaBean
方法一:
Girl queryByNameAndFlower4(A a, B b);<select id="queryByNameAndFlower4" resultType="cn.edu.chd.entity.Girl"> select * from girl where name=#{param1.name} and flower=#{param2.flower} select>方法二:
Girl queryByNameAndFlower4(@Param("a")A a,@Param("b")B b);<select id="queryByNameAndFlower4" resultType="cn.edu.chd.entity.Girl"> select * from girl where name=#{a.name} and flower=#{b.flower} select> -
一组值的传入(List集合)
动态SQL
-
if标签
<select id="queryByCountryAndCity" resultType="cn.edu.chd.entity.Address"> select * from address where <if test="country != null"> country=#{country} and if> city=#{city} select> -
where标签:可以消除多余的and,但要注意只能处理前置and,不能处理后置and
<select id="queryByCountryAndCity" resultType="cn.edu.chd.entity.Address"> select * from address <where> <if test="country != null and country != ''"> and country=#{country} if> <if test="city != null and city != ''"> and city=#{city} if> where> select>- 如何添加log4j:在pom.xml添加log4j依赖项,在resources目录下添加log4j.properties,在mybatis核心配置文件的settings标签中开启日志,具体教程参考官方文档。
-
set标签:可以消除多余的逗号,但要注意只能处理后置的逗号
<update id="updateAddress" parameterType="cn.edu.chd.entity.Address"> update address <set> <if test="country != null and country != ''"> country=#{country}, if> <if test="state != null and state != ''"> state=#{state}, if> <if test="city != null and city != ''"> city=#{city}, if> <if test="street != null and street != ''"> street=#{street}, if> <if test="zip != null and zip != ''"> zip=#{zip}, if> set> where addr_id=#{addrId} update> -
choose、when、otherwise标签
<select id="query" resultType="cn.edu.chd.entity.Address" parameterType="cn.edu.chd.entity.Address"> select * from address <where> <choose> <when test="country != null"> and country=#{country} when> <when test="state != null"> and state=#{state} when> <otherwise> and city=#{city} otherwise> choose> where> select> -
trim标签:trim标签有四个属性,分别为prefix,suffix,prefixOverrides,suffixOverrides,分别表示添加前缀、添加后缀、消除前缀、消除后缀。
<select id="queryTrim" resultType="cn.edu.chd.entity.Address" parameterType="cn.edu.chd.entity.Address"> select * from address <trim prefix="WHERE" suffixOverrides="AND"> <if test="country != null and country != ''"> country=#{country} and if> <if test="state != null and state != ''"> state=#{state} and if> <if test="city != null and city != ''"> city=#{city} and if> <if test="street != null and street != ''"> street=#{street} and if> <if test="zip != null and zip != ''"> zip=#{zip} and if> trim> select> -
foreach标签
<select id="queryByIds" resultType="cn.edu.chd.entity.Address">

    select * from address
    <where>
        addr_id in
        <foreach collection="list" open="(" close=")" item="item" separator=",">
        	#{item}
        foreach>
    where>
select>
foreach标签用于遍历list集合中的元素,其中collection属性表示集合的名称,open表示起始字符串,close表示结束字符串,item属性指代list集合中的每一个元素,separator属性表示分隔符,index表示循环的下标值,标签体表示每轮循环输出的结果。
-
模糊查询
注意:#{}不支持拼接字符串
解决方案:
方案一:在应用层添加%
List<Address> list = mapper.queryLike("%law%");方案二:使用字符串拼接函数concat()
<select id="queryLike" resultType="cn.edu.chd.entity.Address">
    select * from address
    where city like concat('%',#{city},'%')
select>
方案三:使用bind标签,重新绑定并引用传入的参数
<select id="queryLike" resultType="cn.edu.chd.entity.Address"> <bind name="_city" value="'%'+city+'%'"/> select * from address where city like #{_city}; select> -
sql标签:
- 功能:根据传入的对象动态的修改其中的值,如果某个字段传入的是非空值,再去修改,否则不修改。
- 具体步骤:使用sql标签声明一组列名,使用include标签在需要这组列名的地方占位。
<sql id="baseColumn">
    country,state,city
sql>
<select id="listAll" resultType="cn.edu.chd.entity.Address">
    select
    <include refid="baseColumn"/>
    from address
select>
缓存
- 意义:数据库查询速度相比起应用程序要慢很多,使用缓存能够加快数据查询的效率。
- MyBatis可以定制缓存,分为一级缓存和二级缓存。
- 一级缓存:会话级别的缓存,只有在同一个会话中才有效,默认开启且不能关闭
- 二级缓存:会话工厂级别的缓存,默认关闭但可以手动开启
- 过程:如果开启了二级缓存,先在二级缓存中查询。如果没有查询到,再去一级缓存。如果还没有查询到,在查询数据库。
- 缓存失效:
- 第一种情况:执行插入、更新、删除等操作会导致缓存失效。
- 第二种情况:手动清空缓存,清空所有缓存
sqlSession.clearCache(); - 二级缓存:
- 开启二级缓存的步骤
第一步:在mapper的xml文件中添加以下标签
第二步:在MyBatis配置文件中开启缓存<cache/>
第三步:实体类实现Serializable<setting name="cacheEnabled" value="true"/> - 验证二级缓存的存在
输出结果//开启两个会话 SqlSession sqlSession = MyBatisUtil.getSession(); SqlSession sqlSession2 = MyBatisUtil.getSession(); //得到两个mapper对象 AddressMapper mapper = sqlSession.getMapper(AddressMapper.class); AddressMapper mapper2 = sqlSession2.getMapper(AddressMapper.class); //会话一进行查询 mapper.listAll(); sqlSession.commit(); sqlSession.close();//关闭会话一 //会话二进行查询 mapper2.listAll(); sqlSession2.commit(); sqlSession2.close();//关闭会话二DEBUG [main] - Cache Hit Ratio [cn.edu.chd.mapper.AddressMapper]: 0.0 DEBUG [main] - ==> Preparing: select country,state,city from address DEBUG [main] - ==> Parameters: DEBUG [main] - <== Total: 5 DEBUG [main] - Cache Hit Ratio [cn.edu.chd.mapper.AddressMapper]: 0.5
- 开启二级缓存的步骤
- 配置缓存属性
<cache eviction="FIFO" flushInterval="60000" size="512" readOnly="true"/>- eviction:配置缓存的回收策略。LRU——最近最少使用;FIFO——先进先出;SOFT——软引用;WEAK——弱引用。默认回收策略是LRU。
- flushInterval:刷新间隔毫秒数
- size:引用数目,默认为1024
- readOnly:只读属性为true时返回缓存对象的浅拷贝,不可修改;只读属性为false时返回缓存对象的深拷贝,可修改。
关系映射
- 实体关系问题
-
从数学上对数量关系进行描述
1-1:强弱之分
1-n: -
MyBatis实现1-1多表查询
1、创建实体类User、UserDetail和对应的数据库表user、user_detail
2、创建User的子类UserWithDetail,并与UserDetail类关联public class UserWithDetail extends User { private UserDetail userDetail; //生成get/set方法 }3、创建UserMapper接口和UserMapper.xml配置文件
4、实现数据的封装- 方法一:使用resultMap实现数据的封装
MyBatis对于处理简单的单表查询一般使用resultType就可以解决,对于多表联合查询往往都需要使用resultMap进行详细的描述,告诉mybatis怎么封装。
<resultMap id="userWithDetailMap" type="cn.edu.chd.entity.UserWithDetail"> <id property="uid" column="uid"/> <result property="password" column="password"/> <result property="phone" column="phone"/> <result property="createTime" column="create_time"/> <result property="status" column="status"/> <association property="userDetail" javaType="cn.edu.chd.entity.UserDetail"> <id property="udid" column="udid"/> <result property="address" column="address"/> <result property="cid" column="cid"/> association> resultMap> <select id="queryById" resultMap="userWithDetailMap"> select user.uid,user.phone,user.password,user.create_time,user.status, user_detail.udid,user_detail.address,user_detail.cid from user inner join user_detail on user.uid=user_detail.uid where user.uid=#{id} select>- 方法二:resultMap标签的连缀写法
<resultMap id="userWithDetailMap" type="cn.edu.chd.entity.UserWithDetail"> <id property="uid" column="uid"/> <result property="password" column="password"/> <result property="phone" column="phone"/> <result property="createTime" column="create_time"/> <result property="status" column="status"/> <result property="userDetail.udid" column="udid"/> <result property="userDetail.address" column="address"/> <result property="userDetail.cid" column="cid"/> resultMap>- 方法三:分步查询
分两步走,先查询user表,然后再查询user_detail表,在UserMapper.xml中配置分步查询。
<resultMap id="userBaseMap" type="cn.edu.chd.entity.User"> <id property="uid" column="uid"/> <result property="password" column="password"/> <result property="phone" column="phone"/> <result property="createTime" column="create_time"/> <result property="status" column="status"/> resultMap> <resultMap id="userWithDetailMap" extends="userBaseMap" type="cn.edu.chd.entity.UserWithDetail"> <association property="userDetail" select="cn.edu.chd.mapper.UserDetailMapper.queryByUserId" column="uid"/> resultMap> - 方法一:使用resultMap实现数据的封装
-
MyBatis实现1-n多表查询
1、创建实体类Blog、Comment和对应的数据库表blog和comment
2、创建User类的子类UserBlog并与Blog类关联,Blog类与Comment类关联,关联类型为一对多,并生成get/set方法//UserBlog.java public class UserBlog extends User { private List<Blog> blogs;//体现User与Blog之间一对多的关系 //生成get/set方法和toString方法 } //Blog.java public class Blog { private Integer id; private String title; private String summary; private String content; private User user; private List<Comment> comments;//体现Blog与Comment之间一对多的关系 //生成get/set方法和toString方法 } //Comment.java public class Comment { private Integer id; private String content; //生成get/set方法和tostring方法 }3、在UserMapper.xml中进行配置
<resultMap id="userBaseMap" type="cn.edu.chd.entity.User">
    <id property="uid" column="uid"/>
    <result property="password" column="password"/>
    <result property="phone" column="phone"/>
    <result property="createTime" column="create_time"/>
    <result property="status" column="status"/>
resultMap>

<resultMap id="userWithBlogMap" extends="userBaseMap" type="cn.edu.chd.entity.UserBlog">
    <collection property="blogs" ofType="cn.edu.chd.entity.Blog">
        <id property="id" column="bid"/>
        <result property="title" column="title"/>
        <result property="content" column="blog_content"/>
        <result property="summary" column="summary"/>
        <collection property="comments" ofType="cn.edu.chd.entity.Comment">
            <id property="id" column="cid"/>
            <result property="content" column="comment_content"/>
        collection>
    collection>
resultMap>

<select id="queryByIdWithBlog" resultMap="userWithBlogMap">
    SELECT t1.`uid`,t1.phone,t1.`password`,t1.`create_time`,t1.`status`,
        t2.`id` AS bid,t2.`title`,t2.`content` AS blog_content,t2.`summary`,
        t3.`id` AS cid,t3.`content` AS comment_content
    FROM `user` t1,`blog` t2,`comment` t3
    WHERE t1.uid=t2.uid AND t2.id=t3.bid AND t1.uid=#{id}
select>
-
Spring框架
简介
-
2002年由Rod Johnson开发的一种框架,主要用来进行java企业级的开发以代替EJB。EJB使用比较繁琐,不仅需要继承某个类,还要实现一堆接口方法。使用Spring框架能够大大简化项目的开发,改变了对象创建的方式,降低了代码的耦合度,方便维护与测试
-
使用new关键字创建对象耦合度比较高,依赖关系由java代码维护,难以修改和维护。
//写死的方式,想要替换必须修改代码
Girl g = new Girl();
new PrettyGirl();
new YoungGirl();

Pay pay;
pay = new WXPay();
pay = Alipay();
pay = ManualPay();
-
使用Spring框架时,大部分的对象获取应该从容器中获取,而不是进行Java硬编码。
-
容器:就由它来写,以后我们要什么,就从这个容器中拿,在容器去声明告诉它,给我准备什么。
-
基础技术
- java
- 反射
- xml
- xml解析
- 代理
- 大量的设计模式
-
spring可以学习的模块
- Core technologies: dependency injection, events, resources, i18n, validation, data binding, type conversion, SpEL, AOP.
- Testing: mock objects, TestContext framework, Spring MVC Test,
WebTestClient. - Data Access: transactions, DAO support, JDBC, ORM, Marshalling XML.
- Spring MVC and Spring WebFlux web frameworks.
- Integration: remoting, JMS, JCA, JMX, email, tasks, scheduling, cache.
- Languages: Kotlin, Groovy, dynamic languages
-
官网:https://spring.io/
基础环境搭建
-
基本步骤
- 添加Spring依赖
- 编写一个Spring的配置文件
- 通过Spring的应用程序上下文对象获取对象
-
示例:配置Spring框架并创建一个对象
- 添加依赖项:
<dependency> <groupId>org.springframeworkgroupId> <artifactId>spring-coreartifactId> <version>5.1.5.RELEASEversion> dependency> <dependency> <groupId>org.springframeworkgroupId> <artifactId>spring-beansartifactId> <version>5.1.5.RELEASEversion> dependency> <dependency> <groupId>org.springframeworkgroupId> <artifactId>spring-contextartifactId> <version>5.1.5.RELEASEversion> dependency>- 创建实体类Girl
package cn.edu.chd.entity; public class Girl { private String name; private Integer age; //todo 生成get/set方法 }- 添加spring核心配置文件applicationContext.xml
<beans xmlns="http://www.springframework.org/schema/beans" xmlns:xsi="http://www.w3.org/2001/XMLSchema-instance" xsi:schemaLocation="http://www.springframework.org/schema/beans http://www.springframework.org/schema/beans/spring-beans.xsd"> <bean id="girl" class="cn.edu.chd.entity.Girl"> <property name="name" value="lucy"/> <property name="age" value="18"/> bean> beans>- 编写测试代码
public void m1(){ //获取上下文对象,spring里面声明对象都需要通过上下文对象获取 ApplicationContext ctx = new ClassPathXmlApplicationContext("applicationContext.xml"); //通过ctx对象获得Girl对象 Girl g = (Girl) ctx.getBean("girl"); System.out.println(g.getName()); } -
普通编写VSSpring方式
普通的获取对象的方式,所有对象之间的依赖,类之间的依赖关系都是在java代码里面维护的,很难维护,如果有替换方案也难以替换。
对象的产生全都是在配置文件里面完成的,可以直接从配置文件中了解依赖关系。
两大基本思想
-
控制反转(IOC,inverse of control)
什么是控制?谁反转了谁?
- 控制:创建对象、彼此关联的权力
- 夺取开发人员控制权,反转给spring容器。开发人员声明需要的对象,由spring容器完成对象的创建与管理,这种做法彻底改变了编程的方式,降低了代码的耦合度。
依赖注入:通过配置文件将属性值注入到bean对象中
- 面向切面编程(AOP,Aspect Oriented Programming)
容器

- pojos:自己定义的实体类
- metadata:在spring配置文件中配置的数据就是元数据,即告诉Spring容器在应用程序中实例化、配置和组装对象
- 实例化容器:利用ClassPathXmlContext等将配置文件传入
值的注入
-
setter注入
-
其字段必须具有对应的setter方法
-
通过property子节点注入,name指定要注入的属性名称,value指定要注入的值,ref指定要注入的其他bean对象的id,注入对象只能使用ref不能使用value。
-
如果没有对应setter方法就会报错,Invalid property ‘name’ of bean class [cn.edu.chd.entity.Girl]: Bean property ‘name’ is not writable or has an invalid setter method.
-
默认通过无参构造器完成对象的创建,如果没有默认的构造器就会报错:No default constructor found; nested exception is java.lang.NoSuchMethodException: cn.edu.chd.entity.Girl.()
<bean id="girl" class="cn.edu.chd.entity.Girl" depends-on="dog">
    <property name="name" value="韩雪"/>
    <property name="age" value="33"/>
    <property name="dog" ref="dog"/>
bean>
<bean id="dog" class="cn.edu.chd.entity.Dog">
    <property name="name" value="哮天犬"/>
bean>
-
-
构造注入
- 必须有匹配的有参构造方法
<bean id="car" class="cn.edu.chd.entity.Car"> <constructor-arg name="name" value="宝马"/> <constructor-arg name="price" value="3333333333"/> <constructor-arg name="speed" value="200"/> bean> <bean id="car" class="cn.edu.chd.entity.Car"> <constructor-arg index="0" value="宝马"/> <constructor-arg index="1" value="3333333333"/> <constructor-arg index="2" value="200"/> bean> <bean id="car" class="cn.edu.chd.entity.Car"> <constructor-arg type="java.lang.String" value="宝马"/> <constructor-arg type="java.lang.Double" value="3333333333"/> <constructor-arg type="java.lang.Double" value="200"/> bean> -
特殊属性值的注入
- 如果其对应的值是简单的字面值,直接写就可以了,如果是一个其他的类,那么使用内部bean的方式完成注入
<bean class="cn.edu.chd.entity.People" id="people"> <property name="name" value="阿发"/> <property name="age" value="62"/> <property name="friends"> <array> <value>刘德华value> <value>郭富城value> <value>黎明value> <value>张学友value> array> property> <property name="numbers"> <list> <value>8value> <value>7value> list> property> <property name="cats"> <list> <bean class="cn.edu.chd.entity.Cat"> <property name="skin" value="蓝色"/> <property name="leg" value="4"/> bean> <bean class="cn.edu.chd.entity.Cat"> <property name="skin" value="黄色"/> <property name="leg" value="2"/> bean> list> property> <property name="pigs"> <set> <bean class="cn.edu.chd.entity.Pig"> <property name="name" value="佩奇"/> <property name="sleep" value="80"/> <property name="kw" value="香辣"/> bean> <bean class="cn.edu.chd.entity.Pig"> <property name="name" value="小宝"/> <property name="sleep" value="99"/> <property name="kw" value="酱香"/> bean> set> property> <property name="users"> <map> <entry key="user1"> <bean class="cn.edu.chd.entity.User"> <property name="name" value="韩雪"/> <property name="address" value="梧桐村"/> bean> entry> <entry key="user2"> <bean class="cn.edu.chd.entity.User"> <property name="name" value="林青霞"/> <property name="address" value="台湾"/> bean> entry> map> property> bean> -
自动注入
<bean class="cn.edu.chd.entity.User" id="user" autowire="byType">
    <property name="name" value="陈慧琳"/>
    <property name="address" value="香港"/>
bean>
<bean class="cn.edu.chd.entity.Pig" id="pig">
    <property name="name" value="大宝"/>
bean>
![]()
-
解决方案
<bean class="cn.edu.chd.entity.Pig" id="pig" primary="true"> <property name="name" value="大宝"/> bean> <bean class="cn.edu.chd.entity.Pig" id="pig2" primary="false"> <property name="name" value="巨大宝"/> bean> -
自动注入的类型:
- byType:按照数据类型注入
- byName:按照bean对应的pojo里面的属性名来进行匹配
- constructor:先按byType匹配,如果结果不唯一再按照bean对应的pojo里面的构造方法的传入参数的名称来进行匹配
- default:不明确
- none:不注入
bean元素的探讨
-
属性探讨
-
abstract:该bean将无法被实例化,用于子bean继承
-
parent:指定父bean的id,继承父bean的属性和属性值
<bean id="girl" class="cn.edu.chd.entity.Girl" abstract="true"> <property name="name" value="韩雪"/> bean> <bean id="yourGirl" class="cn.edu.chd.entity.Girl" parent="girl"> <property name="age" value="33"/> bean> -
destroy-method:指定bean销毁时必须执行的方法,多用于一些清理工作。触发条件是bean确实被销毁才发生。
-
init-method:指定bean初始化时执行的方法,用于做准备性的工作。
<bean id="girl" class="cn.edu.chd.entity.Girl" destroy-method="clear" init-method="init">
    <property name="name" value="韩雪"/>
    <property name="age" value="33"/>
bean>
ApplicationContext ctx = new ClassPathXmlApplicationContext("applicationContext.xml"); Girl g = ctx.getBean("girl",Girl.class); //((ClassPathXmlApplicationContext) ctx).close();//情形一:容器被关闭 //((ClassPathXmlApplicationContext) ctx).refresh();//情形二:容器被刷新
((ClassPathXmlApplicationContext) ctx).destroy();//情形三:容器被销毁,该方法deprecated
- name:别名,通过它一样可以获取对象,可以设置多个别名,分隔符可以采用空格、逗号等等 - scope:singleton/prototype,配置单例/原型模式,单例模式指spring的上下文中只有一个对象,原型模式则每次访问都创建一个新对象。 - primary:与自动注入相关的内容,暂不讨论 - lazy-init:延迟初始化,默认情况下在加载完配置文件后就创建对象,为true时当访问对象才创建。 - 直接初始化:程序启动慢些,内存消耗大些,使用bean快些 - 延迟初始化:程序启动快,内存消耗小,使用bean时慢一些 - depends-on:如果一个bean的执行严重依赖于另一个bean的准备的话,就可以配置depends-on属性,属性值为被依赖bean的id。 -
-
补充几点
- 别名:alias标签
- 非字面值的注入问题:通过property子节点的ref
- spring多个配置文件中的bean可以相互引用
ApplicationContext对象与BeanFactory对象的区别
ApplicationContext对象不仅具有BeanFactory的全部功能,还添加了一些新特性。参考官方文档。
资源的引入
- 资源的路径
Resource template = ctx.getResource("some/resource/path/myTemplate.txt");//
Resource template = ctx.getResource("classpath:some/resource/path/myTemplate.txt");
Resource template = ctx.getResource("file:///some/resource/path/myTemplate.txt");
Resource template = ctx.getResource("http://myhost.com/resource/path/myTemplate.txt");
-
作为依赖项的资源
<bean id="myBean" class="..."> <property name="template" value="some/resource/path/myTemplate.txt"/> bean> -
spring配置文件完整的schema约束
<beans xmlns="http://www.springframework.org/schema/beans" xmlns:xsi="http://www.w3.org/2001/XMLSchema-instance" xmlns:aop="http://www.springframework.org/schema/aop" xmlns:c="http://www.springframework.org/schema/c" xmlns:cache="http://www.springframework.org/schema/cache" xmlns:context="http://www.springframework.org/schema/context" xmlns:jdbc="http://www.springframework.org/schema/jdbc" xmlns:jee="http://www.springframework.org/schema/jee" xmlns:lang="http://www.springframework.org/schema/lang" xmlns:mvc="http://www.springframework.org/schema/mvc" xmlns:p="http://www.springframework.org/schema/p" xmlns:task="http://www.springframework.org/schema/task" xmlns:tx="http://www.springframework.org/schema/tx" xmlns:util="http://www.springframework.org/schema/util" xsi:schemaLocation="http://www.springframework.org/schema/jee http://www.springframework.org/schema/jee/spring-jee-4.3.xsd http://www.springframework.org/schema/mvc http://www.springframework.org/schema/mvc/spring-mvc-4.3.xsd http://www.springframework.org/schema/context http://www.springframework.org/schema/context/spring-context-4.3.xsd http://www.springframework.org/schema/aop http://www.springframework.org/schema/aop/spring-aop-4.3.xsd http://www.springframework.org/schema/util http://www.springframework.org/schema/util/spring-util-4.3.xsd http://www.springframework.org/schema/jdbc http://www.springframework.org/schema/jdbc/spring-jdbc-4.3.xsd http://www.springframework.org/schema/cache http://www.springframework.org/schema/cache/spring-cache-4.3.xsd http://www.springframework.org/schema/task http://www.springframework.org/schema/task/spring-task-4.3.xsd http://www.springframework.org/schema/beans http://www.springframework.org/schema/beans/spring-beans.xsd http://www.springframework.org/schema/lang http://www.springframework.org/schema/lang/spring-lang-4.3.xsd http://www.springframework.org/schema/tx http://www.springframework.org/schema/tx/spring-tx-4.3.xsd "> beans> -
资源文件与配置文件的引入
<context:property-placeholder location="classpath:db.properties"/>

<bean class="cn.edu.chd.dao.ProviderDao" id="providerDao">

    <property name="driver" value="${driver}"/>
    <property name="url" value="${url}"/>
    <property name="user" value="${user}"/>
    <property name="password" value="${password}"/>
bean>


<import resource="classpath:spring/spring-*.xml" />
注解
-
组件注解
- component
- controller (springMVC)
- service(业务层)
- repository(dao层)
这些注解的功能都是相似的,只是语义不同。
-
自动注入注解
- Autowired
-
开启自动注解的扫描
<context:component-scan base-package="cn.edu.chd.entity"/> <context:component-scan base-package="cn.edu.chd.entity"> <context:exclude-filter type="annotation" expression="org.springframework.stereotype.Repository"/> context:component-scan> -
使用注解完成Spring的配置(略)
@Configuration//表明一个类是配置类,程序启动的时候扫描这个类,就能够完成所有的配置
@ComponentScan(basePackages = "cn.edu.chd")//开启扫描的注解
@ImportSource("classpath:path/to/applicationContext.xml")//引入配置文件
@PropertySource("classpath:path/to/db.properties")//引入properties文件
public class SpringConfig {
    @Bean("girl")//在Spring容器中注册一个bean
    public Girl createGirl(){
        Girl g = new Girl();
        g.setName("wangzuxian");
        g.setAge(22);
        return g;
    }
    @Bean("myService")//在Spring容器中注册一个bean
    public MyService createMyService(){
        return new MyService();
    }

    @Autowired
    private Environment env;//获取配置文件中的数据

    @Bean("myDao")
    public MyDao createMyDao(){
        System.out.println(env.getProperty("driver"));//取得配置文件中的值
        return new MyDao();
    }
}

//测试类
public class TestSpring{
    @Test
    public void m1(){
        ApplicationContext ctx = new AnnotationConfigApplicationContext(SpringConfig.class);
        MyService myService = ctx.getBean("myService",MyService.class);
        myService.hello();
    }
}
Spring AOP
AOP简介
-
背景
- 并不是用来取代OOP,只是OOP的一个补充。
- 传统的编程模式是纵向的,从问题到问题的解决方案。
- AOP将关注点从纵向变为横切面。对于不同的业务模块,事务处理的过程基本都是相似的,早期通过模板template达到封装的目的,而AOP在处理业务时,既没有实现、继承,也没有编写事务代码,仅通过配置文件就能够实现事务的控制
-
概念
-
切面:切入点和通知的结合
-
连接点:那些可以被被拦截到的点,Spring只支持方法类型的连接点,因此这里的点就是方法
-
切入点:那些被拦截的连接点就是切入点
-
建议(通知):拦截后执行的操作就是建议(通知)
-
简介:一种特殊的通知,在不修改代码的前提下在运行时为对象添加一些属性和方法
-
目标对象:要代理的原对象,即将通知应用到的类的对象
-
AOP代理:由AOP框架创建的对象,用于实现建议的内容,代替目标对象实际执行。在Spring框架中,aop代理可以是JDK动态代理或CGLIB代理
-
织入:将增强应用到目标对象的过程
-
-
建议类型
- 前置通知(before):在连接点之前执行,不能阻止进入连接点
- 后置通知(after):方法返回或抛出异常之前执行
- 异常通知(after-throwing):抛出异常之后执行
- 返回通知(又名最终通知,after-returning):方法返回之后执行
- 环绕通知(around):最全面的建议,在环绕建议中可以阻止连接点的执行
使用配置文件实现AOP
-
添加依赖项:
<dependency> <groupId>org.aspectjgroupId> <artifactId>aspectjrtartifactId> <version>1.9.2version> dependency> <dependency> <groupId>org.aspectjgroupId> <artifactId>aspectjweaverartifactId> <version>1.9.2version> dependency> -
配置文件
<beans xmlns="http://www.springframework.org/schema/beans" xmlns:aop="http://www.springframework.org/schema/aop" ...... xsi:schemaLocation=" http://www.springframework.org/schema/aop http://www.springframework.org/schema/aop/spring-aop-4.3.xsd ......"> <bean id="providerService" class="cn.edu.chd.service.ProviderService"/> <aop:aspectj-autoproxy/> <bean id="beforeAdvice" class="cn.edu.chd.advice.BeforeAdvice"/> <aop:config> <aop:aspect ref="beforeAdvice"> <aop:before method="methodBefore" pointcut="execution(public void cn.edu.chd.service.ProviderService.add())"/> aop:aspect> aop:config> beans> -
切入点表达式的写法
-
Spring AOP中一般使用execution切入点表达式,格式如下:
execution(modifiers-pattern? ret-type-pattern declaring-type-pattern?name-pattern(param-pattern) throws-pattern?) -
*表示任意值,可以用来替换修饰器返回类型、包名或包名的一部分、参数列表的类型
-
.用于连接包名、类名和方法名
-
…用于参数列表表示接受任意个参数,或者用于当前包下或当前包的子包下
-
实验证明包装类和基本数据类型对于execution是严格区分的
-
示例
execution(public * *(..))
execution(* set*(..))
execution(* com.xyz.service.AccountService.*(..)
execution(* com.xyz.service.*.*(..))
execution(* com.xyz.service..*.*(..))
-
-
注意事项
-
如果配置了多个相同类型的通知,那么按照配置的先后顺序依次执行
-
可以给通知的方法添加一个参数JoinPoint,该对象能够获取几乎所有这个方法的信息
public void before(JoinPoint joinPoint){ System.out.println(joinPoint.getSignature().getName()); System.out.println(Arrays.toString(joinPoint.getArgs())); } -
AOP只能应用于Spring容器中得到的bean
-
返回通知中returning属性可以实现返回值的绑定,值为通知的传入参数名
-
异常通知中throwing属性可以实现异常的绑定,值为通知的传入参数名
-
使用注解实现AOP
-
添加依赖项(同上)
-
在配置文件中引入aop约束并激活自动代理,同时开启基础扫描包
<aop:aspectj-autoproxy/> <context:component-scan base-package="cn.edu.chd"/> -
添加注解
package cn.edu.chd.advice;

import org.aspectj.lang.JoinPoint;
import org.aspectj.lang.ProceedingJoinPoint;
import org.aspectj.lang.annotation.*;
import org.springframework.stereotype.Component;

@Aspect
@Component
public class MyAdvice {
    @Before("execution(* cn.edu.chd.service.*.*(..))")
    public void before(){
        System.out.println("before........");
    }
    @After("execution(* cn.edu.chd.service.*.*(..))")
    public void after(){
        System.out.println("after..........");
    }
    @AfterReturning(pointcut="execution(* cn.edu.chd.service.*.*(..))",returning = "returning")
    public void afterReturning(String returning){
        System.out.println("afterReturning.............");
        System.out.println("returning = " + returning);
    }
    @AfterThrowing(pointcut="execution(* cn.edu.chd.service.*.*(..))",throwing="throwing")
    public void afterThrowing(Throwable throwing){
        System.out.println("afterThrowing..............");
    }
    @Around("execution(* cn.edu.chd.service.*.*(..))")
    public String around(ProceedingJoinPoint proceedingJoinPoint) throws Throwable {
        System.out.println("around begin.................");
        proceedingJoinPoint.proceed();
        System.out.println("around end.............");
        return "the returning of around";

    }
}
@Service public class MyService { public String hello(String msg){ System.out.println("msg = " + msg); return "the returning of hello"; } } -
配置多个通知的先后次序问题
同一个类定义的同类型通知按照定义的先后顺序执行
不同的类中定义的同类型通知按照切面优先级小的优先执行
通过@Order注解可以设置优先级,优先级是一个int整数
//MyAdvice.java
@Order(100)
@Aspect
@Component
public class MyAdvice {

    @Before("execution(* cn.edu.chd.service.*.*(..))")
    public void before(){
        System.out.println("before............");
    }
}
//OtherAdvice.java
@Order(10)
@Aspect
@Component
public class OtherAdvice {
    @Before("execution(* cn.edu.chd.service.*.*(..))")
    public void before2(){
        System.out.println("before2.....................");
    }
}
/* 执行结果
 * before2.....................
 * before............
 */
Spring MVC
简介
spring mvc是一个web层的mvc框架,mvc分别指模型(Model)、视图(View)、控制器(Controller)
MVC模式将责任进行拆分,不同的组件负责不同的事情,好处是结构清晰、更好维护,缺点是比较复杂
原理分析
- 流程图

-
组件分析
-
web.xml注册前端控制器,目的在于,我们希望让springmvc去处理所有的请求
通过
<servlet-mapping>
  <servlet-name>springmvcservlet-name>

  <url-pattern>/url-pattern>
servlet-mapping>
确实是处理所有的请求(不是真的所有)
-
urlPattern的写法问题
-
/
处理所有的请求,和/*不一样,处理完毕要出去的时候不会再将girl.jsp当作一个新的请求,将这个渲染的结构直接返回给浏览器
-
/*
永远都不要这么写。因为请求 /helloController过去的时候,它的视图名称是girl,girl.jsp页面,它将其当作了一个叫girl.jsp的请求,尝试去匹配对应的controller,但是容器中根本不存在这样的controller,于是就会404错误
-
*.do
这种方式是有的开发团队习惯将请求的行为添加一个扩展名.do用以区分,还有的团队习惯用.action
-
-
-
关于前端控制器的解释
spring mvc设计的理念是希望开发者尽量远离原生的servlet api,因为原生的servlet api使用起来比较繁琐,希望将操作进一步的简化,对很多东西进行了拆分,不希望我们将一些技术点绑定死,可以做到随意的切换。但本身还是servlet,分发的servlet。
-
springmvc配置文件的问题
默认情况下使用dispatcherServlet的名字当作命名空间,在web-inf下寻找[servletName]-servlet.xml配置文件。
如果想要修改配置文件的名称,那么可以修改web.xml配置文件
<servlet>
    <servlet-name>springmvcservlet-name>
    <servlet-class>org.springframework.web.servlet.DispatcherServletservlet-class>
    <init-param>

        <param-name>namespaceparam-name>
        <param-value>mvcparam-value>
    init-param>
servlet>
将配置文件移动位置之后,会出现错误,因为默认的规则要求在web-inf下。但是maven项目的标准应该在resources下面,如果解决这一问题?
重新指定上下文的配置文件的位置即可。
<servlet> <servlet-name>springmvcservlet-name> <servlet-class>org.springframework.web.servlet.DispatcherServletservlet-class> <init-param> <param-name>contextConfigLocationparam-name> <param-value>classpath:springmvc.xmlparam-value> init-param> servlet> -
视图解析器
- spring mvc支持多种视图技术,包括
- jsp
- freemaker(模板技术)
- 内部的视图解析器
- 视图前缀
- /jsp/它是我们请求响应资源的路径的配置,viewName=girl会加上前缀变为/jsp/girl
- 后缀
- .jsp 此时我们的前缀+视图名称+后缀= /jsp/girl.jsp
- request.getDS.forward(request,response)的作用是一样的,使用spring mvc可以简化操作流程
- 视图前缀
- 物理视图是由逻辑视图转化而来的,物理视图是webapp/jsp/girl.jsp,逻辑视图则是由前缀、逻辑视图名称和后缀组成的。physical view = prefix + logicViewName + suffix
- spring mvc支持多种视图技术,包括
-
控制器的解释
比较传统的方式是通过实现接口的方式实现的,Controller
如果接口只有一个方法,这种接口就称为函数式接口
@Nullable
ModelAndView handleRequest(HttpServletRequest request,HttpServletResponse response) throws Exception;
这个接口像doGet方法和doPost方法,区别在于返回值是ModelAndView对象,在Model中填充数据,在具体的视图View中进行展示
@Override
public ModelAndView handleRequest(HttpServletRequest httpServletRequest, HttpServletResponse httpServletResponse) throws Exception {
    ModelAndView mav = new ModelAndView();//定义一个ModelANdView对象
    mav.addObject("girl","菲菲");//添加Model数据
    mav.setViewName("girl");//添加View数据
    return mav;//返回该对象
}
还需要在配置文件中配置一下bean,要取个名字name,充当这个请求的uri。
只处理一个请求,感觉和servlet差别不大,不过真实使用一般采用注解开发。
spring mvc环境配置
-
步骤
- 创建web项目
- 编写web.xml,在其中注册一个特殊的servlet,前端控制器
- 编写一个spring mvc的配置文件
- 注册一个视图解析器
- 编写一个控制器
- 编写一个结果页面
-
创建web项目
pom.xml
<dependency>
    <groupId>org.springframeworkgroupId>
    <artifactId>spring-webmvcartifactId>
    <version>5.1.5.RELEASEversion>
dependency>

<dependency>
    <groupId>javax.servletgroupId>
    <artifactId>javax.servlet-apiartifactId>
    <version>3.1.0version>
    <scope>providedscope>
dependency>
web.xml
<web-app xmlns="http://xmlns.jcp.org/xml/ns/javaee"
         xmlns:xsi="http://www.w3.org/2001/XMLSchema-instance"
         xsi:schemaLocation="http://xmlns.jcp.org/xml/ns/javaee
                             http://xmlns.jcp.org/xml/ns/javaee/web-app_4_0.xsd"
         version="4.0">
    <display-name>Archetype Created Web Applicationdisplay-name>
    <servlet>

        <servlet-name>springmvcservlet-name>
        <servlet-class>org.springframework.web.servlet.DispatcherServletservlet-class>

        <init-param>
            <param-name>contextConfigLocationparam-name>
            <param-value>classpath:springmvc.xmlparam-value>
        init-param>
    servlet>

    <servlet-mapping>
        <servlet-name>springmvcservlet-name>

        <url-pattern>/url-pattern>
    servlet-mapping>
web-app>
注解开发模式
-
基本注解
- @Controller
- @RequestMapping
-
开发步骤
-
配置基础扫描的包,使配置的注解生效
-
在指定的类上面添加@Controller注解
-
添加@RequestMapping注解,添加视图名称参数(是由不同的requestHandler处理的HandlerMapping)
-
-
当我们写上Controller组件之后,就标记为一个控制器的组件,handlerMapping会去扫描寻找这个controller是否与之匹配,如果发现匹配就把处理工作交给它
具体的匹配就通过请求的路径进行匹配的@RequestMapping(uri),此时就是通过这个uri进行匹配的
-
@RequestMapping可以写在类上,也可以写在方法上,一般组合使用,类上的和方法上的requestMapping会进行拼接。
-
示例
<beans xmlns="http://www.springframework.org/schema/beans"
       xmlns:context="http://www.springframework.org/schema/context"
       xmlns:xsi="http://www.w3.org/2001/XMLSchema-instance"
       xsi:schemaLocation="http://www.springframework.org/schema/beans
           http://www.springframework.org/schema/beans/spring-beans.xsd
           http://www.springframework.org/schema/context
           http://www.springframework.org/schema/context/spring-context.xsd">

    <context:component-scan base-package="cn.edu.chd"/>

    <bean class="org.springframework.web.servlet.view.InternalResourceViewResolver">

        <property name="prefix" value="/jsp/"/>

        <property name="suffix" value=".jsp"/>
    bean>
beans>
@Controller @RequestMapping("/orders") public class OrdersController{ @RequestMapping("/addOrder") //返回值就是视图名称 public String addOrders(Model model){ List<Orders> list = new ArrayList<>(); Orders o = new Orders(); o.setId("1"); o.setName("洗面奶"); o.setTotal(333.3); list.add(o); o = new Orders(); o.setId("2"); o.setName("平底锅"); o.setTotal(888.77); list.add(o); model.addAttribute("list",list); return "orders"; } }<%-- Created by IntelliJ IDEA. User: lenovo Date: 2019/8/3 Time: 16:12 To change this template use File | Settings | File Templates. --%> <%@ page contentType="text/html;charset=UTF-8" language="java" %> <%@taglib prefix="c" uri="http://java.sun.com/jsp/jstl/core" %>Title ${obj.id} ${obj.name} ${obj.total}
转发与重定向
-
本质区别:重定向发起了一个新的请求,转发则没有
-
转发到页面:默认到选项
-
重定向到页面:redirect:path
-
转发到另一个控制器:forward:path
//不继承任何的类实现任何的接口,没有强迫性
@Controller
@RequestMapping("/hello")
public class HelloController {
    @RequestMapping("/forward")
    public String forward(Model model) {
        //spring mvc Model默认是request域中存放值
        System.out.println(111);
        model.addAttribute("skill", "sleep");
        return "forward";
    }
    @RequestMapping("/redirect")
    public String redirect(Model model){
        model.addAttribute("skill","cook");
        System.out.println(222);
        //不带斜杠的写法表示相对路径,根据当前上下文决定
        //如果加上redirect: 就跟视图解析的规则无关
        return "redirect:/jsp/redirect.jsp";
    }

    @RequestMapping("/forward2")
    public String forward2(){
        return "forward:/baby/hello";
    }
}
关于Spring MVC访问web元素的问题
- 可以获得的web元素
- request
- session
- application
- 可以通过模拟的对象完成操作,也可使用原生的Servlet API完成,直接在方法中传入参数即可
@Controller
@RequestMapping("/hello")
public class HelloController {
    //模拟请求
    @RequestMapping("/request")
    public String request(WebRequest request){
        System.out.println(request.getParameter("girl"));
        return "forward";
    }

    @RequestMapping("/request2")
    public String request2(HttpServletRequest request){
        System.out.println(request.getParameter("boy"));
        return "forward";
    }

    @RequestMapping("/request3")
    public String request3(HttpSession session){
        session.setAttribute("skill","sleep");
        return "redirect:/jsp/forward.jsp";
    }

    @RequestMapping("/request4")
    public String request4(HttpSession session){
        session.getServletContext().setAttribute("ctx","宇宙我最帅");
        return "redirect:/jsp/forward.jsp";
    }
}
注解的研究
-
@RequestMapping
-
value:配置访问的路径
请求映射的路径path可以写多个值,用{}括起来
@RequestMapping({"/a","/b","/c"}) -
path:是value的别名,作用与value一致
-
method:指定可以访问请求的类型,可以写成数组的形式,取值为RequestMethod.GET/POST/…
@RequestMapping(value="/a",method={RequestMethod.GET,RequestMethod.POST}) -
params:指定参数或限定这个参数的特征(=、!=)
@RequestMapping(path="/m1",params={"girl","boy"}) .../hello/m1 访问失败 .../hello/m1?boy=b&girl=g 访问成功 @RequestMapping(path="/m2",params={"girl=g","boy!=b"}) .../hello/m2 访问失败 .../hello/m2?boy=b&girl=g 访问失败 .../hello/m2?boy=c&girl=g 访问成功 -
headers:能够影响浏览器的行为
-
consumes:消费者,描述媒体类型,例如可以限定媒体类型为application/json;charset=UTF-8
-
produces:生产者,产生的响应的媒体类型
-
-
关于请求路径的问题,spring mvc支持ant风格
- ? 表示任意的字符,斜杠例外
- * 表示任意长度任意内容的字符串,斜杠除外
- ** 支持任意层路径,但是必须写成“/**”,不能写成“/get**"这种形式
-
其他Mapping注解
-
@GetMapping:相当于只允许get方式提交数据的@RequestMapping
-
@PostMapping:相当于只允许post方式提交数据的@RequestMapping
-
…
-
对于非get、post请求的支持,需要额外添加一些内容
- 添加一个过滤器
<filter> <filter-name>hiddenHttpMethodFilterfilter-name> <filter-class>org.springframework.web.filter.HiddenHttpMethodFilterfilter-class> filter> <filter-mapping> <filter-name>hiddenHttpMethodFilterfilter-name> <url-pattern>/*url-pattern> filter-mapping>- 表单提交里面还要添加一个隐藏的参数
<form action="${pageContext.request.contextPath}/hello/m3" method="post">
    <input type="hidden" name="_method" value="delete"/>
    delete<br/><input type="submit" value="submit"/>
form>
-
-
@PathVariable
-
restful风格
详情参考罗伊菲尔丁的博士论文
-
示例
@RequestMapping("/add/{id}/{name}/{price}")
public String addProduct(@PathVariable("id")Integer id,@PathVariable("name")String name,@PathVariable("price")Double price){
    System.out.println("id = " + id);
    System.out.println("name = " + name);
    System.out.println("price = " + price);
    return "result";
}
-
-
@ResponseBody:返回数据而不是一个页面,一般情况下返回的是json格式的数据
-
@RequestParam:参见表单数据的提交部分
-
@ModelAttribute:
-
使用方式一:
//就是在Controller里面任意一个具体方法执行前都会执行
@ModelAttribute("user")//默认是类名首字母小写
public User init(){
    System.out.println("init");
    User u = new User();
    u.setUsername("金田一一");
    return u;
}

@RequestMapping("/login")
@ResponseBody
public String login(Model model){
    System.out.println("model.containsAttribute(\"u\") = " + model.containsAttribute("u"));//false
    System.out.println("model.containsAttribute(\"user\") = " + model.containsAttribute("user"));//true
    System.out.println("model.containsAttribute(\"vdfdfdf\") = " + model.containsAttribute("vdfdfdf"));//false
    return "ok";
}
如果某些对象从头到尾每次请求都要存在,不消失,就是适合这么用
-
使用方式二:
@ModelAttribute public void init(Model model){ System.out.println("init"); User u = new User(); u.setUsername("金田一一"); model.addAttribute("user",u); } -
使用方式三:这种方式会在model中直接寻找
@RequestMapping("/login") @ResponseBody public String login(@ModelAttribute User user){ System.out.println("user = " + user); return "ok"; }注意如果user同时与表单数据绑定了,那么model中的值会被表单数据传入的值覆盖掉。
-
-
@RequestBody
json数据,不是通过form表单传递,而是通过下面的方式传递数据
ajax({ data: }) -
@SessionAttributes
用在类上面,将model中的属性添加到session中,可以根据属性名或类型来添加。
@Controller @RequestMapping("/user") @SessionAttributes("user")//将model中的user对象添加到session中 //添加多个值:@SessionAttributes(value={"user","usr"}) //根据类型添加:@SessionAttributes(types=User.class) //根据名称和类型添加:@SessionAttributes(value={"user","usr"},types={User.class,Orders.class}) public class UserController { //表单数据被绑定到user对象中,user对象被添加到model中,@SessionAttributes在model中寻找user并添加到session中 @PostMapping("/put") public String put(User user){ System.out.println("user = " + user); return "redirect:/jsp/result.jsp"; } } -
@SessionAttribute
要求当前这次访问中的会话里面必须要有某个对象
@Controller @RequestMapping("/user") @SessionAttributes("userInfo") public class UserController { @RequestMapping("/register") @ResponseBody public String doRegister(User userInfo){ return "register successfully!" } @RequestMapping("/login") public String doLogin(@SessionAttribute User user){ return "redirect:/jsp/home.jsp"; } } -
@CookieValue
获取cookie中的某个键值对
@PostMapping("/put") public String put(User user,@CookieValue("JSESSIONID") String jsessionid){ System.out.println("jsessionid = " + jsessionid); return "redirect:/jsp/result.jsp"; } -
@RestController
相当于@Controller+@ResponseBody
常见问题的解决
-
关于静态资源访问的问题
由于我们的servlet设置了URL匹配方式为“/”,所以静态资源也被当做一个后台的请求
Request URL: http://localhost:8080/springmvc_war_exploded/static/css/index.css它尝试匹配一个static/css/index.css的Controller里面的RequestMapping,因为没有所以匹配404
解决方法:
-
方法一:最简单的,是让springmvc单独处理,将这些请求交给容器的默认Servlet处理,就不让DispatcherServlet来处理了。springmvc能够根据MIME类型区分出媒体请求
<mvc:default-servlet-handler/> <mvc:annotation-driven/> -
方法二:通过映射关系描述一一编写规则
<mvc:resources mapping="/static/css/*" location="static/css/"/> -
方法三:自行在web.xml中定义映射规则
-
-
关于post请求中文乱码问题的解决
添加一个过滤器即可,spring mvc提供了优良的字符编码过滤器,注册即可使用
<filter> <filter-name>characterEncodingFilterfilter-name> <filter-class>org.springframework.web.filter.CharacterEncodingFilterfilter-class> <init-param> <param-name>encodingparam-name> <param-value>UTF-8param-value> init-param> <init-param> <param-name>forceRequestEncodingparam-name> <param-value>trueparam-value> init-param> filter> <filter-mapping> <filter-name>characterEncodingFilterfilter-name> <url-pattern>/*url-pattern> filter-mapping> -
关于form表单提交数据请求
<form action="${pageContext.request.contextPath}/user/put" method="post"> <input type="hidden" name="_method" value="put"/> username:<input type="text" name="username"/><br/> password:<input type="password" name="password"/><br/> <input type="submit" value="提交"/> form>-
方式一:通过属性名字进行绑定
通过属性的名称进行绑定可以完成数据的传递,页面当中表单元素的name属性值与后台形参的名字要保持一致。
@Controller @RequestMapping("/user") public class UserController { @PutMapping("/put") @ResponseBody //页面当中表单元素的属性值与后台形参的名字要保持一致 public String put(String username,String password){ System.out.println("username = " + username); System.out.println("password = " + password); return "ok"; } } -
方式二:利用@RequestParam注解
@Controller @RequestMapping("/user") public class UserController { @PutMapping("/put") @ResponseBody public String put(@RequestParam("username") String usr,@RequestParam("password") String pwd){ System.out.println("usr = " + usr); System.out.println("pwd = " + pwd); return "ok"; } } -
方式三:利用实体类对象实现参数传递
@Controller @RequestMapping("/user") public class UserController { @PutMapping("/put") @ResponseBody public String put(User user){ System.out.println("user = " + user); return "ok"; } } -
关于时间类型数据的传递
方法一:在实体类属性前或方法的参数前添加@DateTimeFormat注解
//User.java
public class User{
    private String username;
    private String password;
    @DateTimeFormat(pattern="yyyy-MM-dd")
    private Date birthday;
}
//UserController.java
@RequestMapping("/login")
@ResponseBody
public String login(User user){
    System.out.println("user = " + user);
    return "ok";
}

@RequestMapping("/login")
@ResponseBody
public String login2(
    String username,
    String password,
    @DateTimeFormat("yyyy-MM-dd") Date birthday){
    System.out.println("user = " + user);
    return "ok";
}
方法二:添加
//配置Date类型数据的绑定规则
@InitBinder("user")//不写参数默认为类名首字母小写
public void init(WebDataBinder dataBinder){
    //这里指定什么格式,前台就只能传递什么格式
    SimpleDateFormat sdf = new SimpleDateFormat("yyyy-MM-dd");
    sdf.setLenient(false);
    dataBinder.registerCustomEditor(Date.class,new CustomDateEditor(sdf,false));

    sdf = new SimpleDateFormat("yyyy-MM-dd HH:mm:ss");
    sdf.setLenient(false);
    dataBinder.registerCustomEditor(Date.class,new CustomDateEditor(sdf,false));
}

@PostMapping("/put")
@ResponseBody
public String put(User user){
    System.out.println("user = " + user);
    //打印的结果:user = User{username='***', password='111', birthday=Thu Aug 01 00:00:00 CST 2019}
    return "ok";
}
-
LayUI工具的使用
https://www.layui.com/
Json数据交互
-
额外依赖
<dependency>
    <groupId>com.fasterxml.jackson.coregroupId>
    <artifactId>jackson-databindartifactId>
    <version>2.9.3version>
dependency>
<dependency>
    <groupId>com.fasterxml.jackson.coregroupId>
    <artifactId>jackson-coreartifactId>
    <version>2.9.3version>
dependency>
<dependency>
    <groupId>com.fasterxml.jackson.coregroupId>
    <artifactId>jackson-annotationsartifactId>
    <version>2.9.3version>
dependency>
<dependency>
    <groupId>net.sf.json-libgroupId>
    <artifactId>json-libartifactId>
    <version>2.4version>
    <classifier>jdk15classifier>
dependency>


<dependency>
    <groupId>org.codehaus.jacksongroupId>
    <artifactId>jackson-core-aslartifactId>
    <version>1.9.2version>
dependency>
<dependency>
    <groupId>org.codehaus.jacksongroupId>
    <artifactId>jackson-mapper-aslartifactId>
    <version>1.9.2version>
dependency>
json数据返回前台以及如何解析
-
json后台返回
-
返回pojo
@RequestMapping("/m1") @ResponseBody//this annotation knows what is returned is not view, it will convert the data into json form public User m1(){ User user = new User(); user.setName("许晴"); user.setPassword("e434243"); return user; } -
返回map
@RequestMapping("/m2") @ResponseBody public Map<String,Object> m2(){ Map<String,Object> map = new HashMap<>(); map.put("name","许晴"); map.put("password","12345454"); return map; } -
返回数组
@RequestMapping("/m3") @ResponseBody public User[] m3(){ User user = new User(); user.setPassword("123"); user.setName("许晴"); User user1 = new User(); user1.setPassword("456"); user1.setName("姜文"); return new User[]{user,user1}; } -
返回list
@RequestMapping("/m4")
@ResponseBody
public List<User> m4(){
    List<User> users = new ArrayList<>();
    User user = new User();
    user.setName("许晴");
    user.setPassword("123");
    users.add(user);
    user = new User();
    user.setName("姜文");
    user.setPassword("456");
    users.add(user);
    return users;
}
-
-
json前台如何解析
json数据使用ajax提交到后台进行解析
-
指明返回的数据类型
contentType:"application/json;charset=utf-8" -
json后台接收数据
@RequestMapping("/add") @ResponseBody //@RequestBody注解用于接受通过ajax形式传回的json数据,如果不加这个注解就只能接受表单数据 public String add(@RequestBody User user){ System.out.println("user = "+user); return "ok"; } //也可以接收list集合 @RequestMapping("/addList") @ResponseBody public String addList(@RequestBody List<User> users){ System.out.println("users = "+users); return "ok"; } -
json前台发送数据
-
关于form提交数据与ajax提交数据的区别
对于form表单提交的数据,contentType属于application/x-www-form-urlencoded
对于ajax发送json,contentType则属于application/json


使用layui改善表单的显示
//注意引入jquery
layui.use(['element','jquery','layer'],function(){
    var element=layui.element;
    var jquery=layui.jquery;
    var layer=layui.layer;

});
xml数据交互
对于很多第三方开发,还是由很多会采用XML作为数据交互,比如微信
-
添加额外的依赖
<dependency> <groupId>com.fasterxml.jackson.dataformatgroupId> <artifactId>jackson-dataformat-xmlartifactId> <version>2.9.3version> dependency> -
方法返回的数据定义
@RestController
@RequestMapping("/xml")
public class XMLController {
    //描述生产类型,也就是返回的类型
    //@RequestMapping(value="/m1",produces={"application/xml"})
    @RequestMapping(value="/m1",produces = {MediaType.APPLICATION_XML_VALUE})
    public User m1() {
        //将数据转换为XML形式user
        User u = new User();
        u.setName("梁佳豪");
        u.setPassword("123");
        return u;
    }
}
如果想要实现以下的效果
<user name="hahaha">
	<password>123password>
user>
文件上传
文件上传有2种方式,在servlet3.0之前采用的方案是apache fileUpload,Servlet3.0之后可以采用servlet的文件上传。
在进行文件上传之前,务必将表单数据类型设置为“multipart/form”,这一点非常关键。
-
apache 上传组件方案
-
添加依赖
<dependency> <groupId>commons-fileuploadgroupId> <artifactId>commons-fileuploadartifactId> <version>1.3.3version> dependency> -
在springmvc.xml中要进行注册一个文件上传解析器
<bean id="multipartResolver" class="org.springframework.web.multipart.commons.CommonsMultipartResolver"> <property name="maxUploadSize" value="1024*1024"/> <property name="defaultEncoding" value="UTF-8"/> <property name="maxUploadSizePerFile" value="2000000"/> bean> -
准备一个上传的页面
<%@ page contentType="text/html;charset=UTF-8" language="java" %>Title <%--添加一个 enctype="multipart/form-data"--%> -
后台处理程序
@RestController @RequestMapping("/file") public class FileController { private static String uploadPath = "D:"+ File.separator; @RequestMapping("/upload") public String upload(@RequestParam("file") MultipartFile multipartFile) { // 1 传到哪里去 2 传什么 3 传的细节 // 1 判断 String newFilename=null; if (multipartFile != null && !multipartFile.isEmpty()) { // 不空才传文件 // 2 获取原始的文件名 String originalFilename = multipartFile.getOriginalFilename(); System.out.println("orginalFilename = " + originalFilename); // 3 截取不带扩展名的文件名 String fileNamePrefix = originalFilename.substring(0, originalFilename.lastIndexOf(".")); // 4 加工处理文件名,原文件名+时间戳 String newFileNamePrefix = fileNamePrefix + new Date().getTime(); // 5 得到新文件名 newFilename = newFileNamePrefix + originalFilename.substring(originalFilename.lastIndexOf(".")); // 6 构建文件对象 File file = new File(uploadPath + newFilename); // 7 上传 try { multipartFile.transferTo(file); } catch (IOException e) { e.printStackTrace(); } } return newFilename; } } -
多个文件上传:
基本方法是类似的,在jsp页面的表单中添加文件类型的表单输入项,然后在后台处理程序中将传入的参数改为MultipartFile类型的数组,对数组进行遍历,逐个上传即可。
-
-
Servlet3.0新特性
-
在springmvc.xml中注册一个文件上传解析器
<bean id="multipartResolver" class="org.springframework.web.multipart.support.StandardServletMultipartResolver"/> -
在web.xml中进行配置
<servlet> <servlet-name>springmvcservlet-name> <servlet-class>org.springframework.web.servlet.DispatcherServletservlet-class> <init-param> <param-name>contextConfigLocationparam-name> <param-value>classpath:springmvc.xmlparam-value> init-param> <multipart-config> <max-file-size>20000000max-file-size> multipart-config> servlet> -
后台处理程序同上
-
文件下载
-
后台处理程序
@RestController
@RequestMapping("/file")
public class FileController {

    private static String parentPath = "D:"+File.separator;

    @RequestMapping("/download")
    public String download(HttpServletResponse response) {
        //通过输出流写到客户端、浏览器
        // 1 获取文件下载名
        String fileName = "流浪地球.HD1280高清国语中字版.mp4";

        // 2 构建一个文件对象通过Paths工具类获取一个Path对象
        Path path = Paths.get(parentPath, fileName);

        // 3 判断是否存在
        if(Files.exists(path)){
            // 存在则下载
            // 通过response设置响应类型
            // 4 获取文件的后缀
            String fileSuffix = fileName.substring(fileName.lastIndexOf(".")+1);

            // 5 设置contentType,只有指定它才能去下载
            response.setContentType("application/"+fileSuffix);

            // 6 添加头信息
            response.addHeader("Content-Disposition", "attachment; filename="
                    + new String(fileName.getBytes(StandardCharsets.UTF_8),
                              StandardCharsets.ISO_8859_1));

            // 7 通过Path写出去就ok
            try {
                Files.copy(path,response.getOutputStream());
            } catch (IOException e) {
                e.printStackTrace();
            }
        }
        return "ok";
    }
}
拦截器
-
spring mvc提供了拦截器,类似于过滤器,它将在处理请求之前先做检查,有权决定接下来是否继续,也可以对我们的请求进行加工。
拦截器可以设计多个

-
通过实现HandlerInterceptor,这是一个接口,定义了非常重要的三个方法
- 前置处理
- 后置处理
- 完成处理
案例一:通过拦截器实现方法耗时统计
-
添加日志依赖项:
<dependency> <groupId>log4jgroupId> <artifactId>log4jartifactId> <version>1.2.17version> dependency> -
定义拦截器类
//MethodTimerInterceptor.java //实现接口HandlerInterceptor,重写三个方法 public class MethodTimerInterceptor implements HandlerInterceptor { private static final Logger LOGGER= Logger.getLogger(MethodTimerInterceptor.class); // 前置功能 开始 到 结束 两个时间点做减法 @Override public boolean preHandle(HttpServletRequest request, HttpServletResponse response, Object handler) throws Exception { //定义开始时间 long start = System.currentTimeMillis(); // 将其存入到请求域中 request.setAttribute("start",start); // 返回true,才会找下一个拦截器或找控制器 //记录请求日志 LOGGER.info(request.getRequestURI()+",请求到达"); return true; } @Override public void postHandle(HttpServletRequest request, HttpServletResponse response, Object handler, ModelAndView modelAndView) throws Exception { // 取出start long start = (long) request.getAttribute("start"); // 得到end long end = System.currentTimeMillis(); // 记录一下耗时 long spendTime = end - start; if(spendTime >= 1000){ LOGGER.warn("方法耗时:"+spendTime+"毫秒,方法耗时严重,请及时处理"); }else{ LOGGER.info("方法耗时:"+spendTime+"毫秒,速度正常"); } } @Override public void afterCompletion(HttpServletRequest request, HttpServletResponse response, Object handler, Exception ex) throws Exception { } } -
在springmvc.xml中配置拦截器
<mvc:interceptors> <mvc:interceptor> <mvc:mapping path="/**/*"/> <bean class="cn.edu.chd.interceptors.MethodTimerInterceptor"> bean> mvc:interceptor> mvc:interceptors> -
测试
@Controller
@RequestMapping("/user")
public class UserController {
  @RequestMapping("/login")
  public String login() {
      System.out.println("login.............");
      return "user";
  }
}

//执行结果
//16:29:12,320  INFO http-nio-8080-exec-12 interceptors.MethodTimerInterceptor:24 - /springmvc_war_exploded/user/login,请求到达
//login.............
//16:29:12,355  INFO http-nio-8080-exec-12 interceptors.MethodTimerInterceptor:39 - 方法耗时:35毫秒,速度正常
案例二:通过拦截器实现方法耗时统计
-
添加日志依赖项:
<dependency> <groupId>log4jgroupId> <artifactId>log4jartifactId> <version>1.2.17version> dependency> -
定义拦截器类
public class SessionInterceptor implements HandlerInterceptor { private static final Logger LOGGER = Logger.getLogger(SessionInterceptor.class); //检查当前会话是否有user,如果有放行,如果没有不放行 @Override public boolean preHandle(HttpServletRequest request, HttpServletResponse response, Object handler) throws Exception { Object user = request.getSession().getAttribute("SESSION_USER"); if(user == null){ LOGGER.warn("您的权限不够,请先登录"); return false; } if(user instanceof User){ //再去数据库检查身份,是否拉黑了 User u = (User)user; u.setPassword(null); request.getSession().setAttribute("SESSION_USER",u); LOGGER.info(u.getUsername()+"处于登录状态,可以执行操作"); return true; } else{ LOGGER.warn("请不要搞事情,请先登录"); } return false; } } -
在springmvc.xml中配置拦截器
<mvc:interceptors> <mvc:interceptor> <mvc:mapping path="/user/**/*"/> <mvc:exclude-mapping path="/user/login"/> <bean class="cn.edu.chd.interceptors.SessionInterceptor"/> mvc:interceptor> mvc:interceptors> -
测试
@Controller
@RequestMapping("/user")
public class UserController {
  @RequestMapping("/login")
  public String login(User user, HttpSession session) {
      System.out.println("login.............");
      //数据库检查
      //将用户信息存到会话中,也可以通过状态信息
      session.setAttribute("SESSION_USER",user);
      return "user";
  }

  @RequestMapping("/delete")
  public String delete(){
      System.out.println("delete.......");
      return "delete";
  }
}

//17:36:04,928  WARN http-nio-8080-exec-2 interceptors.SessionInterceptor:17 - 您的权限不够,请先登录
//login.............
//17:36:44,663  INFO http-nio-8080-exec-2 interceptors.SessionInterceptor:26 - 梁佳豪处于登录状态,可以执行操作
//delete.......
拦截器的注意事项
- 配置在前的先执行,配置在后的后执行
- 拦截器与过滤器的比较
- 相似:都有优先处理请求的权力,可以决定是否将控制权移交给控制器,可以加工请求的数据
- 区别:过滤器优先于拦截器执行,过滤器是servlet组件,拦截器大都是框架提供的
SSM整合
spring和spring mvc天然集成,所以只需要解决mybatis和spring整合的问题
重点整合mybatis和spring
- 由spring容器管理mybatis这个mapper
- 由spring利用声明式事务(AOP)进行事务综合管理
添加依赖
<project xmlns="http://maven.apache.org/POM/4.0.0" xmlns:xsi="http://www.w3.org/2001/XMLSchema-instance"
         xsi:schemaLocation="http://maven.apache.org/POM/4.0.0 http://maven.apache.org/xsd/maven-4.0.0.xsd">
    <modelVersion>4.0.0modelVersion>

    <groupId>cn.edu.chdgroupId>
    <artifactId>ssmartifactId>
    <version>1.0-SNAPSHOTversion>
    <packaging>warpackaging>

    <name>ssm Maven Webappname>
    <url>http://www.example.comurl>

    <properties>
        <project.build.sourceEncoding>UTF-8project.build.sourceEncoding>
        <maven.compiler.source>1.8maven.compiler.source>
        <maven.compiler.target>1.8maven.compiler.target>
        <spring.version>5.0.8.RELEASEspring.version>
        <jackson.version>2.9.3jackson.version>
    properties>

    <dependencies>
        <dependency>
            <groupId>junitgroupId>
            <artifactId>junitartifactId>
            <version>4.12version>
            <scope>testscope>
        dependency>


        <dependency>
            <groupId>org.springframeworkgroupId>
            <artifactId>spring-coreartifactId>
            <version>${spring.version}version>
        dependency>
        <dependency>
            <groupId>org.springframeworkgroupId>
            <artifactId>spring-contextartifactId>
            <version>${spring.version}version>
        dependency>
        <dependency>
            <groupId>org.springframeworkgroupId>
            <artifactId>spring-context-supportartifactId>
            <version>${spring.version}version>
        dependency>
        <dependency>
            <groupId>org.springframeworkgroupId>
            <artifactId>spring-beansartifactId>
            <version>${spring.version}version>
        dependency>
        <dependency>
            <groupId>org.springframeworkgroupId>
            <artifactId>spring-webartifactId>
            <version>${spring.version}version>
        dependency>
        <dependency>
            <groupId>org.springframeworkgroupId>
            <artifactId>spring-webmvcartifactId>
            <version>${spring.version}version>
        dependency>
        <dependency>
            <groupId>org.springframeworkgroupId>
            <artifactId>spring-aopartifactId>
            <version>${spring.version}version>
        dependency>
        <dependency>
            <groupId>org.springframeworkgroupId>
            <artifactId>spring-aspectsartifactId>
            <version>${spring.version}version>
        dependency>
        <dependency>
            <groupId>org.springframeworkgroupId>
            <artifactId>spring-jdbcartifactId>
            <version>${spring.version}version>
        dependency>
        <dependency>
            <groupId>org.springframeworkgroupId>
            <artifactId>spring-txartifactId>
            <version>${spring.version}version>
        dependency>


        <dependency>
            <groupId>com.fasterxml.jackson.coregroupId>
            <artifactId>jackson-databindartifactId>
            <version>${jackson.version}version>
        dependency>
        <dependency>
            <groupId>com.fasterxml.jackson.coregroupId>
            <artifactId>jackson-coreartifactId>
            <version>${jackson.version}version>
        dependency>
        <dependency>
            <groupId>com.fasterxml.jackson.coregroupId>
            <artifactId>jackson-annotationsartifactId>
            <version>${jackson.version}version>
        dependency>

        <dependency>
            <groupId>net.sf.json-libgroupId>
            <artifactId>json-libartifactId>
            <version>2.4version>
            <classifier>jdk15classifier>
        dependency>


        <dependency>
            <groupId>org.codehaus.jacksongroupId>
            <artifactId>jackson-core-aslartifactId>
            <version>1.9.2version>
        dependency>
        <dependency>
            <groupId>org.codehaus.jacksongroupId>
            <artifactId>jackson-mapper-aslartifactId>
            <version>1.9.2version>
        dependency>


        <dependency>
            <groupId>commons-fileuploadgroupId>
            <artifactId>commons-fileuploadartifactId>
            <version>1.3.1version>
        dependency>


        <dependency>
            <groupId>org.mybatisgroupId>
            <artifactId>mybatisartifactId>
            <version>3.4.1version>
        dependency>
        <dependency>
            <groupId>mysqlgroupId>
            <artifactId>mysql-connector-javaartifactId>
            <version>5.1.38version>
        dependency>


        <dependency>
            <groupId>org.slf4jgroupId>
            <artifactId>slf4j-apiartifactId>
            <version>1.7.12version>
        dependency>
        <dependency>
            <groupId>org.slf4jgroupId>
            <artifactId>slf4j-log4j12artifactId>
            <version>1.7.12version>
        dependency>
        <dependency>
            <groupId>log4jgroupId>
            <artifactId>log4jartifactId>
            <version>1.2.17version>
        dependency>


        <dependency>
            <groupId>com.mchangegroupId>
            <artifactId>c3p0artifactId>
            <version>0.9.2.1version>
        dependency>


        <dependency>
            <groupId>org.mybatisgroupId>
            <artifactId>mybatis-springartifactId>
            <version>1.3.0version>
        dependency>


        <dependency>
            <groupId>javax.servletgroupId>
            <artifactId>javax.servlet-apiartifactId>
            <version>3.1.0version>
            <scope>providedscope>
        dependency>
        <dependency>
            <groupId>javax.servlet.jspgroupId>
            <artifactId>javax.servlet.jsp-apiartifactId>
            <version>2.3.1version>
            <scope>providedscope>
        dependency>
        <dependency>
            <groupId>javax.servletgroupId>
            <artifactId>jstlartifactId>
            <version>1.2version>
        dependency>


        <dependency>
            <groupId>joda-timegroupId>
            <artifactId>joda-timeartifactId>
            <version>2.9.9version>
        dependency>


        <dependency>
            <groupId>com.github.pagehelpergroupId>
            <artifactId>pagehelperartifactId>
            <version>5.1.2version>
        dependency>


        <dependency>
            <groupId>commons-codecgroupId>
            <artifactId>commons-codecartifactId>
            <version>1.10version>
        dependency>
    dependencies>

    <build>
        <finalName>ssmfinalName>
        <pluginManagement>
            <plugins>
                <plugin>
                    <artifactId>maven-clean-pluginartifactId>
                    <version>3.1.0version>
                plugin>

                <plugin>
                    <artifactId>maven-resources-pluginartifactId>
                    <version>3.0.2version>
                plugin>
                <plugin>
                    <artifactId>maven-compiler-pluginartifactId>
                    <version>3.8.0version>
                plugin>
                <plugin>
                    <artifactId>maven-surefire-pluginartifactId>
                    <version>2.22.1version>
                plugin>
                <plugin>
                    <artifactId>maven-war-pluginartifactId>
                    <version>3.2.2version>
                plugin>
                <plugin>
                    <artifactId>maven-install-pluginartifactId>
                    <version>2.5.2version>
                plugin>
                <plugin>
                    <artifactId>maven-deploy-pluginartifactId>
                    <version>2.8.2version>
                plugin>
            plugins>
        pluginManagement>
    build>
project>
web.xml配置
注册spring的上下文
<context-param>

    <param-name>contextConfigLocationparam-name>
    <param-value>classpath:spring/applicationContext.xmlparam-value>
context-param>
字符编码以及全HTTP请求支持过滤器添加
<filter>
    <filter-name>encodingFilterfilter-name>
    <filter-class>org.springframework.web.filter.CharacterEncodingFilterfilter-class>
    <init-param>
        <param-name>encodingparam-name>
        <param-value>UTF-8param-value>
    init-param>
    <init-param>
        <param-name>forceRequestEncodingparam-name>
        <param-value>trueparam-value>
    init-param>
    <init-param>
        <param-name>forceResponseEncodingparam-name>
        <param-value>trueparam-value>
    init-param>
filter>
<filter-mapping>
    <filter-name>encodingFilterfilter-name>
    <url-pattern>/*url-pattern>
filter-mapping>
<filter>
    <filter-name>hiddenHttpMethodFilterfilter-name>
    <filter-class>org.springframework.web.filter.HiddenHttpMethodFilterfilter-class>
filter>
<filter-mapping>
    <filter-name>hiddenHttpMethodFilterfilter-name>
    <url-pattern>/*url-pattern>
filter-mapping>
DispatcherServlet注册
<servlet>
    <servlet-name>springMVCservlet-name>
    <servlet-class>org.springframework.web.servlet.DispatcherServletservlet-class>
    <init-param>
        <param-name>contextConfigLocationparam-name>
        <param-value>classpath:spring/spring-servlet.xmlparam-value>
    init-param>
    <load-on-startup>1load-on-startup>
servlet>
<servlet-mapping>
    <servlet-name>springMVCservlet-name>
    <url-pattern>/url-pattern>
servlet-mapping>
spring启动监听器配置
<listener>
	<listener-class>org.springframework.web.context.ContextLoaderListenerlistener-class>
listener>
spring核心配置文件编写
核心配置文件用于引入其他配置文件 applicationContext.xml
<beans xmlns="http://www.springframework.org/schema/beans"
       xmlns:xsi="http://www.w3.org/2001/XMLSchema-instance"
       xsi:schemaLocation="http://www.springframework.org/schema/beans http://www.springframework.org/schema/beans/spring-beans.xsd">

    <import resource="classpath:spring/spring-*.xml"/>
beans>
spring-servlet.xml
<beans xmlns="http://www.springframework.org/schema/beans"
       xmlns:xsi="http://www.w3.org/2001/XMLSchema-instance"
       xmlns:aop="http://www.springframework.org/schema/aop"
       xmlns:c="http://www.springframework.org/schema/c"
       xmlns:cache="http://www.springframework.org/schema/cache"
       xmlns:context="http://www.springframework.org/schema/context"
       xmlns:jdbc="http://www.springframework.org/schema/jdbc"
       xmlns:jee="http://www.springframework.org/schema/jee"
       xmlns:lang="http://www.springframework.org/schema/lang"
       xmlns:mvc="http://www.springframework.org/schema/mvc"
       xmlns:p="http://www.springframework.org/schema/p"
       xmlns:task="http://www.springframework.org/schema/task"
       xmlns:tx="http://www.springframework.org/schema/tx"
       xmlns:util="http://www.springframework.org/schema/util"
       xsi:schemaLocation="http://www.springframework.org/schema/jee http://www.springframework.org/schema/jee/spring-jee.xsd
                           http://www.springframework.org/schema/mvc http://www.springframework.org/schema/mvc/spring-mvc.xsd
                           http://www.springframework.org/schema/context http://www.springframework.org/schema/context/spring-context.xsd
                           http://www.springframework.org/schema/aop http://www.springframework.org/schema/aop/spring-aop.xsd
                           http://www.springframework.org/schema/util http://www.springframework.org/schema/util/spring-util.xsd
                           http://www.springframework.org/schema/jdbc http://www.springframework.org/schema/jdbc/spring-jdbc.xsd
                           http://www.springframework.org/schema/cache http://www.springframework.org/schema/cache/spring-cache.xsd
                           http://www.springframework.org/schema/task http://www.springframework.org/schema/task/spring-task.xsd
                           http://www.springframework.org/schema/beans http://www.springframework.org/schema/beans/spring-beans.xsd
                           http://www.springframework.org/schema/lang http://www.springframework.org/schema/lang/spring-lang.xsd
                           http://www.springframework.org/schema/tx http://www.springframework.org/schema/tx/spring-tx.xsd">

    <context:component-scan base-package="com.sz">
    	<context:exclude-filter type="annotation" expression="org.springframework.stereotype.Service"/>
    context:component-scan>


    <bean class="org.springframework.web.servlet.view.InternalResourceViewResolver">
    	<property name="prefix" value="/pages/"/>
        <property name="suffix" value=".jsp"/>
    bean>


    <mvc:annotation-driven>

        <mvc:message-converters>
            <bean class="org.springframework.http.converter.StringHttpMessageConverter">
                <property name="supportedMediaTypes">
                    <list>
                        <value>application/json;charset=UTF-8value>
                    list>
                property>
            bean>
        mvc:message-converters>
    mvc:annotation-driven>

    <bean class="org.springframework.web.servlet.mvc.method.annotation.RequestMappingHandlerAdapter">
        <property name="messageConverters">
            <list>
                <bean class="org.springframework.http.converter.StringHttpMessageConverter">
                    <property name="supportedMediaTypes">
                        <list>
                            <value>text/html;charset=UTF-8value>
                            <value>application/json;charset=UTF-8value>
                        list>
                    property>
                bean>
                <bean class="org.springframework.http.converter.json.MappingJackson2HttpMessageConverter">
                    <property name="supportedMediaTypes">
                        <list>
                            <value>text/html;charset=UTF-8value>
                            <value>application/json;charset=UTF-8value>
                        list>
                    property>
                bean>
            list>
        property>
    bean>


    <bean id="multipartResolver" class="org.springframework.web.multipart.commons.CommonsMultipartResolver">

        <property name="maxUploadSize" value="54000000"/>
        <property name="defaultEncoding" value="UTF-8"/>
    bean>

    <mvc:default-servlet-handler />
beans>
spring-mybatis.xml
<beans xmlns="http://www.springframework.org/schema/beans"
       xmlns:xsi="http://www.w3.org/2001/XMLSchema-instance"
       xmlns:aop="http://www.springframework.org/schema/aop"
       xmlns:c="http://www.springframework.org/schema/c"
       xmlns:cache="http://www.springframework.org/schema/cache"
       xmlns:context="http://www.springframework.org/schema/context"
       xmlns:jdbc="http://www.springframework.org/schema/jdbc"
       xmlns:jee="http://www.springframework.org/schema/jee"
       xmlns:lang="http://www.springframework.org/schema/lang"
       xmlns:mvc="http://www.springframework.org/schema/mvc"
       xmlns:p="http://www.springframework.org/schema/p"
       xmlns:task="http://www.springframework.org/schema/task"
       xmlns:tx="http://www.springframework.org/schema/tx"
       xmlns:util="http://www.springframework.org/schema/util"
       xsi:schemaLocation="http://www.springframework.org/schema/jee http://www.springframework.org/schema/jee/spring-jee.xsd
                           http://www.springframework.org/schema/mvc http://www.springframework.org/schema/mvc/spring-mvc.xsd
                           http://www.springframework.org/schema/context http://www.springframework.org/schema/context/spring-context.xsd
                           http://www.springframework.org/schema/aop http://www.springframework.org/schema/aop/spring-aop.xsd
                           http://www.springframework.org/schema/util http://www.springframework.org/schema/util/spring-util.xsd
                           http://www.springframework.org/schema/jdbc http://www.springframework.org/schema/jdbc/spring-jdbc.xsd
                           http://www.springframework.org/schema/cache http://www.springframework.org/schema/cache/spring-cache.xsd
                           http://www.springframework.org/schema/task http://www.springframework.org/schema/task/spring-task.xsd
                           http://www.springframework.org/schema/beans http://www.springframework.org/schema/beans/spring-beans.xsd
                           http://www.springframework.org/schema/lang http://www.springframework.org/schema/lang/spring-lang.xsd
                           http://www.springframework.org/schema/tx http://www.springframework.org/schema/tx/spring-tx.xsd">
    <context:component-scan base-package="cn.edu.chd.mapper">
        <context:exclude-filter type="annotation" expression="org.springframework.stereotype.Controller"/>
    context:component-scan>

    <context:property-placeholder location="classpath:db.properties"/>
    <bean id="dataSource" class="com.mchange.v2.c3p0.ComboPooledDataSource">
        <property name="driverClass" value="${jdbc.driver}"/>
        <property name="jdbcUrl" value="${jdbc.url}"/>
        <property name="user" value="${jdbc.username}"/>
        <property name="password" value="${jdbc.password}"/>


        <property name="maxPoolSize" value="30"/>
        <property name="minPoolSize" value="10"/>

        <property name="autoCommitOnClose" value="false"/>

        <property name="checkoutTimeout" value="100000"/>

        <property name="acquireRetryAttempts" value="2"/>
    bean>


    <bean id="SqlSessionFactoryBean" class="org.mybatis.spring.SqlSessionFactoryBean">
        <property name="dataSource" ref="dataSource"/>


        <property name="mapperLocations" value="classpath:cn/edu/chd/mapper/**/*.xml" />
        <property name="configuration">
            <bean class="org.apache.ibatis.session.Configuration">

                <property name="mapUnderscoreToCamelCase" value="true"/>
            bean>
        property>

        <property name="plugins">
            <array>

                <bean class="com.github.pagehelper.PageInterceptor">

                    <property name="properties">
                        <value>
                            helperDialect=mysql
                            reasonable=true
                            supportMethodsArguments=true
                            params=count=countSql
                            autoRuntimeDialect=true
                        value>
                    property>
                bean>
            array>
        property>
    bean>


    <bean class="org.mybatis.spring.mapper.MapperScannerConfigurer">
        <property name="basePackage" value="cn.edu.chd.mapper"/>
        <property name="sqlSessionFactoryBeanName" value="SqlSessionFactoryBean"/>
    bean>


    <bean id="transactionManager" class="org.springframework.jdbc.datasource.DataSourceTransactionManager">
        <property name="dataSource" ref="dataSource"/>
    bean>


    <tx:advice transaction-manager="transactionManager" id="transactionAdvice">

        <tx:attributes>

            <tx:method name="select*" read-only="true"/>
            <tx:method name="get*" read-only="true"/>
            <tx:method name="query*" read-only="true"/>
            <tx:method name="delete*" propagation="REQUIRED" rollback-for="Exception"/>
            <tx:method name="update*" propagation="REQUIRED" rollback-for="Excpetion"/>
            <tx:method name="insert*" propagation="REQUIRED" rollback-for="Exception"/>
            <tx:method name="add*" propagation="REQUIRED" rollback-for="Exception"/>
        tx:attributes>
    tx:advice>

    <aop:config>
        <aop:pointcut id="txCut" expression="execution(* cn.edu.chd.service..*.*(..))"/>
        <aop:advisor advice-ref="transactionAdvice" pointcut-ref="txCut"/>
    aop:config>


    <tx:annotation-driven transaction-manager="transactionManager"/>
beans>
mybatis映射文件
<mapper namespace="org.mybatis.example.BlogMapper">
    <select id="selectBlog" resultType="Blog">
        select * from Blog where id = #{id}
    select>
mapper>
log4j.properties
#定义LOG输出级别
log4j.rootLogger=INFO,Console,File

#定义日志输出目的地为控制台
log4j.appender.Console=org.apache.log4j.ConsoleAppender
log4j.appender.Console.Target=System.out
#可以灵活的指定日志输出格式 , 下面一行是指定具体的格式
log4j.appender.Console.layout=org.apache.log4j.PatternLayout
log4j.appender.Console.layout.ConversionPattern=[%c]-%m%n

#mybatis显示SQL语句日志配置
log4j.logger.com.leike.mapper=DEBUG

#文件大小到达指定尺寸的时候产生一个新的文件
log4j.appender.File=org.apache.log4j.RollingFileAppender
#指定输出目录 这里会放在tomcat之下
log4j.appender.File.File=D:/log.log
#定义文件最大大小
log4j.appender.File.MaxFileSize=10MB
#输出所有日志 如果换成DEBUG表示输出DEBUF以上级别的日志
log4j.appender.File.Threshold=ALL
log4j.appender.file.layout=org.apache.log4j.PatternLayout
log4j.appender.file.layout.ConversionPattern=[%p][%d{yyyy-MM-dd HH\:mm|\:ss}][%c]%m%n