基于ubuntu19.10的嵌入式linux根文件系统制作(一)
1、源码准备
下载地址:
http://cdimage.ubuntu.com/ubuntu-base/releases/19.10/release/
对于arm64架构选择
![]()
对于arm架构选择
![]()
2、基础准备
PC环境配置
sudo apt-get install repo git-core gitk git-gui gcc-arm-linux-gnueabihf u-boot-tools device-tree-compiler \
gcc-aarch64-linux-gnu mtools parted libudev-dev libusb-1.0-0-dev python-linaro-image-tools \
linaro-image-tools gcc-4.8-multilib-arm-linux-gnueabihf gcc-arm-linux-gnueabihf libssl-dev \
gcc-aarch64-linux-gnu g+conf autotools-dev libsigsegv2 m4 intltool libdrm-dev curl sed make \
binutils build-essential gcc g++ bash patch gzip bzip2 perl tar cpio python unzip rsync file bc wget \
libncurses5 libqt4-dev libglib2.0-dev libgtk2.0-dev libglade2-dev cvs git mercurial rsync openssh-client \
subversion asciidoc w3m dblatex graphviz python-matplotlib libc6:i386 libssl-dev texinfo \
liblz4-tool genext2fs lib32stdc++6
将下载后的源码解压到新建的temp文件夹下
mkdir temp
sudo tar -xpf ubuntu-base-xxxx-base-arm64.tar.gz -C temp
准备网络:
sudo cp -b /etc/resolv.conf temp/etc/resolv.conf
准备qemu
sudo cp /usr/bin/qemu-aarch64-static temp/usr/bin/
3、文件系统配置
进入文件系统
sudo chroot temp
更新
apt update
apt upgrade
安装必备工具
apt install vim git sudo ifupdown net-tools udev fbset initramfs-tools init inetutils-ping lsb-core openssh-server openssh-client \
neofetch tmux alsa-base alsa-utils alsa-source libasound2-dev wpasupplicant toilet figlet tree
修改用户名和主机名-----username@hostname
-修改用户名
<<添加普通用户并设置密码>>
useradd -s '/bin/bash' -m -G adm,sudo xxx
passwd xxx
<<root用户设置密码>>
passwd root

-修改主机名
echo xxx > /etc/hostname 或  gedit  /etc/hostname
网络配置-----eth0网卡配置
cd /etc/network
vim interfaces
将interfaces文件内容修改成如下:
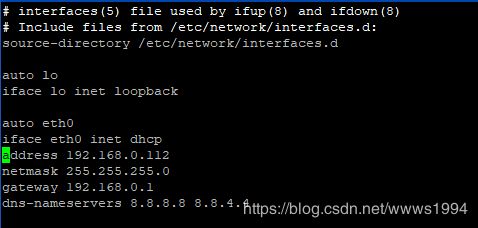
以上修改完后就可以退出系统
exit
4、镜像文件制作
mkdir  rootfs
# 基本块单位为1M,4000块共4G,count根据temp文件夹大小来修改
dd if=/dev/zero of=linuxroot.img bs=1M count=4000
mkfs.ext4 linuxroot.img
sudo mount linuxroot.img rootfs/
sudo cp -rfp temp/*  rootfs/
sudo umount rootfs/
e2fsck -p -f linuxroot.img
resize2fs  -M linuxroot.img
5、BUG解决
1、在添加普通用户时出现

解决方法:
1)设置/usr/bin/passwd的正确权限
chmod 777 /usr/bin/passwd
2)去除/etc/passwd和/etc/shadow的i属性
chattr -i /etc/passwd
chmod 777 /etc/passwd
chattr -i /etc/shadow
chmod 755 /etc/shadow
pwconv #同步/etc/passwd 和/etc/shadow
3)
mount -o rw,remount / 或 mount -o remount,rw/
2、执行chroot后主机名和用户名为绿色
![]()
解决方法:运行 source /root/.bashrc
3、在apt update 和apt upgrade时出现
执行apt update出现

解决方法:执行 chmod go+rw /dev/null
执行apt upgrade时出现
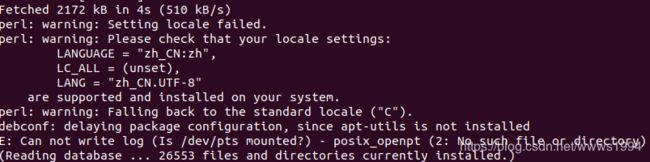
解决方法: vim /root/.bashrc,然后在文件尾加入export LC_ALL=C,保存后执行source /root/.bashrc