SpringBoot学习2之整合Web技术
(一)SpringBoot整合Servlet技术
很多刚接触JavaEE的初学者都会学习Web技术中的Jsp/Servlet,同样的SpringBoot中也提供了整合Servlet技术的;
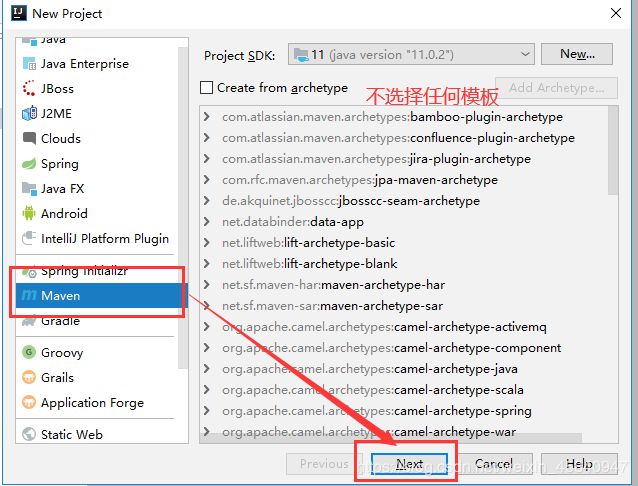
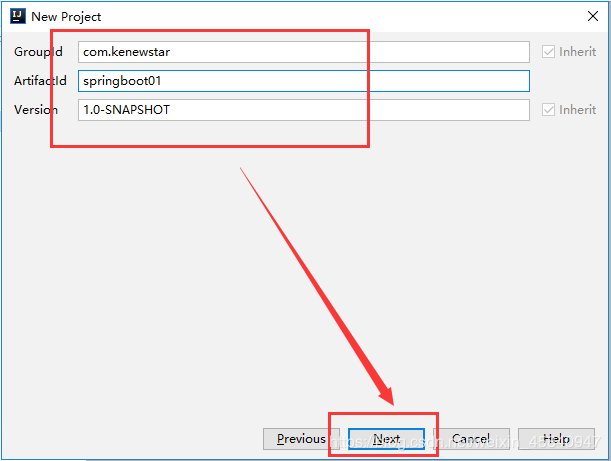
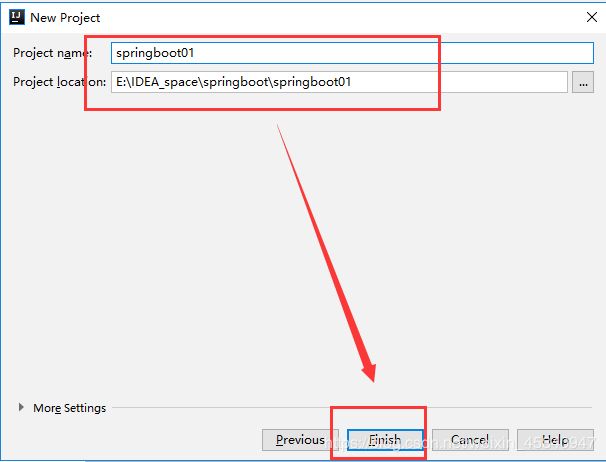
创建一个Java项目(IDEA+Maven)
SpringBoot整合Servlet有两种方式:
1 通过注解方式完成Servlet组件的注册
① 创建一个FirstServlet类继承HttpServlet
创建代码如下:
package com.kenewstar.servlet;

import javax.servlet.ServletException;
import javax.servlet.annotation.WebServlet;
import javax.servlet.http.HttpServlet;
import javax.servlet.http.HttpServletRequest;
import javax.servlet.http.HttpServletResponse;
import java.io.IOException;

/**
 * @Author:kenewstar
 * @Description: 用于springboot整合servlet,
 *              方式一:通过注解扫描完成Servlet组件的注册
 * @Date:Created in  2020/4/20
 */
@WebServlet("/first")   //url访问路径
public class FirstServlet extends HttpServlet {

    @Override
    protected void service(HttpServletRequest req, HttpServletResponse resp) throws ServletException, IOException {
        //控制台打印数据
        System.out.println("springboot整合servlet:使用注解方式");
    }
}
以上代码不做过多讲解,只是一个很普通的Servlet;
接下来我们需要创建一个SpringBoot启动类;
② 创建SpringBoot启动类
package com.kenewstar;

import org.springframework.boot.SpringApplication;
import org.springframework.boot.autoconfigure.SpringBootApplication;
import org.springframework.boot.web.servlet.ServletComponentScan;

/**
 * @Author:kenewstar
 * @Description: spingboot启动类,测试FirstServlet
 * @Date:Created in 2020/4/20
 */
@SpringBootApplication
@ServletComponentScan   //用于扫描@WebServlet注解
public class FirstApp {

    public static void main(String[] args) {
        //启动springboot
        SpringApplication.run(FirstApp.class,args);
    }
}
SpringBoot启动类,在上一篇代码已经写过,不过是多了一个注解而已,@ServletComponentScan,它的作用就是对有@WebServlet注解的Servlet类做扫描,让SpringBoot知道这个类是一个Servlet类,当启动SpringBoot启动类时,即完成了Servlet的注册,我们就可以通过@WebServlet注解提供的URL地址映射访问到我们的项目了;
项目启动后,输入地址:

2 通过方法方式完成Servlet组件的注册
上面代码中我们使用了注解方式,但是我们也可以不使用注解的方式来完成Servlet的组件的注册;
① 创建SecondServlet继承HttpServlet
SecondServlet的代码如下:
package com.kenewstar.servlet;

import javax.servlet.ServletException;
import javax.servlet.http.HttpServlet;
import javax.servlet.http.HttpServletRequest;
import javax.servlet.http.HttpServletResponse;
import java.io.IOException;
/**
 * @Author:kenewstar
 * @Description: 用于springboot整合servlet
 *              方式二:使用方法完成Servlet组件的注册
 * @Date:Created in  2020/4/20
 */
public class SecondServlet extends HttpServlet {

    @Override
    protected void service(HttpServletRequest req, HttpServletResponse resp) throws ServletException, IOException {

        System.out.println("springboot整合servlet:使用方法注册");
    }
}
上述代码中我们可以看到它与①中的方式只不过是差了一个注解而已;
接下来我们创建SpringBoot的启动类;
② 创建SpringBoot启动类
代码如下所示:
package com.kenewstar;

import com.kenewstar.servlet.SecondServlet;
import org.springframework.boot.SpringApplication;
import org.springframework.boot.autoconfigure.SpringBootApplication;;
import org.springframework.boot.web.servlet.ServletRegistrationBean;
import org.springframework.context.annotation.Bean;

/**
 * @Author:kenewstar
 * @Description: springboot启动类,用于测试springboot整合Servlet第二种方式
 * @Date:Created in  2020/4/20
 */
@SpringBootApplication
public class SecondApp {

    public static void main(String[] args) {
        //启动springboot
        SpringApplication.run(SecondApp.class,args);

    }
    @Bean
    public ServletRegistrationBean getServlet(){
        //实例化ServletRegistrationBean
        ServletRegistrationBean srb = new ServletRegistrationBean(new SecondServlet());
        //添加url
        srb.addUrlMappings("/second");
        return srb;
    }

}
所谓通过方法注册Servlet,就是在启动类中添加一个方法,名称不做要求,但是返回值必须是ServletRegistrationBean类,该类的作用就是注册一个Servlet,我们需要实例化这个类,并将我们所需注册的Servlet类实例添加进去,也就是**ServletRegistrationBean srb = new ServletRegistrationBean(new SecondServlet());**这行代码,它就是注册Servlet,另外,还需要使用该对象调用一个叫做addUrlMappings的方法,参数为字符串类型,该字符串就是我们接下来访问的URL,它的作用就相当于@WebServlet("/second"),最后我们必须在方法上添加@Bean注解,否则,SpringBoot不会加载;
启动SpringBoot程序;
访问如下:

查看控制台打印结果:

以上就是我们使用SpringBoot整合Servlet技术的两种方式;
(二)SpringBoot整合Filter(过滤器)
接下来我们使用SpringBoot整合Filter,它的过程与整合Servlet相似,我们直接往下走:
SpringBoot整合Filter的两种方式:
1 通过注解完成Filter组件的注册
① 创建FirstFilter类实现Filter接口
代码如下:
package com.kenewstar.filter;

import javax.servlet.*;
import javax.servlet.annotation.WebFilter;
import java.io.IOException;

/**
 * @Author:kenewstar
 * @Description: springboot整合Filter
 *              方式一:通过注解扫描完成Filter组件的注册
 * @Date:Created in 2020/4/20
 */
@WebFilter("/first")
public class FirstFilter implements Filter {

    @Override
    public void doFilter(ServletRequest request, ServletResponse response, FilterChain chain) throws IOException, ServletException {
        System.out.println("进入Filter");
        chain.doFilter(request,response);
        System.out.println("离开Filter");
    }
}
我们可以看到代码与整合Servlet的第一种方式非常相似,只是注解变成了@WebFilter,同样在注解中添加URL映射,如果添加映射为/first,那么它就是FirstServlet的专属过滤器,我们也可以添加多个路径,或者也可以配置为/*,那就是拦截所有请求;
@WebFilter(urlPatterns = {"/first","/second"})
@WebFilter(urlPatterns = {"*.do","*.jsp"})
给多个请求配置过滤器,如上,可以自行配置;
② 创建SpringBoot启动类
代码如下:
package com.kenewstar;
import org.springframework.boot.SpringApplication;
import org.springframework.boot.autoconfigure.SpringBootApplication;
import org.springframework.boot.web.servlet.ServletComponentScan;
/**
 * @Author:kenewstar
 * @Description: spingboot启动类,测试FilterServlet
 * @Date:Created in 2020/4/20
 */
@SpringBootApplication
@ServletComponentScan   //用于扫描@WebServlet,@WebFilter注解
public class FirstApp {

    public static void main(String[] args) {
        //启动springboot
        SpringApplication.run(FirstApp.class,args);
    }
}
上述代码中我们可以看出,它其实和SpringBoot整合Servlet的启动类是一样,我们直接运行;
访问项目:

控制台打印结果:

我们看到,在访问Servlet之前先访问了过滤器,Servlet响应结束后,又走了过滤器,这就使得过滤器在用户与服务器之间做了拦截并处理;
2 使用方法完成Filter的注册
① 创建SecondFilter类并实现Filter接口
代码如下:
package com.kenewstar.filter;
import javax.servlet.*;
import java.io.IOException;
/**
 * @Author:kenewstar
 * @Description: springboot整合Filter
 *              方式二:通过方法完成Filter组件的注册
 * @Date:Created in 2020/4/20
 */
public class SecondFilter implements Filter {

    @Override
    public void doFilter(ServletRequest request, ServletResponse response, FilterChain chain) throws IOException, ServletException {
        System.out.println("进入Filter");
        chain.doFilter(request,response);
        System.out.println("离开Filter");
    }
}
代码其实都是非常相似的,不做过多介绍;
② 创建SpringBoot启动类
代码如下:
package com.kenewstar;
import com.kenewstar.servlet.SecondServlet;
import com.kenewstar.filter.SecondFilter;
import org.springframework.boot.SpringApplication;
import org.springframework.boot.autoconfigure.SpringBootApplication;
import org.springframework.boot.web.servlet.FilterRegistrationBean;
import org.springframework.boot.web.servlet.ServletRegistrationBean;
import org.springframework.context.annotation.Bean;

/**
 * @Author:kenewstar
 * @Description: springboot启动类,用于测试springboot整合Filter第二种方式
 * @Date:Created in 2020/4/20
 */
@SpringBootApplication
public class SecondApp {

    public static void main(String[] args) {
        //启动springboot
        SpringApplication.run(SecondApp.class,args);

    }
    @Bean
    public FilterRegistrationBean getFilter(){
        //实例化FilterRegistrationBean
        FilterRegistrationBean frb = new FilterRegistrationBean(new SecondFilter());
        //添加url,可变参数
        frb.addUrlPatterns("/second");
        return frb;
    }
    @Bean
    public ServletRegistrationBean getServlet(){
        //实例化ServletRegistrationBean
        ServletRegistrationBean srb = new ServletRegistrationBean(new SecondServlet());
        //添加url
        srb.addUrlMappings("/second");
        return srb;
    }

}
可以看出做法与整合Servlet的方式非常相似,只是添加了一个返回值为FilterRegistrationBean的方法,用于注册Filter组件;
启动项目,访问如下:

查看控制它打印结果:

到此SpringBoot整合Filter完成;
(三)SpringBoot整合Listener(监听器)
SpringBoot整合监听器的两种方式:
1 通过注解完成Listener的注册
① 创建一个监听器类,实现ServletContextListener接口
代码如下:
package com.kenewstar.listener;

import javax.servlet.ServletContextEvent;
import javax.servlet.ServletContextListener;
import javax.servlet.annotation.WebListener;

/**
 * @Author:kenewstar
 * @Description: spingboot整合Listener
 *              方式一:通过注解完成Listener组件的注册
 * @Date:Created in 2020/4/20
 */
@WebListener
public class FirstListener implements ServletContextListener {

    @Override
    public void contextInitialized(ServletContextEvent sce) {
        System.out.println("Listener被初始化了");
    }
}
该监听器的作用就是当项目被启动时,会调用contextInitialized的方法,因此当我们的项目被启动时,会调用该方法,打印语句;
② 创建SpringBoot启动类
代码如下:
package com.kenewstar;

import org.springframework.boot.SpringApplication;
import org.springframework.boot.autoconfigure.SpringBootApplication;
import org.springframework.boot.web.servlet.ServletComponentScan;

/**
 * @Author:kenewstar
 * @Description: spingboot启动类,测试FirstServlet
 * @Date:Created in  2020/4/20
 */
@SpringBootApplication
@ServletComponentScan   //用于扫描@WebServlet,@WebListener,@WebFilter注解
public class FirstApp {

    public static void main(String[] args) {
        //启动springboot
        SpringApplication.run(FirstApp.class,args);
    }
}
2 通过方法完成Listener的注册
① 创建一个监听器类,实现ServletContextListener接口
代码如下:
package com.kenewstar.listener;

import javax.servlet.ServletContextEvent;
import javax.servlet.ServletContextListener;

/**
 * @Author:kenewstar
 * @Description: SpringBoot整合Listener,第二种方式
 * @Date:Created in 2020/4/20
 */
public class SecondListener implements ServletContextListener {

    @Override
    public void contextInitialized(ServletContextEvent sce) {
        System.out.println("Listener被初始化了");
    }
}
② 创建SpringBoot启动类
代码如下:
package com.kenewstar;
import com.kenewstar.listener.SecondListener;
import org.springframework.boot.SpringApplication;
import org.springframework.boot.autoconfigure.SpringBootApplication;
import org.springframework.boot.web.servlet.ServletListenerRegistrationBean;
import org.springframework.context.annotation.Bean;

/**
 * @Author:kenewstar
 * @Description: springboot启动类,用于测试springboot整合Listener第二种方式
 * @Date:Created in 2020/4/20
 */
@SpringBootApplication
public class SecondApp {

    public static void main(String[] args) {
        //启动springboot
        SpringApplication.run(SecondApp.class,args);

    }
    @Bean
    public ServletListenerRegistrationBean<SecondListener> getListener(){
        //实例化SerServletListenerRegistrationBean
        ServletListenerRegistrationBean<SecondListener> slrb = new
                ServletListenerRegistrationBean<>(new SecondListener());
        return slrb;

    }

}
启动SpringBoot项目后,控制台打印如下:

以上就是SpringBoot整合Listener;
(四)SpringBoot访问静态资源
用户如何访问项目的静态资源呢,比如html,css,js,图片文件等等;
第一种方式:通过访问classpath/static
首先我们看项目的目录结构:
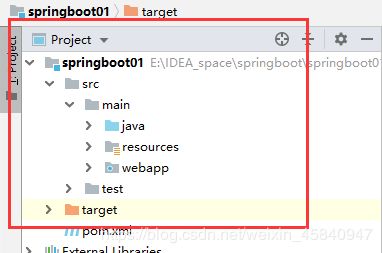
我们的静态资源就放在resources目录下,不过必须在该目录下创建一个名为static目录,我们所有的静态资源均放在该目录下,而且目录名必须为static,即SpringBoot都是从classpath/static目录下访问静态资源;
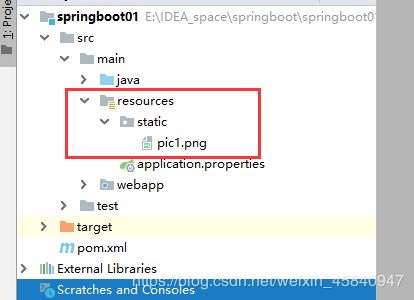
如上图所示在static目录下放一张pic1.png图片
启动项目,访问该资源:
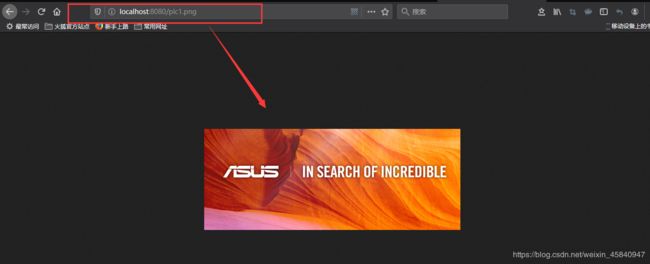
在开发中我们一般是将图片专门放置在一个文件夹中,因此我们在static目录下创建images目录,存放pic2.png,如下:
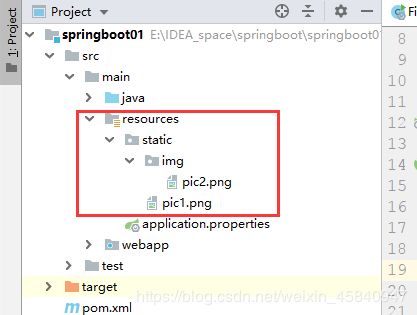
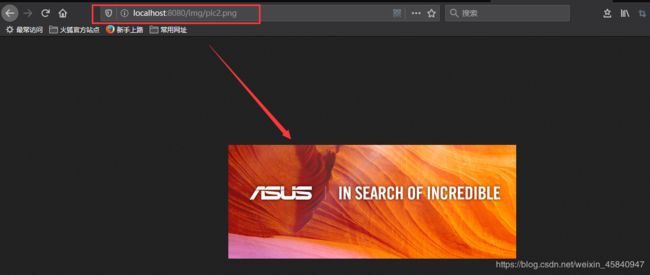
如此,我们再访问图片时,需要带上路径:
第二种方式:创建webapp目录
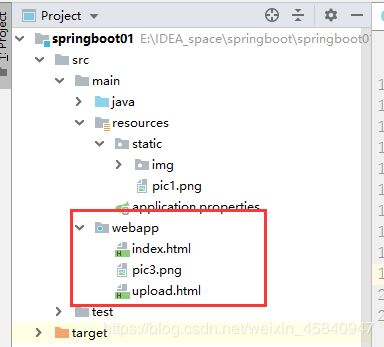
在ServletContext根目录下,如下图所示:
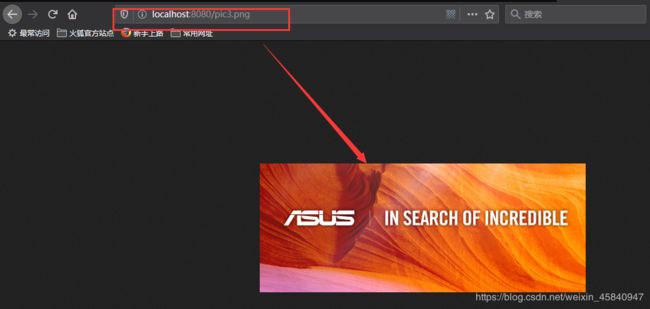
目录名必须是webapp,如下我们在目录中放置一张图片pic3.png
访问结果:
