基于Sentinel实现服务保护
目录
一:服务保护基本概念
1.1 服务限流 / 熔断
1.2 服务降级
1.3 服务雪崩
二:Sentinel 与 Hytrix 区别
三:Sentinel 环境搭建
四:Springboot 整合 Sentinel
4.1 纯代码形式
4.2 注解形式
一:服务保护基本概念
服务接口保护一些常见措施
- 黑名单和白名单
- 对IP进行限流和熔断
- 服务降级
- 服务隔离
1.1 服务限流 / 熔断
服务限流目的是为了更好的保护服务,在高并发的情况下,如果客户端请求的数量达到一定阈值(可后台配置),则开启自我保护措施,不再执行业务逻辑,直接调用我们定义的服务降级方法,即本地 falback 的方法,返回一个友好的提示。
1.2 服务降级
在高并发的情况下,防止用户一直等待,采用限流/熔断方法,使用服务降级的方式,不再执行业务逻辑,直接调用我们定义的服务降级方法,即本地 falback 的方法,返回一个友好的提示,例如返回 “当前操作人数太多,请稍后再试!”。
1.3 服务雪崩
默认情况下,tomcat或者netty服务器只会用一个线程池(可通过服务打印的日志看出只有一个线程池,因为日志默认会显示线程池名称+线程id)处理所有接口的请求。高并发情况下,如果所有请求都只请求同一个接口,则所有线程都在处理这个接口的请求,导致短暂时间内没有多余的线程去处理其他接口的请求。
解决服务雪崩的方案,也即是服务隔离机制:
- 线程池隔离机制:每个接口都有自己的线程池,线程池互不影响。但是缺点是占用内存资源大。
- 信号量隔离机制:对接口设置线程数阈值,即最多有多少个线程能处理同一个接口,如果超出阈值,则拒绝服务。
二:Sentinel 与 Hytrix 区别
Sentinel 中文意思是哨兵,它以流量为切入点,从流量控制,熔断降级,系统负载保护等多个维度保护服务的稳定性。有以下特征:
- 丰富的应用场景:前哨兵承接了阿里巴巴近10年的双十一大促流的核心场景,例如秒杀(即突然流量控制在系统容量可以承受的范围),消息削峰填谷,传递流量控制,实时熔断下游不可用应用等。
- 完备的实时监控:Sentinel 提供实时监控功能,可以在控制台中查看应用的单台机器秒级数据,甚至500台以下规模的整合的汇总运行情况。
- 广泛的开源生态:Sentinel提供开箱即用的与其他开源框架/库的集成模块,例如与SpringCloud, Dubbo, gRPC的整合。只需要另外的依赖并进行简单的配置即可快速地接入Sentinel。
- 完善的SPI扩展点:Sentinel 提供简单易用,完善的SPI扩展接口。您可以通过实现扩展接口来快速地定制逻辑。例如定制规则管理,适应动态数据源等。
Sentinel中文文档:https://github.com/alibaba/Sentinel/wiki/%E4%B8%BB%E9%A1%B5
| 对比 | Sentinel | Hytrix |
| 隔离策略 | 信号量隔离 | 线程池隔离 / 信号量隔离 |
| 熔断降级策略 | 基于响应时间或失败比率 | 基于失败比率 |
| 实时指标实现 | 滑动窗口 | 滑动窗口(基于RxJava) |
| 规则配置 | 支持多种数据源 | 支持多种数据源 |
| 扩展性 | 多扩展性 | 插件的形式 |
| 基于注解的支持 | 支持 | 支持 |
| 限流 | 基于QPS,基于调用关系的限流 | 不支持 |
| 流量整形 | 支持慢启动,匀速器模式 | 不支持 |
| 系统负载保护 | 支持 | 不支持 |
| 控制台 | 开箱即用,可配置规则,查看秒级监控,机器发现等 | 不完善 |
| 常见框架的适配 | Servlet,SpringCloud,Dubbo,gPRC等 | Servlet,Spring Cloud Netflix |
三:Sentinel 环境搭建
Sentinel-Dashboard下载:https://github.com/alibaba/Sentinel/releases
启动jar服务命令:
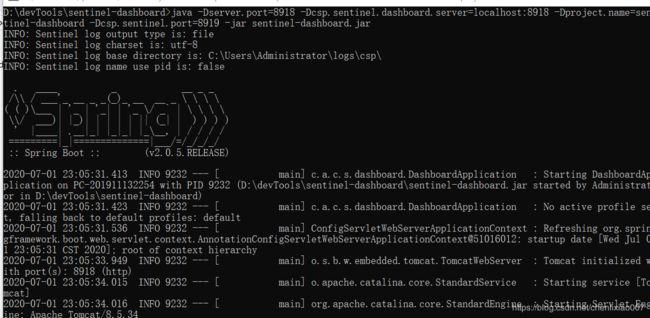
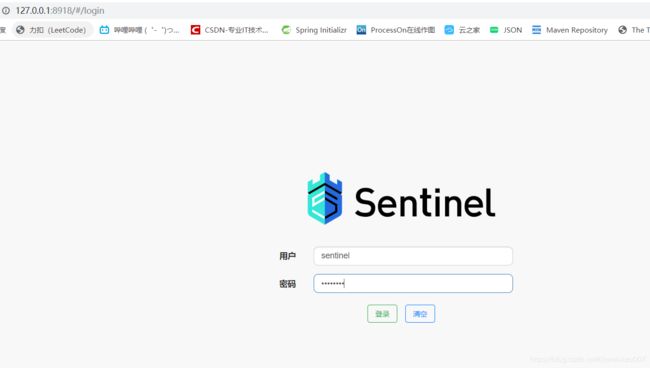
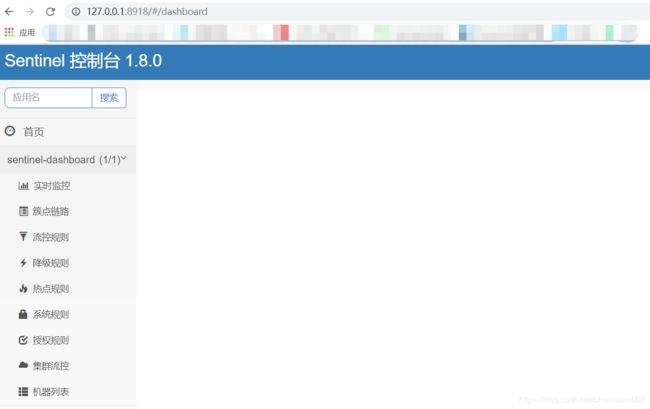
java -Dserver.port=8918 -Dcsp.sentinel.dashboard.server=localhost:8918 -Dproject.name=sentinel-dashboard -Dcsp.sentinel.port=8919 -jar sentinel-dashboard.jar浏览器打开:http://127.0.0.1:8918/#/login,账号和密码都是sentinel
四:Springboot 整合 Sentinel
Springboot 整合 Sentinel有2种方式:
- 使用纯代码或者注解在工程中进行配置
- Sentinel 控制台 + 注解进行配置
下面以流控规则为例讲解上述2种方式
pom.xml文件
    4.0.0

        org.springframework.boot
        spring-boot-starter-parent
        2.1.15.RELEASE


    com.nobdoy
    sentinel-pro
    0.0.1-SNAPSHOT
    sentinel-pro
    Demo project for Spring Boot


        1.8


            org.springframework.boot
            spring-boot-starter-web


            org.springframework.boot
            spring-boot-starter-test
            test


            org.springframework.cloud
            spring-cloud-alibaba-sentinel
            0.2.2.RELEASE


            org.springframework.boot
            spring-boot-starter-actuator


            org.springframework.cloud
            spring-cloud-starter-openfeign
            2.1.0.RELEASE


                org.springframework.boot
                spring-boot-maven-plugin
配置文件application.properties
server.port=8081
server.servlet.context-path=/sentinelService

spring.application.name=sentinel-pro

# 配置Sentinel
spring.cloud.sentinel.transport.dashboard=127.0.0.1:8918
spring.cloud.sentinel.eager=true
4.1 纯代码形式
定义接口
package com.nobdoy.controller;

import com.alibaba.csp.sentinel.Entry;
import com.alibaba.csp.sentinel.SphU;
import com.alibaba.csp.sentinel.slots.block.BlockException;
import org.springframework.web.bind.annotation.GetMapping;
import org.springframework.web.bind.annotation.RequestMapping;
import org.springframework.web.bind.annotation.RestController;

/**
 * @author Mr.nobody
 * @Description 测试Sentinel
 * @date 2020/7/1
 */
@RestController
@RequestMapping
public class SentinelController {

    @GetMapping("/testQPS")
    public String testQPS() {
        // 睡眠是为了请求不那么块结束,让后续的请求触发限流规则
        try {
            Thread.sleep(500);
        } catch (InterruptedException e) {
            e.printStackTrace();
        }

        Entry entry = null;
        try {
            entry = SphU.entry("testQPS");
        } catch (BlockException e) { // 限流后进入此异常
            e.printStackTrace();
            return "当前访问人数过多,请稍后再试!";
        } finally {
            // SphU.entry与entry.exit()成对出现,否则会导致调用链记录异常
            if (entry != null) {
                entry.exit();
            }
        }

        return "This is testQPS api...";
    }
}
定义限流规则
package com.nobdoy.config;

import com.alibaba.csp.sentinel.slots.block.RuleConstant;
import com.alibaba.csp.sentinel.slots.block.flow.FlowRule;
import com.alibaba.csp.sentinel.slots.block.flow.FlowRuleManager;
import org.springframework.boot.ApplicationArguments;
import org.springframework.boot.ApplicationRunner;
import org.springframework.stereotype.Component;

import java.util.ArrayList;
import java.util.List;

/**
 * @author Mr.nobody
 * @Description 限流规则配置,在程序启动时会自动加载
 * @date 2020/7/1
 */
@Component
public class SentinelApplicationRunner implements ApplicationRunner {

    // 限流规则名称,与作用的接口名称一致
    private static final String LIMIT_KEY = "testQPS";

    @Override
    public void run(ApplicationArguments args) throws Exception {
        List flowRules = new ArrayList();
        FlowRule rule = new FlowRule();
        //设置限流规则名称
        rule.setResource(LIMIT_KEY);
        //设置QPS限流
        rule.setGrade(RuleConstant.FLOW_GRADE_QPS);
        //设置QPS为1
        rule.setCount(1);
        rule.setLimitApp("default");
        flowRules.add(rule);
        FlowRuleManager.loadRules(flowRules);
        System.out.println("-------------------配置限流规则成功-----------------------");
    }
}
定义启动类
package com.nobdoy;

import org.springframework.boot.SpringApplication;
import org.springframework.boot.autoconfigure.SpringBootApplication;
import org.springframework.cloud.openfeign.EnableFeignClients;

@SpringBootApplication
@EnableFeignClients
public class Application {

    public static void main(String[] args) {
        SpringApplication.run(Application.class, args);
    }

}
启动服务后,我们能在Sentinel Dashboard 控制台看到服务设置的限流规则了。以下规则含义为如果在1秒内接口访问次数超过1,则进行限流。
在浏览器快速多次访问 http://127.0.0.1:8081/sentinelService/testQPS ,会出现以下两种返回结果:
4.2 注解形式
将4.1中的接口改为如下,其他不用修改。访问接口后的返回结果和4.1的一样。
package com.nobdoy.controller;

import com.alibaba.csp.sentinel.annotation.SentinelResource;
import com.alibaba.csp.sentinel.slots.block.BlockException;
import org.springframework.web.bind.annotation.GetMapping;
import org.springframework.web.bind.annotation.RequestMapping;
import org.springframework.web.bind.annotation.RestController;

/**
 * @author Mr.nobody
 * @Description 测试Sentinel
 * @date 2020/7/1
 */
@RestController
@RequestMapping
public class SentinelController {

    // value的值即为限流配置的名称
    @SentinelResource(value = "testQPS", blockHandler = "testBlockHandler")
    @GetMapping("/testQPS")
    public String testQPS() {
        // 睡眠是为了请求不那么块结束,让后续的请求触发限流规则
        try {
            Thread.sleep(500);
        } catch (InterruptedException e) {
            e.printStackTrace();
        }

        return "This is testQPS api...";
    }

    public String testBlockHandler(BlockException e) {
        e.printStackTrace();
        return "当前访问人数过多,请稍后再试!";
    }
}
4.3 Sentinel Dashboard 控制台手动配置限流规则
删除SentinelApplicationRunner类,定义的接口如4.2注解形式。在控制台添加如下图限流配置:
注意:如果没有使用@SentinelResource注解,接口默认的资源名称为接口路径地址。例如接口注解为@GetMapping("/testQPS"),则在控制台创建的流控规则的资源名需要填写为/testQPS。
基于线程数进行限流,接口定义和控制台配置如下,在同一秒内访问接口次数超过处理的线程数,则进行限流,接口返回跟以上样例一样
    // value的值即为限流配置的名称
    @SentinelResource(value = "testSemaphore", blockHandler = "testBlockHandler")
    @GetMapping("/testSemaphore")
    public String list() {
        // 睡眠是为了请求不那么块结束,让后续的请求触发限流规则
        try {
            Thread.sleep(500);
        } catch (InterruptedException e) {
            e.printStackTrace();
        }

        return "This is testSemaphore api...";
    }

    public String testBlockHandler(BlockException e) {
        e.printStackTrace();
        return "当前访问人数过多,请稍后再试!";
    }
五:Sentinel 控制台详解
5.1 降级规则
下图表示,如果1秒内持续有5个请求,对应时刻的平均响应时间均大于100毫秒时,在接下来的3秒内,服务降级,即调用我们定义的降级方法。
平均相应时间RT(DEGRADE_GRADE_RT):在1秒内持续进入5个请求,对应时刻的平均响应时间(秒级)均超过阈值(毫秒级)时,则在接下来的时间窗口(秒级)内,对这个方法的调用都会自动熔断(抛出DegradeException)。Sentinel默认的
六:Sentinel 规则持久化
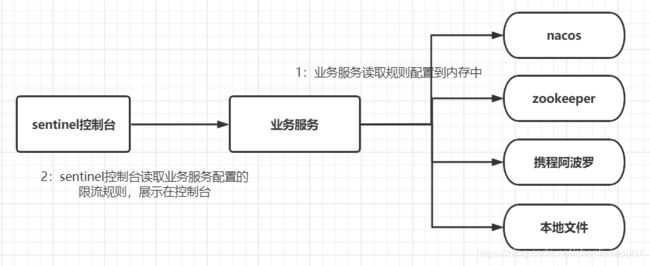
默认情况下,Sentinel不支持持久化,需要我们手动独立处理持久化。官方默认情况下支持4种持久化:
- nacos分布式配置中心
- Zookeeper
- 携程的阿波罗
- 存放在本地文件
那有人想说你这么知道是4种呢?其实从源代码就可以看出:
以nacos为例,简单讲解如何进行持久化。
6.1 首先在nacos控制台配置Sentinel的配置规则信息
存储在nacos的数据形式如下:
[
    {
        "resource" : "serviceDegradeRtType",
        "limitApp" : "default",
        "grade" : 1,
        "count" : 10,
        "stratery" : 0,
        "controlBehavior" : 0,
        "clusterMode" : false
    }
]

// resource:资源名,即限流规则的作用对象
// limitApp:流控针对的调用来源,若为default则不区分调用来源
// grade:限流阈值类型,即QPS还是并发线程数,0代表线程数,1代表QPS
// count:限流阈值
// strategy:调用关系限流策略
// controlBehavior:流量控制效果(快速失败,Warm Up,排队等待)
// clusterMode:是否集群
6.2 业务服务配置文件如下:
server.port=8081
server.servlet.context-path=/sentinelService

spring.application.name=sentinel-pro

# 配置Sentinel
spring.cloud.sentinel.transport.dashboard=127.0.0.1:8918
spring.cloud.sentinel.eager=true
# nacos注册地址
spring.cloud.nacos.discovery.server-addr=127.0.0.1:8848
# nacos连接地址
spring.cloud.sentinel.datasource.ds.nacos.server-addr=127.0.0.1:8848
# nacos连接分组
spring.cloud.sentinel.datasource.ds.nacos.group-id=DEFAULT_GROUP
# 路由存储规则
spring.cloud.sentinel.datasource.ds.nacos.rule-type=flow
# 读取配置文件id
spring.cloud.sentinel.datasource.ds.nacos.data-id=sentinel-pro
# 读取配置文件类型
spring.cloud.sentinel.datasource.ds.nacos.data-type=json
6.3 然后在我们的业务服务中(例如服务启动时),读取nacos的限流规则信息,再进行sentinel规则初始化即可。
不过有现成的组件能帮我们做这件事,在pom.xml文件添加依赖,此依赖能在我们的业务服务自动将nacos中的流控规则配置读取到我们的服务中,并能让sentinel控制台读取。
    com.alibaba.csp
    sentinel-datasource-nacos
    1.5.2


