jumpserver安装与部署
一、准备Python环境和Python虚拟环境
1、安装依赖包
# yum -y install wget sqlite-devel xz gcc automake zlib-devel openssl-devel epel-release git
2、创建文件夹
# mkdir -p /usr/local/python3
3、下载Python3
# wget https://www.python.org/ftp/python/3.6.1/Python-3.6.1.tgz
4、解压
# tar -zxvf Python-3.6.1.tgz
5、进入解压后的目录,编译安装
# cd Python-3.6.1
# ./configure --prefix=/usr/local/python3
# make && make install
6、检查是否安装成功
# python3 -V
Python 3.6.8
# pip3 -V
pip 9.0.3 from /usr/lib/python3.6/site-packages (python 3.6)
7、建立 Python 虚拟环境
7.1 centos 7 自带的是 Python2,而 Yum 等工具依赖原来的 Python,为了不扰乱原来的环境我们来使用 Python 虚拟环境
# cd /opt
# python3 -m venv py3
# source /opt/py3/bin/activate
# 看到下面的提示符代表成功,以后运行 Jumpserver 都要先运行以上 source 命令,以下所有命令均在该虚拟环境中运行
(py3) [root@localhost py3
二、安装Jumpserver 1.0.0
1、下载或 Clone 项目
# cd /opt/
# git clone --depth=1 https://github.com/jumpserver/jumpserver.git && cd jumpserver && git checkout master
2、 安装编译环境依赖
(py3) [root@a requirements]# cd /opt/jumpserver/requirements
(py3) [root@a requirements]# yum -y install $(cat rpm_requirements.txt)
Repository epel is listed more than once in the configuration
Last metadata expiration check: 0:09:49 ago on Fri 12 Jun 2020 01:58:03 PM CST.
Package gcc-8.3.1-4.5.el8.x86_64 is already installed.
Package krb5-devel-1.17-9.el8.x86_64 is already installed.
No match for argument: lcms2-devel
Package openssh-clients-8.0p1-4.el8_1.x86_64 is already installed.
Package telnet-1:0.17-73.el8.x86_64 is already installed.
Error: Unable to find a match: lcms2-devel
(py3) [root@a requirements]# rpm -e epel-release
(py3) [root@a requirements]# yum -y install $(cat rpm_requirements.txt)
Last metadata expiration check: 0:33:35 ago on Fri 12 Jun 2020 02:26:54 PM CST.
Package gcc-8.3.1-4.5.el8.x86_64 is already installed.
Package krb5-devel-1.17-9.el8.x86_64 is already installed.
No match for argument: lcms2-devel
Package openssh-clients-8.0p1-4.el8_1.x86_64 is already installed.
Package telnet-1:0.17-73.el8.x86_64 is already installed.
Error: Unable to find a match: lcms2-devel(py3) [root@a requirements]# dnf config-manager --set-enabled PowerTools (解决centos冲突)
(py3) [root@a requirements]# yum -y install $(cat rpm_requirements.txt)
Error:
Problem: package mariadb-devel-3:10.3.17-1.module_el8.1.0+257+48736ea6.x86_64 conflicts with mysql-devel provided by mysql-devel-8.0.17-3.module_el8.0.0+181+899d6349.x86_64
- package mysql-devel-8.0.17-3.module_el8.0.0+181+899d6349.x86_64 conflicts with mariadb-devel provided by mariadb-devel-3:10.3.17-1.module_el8.1.0+257+48736ea6.x86_64
- conflicting requests
(try to add '--allowerasing' to command line to replace conflicting packages or '--skip-broken' to skip uninstallable packages or '--nobest' to use not only best candidate packages)(py3) [root@a requirements]# yum -y install $(cat rpm_requirements.txt) --allowerasing --skip-broken
(py3) [root@a requirements]# pip install wheel
(py3) [root@a requirements]# pip install --upgrade pip setuptools
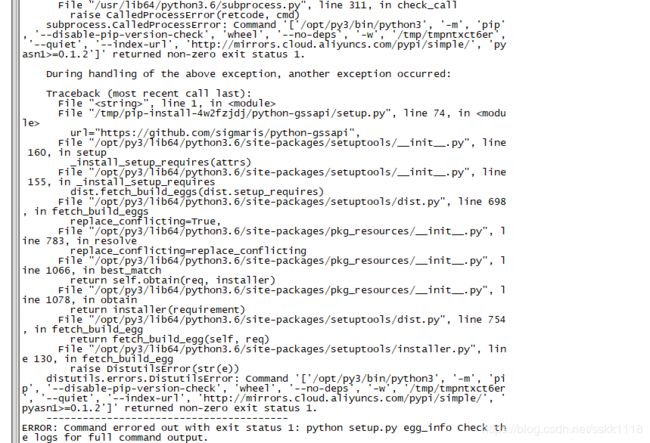
(py3) [root@a requirements]# pip install -r requirements.txt
报错:
(py3) [root@a requirements]#pip install pyasn1>=0.1.2
(py3) [root@a requirements]#pip install -r requirements.txt(重新执行)
报错:
(py3) [root@a requirements]#pip install six>=1.5.0(接下来就是哪个报错 就安装哪个,知道重新执行以下语句成功为止)
(py3) [root@a requirements]#pip install -r requirements.txt(重新执行)

3、修改配置文件
config.yml
(py3) [root@a requirements]# cat /dev/urandom | tr -dc A-Za-z0-9 | head -c 50 ( 获取加密秘钥)
b4ZFW334Cy4IZnSado4inzGDJaWiI24xkbEk9vwUd4xP4rXJWB(py3)
(py3) [root@a requirements]# cat /dev/urandom | tr -dc A-Za-z0-9 | head -c 16 ( 获取BOOTSTRAP_TOKEN)
641Pp6U87BjrMiVa
        # SECURITY WARNING: keep the secret key used in production secret!
        # 加密秘钥 生产环境中请修改为随机字符串,请勿外泄, 可使用命令生成
        # $ cat /dev/urandom | tr -dc A-Za-z0-9 | head -c 49;echo
        SECRET_KEY:b4ZFW334Cy4IZnSado4inzGDJaWiI24xkbEk9vwUd4xP4rXJWB

        # SECURITY WARNING: keep the bootstrap token used in production secret!
        # 预共享Token coco和guacamole用来注册服务账号,不在使用原来的注册接受机制
        BOOTSTRAP_TOKEN:641Pp6U87BjrMiVa

        # Development env open this, when error occur display the full process track, Production disable it
        # DEBUG 模式 开启DEBUG后遇到错误时可以看到更多日志
        # DEBUG: true

        # DEBUG, INFO, WARNING, ERROR, CRITICAL can set. See https://docs.djangoproject.com/en/1.10/topics/logging/
        # 日志级别
        LOG_LEVEL: DEBUG
        # LOG_DIR:

        # Session expiration setting, Default 24 hour, Also set expired on on browser close
        # 浏览器Session过期时间,默认24小时, 也可以设置浏览器关闭则过期
        # SESSION_COOKIE_AGE: 86400
        # SESSION_EXPIRE_AT_BROWSER_CLOSE: false

        # Database setting, Support sqlite3, mysql, postgres ....
        # 数据库设置
        # See https://docs.djangoproject.com/en/1.10/ref/settings/#databases

        # SQLite setting:
        # 使用单文件sqlite数据库
        # DB_ENGINE: sqlite3
        # DB_NAME:
        # MySQL or postgres setting like:
        # 使用Mysql作为数据库
        DB_ENGINE: mysql
        DB_HOST: 127.0.0.1
        DB_PORT: 3306
        DB_USER: jumpserver
        DB_PASSWORD: somepassword
        DB_NAME: jumpserver

        # When Django start it will bind this host and port
        # ./manage.py runserver 127.0.0.1:8080
        # 运行时绑定端口
        HTTP_BIND_HOST: 0.0.0.0
        HTTP_LISTEN_PORT: 8080
        WS_LISTEN_PORT: 8070

        # Use Redis as broker for celery and web socket
        # Redis配置
        REDIS_HOST: 127.0.0.1
        REDIS_PORT: 6379
        REDIS_PASSWORD: 123456
        # REDIS_DB_CELERY: 3
        # REDIS_DB_CACHE: 4

        # Use OpenID Authorization
        # 使用 OpenID 进行认证设置
        # AUTH_OPENID: False # True or False
        # BASE_SITE_URL: None
        # AUTH_OPENID_CLIENT_ID: client-id
        # AUTH_OPENID_CLIENT_SECRET: client-secret
        # AUTH_OPENID_PROVIDER_ENDPOINT: https://op-example.com/
        # AUTH_OPENID_PROVIDER_AUTHORIZATION_ENDPOINT: https://op-example.com/authorize
        # AUTH_OPENID_PROVIDER_TOKEN_ENDPOINT: https://op-example.com/token
        # AUTH_OPENID_PROVIDER_JWKS_ENDPOINT: https://op-example.com/jwks
        # AUTH_OPENID_PROVIDER_USERINFO_ENDPOINT: https://op-example.com/userinfo
        # AUTH_OPENID_PROVIDER_END_SESSION_ENDPOINT: https://op-example.com/logout
        # AUTH_OPENID_PROVIDER_SIGNATURE_ALG: HS256
        # AUTH_OPENID_PROVIDER_SIGNATURE_KEY: None
        # AUTH_OPENID_SCOPES: "openid profile email"
        # AUTH_OPENID_ID_TOKEN_MAX_AGE: 60
        # AUTH_OPENID_ID_TOKEN_INCLUDE_CLAIMS: True
        # AUTH_OPENID_USE_STATE: True
        # AUTH_OPENID_USE_NONCE: True
        # AUTH_OPENID_SHARE_SESSION: True
        # AUTH_OPENID_IGNORE_SSL_VERIFICATION: True
        # AUTH_OPENID_ALWAYS_UPDATE_USER: True

        # Use Radius authorization
        # 使用Radius来认证
        # AUTH_RADIUS: false
        # RADIUS_SERVER: localhost
        # RADIUS_PORT: 1812
        # RADIUS_SECRET:

        # CAS 配置
        # AUTH_CAS': False,
        # CAS_SERVER_URL': "http://host/cas/",
        # CAS_ROOT_PROXIED_AS': 'http://jumpserver-host:port',
        # CAS_LOGOUT_COMPLETELY': True,
        # CAS_VERSION': 3,

        # LDAP/AD settings
        # LDAP 搜索分页数量
        # AUTH_LDAP_SEARCH_PAGED_SIZE: 1000
        #
        # 定时同步用户
        # 启用 / 禁用
        # AUTH_LDAP_SYNC_IS_PERIODIC: True
        # 同步间隔 (单位: 时) (优先)
        # AUTH_LDAP_SYNC_INTERVAL: 12
        # Crontab 表达式
        # AUTH_LDAP_SYNC_CRONTAB: * 6 * * *
        #
        # LDAP 用户登录时仅允许在用户列表中的用户执行 LDAP Server 认证
        # AUTH_LDAP_USER_LOGIN_ONLY_IN_USERS: False
        #
        # LDAP 认证时如果日志中出现以下信息将参数设置为 0 (详情参见:https://www.python-ldap.org/en/latest/faq.html)
        # In order to perform this operation a successful bind must be completed on the connection
        # AUTH_LDAP_OPTIONS_OPT_REFERRALS: -1

        # OTP settings
        # OTP/MFA 配置
        # OTP_VALID_WINDOW: 0
        # OTP_ISSUER_NAME: Jumpserver

        # Perm show single asset to ungrouped node
        # 是否把未授权节点资产放入到 未分组 节点中
        # PERM_SINGLE_ASSET_TO_UNGROUP_NODE: false
        #
        # 启用定时任务
        # PERIOD_TASK_ENABLE: True
        #
        # 启用二次复合认证配置
        # LOGIN_CONFIRM_ENABLE: False
        #
        # Windows 登录跳过手动输入密码
        # WINDOWS_SKIP_ALL_MANUAL_PASSWORD: False
4、生成数据库表结构和初始化数据
(py3) [root@a requirements]# cd /opt/jumpserver/utils
(py3) [root@a requirements]# bash make_migrations.sh
5、启动
(py3) [root@a requirements]# cd /opt/jumpserver
(py3) [root@a requirements]# ./jms start
(py3) [root@a requirements]# ./jms start all -d # 后台运行使用
四、正常部署 koko 组件
(py3) [root@a requirements]# cd /opt
(py3) [root@a requirements]# wget https://demo.jumpserver.org/download/koko/1.5.9/koko-master-linux-amd64.tar.gz
(py3) [root@a requirements]# tar -zxvf koko-master-linux-amd64.tar.gz
(py3) [root@a requirements]# chown -R root:root kokodir
(py3) [root@a requirements]# cd kokodir
未完成-------