caffe的二分类微调,制作train.txt,val.txt
之前利用caffe自带的第二个例子学习微调,大概知道了微调是个什么玩意,做了二分类和多分类,但例子是在notebook中实现的,所以即使实现了,对于分类问题依然云里雾里。
之后,就系统性的把分类做了一遍。话不多说,直接上过程。
友情提示:由与电脑性能有限,因此未GPU加速,因此只是基于CPU。
【参考了如下文章】
系列文章http://blog.csdn.net/sinat_30071459/article/details/51613304
大致分为三个步骤:
一 数据集制作
(1)制作txt文件
(2)转LMDB格式
(3)求均值文件
二 模型训练
(1)修改*.prototxt 网络模型
(2)修改*solver.prototxt配置文件
三 测试
(1)修改deploy.prototxt
(1)测单幅图像
(2)测多副图像
四 干货分享
==================华丽分割线=======================
一 数据集制作
这一部分重点是将图像路径、名称、以及标签写成txt文档形式。生成train.txt,train_val.txt,val.txt,test.txt,labels.txt文件,我觉得一般只需要train.txt,val.txt就可以了,test完全不需要提前准备,因为要测试哪副图像,就把该幅图像放在你能找到的位置,只要不参与训练就OK了。
PS:因此需要train.txt,val.txt以及label.txt三个文件。
(1)制作txt文件
准备两类图像,将其分别放入两个文件夹,如false,true。复制如下代码在txt中,并将其后缀改为sh,运行sh文件的时候,格式一般是:sh **.sh
deepls(){
for x in "$1/"*
do
#echo $x
if [ -f $x ]
then
echo $x $I|cut -d '/' -f1-8 >> $NAME
fi
if [ -d $x ]
then
(deepls "$x")
I=`expr $I + 1`
fi
done
}
I=0
DEST_PATH="/home/name/caffe/secondclassify/true"
NAME="./train1.txt"
deepls $DEST_PATH
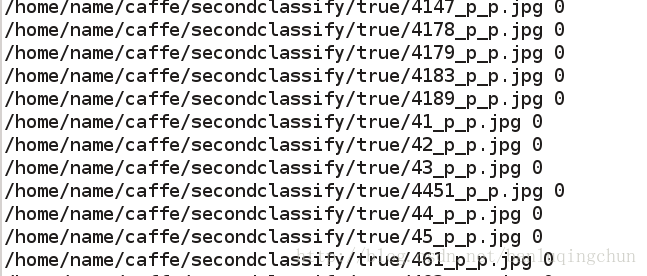
生成的train1.txt,这里的train1.txt只是将其中一类图像转化为txt格式。
同理,生成另一类图像的txt文件train2.txt。
deepls(){
for x in "$1/"*
do
#echo $x
if [ -f $x ]
then
echo $x $I|cut -d '/' -f1-8 >> $NAME
fi
if [ -d $x ]
then
(deepls "$x")
I=`expr $I + 1`
fi
done
}
I=1
DEST_PATH="/home/name/caffe/secondclassify/false"
NAME="./train2.txt"
deepls $DEST_PATH
备注:
通过修改-f1-8数值,即可修改txt文件中图像路径的长度。
通过修改I的值,如I=0,或者I=1来定标签。
.txt如下图所示。 
将上述的trian1.txt和train2.txt文件里的内容放在一个txt文件中,取名为trian.txt,然后将train.txt中标签0和标签1的信息各取一定数量放入到新建的val.txt中当做验证集。至于多少数量,可参考百度知道信息。https://zhidao.baidu.com/question/1834153784184657700.h
在机器学习和模式识别等领域中,一般需要将样本分成独立的三部分训练集(train set),验证集(validation set ) 和测试集(test set)。其中训练集用来估计模型,验证集用来确定网络结构或者控制模型复杂程度的参数,而测试集则检验最终选择最优的模型的性能如何。一个典型的划分是训练集占总样本的50%,而其它各占25%,三部分都是从样本中随机抽取。
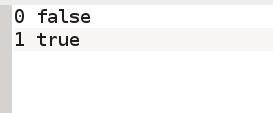
一般的labels.txt可手动完成如二分类。如图所示:
(2)转LMDB格式
修改create_imagenet.sh(此文件原始存在/home/name/caffe/examples/imagenet/里),之后执行sh文件。
#!/usr/bin/env sh
# Create the imagenet lmdb inputs
# N.B. set the path to the imagenet train + val data dirs
set -e

EXAMPLE=/home/name/caffe/secondclassify
#saving lmdb
DATA=/home/name/caffe/secondclassify
#where is txt
TOOLS=/home/name/caffe/build/tools
#由于train
TRAIN_DATA_ROOT=/
VAL_DATA_ROOT=/
#where is pictures

# Set RESIZE=true to resize the images to 256x256. Leave as false if images have
# already been resized using another tool.
RESIZE=true
if $RESIZE; then
  RESIZE_HEIGHT=256
  RESIZE_WIDTH=256
else
  RESIZE_HEIGHT=0
  RESIZE_WIDTH=0
fi

if [ ! -d "$TRAIN_DATA_ROOT" ]; then
  echo "Error: TRAIN_DATA_ROOT is not a path to a directory: $TRAIN_DATA_ROOT"
  echo "Set the TRAIN_DATA_ROOT variable in create_imagenet.sh to the path" \
       "where the ImageNet training data is stored."
  exit 1
fi

if [ ! -d "$VAL_DATA_ROOT" ]; then
  echo "Error: VAL_DATA_ROOT is not a path to a directory: $VAL_DATA_ROOT"
  echo "Set the VAL_DATA_ROOT variable in create_imagenet.sh to the path" \
       "where the ImageNet validation data is stored."
  exit 1
fi

echo "Creating train lmdb..."

GLOG_logtostderr=1 $TOOLS/convert_imageset \
    --resize_height=$RESIZE_HEIGHT \
    --resize_width=$RESIZE_WIDTH \
    --shuffle \
    $TRAIN_DATA_ROOT \
    $DATA/train.txt \
    $EXAMPLE/secondclassify_train_lmdb

echo "Creating val lmdb..."

GLOG_logtostderr=1 $TOOLS/convert_imageset \
    --resize_height=$RESIZE_HEIGHT \
    --resize_width=$RESIZE_WIDTH \
    --shuffle \
    $VAL_DATA_ROOT \
    $DATA/val.txt \
    $EXAMPLE/secondclassify_val_lmdb

echo "Done."
(3)求均值文件
修改均值文件make_imagenet_mean.sh(此文件原始存在/home/name/caffe/examples/imagenet/里),之后执行sh文件。
#!/usr/bin/env sh
# Compute the mean image from the imagenet training lmdb
# N.B. this is available in data/ilsvrc12
EXAMPLE=/home/name/caffe/secondclassify
DATA=/home/name/caffe/secondclassify
TOOLS=build/tools
rm -rf $DATA/secondclassify_mean.binaryproto
$TOOLS/compute_image_mean $EXAMPLE/secondclassify_train_lmdb \
  $DATA/secondclassify_mean.binaryproto
echo "Done."
二 模型训练
在/home/name/caffe/models/bvlc_reference_caffenet里复制solver.prototxt和train_val.prototxt文件到你所建的文件夹,并将其名称修改为sencondclassify_solver.prototxt和sencondclassify_train_val.prototxt。
(1) 点击secondclassify_train_val.prototxt,需要修改以下内容。
1name: "CaffeNet_sencondclassify"(可改可不改)
2mean_file: "/home/name/caffe/secondclassify/secondclassify_mean.binaryproto"
3source: "/home/name/caffe/secondclassify/secondclassify_train_lmdb"
4 mean_file: "/home/name/caffe/secondclassify/secondclassify_mean.binaryproto"
5source: "/home/name/caffe/secondclassify/secondclassify_val_lmdb"
6 name: "fc8_secondclassify"(由于只是对第八层进行了微调,因此所有和fc8有关系的都需要改名字)
7num_output: **2**
(2) 点击secondclassify_solver.prototxt,需要修改以下内容。
包括路径,各个参数,这些参数需要认真查看其每一个的意义。
net: "/home/name/caffe/secondclassify/sencondclassify_train_val.prototxt"
test_iter: 2
test_interval: 100
base_lr: 0.01
lr_policy: "step"
gamma: 0.1
stepsize: 100
display: 20
max_iter: 2000
momentum: 0.9
weight_decay: 0.0005
snapshot: 200
snapshot_prefix: "/home/tuxiang/caffe1/secondclassify/sencondclassify_caffenet_train"
solver_mode: CPU (3)修改并执行train.sh文件开始训练(此文件原始存在/home/name/caffe/examples/imagenet/里)
微调第八层,在预训练模型bvlc_reference_caffenet.caffemodel基础上训练,其所在位置为/home/name/caffe/models/bvlc_reference_caffenet/。
./build/tools/caffe train \
--solver=secondclassify/secondclassify_solver.prototxt \
--weights=secondclassify/bvlc_reference_caffenet.caffemodel
三 测试
(1)修改deploy.prototxt文件
基本就是修改fc8为之前训练时候的名字,修改num_output: 2。
(2)测试单副图像(也可用测试多幅图像的代码,只需修改循环的总数就可以了)
import cv2
import numpy as np
import matplotlib.pyplot as plt
import time
start = time.clock()

plt.rcParams['figure.figsize'] = (10, 10)        # large images
plt.rcParams['image.interpolation'] = 'nearest'  # don't interpolate: show square pixels
plt.rcParams['image.cmap'] = 'gray'  # use grayscale output rather than a (potentially misleading) color heatmap

caffe_root = '/home/name/caffe/secondclassify/'  # this file should be run from {caffe_root}/examples
import os
os.chdir(caffe_root)  #将当前工作目录转到制定路径
import sys
sys.path.insert(0, 'python')

import caffe

caffe.set_mode_cpu()

model_def = caffe_root + 'secondclassify_deploy.prototxt'
model_weights = caffe_root + 'secondclassify_caffenet_train_iter_2000.caffemodel'

net = caffe.Net(model_def, # defines the structure of the model
 model_weights,# contains the trained weights
                caffe.TEST)# use test mode (e.g., don't perform dropout)


transformer = caffe.io.Transformer({'data': net.blobs['data'].data.shape})
transformer.set_transpose('data', (2,0,1))  # move image channels to outermost dimension
#transformer.set_mean('data', mu)
transformer.set_mean('data', np.array([104,117,123]))  # subtract the dataset-mean value in each channel
transformer.set_raw_scale('data', 255)      # rescale from [0, 1] to [0, 255]
transformer.set_channel_swap('data', (2,1,0))  # swap channels from RGB to BGR

net.blobs['data'].reshape(1,  # batch size
                          3,   # 3-channel (BGR) images
                          227, 227)  # image size is 227x227
image = caffe.io.load_image(caffe_root + '111/10.jpg')
transformed_image = transformer.preprocess('data', image)
plt.imshow(image)
plt.show()

# copy the image data into the memory allocated for the net
net.blobs['data'].data[...] = transformed_image
### perform classification
output = net.forward()

output_prob = output['prob'][0]  # the output probability vector for the first image in the batch
print 'predicted class is:', output_prob.argmax()

# load ImageNet labels
labels_file = caffe_root + 'labels.txt'
if not os.path.exists(labels_file):
    get_ipython().system(u'../data/ilsvrc12/get_ilsvrc_aux.sh')

labels = np.loadtxt(labels_file, str, delimiter='\t')

print 'output label:', labels[output_prob.argmax()]
print output_prob

end = time.clock()
print('Runing time:%s Senconds'%(end-start))
(3)测试多副图像
文件夹111里有10副图像,可根据自己所要测试的数量改写
import numpy as np
import matplotlib.pyplot as plt
import sys,os
import time
caffe_root = '/home/name/caffe/secondclassify/'
sys.path.insert(0, caffe_root + 'python')
import caffe
os.chdir(caffe_root)
net_file=caffe_root + 'secondclassify_deploy.prototxt'
caffe_model=caffe_root + 'secondclassify_caffenet_train_iter_2000.caffemodel'
mean_file=caffe_root + 'secondclassify_mean.binaryproto'
net = caffe.Net(net_file,caffe_model,caffe.TEST)
transformer = caffe.io.Transformer({'data': net.blobs['data'].data.shape})
transformer.set_transpose('data', (2,0,1))
transformer.set_mean('data', np.array([104,117,123]))
transformer.set_raw_scale('data', 255)
transformer.set_channel_swap('data', (2,1,0))
net.blobs['data'].reshape(1, 3,227, 227)
IMAGE_FILE=caffe_root + '111/'
imagenet_labels_filename = caffe_root + 'labels.txt'
labels = np.loadtxt(imagenet_labels_filename, str, delimiter='\t')
for i in xrange(10):
  start = time.clock()
  imgstr = IMAGE_FILE + str(i+1) + '.jpg'
  im = caffe.io.load_image(imgstr,color=True)
  net.blobs['data'].data[...] = transformer.preprocess('data',im)
  out = net.forward()
  pridects = out['prob']
  print pridects
  pridect = pridects.argmax()
  print pridect
  print '%d.jpg style: %s  (prob= %5.2f%%)' % (i+1, labels[pridect],100*pridects[0][pridect])
  plt.figure(i+1)
  end = time.clock()
  print 'times = %s' %(end-start)
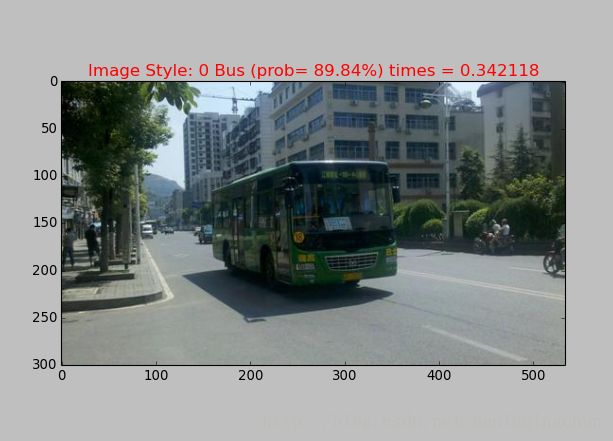
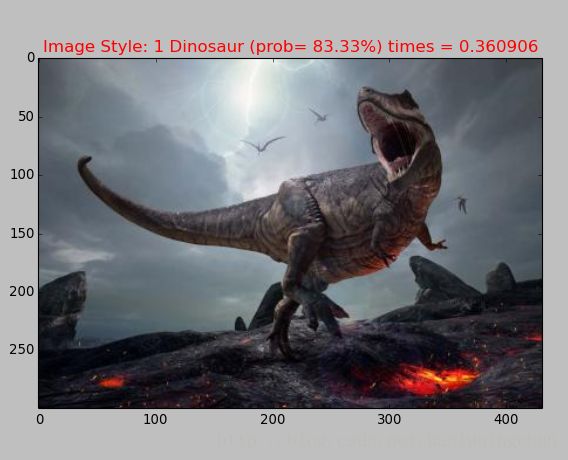
  plt.title('Image Style: %s (prob= %5.2f%%) times = %s' % (labels[pridect],100*pridects[0][pridect],(end-start)),
  fontsize=15,color='r')
  plt.imshow(im)
  plt.pause(5)
plt.close()#resize_image.sh
#!/bin/bash
# Used to resize the images
help_messge()
{
echo "Usage: resize_image -d -w -h "
echo "-d The directory contains the images"
echo "-w The width after convert"
echo "-h The height after convert"
exit 1
}
if [ $# -lt 6 ]
then
help_messge
fi
while getopts d:w:h: opt
do
case "$opt" in
d) dir="$OPTARG";;
w) w="$OPTARG";;
h) h="$OPTARG";;
esac
done
if [ -d $dir ]
then
cd $dir
ls *.jpg > filelist.$$
for image in $(cat filelist.$$)
do
echo "Convert file $image"
convert -resize "$w"x"$h" $dir/$image $dir/$image
done
rm filelist.$$
nautilus $dir
else
echo "The directory $dir is not exist"
exit 1
fi
2 批量修改图像名称
#!/bin/bash
#written by mofansheng@2016-02-17
path=/goodboy
[ -d $path ] && cd $path
for file in `ls`
do
 mv $file `echo $file|sed 's/\(.*\)\.\(.*\)/\1_p.\2/g'`
done

