SpringBoot
Spring Boot
0.学习来源:https://www.imooc.com/t/4559066
1.简述
Spring boot是SpringMVC的进阶版
2.构建SpringBoot的demo项目
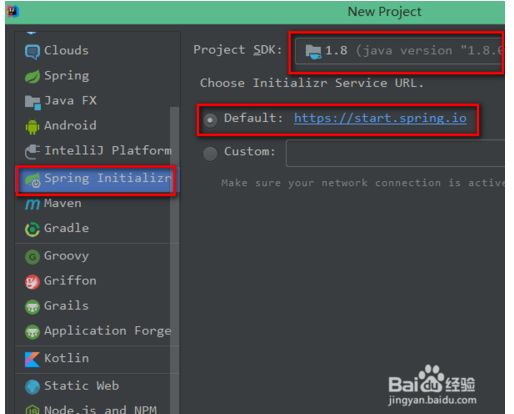
2.1 idea创建项目
- idea旗舰版:
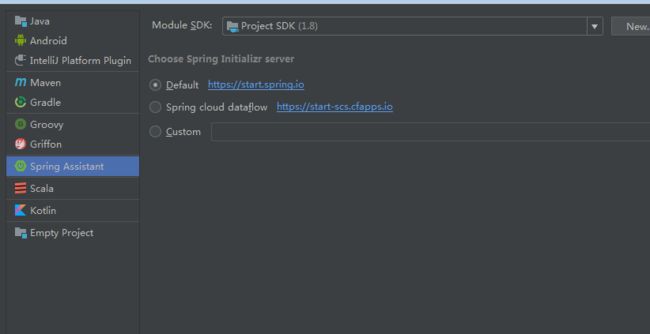
- idea社区版:
社区版没有Spring initializr选项,需要安装插件叫做 Spring Assistant
后面的步骤都是大同小异
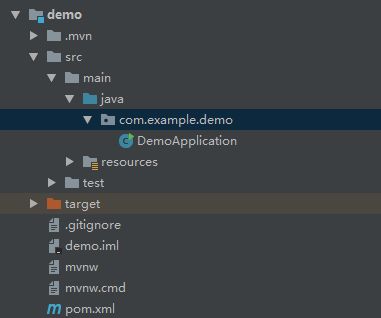
创建完项目以后是这样子的
说明:
- DemoApplication是自动生成的
- pom.xml里面是maven依赖
2.2 运行项目
2.2.1 直接运行
并没有下载配置过tomcat就可以运行,不知道是不是内部自带的。
2.2.2 增加一些内容以后再运行
- 创建一个HelloController类:
package com.example.demo;

import org.springframework.web.bind.annotation.RequestMapping;
import org.springframework.web.bind.annotation.RequestMethod;
import org.springframework.web.bind.annotation.RestController;

@RestController
public class HelloController {

    @RequestMapping(value = "/hello",method = RequestMethod.GET)
    public String say(){
        return "hello";
    }
}
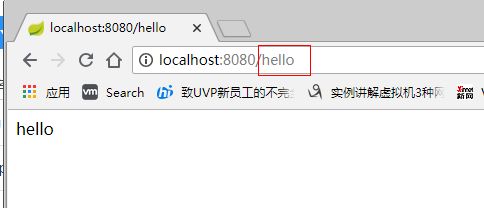
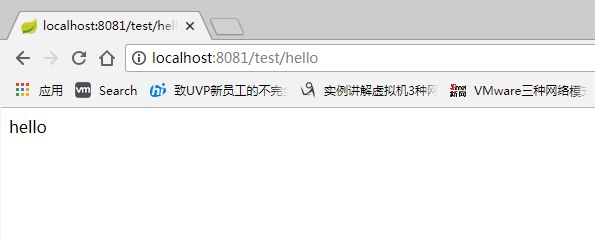
- 再运行
3.配置
3.1 application.properties
修改一些配置
//修改端口
server.port = 8081

//老版更改路径
server.context-path =/test
//新版更改路径
server.servlet.context-path =/test
重新运行
3.2 application.yml(推荐使用)
这个也是配置文件,和application.propertices作用差不多,但是写法格式不一样。
server:
  port: 8082
  servlet.context-path: /test2
//注意冒号后面有空格
3.3 读取application.yml里面的其他数据
server:
  port: 8080
  servlet.context-path: /test

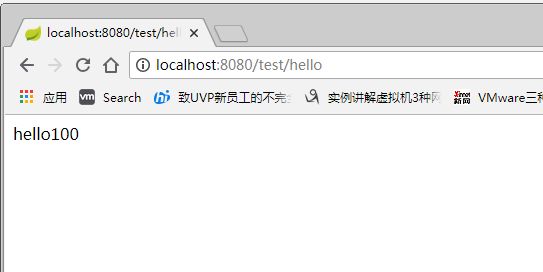
data: 100
package com.example.demo;

import org.springframework.beans.factory.annotation.Value;
import org.springframework.web.bind.annotation.RequestMapping;
import org.springframework.web.bind.annotation.RequestMethod;
import org.springframework.web.bind.annotation.RestController;

@RestController
public class HelloController {

    //把application.yml里面的data数据注入到data变量里面
    @Value("${data}")
    private int data;

    @RequestMapping(value = "/hello",method = RequestMethod.GET)
    public String say(){
        return "hello"+data;
    }
}
server:
  port: 8081
  servlet.context-path: /test

data: 1000
age: 1000

content: "data: ${data},age: ${age}"
content2: "${data}"
content3: ${data}
package com.example.demo;

import org.springframework.beans.factory.annotation.Value;
import org.springframework.web.bind.annotation.RequestMapping;
import org.springframework.web.bind.annotation.RequestMethod;
import org.springframework.web.bind.annotation.RestController;

@RestController
public class HelloController {

    //把application.yml里面的data数据注入到data变量里面
    @Value("${data}")
    private int data;

    @Value("${content}")
    private String content;

    @Value("${content2}")
    private String content2;

    @Value("${content3}")
    private int content3;

    @RequestMapping(value = "/hello",method = RequestMethod.GET)
    public String say(){
        return "content:"+content+"  content2:"+content2+"  content3:"+content3;
    }
}
3.5 读取yml文件到bean类
bean:
package com.example.demo;

import org.springframework.boot.context.properties.ConfigurationProperties;
import org.springframework.stereotype.Component;

@Component
@ConfigurationProperties(prefix = "person")
public class personProperties {
    private Integer age;

    public Integer getAge() {
        return age;
    }

    public void setAge(Integer age) {
        this.age = age;
    }

    public String getName() {
        return name;
    }

    public void setName(String name) {
        this.name = name;
    }

    private String name;
}
application.yml
server:
  port: 8081
  servlet.context-path: /test

person:
  age: 10
  name: zhangsan
controller调用
package com.example.demo;

import org.springframework.beans.factory.annotation.Autowired;
import org.springframework.beans.factory.annotation.Value;
import org.springframework.web.bind.annotation.RequestMapping;
import org.springframework.web.bind.annotation.RequestMethod;
import org.springframework.web.bind.annotation.RestController;

import javax.annotation.Resource;

@RestController
public class HelloController {

    @Resource(name = "personProperties")//或者Autowired
    private personProperties personProperties;


    @RequestMapping(value = "/hello",method = RequestMethod.GET)
    public String say(){
        return "age:"+personProperties.getAge()+"  name:"+personProperties.getName();
    }
}
运行结果
3.6 多个yml配置文件选择
比如说有两个yml配置文件,在开发环境时和真正使用时有些参数是不一样的,用两个yml配置文件把他们区分开,比如一个data在开发时使用的10,在项目使用时是20。这样子,在不同的环境下选择不同的yml配置文件
application-dev.propertices:
server:
  port: 8080
  servlet.context-path: /test

data: 10
application-prod.propertices:
server:
  port: 8080
  servlet.context-path: /test

data: 20
application.propertices:
spring:
  profiles:
    active: dev或者是prod可以选择
controller:
package com.example.demo;

import org.springframework.beans.factory.annotation.Autowired;
import org.springframework.beans.factory.annotation.Value;
import org.springframework.web.bind.annotation.RequestMapping;
import org.springframework.web.bind.annotation.RequestMethod;
import org.springframework.web.bind.annotation.RestController;

import javax.annotation.Resource;

@RestController
public class HelloController {

    @Value("${data}")
    private int data;

    @RequestMapping(value = "/hello",method = RequestMethod.GET)
    public String say(){
        return "data:"+data;
    }
}
4. 注解
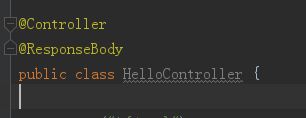
4.1 RestControlle和@Controller+@ResponseBody
@RestControlle
等价于:@Controller+@ResponseBody
就是说:
这两种效果一样
4.2 @RequestMapping
4.2.1 匹配多个路径
表示http://localhost:8080/test/hi和http://localhost:8080/test/hello都可以访问到
@RequestMapping(value = {"/hello","/hi"},method = RequestMethod.GET)
4.2.2 在class前面加RequestMapping
@RestController
@RequestMapping("/hello")
public class HelloController {

    @Value("${data}")
    private int data;

    @RequestMapping(value = "/say",method = RequestMethod.GET)
    public String say(){
        return "data:"+data;
    }
}
4.3 @PathVariable获取参数
@RestController
@RequestMapping("/hello")
public class HelloController {

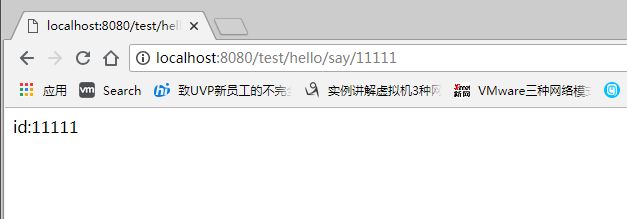
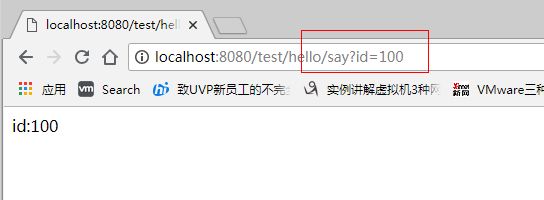
    @RequestMapping(value = "/say/{id}",method = RequestMethod.GET)
    public String say(@PathVariable("id") Integer id){
        return "id:"+id;
    }
}
或者还可以调整id的位置
@RestController
@RequestMapping("/hello")
public class HelloController {

    @RequestMapping(value = "/{id}/say",method = RequestMethod.GET)
    public String say(@PathVariable("id") Integer id){
        return "id:"+id;
    }
}
4.4 @RequestParam
这个也是获取参数
@RestController
@RequestMapping("/hello")
public class HelloController {

    @RequestMapping(value = "/say",method = RequestMethod.GET)
    public String say(@RequestParam(value = "id",required = false,defaultValue = "0") Integer id){
        return "id:"+id;
    }
}
4.5 @GetMapping(value = "/say")和@PostMapping(value = "/say")
@GetMapping(value = "/say") 等价于  @RequestMapping(value = "/say",method = RequestMethod.GET)
@PostMapping(value = "/say") 等价于 @RequestMapping(value = "/say",method = RequestMethod.POST)
5.SpringBoot+jpa+hibernate数据库的简单操作
5.1插入一条数据
先创建一个数据库,不需要创建表
添加依赖(jpa和mysql的)
    4.0.0

    com.example
    demo
    0.0.1-SNAPSHOT
    jar

    demo
    Demo project for Spring Boot


        org.springframework.boot
        spring-boot-starter-parent
        2.0.4.RELEASE


        UTF-8
        UTF-8
        1.8


            org.springframework.boot
            spring-boot-starter-web


            org.springframework.boot
            spring-boot-starter-test
            test


            org.springframework.boot
            spring-boot-starter-data-jpa


            mysql
            mysql-connector-java


                org.springframework.boot
                spring-boot-maven-plugin
配置yml
spring:
  datasource:
    driver-class-name: com.mysql.jdbc.Driver
    url: jdbc:mysql://127.0.0.1:3306/dbgirl
    username: root
    password: 123456
  jpa:
    hibernate:
      ddl-auto: update
    show-sql: true
写一个bean类,注意注解Entity
package com.example.demo;

import javax.persistence.Entity;
import javax.persistence.GeneratedValue;
import javax.persistence.Id;

//注解表示这个类对应数据库里面的一个表
@Entity
public class Girl {

    public Integer getId() {
        return id;
    }

    public void setId(Integer id) {
        this.id = id;
    }

    public String getCupSize() {
        return cupSize;
    }

    public void setCupSize(String cupSize) {
        this.cupSize = cupSize;
    }

    public Integer getAge() {
        return age;
    }

    public void setAge(Integer age) {
        this.age = age;
    }

    //注解表示这个id是主键,而且自增
    @Id
    @GeneratedValue
    private Integer id;
    private String cupSize;
    private Integer age;
}
写一个接口
package com.example.demo;

import org.springframework.data.jpa.repository.JpaRepository;

public interface GirlRepository extends JpaRepository {
}
在Controller中:
    @Autowired
    private GirlRepository girlRepository;

    @RequestMapping(value = "girls",method = RequestMethod.GET)
   public Girl insert(@RequestParam("age") Integer age, @RequestParam("cupSize") String cupSize){
        Girl girl = new Girl();
        girl.setAge(age);
        girl.setCupSize(cupSize);
        System.out.println(age+cupSize);
        return girlRepository.save(girl);
    }
浏览器中:
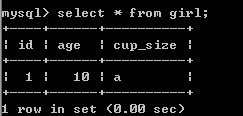
数据库中数据被插入
5.2 数据库事物
    //Transactional注解给这个方法添加事物
    @Transactional
    @RequestMapping(value = "girls2",method = RequestMethod.GET)
    public void insertTwo(){
        Girl girl = new Girl();
        girl.setAge(1);
        girl.setCupSize("a");

        Girl girl2 = new Girl();
        girl2.setAge(2);
        girl2.setCupSize("b");
        girlRepository.save(girl);
        girlRepository.save(girl2);
    }
以上都是简单的使用,更复杂的使用还需继续学习
6表单验证
还是上面的代码,整理一下包结构
功能需求:插入一条新的数据的时候,该数据的某个值必须满足一定要求,比如age>18
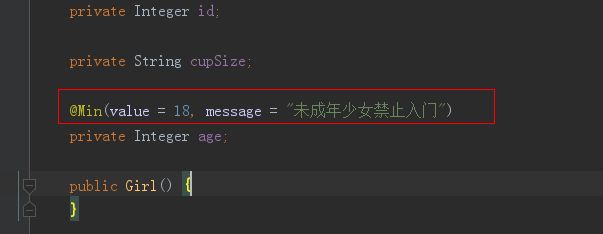
给Girl的字段添加限制条件:
表示这个age数据的最小值是18,当插入的值小于18的时候,是插入不进去的。
    @PostMapping(value = "/girls")
    public Girl girlAdd(@Valid Girl girl, BindingResult bindingResult) {
        if (bindingResult.hasErrors()){
            //可以把message里面的值拿出来
            System.out.println(bindingResult.getFieldError().getDefaultMessage());
            return null;
        }
        girl.setCupSize(girl.getCupSize());
        girl.setAge(girl.getAge());

        return girlRepository.save(girl);
    }
这个@Valid暂时不清楚有什么作用
