自定义TextView中动态设置图片大小
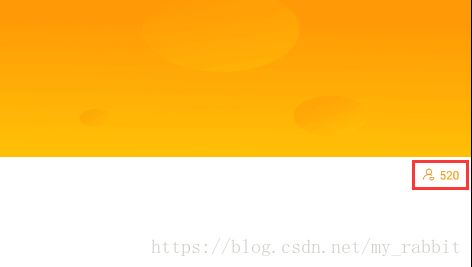
开发过程中,很多场景中都有用到文本和图片并列显示的情况,如下图示:

上图红色框中的布局你会怎么实现?
1、在水平LinearLayout布局中放一个ImageView和一个TextView进行实现?
2、在TextView中设置其drawableLeft进行实现?
以上两种方式在实现上是没有问题,但是都有其明显的缺点:
第一种方式:实现过程中需要添加嵌套三个控件,对于一些复杂页面会增加嵌套层级,同时也提高了View的绘制时间,不利于布局优化。
第二种方式:这个相对于前一个来说在布局上有很大的优化,只需要在TextView中设置其在各个方向上的drawable即可,但这个drawable的大小是不能够通过代码进行设置的,只能让UI裁剪成合适大小的图片使用,Android机型辣么多,确定能够所有的都合适?
我们经常会听到自定义View,那我们就用自定义View来进行实现。由于TextView就有设置图片drawable的属性,那么我们就直接继承AppCompatTextView来实现。
1、自定义View的属性
我们需要设置TextView的图片显示以及图片的宽高,而且我们不确定要设置再其哪个方向上,所以给他定义一个动态配置的属性可供选择,因此我们可以在values/attrs.xml中如下定义:
<declare-styleable name="DrawableTextView">
    <attr name="drawableImage" format="reference" />
    <attr name="drawableWidth" format="dimension" />
    <attr name="drawableHeight" format="dimension" />
    <attr name="drawableLocation">
        <enum name="left" value="1" />
        <enum name="top" value="2" />
        <enum name="right" value="3" />
        <enum name="bottom" value="4" />
    attr>
declare-styleable>
2、在View的构造方法中获取自定义配置属性
public class DrawableTextView extends AppCompatTextView {

    private final int LEFT = 1, TOP = 2, RIGHT = 3, BOTTOM = 4;
    private Drawable drawableImage;
    private int drawableWidth;
    private int drawableHeight;
    private int drawableLocation;

    public DrawableTextView(Context context) {
        this(context, null);
    }

    public DrawableTextView(Context context, AttributeSet attrs) {
        this(context, attrs, 0);
    }

    public DrawableTextView(Context context, AttributeSet attrs, int defStyleAttr) {
        super(context, attrs, defStyleAttr);
        TypedArray typedArray = getContext().obtainStyledAttributes(attrs, R.styleable.DrawableTextView, 0, 0);
        drawableImage = typedArray.getDrawable(R.styleable.DrawableTextView_drawableImage);
        drawableWidth = (int) typedArray.getDimension(R.styleable.DrawableTextView_drawableWidth, 0);
        drawableHeight = (int) typedArray.getDimension(R.styleable.DrawableTextView_drawableHeight, 0);
        drawableLocation = typedArray.getInt(R.styleable.DrawableTextView_drawableLocation, LEFT);
        typedArray.recycle();

        drawDrawable();
    }
 }
3、设置Drawable的宽高和位置
/**
 * 设置Drawable的宽高和位置
 */
public void drawDrawable() {
    if (drawableImage != null) {
        Bitmap bitmap = ((BitmapDrawable) drawableImage).getBitmap();
        Drawable drawable;
        if (drawableWidth != 0 && drawableHeight != 0) {
            drawable = new BitmapDrawable(getResources(), getScaleBitmap(bitmap,
                    drawableWidth, drawableHeight));
        } else {
            drawable = new BitmapDrawable(getResources(), Bitmap.createScaledBitmap(bitmap,
                    bitmap.getWidth(), bitmap.getHeight(), true));
        }
        drawable.setBounds(0, 0, drawableWidth, drawableHeight);
        switch (drawableLocation) {
            case LEFT:
                setCompoundDrawables(drawable, null, null, null);
                break;
            case TOP:
                setCompoundDrawables(null, drawable, null, null);
                break;
            case RIGHT:
                setCompoundDrawables(null, null, drawable, null);
                break;
            case BOTTOM:
                setCompoundDrawables(null, null, null, drawable);
                break;
        }
    }
}
代码比较简单,首先我们判断是否设置了Drawable图片资源,如果设置了则判断宽高是否也设置了(因为需要采取不同的绘制方式),如果设置了宽高则绘制成我们配置的指定宽高,否则按Drawable原图大小进行绘制。
setBounds(int left, int top, int right, int bottom)四个参数指的是drawable将被绘制在canvas的哪个矩形区域内,这个矩形区域的坐标是以canvas左上角为坐标原点进行绘制的。
setCompoundDrawables(Drawable left, Drawable top, Drawable right, Drawable bottom)方法让我们可以在上、下、左、右四个方向设置图标,如果不想在某个地方显示图片则可以设置为null,但是使用此方法前必须已经设置过setBounds(),也就是你要添加的资源必须已经设置过宽和高等信息。
这里需要注意的是如果直接绘制成指定的宽高,运行后会发现Drawable会被从左上角开始裁剪成为指定的大小,所以我们需要根据Drawable原来的大小和目标宽高进行裁剪缩放。
/**
 * 等比缩放图片
 */
public static Bitmap getScaleBitmap(Bitmap bm, int mWidth, int mHeight) {
    // 获得图片宽高
    int width = bm.getWidth();
    int height = bm.getHeight();
    // 计算缩放比例
    float scaleWidth = ((float) mWidth) / width;
    float scaleHeight = ((float) mHeight) / height;
    // 设置缩放Matrix参数
    Matrix matrix = new Matrix();
    matrix.postScale(scaleWidth, scaleHeight);
    // 返回缩放后新图片
    return Bitmap.createBitmap(bm, 0, 0, width, height, matrix, true);
}
4、在布局文件中使用
<com.wiggins.widget.DrawableTextView
    android:layout_width="wrap_content"
    android:layout_height="wrap_content"
    android:drawablePadding="10dp"
    android:ellipsize="end"
    android:gravity="center_vertical"
    android:singleLine="true"
    android:text="520"
    app:drawableHeight="20dp"
    app:drawableImage="@drawable/fans"
    app:drawableLocation="right"
    app:drawableWidth="20dp" />
因为此自定义View继承AppCompatTextView,因此TextView的所有属性都是可以使用的,比如设置文字和图标之间的间距drawablePadding属性,文本内容的对齐方式gravity属性等等都可以使用。