应用版日常linux系统巡检shell脚本
查看linux磁盘脚本
#!/bin/bash

#脚本功能描述:监控服务器主要性能参数指标
#监控项目:内核信息,主机名称,IP地址,登录账户,内存与swap信息,磁盘信息,CPU负载
#内核信息
kernel=$(uname -r)

#操作系统版本
release=$(cat /etc/redhat-release)

#主机名称
hostname=$HOSTNAME

#本地IP地址列表
localip=$(ip a s | awk '/inet /{print $2}')

#总内存容量
mem_total=$(free | awk '/Mem/{print $2}')

#剩余内存容量
mem_free=$(free | awk '/Mem/{print $NF}')

#总swap容量
swap_total=$(free | awk '/Swap/{print $2}')

#剩余swap容量
swap_free=$(free | awk '/Swap/{print $NF}')

#磁盘信息
disk=$(df | awk '/^\/dev/{print $1,$2,$4}'|column -t)

#CPU最近1分钟的平均负载
load1=$(uptime | sed 's/,//g' | awk '{print $(NF-2)}')

#CPU最近5分钟的平均负载
load5=$(uptime | sed 's/,//g' | awk '{print $(NF-1)}')

#CPU最近15分钟的平均负载
load15=$(uptime | sed 's/,//g' | awk '{print $(NF)}')

#登录用户数量
login_users=$(who | wc -l)

#进程数量
procs=$(ps aux | wc -l)

#系统总账户数量
users=$(sed -n '$=' /etc/passwd)

#CPU型号
cpu_info=$(LANG=C lscpu |awk -F: '/Model name/ {print $2}')

#CPU内核数量
cpu_core=$(awk '/processor/{core++} END{print core}' /proc/cpuinfo)

#安装性能监控软件
yum -y -q  install sysstat &>/dev/null

echo -e "\033[34m提取磁盘性能指标,请稍后...\033[0m"

tps=$(LANG=C sar -d -p 1 6 | awk '/Average/' | tail -n +2 |awk '{print "["$2"]磁盘平均IO数量:"$3}') &

read_write=$(LANG=C sar -d -p 1 6 |awk '/Average/' | tail -n +2 | awk '{print "["$2"]平均每秒读写扇区量:"$4,$5}') &

#中断数量
irq=$(vmstat 1 2 |tail -n +4 | awk '{print $11}')

#上下文切换数量
cs=$(vmstat 1 2|tail -n +4 | awk '{print $12}')

#占用内存资源最多的10个进程列表
top_proc_mem=$(ps --no-headers -eo comm,rss | sort -k2 -n |tail -10)

#占用内存资源最多的10个进程列表
top_proc_cpu=$(ps --no-headers -eo comm,rss | sort -k2 -n |tail -10)

#获取网卡流量信息,接收|发送的数据流量,单位为字节(bytes)
net_monitor=$(cat /proc/net/dev | tail -n +3 |awk 'BEGIN{ print "网卡名称 入站数据流量(bytes) 出站数据流量(bytes)"} {print $1,$2,$10}' | column -t)

#输出数据信息
echo -e "\033[32m************************本机主要参数列表********************\033[0m"

echo -e "本机IP地址列表:\033[32m$localip\033[0m"

echo -e "本机主机名称:\033[32m$hostname\033[0m"

echo -e "操作系统版本为:\033[32m$release\033[0m,内核版本:\033[32m$kernel\033[0m"

echo -e "CPU型号为:\033[32m$cpu_info\033[0m,CPU内核数量:\033[32$kernel\033[0m"

echo -e "本机总内存容量:\033[32m$mem_total\033[0m,剩余可用内存容量:\033[32m$mem_free\033[0m"

echo -e "本机swap总容量:\033[32m$swap_local\033[0m,剩余swap容量:\033[32m$swap_free\033[0m"

echo -e "CPU最近1分钟,5分钟,15分钟的平均负载分别为:\033[32m$load1 $load5 $load15\033[0m"

echo -e "本机总账户数量为:\033[32m$users\033[0m,当前登录系统的账户数量:\033[32m$login_users\033[0m"

echo -e "当前系统中启动的进程数量:\033[32m$procs\033[0m"

echo -e "占用CPU资源最多的10个进程列表为:"

echo -e "\033[32m$top_proc_cpu\033[0m"

echo -e "占用CPU内存资源最多的10个进程列表为:"

echo -e "\033[32m$top_proc_mem\033[0m"

echo -e "CPU中断数量为:\033[32m$irq\033[0m,CPU上下文切换数量:\033[32m$cs\033[0m"

echo -e "每个磁盘分区的总容量与剩余容量信息如下:"

echo -e "$disk"

echo -e "$tps"

echo -e "$read_write"

echo -e "$net_monitor"

echo -e "\033[32m************************巡检结束********************\033[0m"
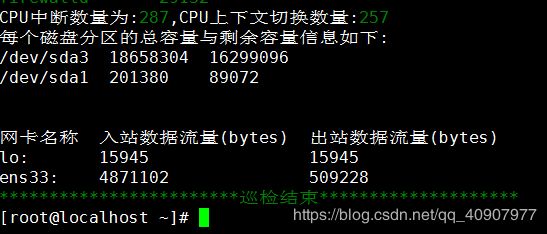
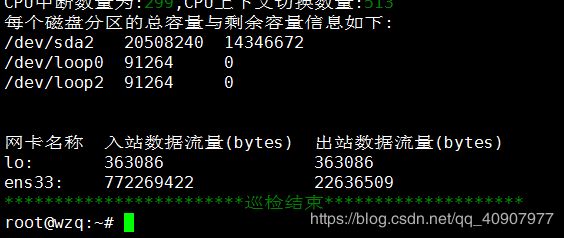
执行结果 :
CentOS 7.5

Ubuntu 16.04执行结果

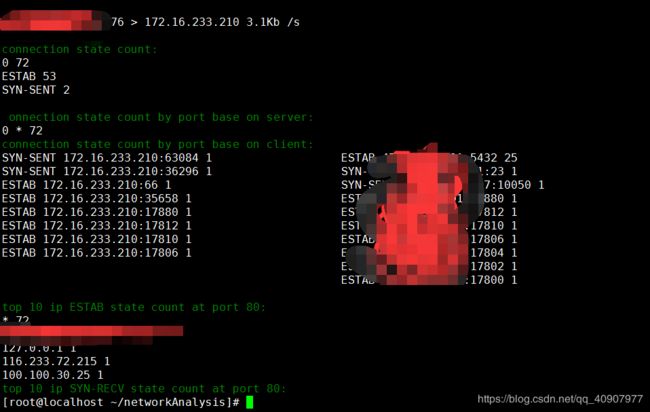
网卡流量监控脚本
适用于ubantu和centos系统
统计一下指定网卡的一段时间内的数据:
有哪些IP的哪些端口连接到了我们的80端口,连接数的top10
服务器网络连接状态统计,有多少FIN-WAIT-2
10秒内服务器和客户端各端口流量统计
ctrl + c 停止排查。
git clone https://github.com/luckman666/networkAnalysis.git

cd networkAnalysis && chmod -R netAnalysis.sh

./netAnalysis.sh
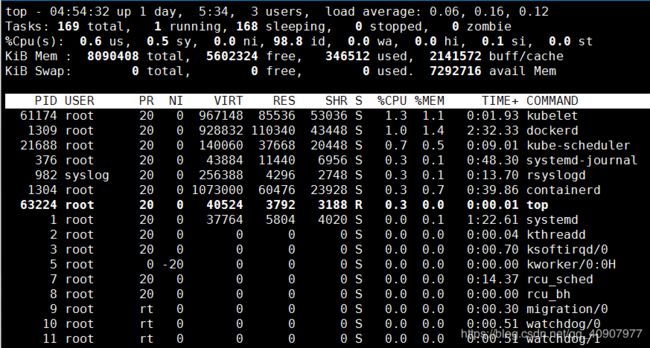
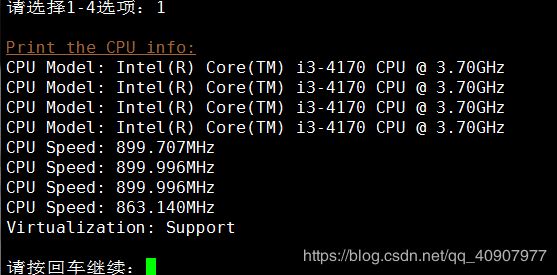
系统巡检脚本
适用于ubantu和centos系统
执行后功能列表:

选择1

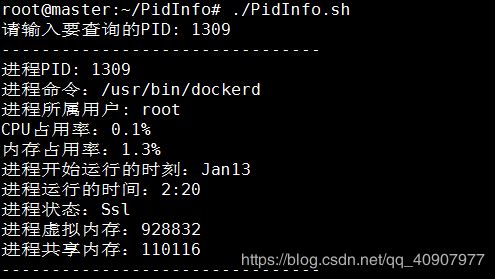
shell脚本根据PID查看所有信息
适用于ubantu和centos系统
# git clone https://github.com/luckman666/PidInfo.git && chmod -R 755  PidInfo

#! /bin/bash
# 根据用户输入的PID,过滤出该PID所有的信息
read -p "请输入要查询的PID: " P
n=`ps -aux| awk '$2~/^'$P'$/{print $11}'|wc -l`
if [ $n -eq 0 ];then
 echo "该PID不存在!!"
 exit
fi
echo "--------------------------------"
echo "进程PID: $P"
echo "进程命令:`ps -aux| awk '$2~/^'$P'$/{print $11}'`"
echo "进程所属用户: `ps -aux| awk '$2~/^'$P'$/{print $1}'`"
echo "CPU占用率:`ps -aux| awk '$2~/^'$P'$/{print $3}'`%"
echo "内存占用率:`ps -aux| awk '$2~/^'$P'$/{print $4}'`%"
echo "进程开始运行的时刻:`ps -aux| awk '$2~/^'$P'$/{print $9}'`"
echo "进程运行的时间:`ps -aux| awk '$2~/^'$P'$/{print $10}'`"
echo "进程状态:`ps -aux| awk '$2~/^'$P'$/{print $8}'`"
echo "进程虚拟内存:`ps -aux| awk '$2~/^'$P'$/{print $5}'`"
echo "进程共享内存:`ps -aux| awk '$2~/^'$P'$/{print $6}'`"
echo "--------------------------------"
批量添加用户
CentOS && Ubuntu
git clone https://github.com/luckman666/mUser.git
chmod -R 755  mUser

添加用户 :
mUser.sh --add name1,name2,…………

删除用户:
mUser.sh --del name1,name2
批量部署k8s脚本
k8s集群部署脚本一键部署(多版本)kubernetes集群部署脚本
注意 : 仅限CentOS
咱们要做就做到底,把K8s部署、升级、扩容这块的脚本一气写完,之前波哥出的k8s集群部署脚本都是指定版本的。

git clone https://github.com/luckman666/k8sDeploy.git && chmod -R 755 k8sDeploy && cd k8sDeploy
# ./k8sDeploy.sh   #安装
k8s集群一键新加node节点脚本
继推出k8s集群一键升级脚本之后,k8s在线扩容节点的需求
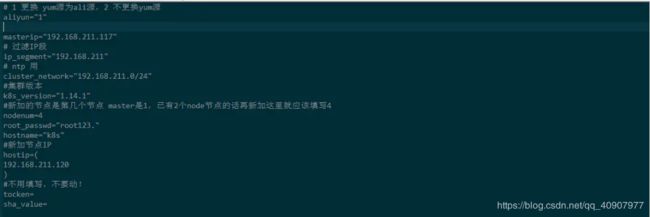
跟以往一下我们有个base.config文件,修改上面的参数。这里我写好了自己的例子还有相关注释。
配置完毕后执行这个脚本就行了

执行效果:

箭头所指就是我们新增的node节点
# git clone https://github.com/luckman666/k8sExt.git && chmod -R 755 k8sExt && cd k8sExt
# k8sExt.sh
漏洞扫描
注意 : CentOS && Ubuntu
一键安装命令
docker run -d -p 8000:80 -v /opt/data:/data ysrc/xunfeng:latest

仓库地址:https://github.com/ysrc/xunfeng
rsync同步脚本
需求 :需要临时多台机器同步文件内容。
配置文件,这里只需要配置这样的参数即可。

注意:
1、因为脚本采用rsync 进行同步,所以源端目标端都必须要安装rsync工具

2、做好源端和目标端单向互信登录,我们之前也推出过一键互信脚本。直接使用即可。
git clone https://github.com/luckman666/rScript.git

chmod -R 755 rScript && cd rScript

修改base.config参数

./rScript.sh

然后就会直接同步过去,为了更灵活方便。波哥还在脚本里面写了忽略哪些文件夹,当然如果您的源端根本没有,那就也不同同步,如果有其他需要忽略的,可以按这个格式往里添加。

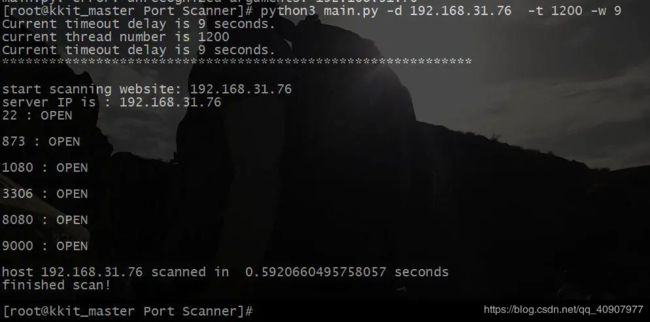
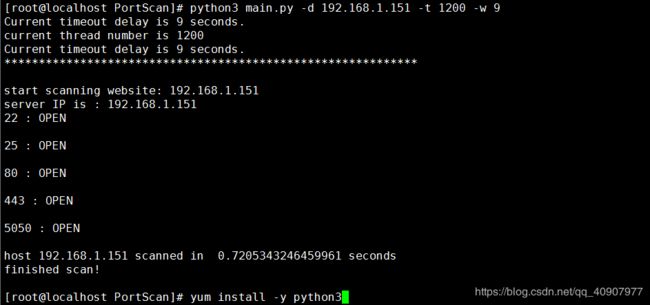
超牛X的多线程端口扫描脚本(python3)
注意 : CentOS && Ubuntu
脚本后续更新及迭代将由kkitDeploy项目代替
https://github.com/luckman666/kkitdeploy_server
请大家持续关注kkitDeploy
脚本
git clone https://github.com/luckman666/PortScan.git
cd PortScan
# 192.168.1.102 也可以填写域名 1200线程数,9秒timeout
# 用python3写的请用python3以上版本
python main.py -d 192.168.1.102 -t 1200 -w 9
检测网站挂马程序(Python)
系统管理员通常从svn/git中检索代码,部署站点后通常首先会生成该站点所有文件的MD5值,如果上线后网站页面内容被篡改(如挂马)等,可以比对之前生成MD5值快速查找去那些文件被更改,为了使系统管理员第一时间发现,可结合crontab或nagios等工具。
程序测试如下:
# python check_change.py
    Usage: python check_change.py update /home/wwwroot
           python check_change.py check /home/wwwroot
# python check_change.py update /data/www #生成站点的md5值
# echo ' ' > /data/www/sitemap.html #测试清空文件
# rm -rf /data/www/sitemap.xml #测试删除文件
# python check_change.py check /data/www  #查找那些文件被篡改
/data/www/sitemap.xml
/data/www/sitemap.html
代码如下(check_change.py):
#!/usr/bin/env python

import os,sys,subprocess

def update(path):
    f = open(file,'w')
    for root,dirs,files in os.walk(path):
        for name in files:
            line = os.path.join(root, name)
            (stdin,stderr) = subprocess.Popen(['md5sum',line],stdout=subprocess.PIPE).communicate()
            f.write(stdin)
    f.close()

def check(path):
    f = open(file,'r')
    for line in f:
        check_ok = """echo '%s' | md5sum -c > /dev/null 2>&1""" % line
        #print check_ok
        if not subprocess.call(check_ok, shell = True) == 0:
            abnormal = line.split()
            print abnormal[1]
    f.close()

def Usage():
    print '''
    Usage: python %s update /home/wwwroot
           python %s check /home/wwwroot
    ''' % (sys.argv[0],sys.argv[0])
    sys.exit()

if len(sys.argv) != 3:
    Usage()

file = 'file.key'
model = sys.argv[1]
path = sys.argv[2]

if os.path.exists(path) == False:
    print "\033[;31mThe directory or file does not exist\033[0m"
    sys.exit()
elif model == 'update':
    update(path)
elif model == 'check':
    check(path)
else:
    Usage()
参考链接 :
https://www.jianshu.com/p/132154dbffe7
linux网络监控流量监控脚本 :https://www.jianshu.com/p/49699add574b
https://www.jianshu.com/p/f2778d3e27f7
检测网站挂马程序(Python) :https://www.jianshu.com/p/4d294e1a2b58

