Cocos2dx lua 启动流程
cocos2dx 版本 3.x,工具 VS2013 + babelua插件
1.lua工具,babelua
babelua下载地址:http://babelua.codeplex.com/,下载后点击安装就可以了 ![]()
看到上图的lua 菜单就成功了。
关于babelua的介绍在其网页里有写,这里就不再阐述了。
2.cocos2dx 创建lua工程
windows 7下,配置好cocos2dx环境后,使用命令行创建项目。
cocos new mylua1 -p com.your_company.mygame -l lua -d f:/lua/mylua1
不会配置环境的同学可以查看cocos2dx源码目录下的ReadMe.md
3.lua项目
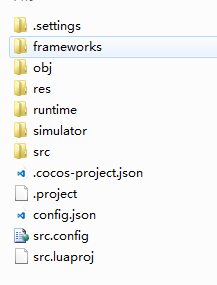
打开 F:\lua\myLua1\frameworks\runtime-src\proj.win32下 的 mylua1.sln
在VS2013下就可以看到 C++下的项目文件了 
可以找到我们的老朋友了,AppDelegate.cpp
bool AppDelegate::applicationDidFinishLaunching()
{
    // set default FPS
    Director::getInstance()->setAnimationInterval(1.0 / 60.0f);

    // register lua module
    auto engine = LuaEngine::getInstance();
    ScriptEngineManager::getInstance()->setScriptEngine(engine);
    lua_State* L = engine->getLuaStack()->getLuaState();
    lua_module_register(L);

    register_all_packages();

    LuaStack* stack = engine->getLuaStack();
    stack->setXXTEAKeyAndSign("2dxLua", strlen("2dxLua"), "XXTEA", strlen("XXTEA"));

    //register custom function
    //LuaStack* stack = engine->getLuaStack();
    //register_custom_function(stack->getLuaState());

#if (COCOS2D_DEBUG > 0) && (CC_CODE_IDE_DEBUG_SUPPORT > 0)
    // NOTE:Please don't remove this call if you want to debug with Cocos Code IDE
    auto runtimeEngine = RuntimeEngine::getInstance();
    runtimeEngine->addRuntime(RuntimeLuaImpl::create(), kRuntimeEngineLua);
    runtimeEngine->start();
#else
//默认调用src/main.lua代码
    if (engine->executeScriptFile("src/main.lua"))
    {
        return false;
    }
#endif

    return true;
}- 1
- 2
- 3
- 4
- 5
- 6
- 7
- 8
- 9
- 10
- 11
- 12
- 13
- 14
- 15
- 16
- 17
- 18
- 19
- 20
- 21
- 22
- 23
- 24
- 25
- 26
- 27
- 28
- 29
- 30
- 31
- 32
- 33
- 34
- 35
与C++下的代码相比,原先的view 初始化,opgl参数初始化等都没有了,看样子都移交给了lua模块了。
但是VS2013在C++下是看不到lua的逻辑代码的,这个时候就需要新建一个VS2013的lua项目了,LUA->New Lua Porject,可以看到新建VS的lua项目需要的设置: 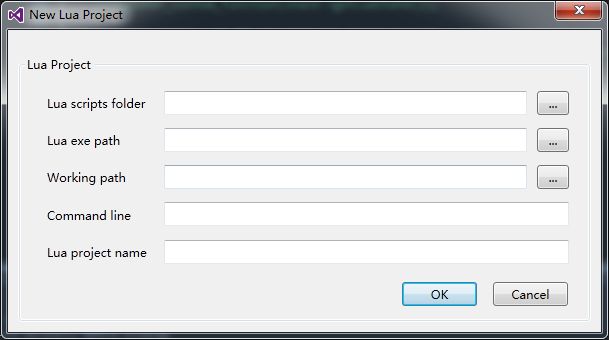
4.关于创建VS lua项目的参数
Lua scripts folder:项目目录
Lua exe path:加载lua脚本exe程序
Working path:工作目录
Command Line:传给Lua脚本的编译参数
Lua project name:lua VS下的名称
从这里可以看到,我们首先需要个exe程序,很显然,cocos2dx C++模块就是一个框架exe,然后加载lua来执行不同的业务。直接运行MyLua1项目,会产生exe程序。
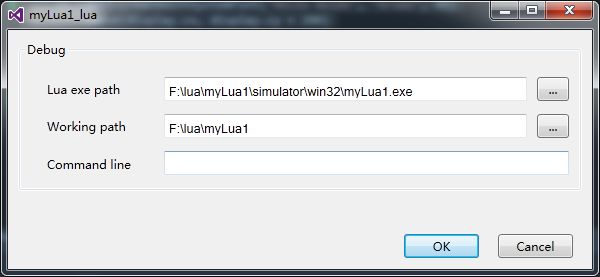
之后设置新建lua项目的参数: 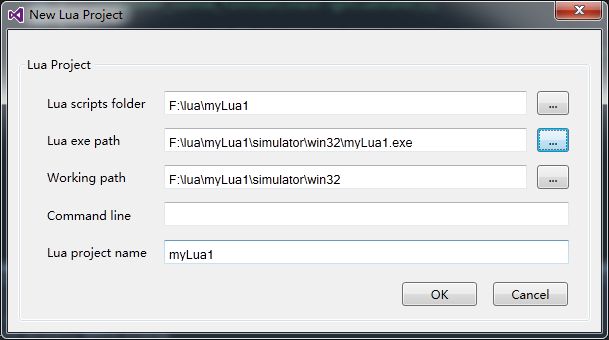
5.尝试修改lua脚本并运行
main.lua
--调用app下的MyApp.lua的create():run()
local function main()
    require("app.MyApp"):create():run()
end

local status, msg = xpcall(main, __G__TRACKBACK__)
if not status then
    print(msg)
end- 1
- 2
- 3
- 4
- 5
- 6
- 7
- 8
- 9
MyApp.lua
local MyApp = class("MyApp", cc.load("mvc").AppBase)-- 继承cc.mvc.AppBase

function MyApp:onCreate()
    math.randomseed(os.time())
end

return MyApp- 1
- 2
- 3
- 4
- 5
- 6
- 7
packages/mvc/AppBase.lua
--这里在MyApp:create()的时候调用
function AppBase:ctor(configs)
    --注意下面的几个成员变量
    self.configs_ = {
        viewsRoot  = "app.views",
        modelsRoot = "app.models",
        defaultSceneName = "MainScene",
    }

    for k, v in pairs(configs or {}) do
        self.configs_[k] = v
    end

    if type(self.configs_.viewsRoot) ~= "table" then
        self.configs_.viewsRoot = {self.configs_.viewsRoot}
    end
    if type(self.configs_.modelsRoot) ~= "table" then
        self.configs_.modelsRoot = {self.configs_.modelsRoot}
    end

    if DEBUG > 1 then
        dump(self.configs_, "AppBase configs")
    end

    if CC_SHOW_FPS then
        cc.Director:getInstance():setDisplayStats(true)
    end

    -- event
    self:onCreate()
end- 1
- 2
- 3
- 4
- 5
- 6
- 7
- 8
- 9
- 10
- 11
- 12
- 13
- 14
- 15
- 16
- 17
- 18
- 19
- 20
- 21
- 22
- 23
- 24
- 25
- 26
- 27
- 28
- 29
- 30
- 31
这里是 MyApp:run()的实现,
function AppBase:run(initSceneName)
    initSceneName = initSceneName or self.configs_.defaultSceneName --指定initScenenName
    self:enterScene(initSceneName) --调用enterScene
end- 1
- 2
- 3
- 4
enterScene()进入具体的场景逻辑了,相当于C++下调用Director::runWithScene()的作用
function AppBase:enterScene(sceneName, transition, time, more)
    local view = self:createView(sceneName)
    view:showWithScene(transition, time, more)
    return view
end- 1
- 2
- 3
- 4
- 5
显示的内容就在 app/views/MainScene.lua 里
function MainScene:onCreate()
    -- add background image
    display.newSprite("HelloWorld.png")
        :move(display.center)
        :addTo(self)

    -- add HelloWorld label,修改下label内容
    cc.Label:createWithSystemFont("Hello Golds", "Arial", 40)
        :move(display.cx, display.cy + 200)
        :addTo(self)

end
- 1
- 2
- 3
- 4
- 5
- 6
- 7
- 8
- 9
- 10
- 11
- 12
- 13
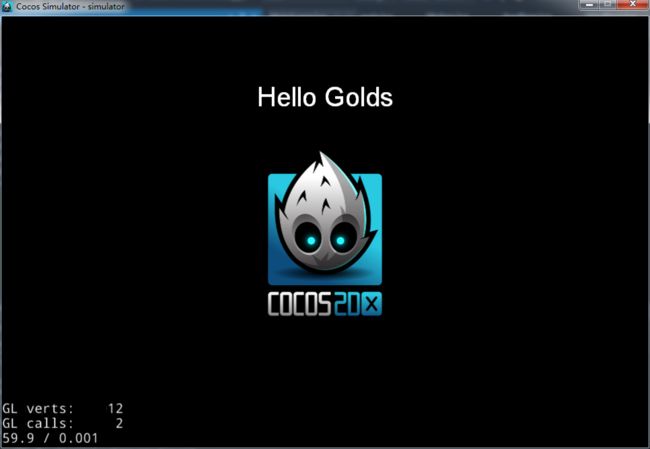
运行 LUA->Run Without Debugging
结果发现显示的内容没有更改,怎么回事呢?
发现创建lua项目的时候 设定的Working path问题,VS2013 默认将原来的脚本代码复制到了 Working path下了,所以改下设置;
选中lua项目,右击->Properties,即修改Working Path: 