Eureka使用小案例
Eureka架构中的三个核心角色:
- 服务注册中心:Eureka的服务端应用,提供服务注册和发现功能
- 服务提供者:提供服务的应用,可以是SpringBoot应用,也可以是其它技术实现,只要对外提供的是Rest风格服务即可。
- 服务消费者:消费应用从注册中心获取服务列表,从而得知每个服务方的信息,知道去哪里调用服务方。
Eureka就好比是滴滴,负责管理、记录服务提供者的信息。服务调用者无需自己寻找服务,而是把自己的需求告诉Eureka,然后Eureka会把符合你需求的服务告诉你。Eureka说白了就是一个注册服务中心。
同时,服务提供方与Eureka之间通过“心跳”机制进行监控,当某个服务提供方出现问题,Eureka自然会把它从服务列表中剔除。
这就实现了服务的自动注册、发现、状态监控。
原理图
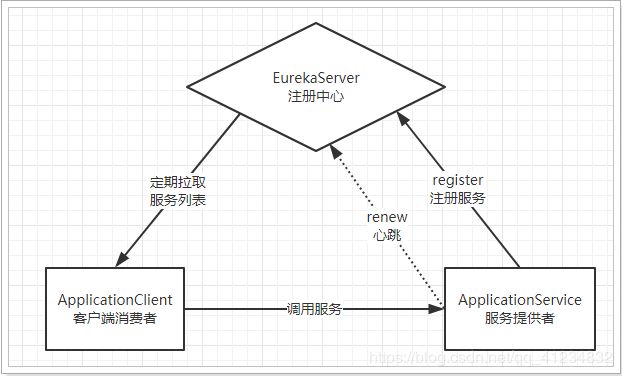
- Eureka:就是服务注册中心(可以是一个集群),对外暴露自己的地址
- 提供者:启动后向Eureka注册自己信息(地址,提供什么服务)
- 消费者:向Eureka订阅服务,Eureka会将对应服务的所有提供者地址列表发送给消费者,并且定期更新
- 心跳(续约):提供者定期通过http方式向Eureka刷新自己的状态
入门案例
1.编写EurekaServer
接下来我们创建一个项目,启动一个EurekaServer,依然使用spring提供的快速搭建工具:
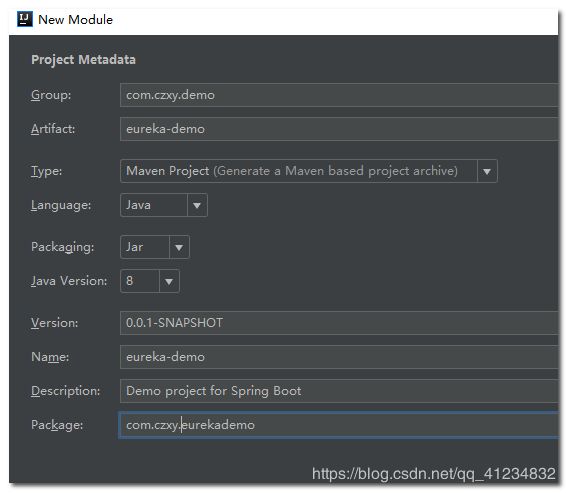
选择依赖:

完整的Pom文件:
    4.0.0

com.czxy.demo
eureka-demo
0.0.1-SNAPSHOT
jar

eureka-demo
Demo project for Spring Boot


    org.springframework.boot
    spring-boot-starter-parent
    2.0.1.RELEASE


    UTF-8
    UTF-8
    1.8

    Finchley.RC1


        org.springframework.cloud
        spring-cloud-starter-netflix-eureka-server


            org.springframework.cloud
            spring-cloud-dependencies
            ${spring-cloud.version}
            pom
            import


            org.springframework.boot
            spring-boot-maven-plugin


        spring-milestones
        Spring Milestones
        https://repo.spring.io/milestone

            false
编写启动类:
@SpringBootApplication
@EnableEurekaServer // 声明这个应用是一个EurekaServer
public class EurekaDemoApplication {

public static void main(String[] args) {
    SpringApplication.run(EurekaDemoApplication.class, args);
}
}
编写配置application.yml:
server:
  port: 10086 # 端口
spring:
  application:
    name: eureka-server # 应用名称,会在Eureka中显示
eureka:
  client:
    register-with-eureka: false # 是否注册自己的信息到EurekaServer,默认是true
    fetch-registry: false # 是否拉取其它服务的信息,默认是true
    service-url: # EurekaServer的地址,现在是自己的地址,如果是集群,需要加上其它Server的地址。
      defaultZone: http://127.0.0.1:${server.port}/eureka
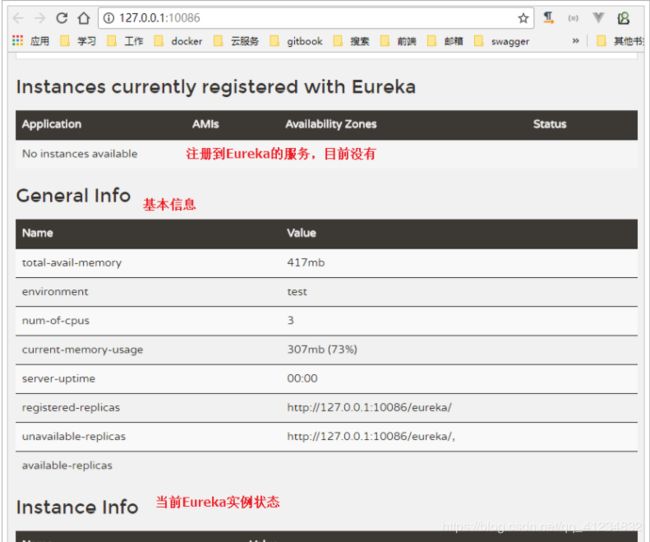
启动服务,并访问:http://127.0.0.1:10086/eureka

2.将user-service注册到Eureka
注册服务,就是在服务上添加Eureka的客户端依赖,客户端代码会自动把服务注册到EurekaServer中。
我们在user-service-demo中添加Eureka客户端依赖:
            org.springframework.cloud
            spring-cloud-dependencies
            Finchley.RC1
            pom
            import


        spring-milestones
        Spring Milestones
        https://repo.spring.io/milestone

            false
然后是Eureka客户端:
    org.springframework.cloud
    spring-cloud-starter-netflix-eureka-client
通过添加@EnableDiscoveryClient来开启Eureka客户端功能
SpringBootApplication
@EnableEurekaClient // 开启EurekaClient功能
public class UserServiceDemoApplication {
	public static void main(String[] args) {
		SpringApplication.run(UserServiceDemoApplication.class, args);
	}
}
编写配置
server:
  port: 8081
spring:
  datasource:
    url: jdbc:mysql://localhost:3306/mydb1?useUnicode=true&characterEncoding=utf8
    username: root
    password: 123456
    driver-class-name: com.mysql.jdbc.Driver
  application:
    name: user-service # 应用名称
eureka:
  client:
    service-url: # EurekaServer地址
      defaultZone: http://127.0.0.1:10086/eureka
  instance:
    prefer-ip-address: true # 当调用getHostname获取实例的hostname时,返回ip而不是host名称
    ip-address: 127.0.0.1 # 指定自己的ip信息,不指定的话会自己寻找
注意:
- 这里我们添加了spring.application.name属性来指定应用名称,将来会作为应用的id使用。
- 不用指定register-with-eureka和fetch-registry,因为默认是true
重启项目,报错
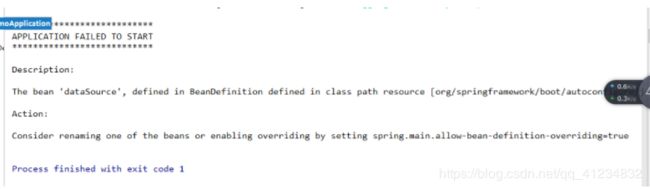
解决方案,设置如下:
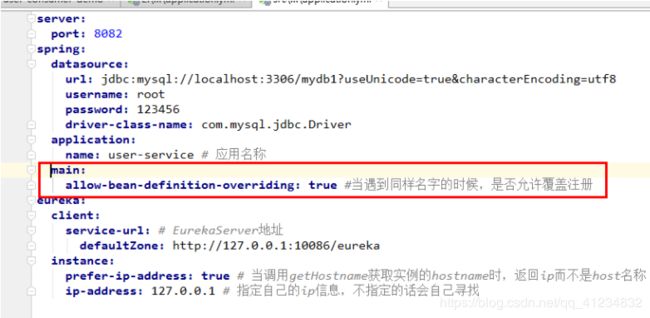
main:
    allow-bean-definition-overriding: true #当遇到同样名字的时候,是否允许覆盖注册
再次运行,OK

我们发现user-service服务已经注册成功了
3.消费者从Eureka获取服务
接下来我们修改consumer-demo,尝试从EurekaServer获取服务。
方法与消费者类似,只需要在项目中添加EurekaClient依赖,就可以通过服务名称来获取信息了!
1)添加依赖:
先添加SpringCloud依赖:
            org.springframework.cloud
            spring-cloud-dependencies
            Finchley.RC1
            pom
            import


        spring-milestones
        Spring Milestones
        https://repo.spring.io/milestone

            false
然后是Eureka客户端:
    org.springframework.cloud
    spring-cloud-starter-netflix-eureka-client
再启动类开启Eureka客户端
@SpringBootApplication
@EnableDiscoveryClient // 开启Eureka客户端
public class UserConsumerDemoApplication {
    @Bean
    public RestTemplate restTemplate() {
        return new RestTemplate();
    }
    public static void main(String[] args) {
        SpringApplication.run(UserConsumerDemoApplication.class, args);
    }
}
修改配置:
server:
  port: 8080
spring:
  application:
    name: user-consumer # 应用名称
eureka:
  client:
    service-url: # EurekaServer地址
      defaultZone: http://127.0.0.1:10086/eureka
  instance:
    prefer-ip-address: true # 当其它服务获取地址时提供ip而不是hostname
    ip-address: 127.0.0.1 # 指定自己的ip信息,不指定的话会自己寻找
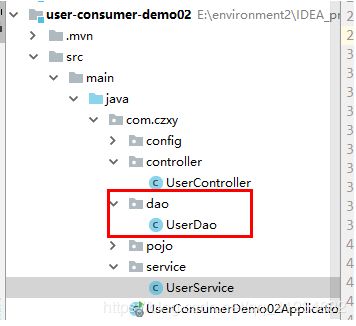
修改user-consumer-demo项目中的UserDao代码,用DiscoveryClient类的方法,根据服务名称,获取服务实例:
// 必须导入org.springframework.cloud.client.discovery.DiscoveryClient
    @Autowired
    private DiscoveryClient discoveryClient;
public User queryUserById(Long id){
    //1、 根据user-service获取user-serivce 的集群的信息
    List instances = discoveryClient.getInstances("user-service");
    //2、由于我们没有集群,只有一个,所以直接取出第一个
    ServiceInstance instance = instances.get(0);
    //3、拼接URL
    String url = "http://"+instance.getHost()+":"+instance.getPort()+"/user/"+id;

    // 使用restTemplate发起请求
    ResponseEntity entity = restTemplate.getForEntity(url, User.class);
    // 获取返回对象
    User user = entity.getBody();
    return user;
}
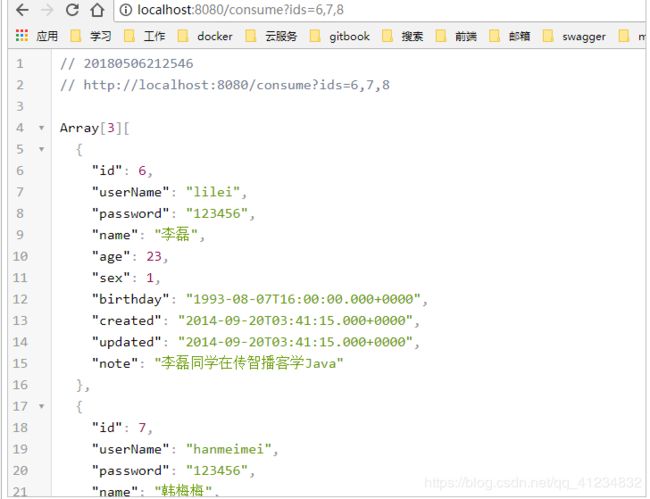
访问结果: