Android自定义View-自定义组件
Android自定义组件
- android自定义组件一般有三种实现方式:
- 一、组合控件:组合控件,顾名思义就是将一些小的控件组合起来形成一个新的控件,这些小的控件多是系统自带的控件。
- 二、自绘控件: 何为自绘控件,就是完全用Paint和canvas画出来的,就是在onDraw()方法里面绘画,在onMeasure()方法里面进行测量,如果是容器在onLayout()方法中定位每个子组件。
- 三、继承控件: 就是继承已有的控件,创建新控件,保留继承的父控件的特性,并且还可以引入新特性。
自绘控件也分两种,自定义组件和自定义容器,自定义组件是继承View类,自定义容器时继承ViewGrounp;今天主要分析下自定义组件;还是举个例子来的实际些,假如我们要画一个最简单的TextView,首先想到的就是canvas.drawText()方法,怎么画了?还是得一步一步来:
(1) )写一个MyTextView类继承View,重写三个构造方法,当然还有onDraw()和onMeasure()方法,如下代码:
public class MyTextView extends View{
/**
 * 文本颜色
 */
private int textColor;
/**
 * 字体大小
 */
private float textSize;
/**
 * 文本
 */
private String text;

/**
 * 绘制时控制
 */
private Paint mPaint;
private Rect mBoud;

public MyTextView(Context context) {
    this(context, null);
}

public MyTextView(Context context, AttributeSet attrs) {
    this(context, attrs, 0);
}

public MyTextView(Context context, AttributeSet attrs, int defStyleAttr) {
    super(context, attrs, defStyleAttr);
}

@Override
protected void onDraw(Canvas canvas) {
    super.onDraw(canvas);
}

@Override
protected void onMeasure(int widthMeasureSpec, int heightMeasureSpec) {
    super.onMeasure(widthMeasureSpec, heightMeasureSpec);
}
(2) 接下来就要想既然是TextView,那肯定是有text,color,textSize等属性。在values目录下的attrs.xml中定义好这些属性,以便在xml中引入MyTextView能够直接操作这些值,然后在有三个参数的构造方法里面将这些属性与控件关联,如下:
attrs.xml:

<resources>
<declare-styleable name="MyTextView">
    <attr name="textColor" format="color|reference"/>
    <attr name="textSize" format="dimension|reference"/>
    <attr name="text" format="string|reference"/>
declare-styleable>
resources>
public MyTextView(Context context, AttributeSet attrs, int defStyleAttr) {
super(context, attrs, defStyleAttr);
TypedArray typedArray = context.getTheme().obtainStyledAttributes(attrs, R.styleable.MyTextView, 0, 0);
textColor = typedArray.getColor(R.styleable.MyTextView_textColor, 0);
textSize = typedArray.getDimensionPixelSize(R.styleable.MyTextView_textSize, 0);
text = typedArray.getString(R.styleable.MyTextView_text);
typedArray.recycle();
}这里解释下三个构造方法,一般一个参数的调用两个参数的,两个参数调用三个参数的,属性与控件的关联写在三个参数的构造方法里面即可。
(3) 已经定义好了属性,那接下来在构造方法里用Paint画笔设置好这些属性,然后用onDraw方法里面的canvas画一个textview,如下:
public MyTextView(Context context, AttributeSet attrs, int defStyleAttr) {
        super(context, attrs, defStyleAttr);
        TypedArray typedArray = context.getTheme().obtainStyledAttributes(attrs, R.styleable.MyTextView, 0, 0);
        textColor = typedArray.getColor(R.styleable.MyTextView_textColor, 0);
        textSize = typedArray.getDimensionPixelSize(R.styleable.MyTextView_textSize, 0);
        text = typedArray.getString(R.styleable.MyTextView_text);
        typedArray.recycle();

        mPaint = new Paint();
        // 设置画笔为抗锯齿
        mPaint.setAntiAlias(true);
        mPaint.setColor(textColor);
        mPaint.setTextSize(textSize);
        //获取绘制文本的宽和高
        mBoud = new Rect();
        mPaint.getTextBounds(text, 0, text.length(), mBoud);
    }

@Override
protected void onDraw(Canvas canvas) {
        super.onDraw(canvas);
        //canvas.drawText(text, x, y, paint); //第一个参数是文本,第四个参数是画笔,第二个参数x默认是字符串的左边在屏幕的位置, 第三个参数y是这个字符文本baseline基线在屏幕上的位置,不是这个字符的中心在屏幕的位置
        Log.v("MyTextView", "getWidth:"+getWidth()/2);
        Log.v("MyTextView", "mBoud.width:"+mBoud.width()/2);
        Log.v("MyTextView", "getHeight"+getHeight()/2);
        Log.v("MyTextView", "mBoud.height:"+mBoud.height()/2);
        Paint.FontMetricsInt fontMetrics = mPaint.getFontMetricsInt();
        int baseline = (getMeasuredHeight() / 2) - ((fontMetrics.bottom + fontMetrics.top) / 2);
        Log.v("MyTextView", "baseline:"+baseline);
        Log.v("MyTextView", "getMeasuredHeight:"+getMeasuredHeight());
        Log.v("MyTextView", "fontMetrics.top:"+fontMetrics.top);
        Log.v("MyTextView", "fontMetrics.bottom:"+fontMetrics.bottom);
        Log.v("MyTextView", "fontMetrics.ascent:"+fontMetrics.ascent);
        Log.v("MyTextView", "fontMetrics.descent:"+fontMetrics.descent);
        canvas.drawText(text, getWidth()/2 - mBoud.width()/2, baseline, mPaint);
    }
**onDraw方法里面的baseline是基线,在Android中,文字的绘制都是从Baseline处开始的,所以第三个参数y不是这个文本中心在屏幕的位置,而是文本基线在屏幕的位置,感兴趣的可移至BaseLine
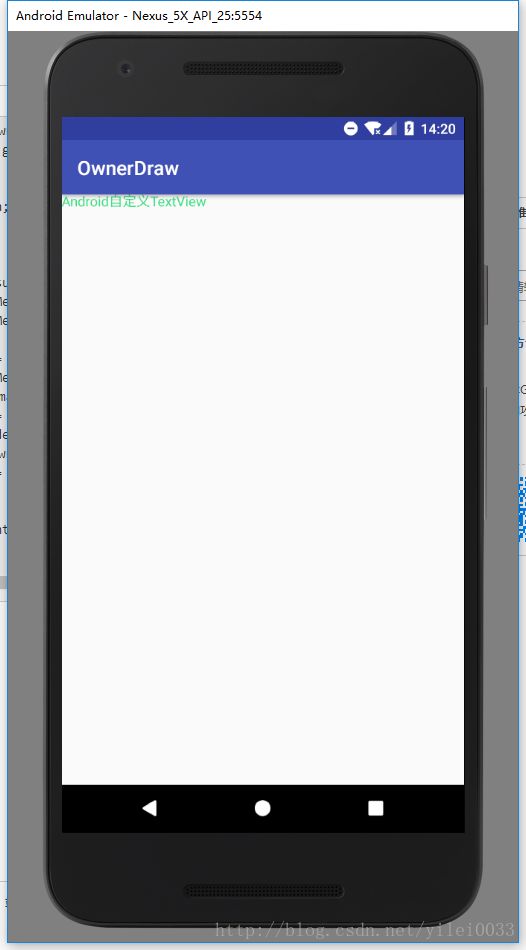
到现在其实我们的画的MyTextView已经可以用了,额?不是还有一个onMeasure方法什么都没有写吗,不急我们先在xml中引入试试看效果**
<RelativeLayout
  xmlns:android="http://schemas.android.com/apk/res/android"
  xmlns:tools="http://schemas.android.com/tools"
  xmlns:app="http://schemas.android.com/apk/res-auto"
  android:id="@+id/activity_mtext_view"
  android:layout_width="match_parent"
  android:layout_height="match_parent"
  tools:context="com.yilei.ownerdraw.activity.MTextViewActivity">

    <com.yilei.ownerdraw.view.MTextView
        android:layout_width="wrap_parent"
        android:layout_height="wrap_content"
        app:texts="Android自定义TextView"
        app:text_colors="@color/chart_green"
        app:text_sizes="14sp"/>
RelativeLayout>
可以看到,我们设置textview的宽高都是wrap_content,但是运行之后都占满了屏幕,之前重写的onMeasure方法就就派上用场了
- 1.首先要了解测量组件的宽高时,是由组件的父容器调用的,首先容器他会遍历容器内所有的子组件,一个一个的测量宽高,这里的我们自定义textView的父容器就是最外层RelativeLayout
- 2.然后要了解MeasureSpec类,这个类为我们提供了两个方法,getMode(int measureSpec)和getSize(int measureSpec)可以获得宽和高的尺寸和模式,这个类还为我们提供了三个常量MeasureSpec.EXACTLY、MeasureSpec.AT_MOST、MeasureSpec.UNSPECIFIED;
- MeasureSpec.EXACTLY:已经为TextView指定确定尺寸或者为math_parent时
- MeasureSpec.AT_MOST:当TextView为wrap_content时
- MeasureSpec.UNSPECIFIED:TextView未定义宽高
上面我们设置了高为wrap_content,但是我们没有测量textview的高,如果指定了为wrap_content,那么此时的高应该是TextView本身的高,所以需要测量然后返回给父容器,下面我们重写onMeasure方法:
@Override
protected void onMeasure(int widthMeasureSpec, int heightMeasureSpec) {
    int width = measureWidth(widthMeasureSpec);
    int height = measureHeight(heightMeasureSpec);
    setMeasuredDimension(width, height);
}

private int measureWidth(int widthMeasureSpec){
    int mode = MeasureSpec.getMode(widthMeasureSpec);
    int size = MeasureSpec.getSize(widthMeasureSpec);
    int width = 0;

    if(mode == MeasureSpec.EXACTLY){
        //如果是math_parent或确定尺寸
        width = size;
    }else if(mode == MeasureSpec.AT_MOST){
        //如果是wrap_parent
        width = getPaddingLeft() + mBound.width() + getPaddingRight();
    }
    return width;
}

private int measureHeight(int heightMeasureSpec){
    int mode = MeasureSpec.getMode(heightMeasureSpec);
    int size = MeasureSpec.getSize(heightMeasureSpec);

    int height = 0;
    if(mode == MeasureSpec.EXACTLY){
        //如果是math_parent或确定尺寸
        height = size;
    }else if(mode == MeasureSpec.AT_MOST){
        //如果是wrap_parent
        height = getPaddingTop() + mBound.height() + getPaddingBottom();
    }
    return height;
}现在TextView测量完成了,已经可以设置宽高了,宽高设置为wrap_content则是TextView本身的宽高,因为我们还考虑了Padding,所以也可以设置TextView的Padding,如果测量时没考虑Padding在xml中设置是不起作用的,有兴趣的的可以试一试
当然,这只是一个很简单的自定义TextView组件,仅为简单的理解自绘View,另外还有自定义容器,自定义容器时就要考虑onLayout方法了,因为要定位每个子组件在容器中位置。想要熟练使用自定义View,必须熟练使用Paint和canvas,这是自定义View的基本。下一篇介绍自定义容器
自定义组件和自定义容器的一些小demo,有兴趣的可以移至OwnerDraw

