CentOS7安装MySQL5.7(两种方式,离线方式解决下载过慢)
转载注明出处:https://blog.csdn.net/zouguo1211/article/details/83867896
前言
系统信息:CentOS Linux release 7.5.1804 (Core)
MySQL版本:mysql-5.7
接下来的操作均是在root权限下安装配置,如果使用非root账户,涉及权限要求,请使用sudo命令
由于在CentOS下装MySQL5.7踩了不少坑,打算重新走一遍,记录下来成功流程;
离线方式(解决在线下载速度过慢)请看文章末尾2019/7/19的更新;
卸载自带的Mariadb
三条命令即可
rpm -qa|grep maria*
yum -y remove maria*
rm -rf /var/lib/mysql/*
下载安装yum源
官网链接
选择适合自己系统的版本
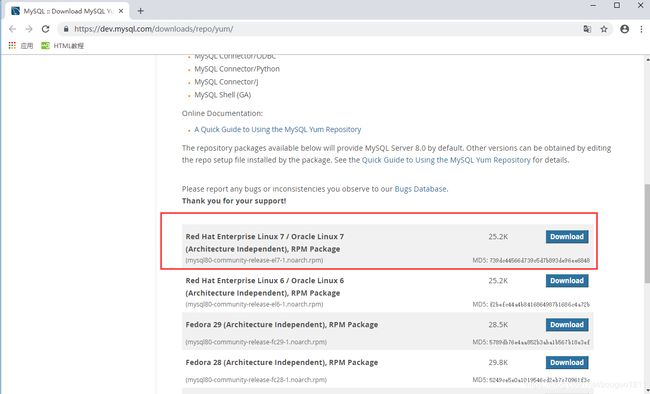
点击Download
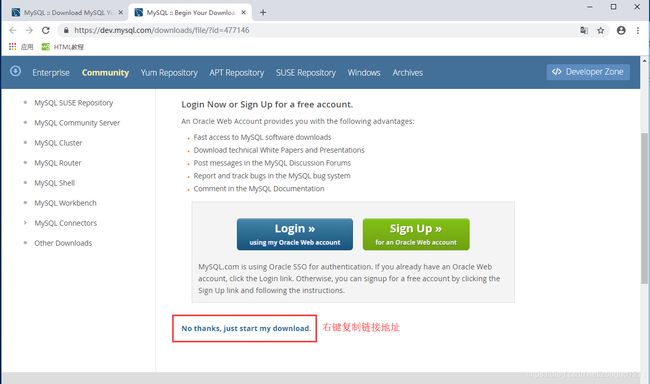
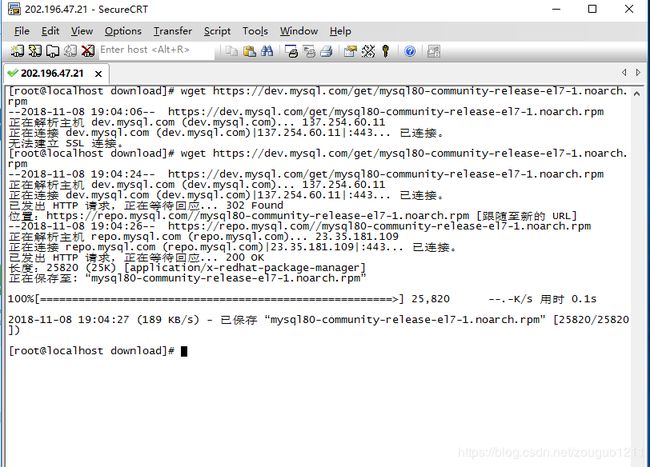
复制链接地址,wget命令下载yum源
wget https://dev.mysql.com/get/mysql80-community-release-el7-1.noarch.rpm
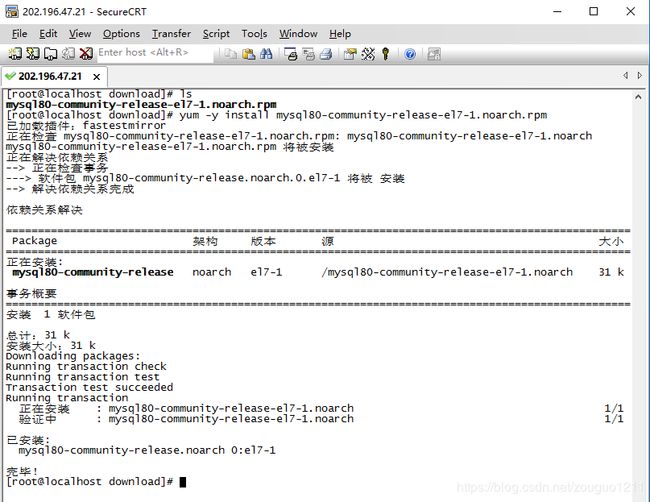
yum -y install mysql80-community-release-el7-1.noarch.rpm
安装Mysql服务器
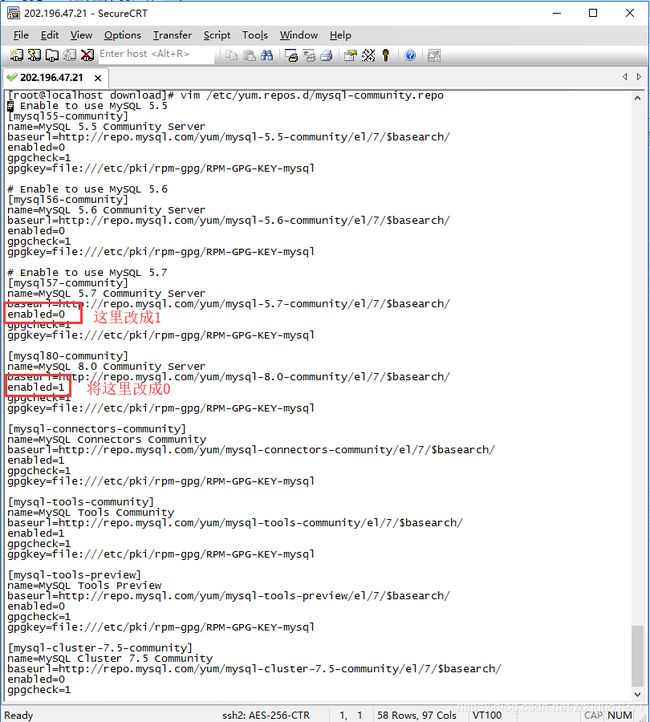
上述安装的源,默认安装Mysql8.0,我们需要修改下配置,来指定安装5.7版本:
命令行输入:
vim /etc/yum.repos.d/mysql-community.repo
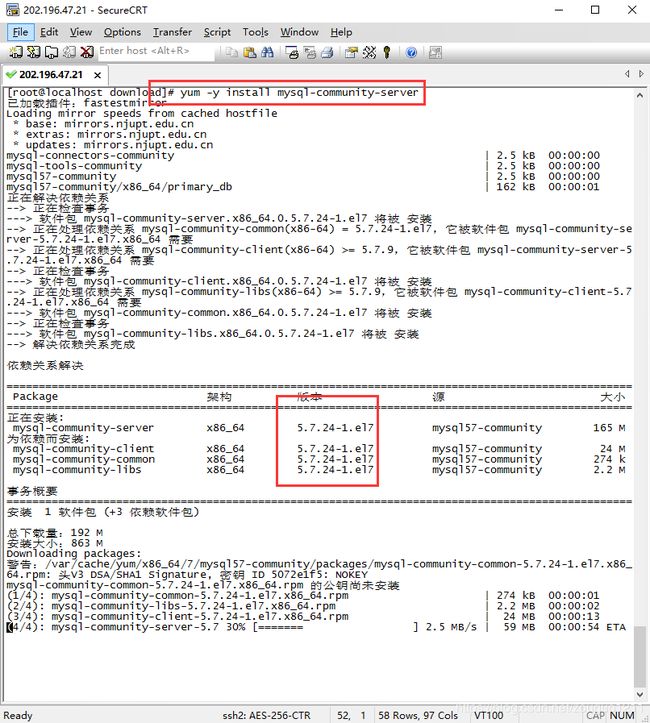
然后输入命令安装服务器==(此过程需要联网)==:
yum -y install mysql-community-server
启动Mysql服务
修改data文件目录
vim编辑/etc/my.cnf文件
# For advice on how to change settings please see
# http://dev.mysql.com/doc/refman/5.7/en/server-configuration-defaults.html

[mysqld]
#
# Remove leading # and set to the amount of RAM for the most important data
# cache in MySQL. Start at 70% of total RAM for dedicated server, else 10%.
# innodb_buffer_pool_size = 128M
#
# Remove leading # to turn on a very important data integrity option: logging
# changes to the binary log between backups.
# log_bin
#
# Remove leading # to set options mainly useful for reporting servers.
# The server defaults are faster for transactions and fast SELECTs.
# Adjust sizes as needed, experiment to find the optimal values.
# join_buffer_size = 128M
# sort_buffer_size = 2M
# read_rnd_buffer_size = 2M
datadir=/var/lib/mysql/data
socket=/var/lib/mysql/mysql.sock

# Disabling symbolic-links is recommended to prevent assorted security risks
symbolic-links=0

log-error=/var/log/mysqld.log
pid-file=/var/run/mysqld/mysqld.pid
将datadir=目录后面追加/data文件夹;
完成后,输入命令启动mysql服务,并查看状态:
systemctl start mysqld
systemctl status mysqld

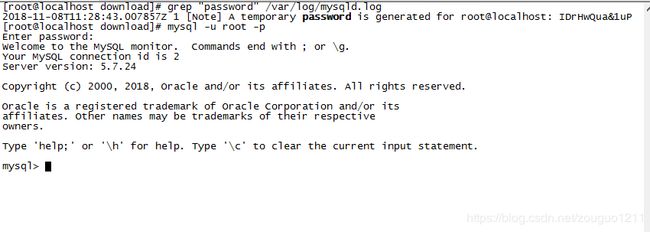
启动成功,接下来进入数据库,首先要找到初始化的root默认密码;
使用默认密码登陆
输入命令:
grep "password" /var/log/mysqld.log
修改默认密码
此时,由于5.7版本开始的安全机制需要修改掉默认密码才能对数据库进行操作;
修改密码:
ALTER USER 'root'@'localhost' IDENTIFIED BY '新密码';
调整密码安全级别
由于5.7以后使用了validate-password插件,如果没有修改密码安全级别的话,新密码过于简单就会报错

如果是自己学习使用,不想设置过于复杂的密码的话,我们可以降低级别
set global validate_password_policy=0;
set global validate_password_length=1;
设置完这两句之后,便可以设置简单密码了;
具体说明请参考官网6.5.3密码验证插件
创建新用户并开启远程连接
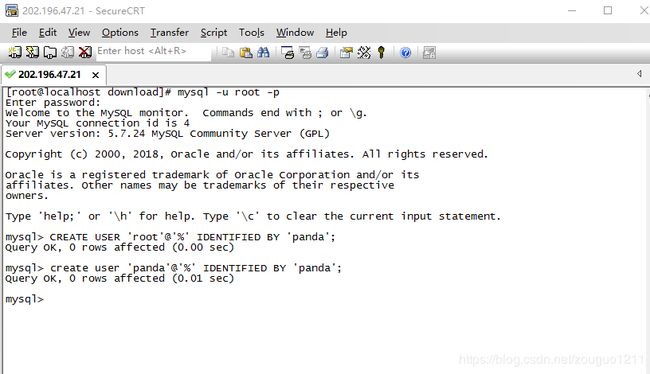
创建用户
首先创建一个用户,由于5.7中mysql.user表没有password字段而是改为了authentication_string
CREATE USER 'username'@'host' IDENTIFIED BY 'password';
其中host如果设为localhost表示在本地登陆,如果设为%,表示在任意ip都可登陆;
授权与撤销授权
首先创建一个数据库demoDB
CREATE DATABASE demoDB;
然后为root@%用户授权demoDB库的所有权限,并刷新权限;
GRANT all privileges ON demoDB.* TO 'root'@'%' IDENTIFIED BY 'panda';
flush privileges;
这里的all privileges指所有权限,可以用部分权限名称代替(这里不作重点讲授)
这里的*指代demoDB库的所有表
查看用户授权信息
SHOW GRANTS FOR 'username'@'host';
撤销授权命令
REVOKE privilege ON databasename.tablename FROM 'username'@'host';
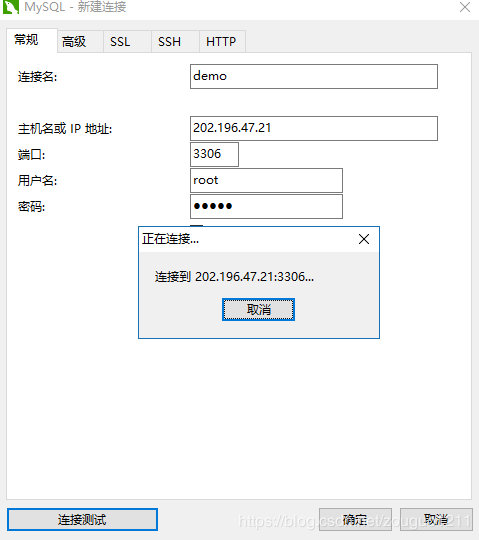
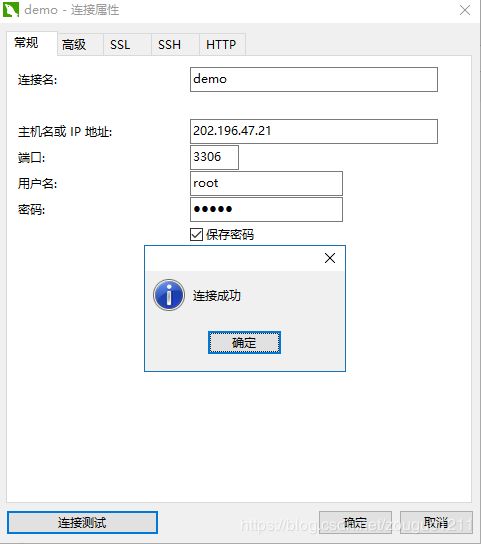
远程登陆验证
先打开防火墙的3306端口,并重启防火墙:
firewall-cmd --zone=public --add-port=3306/tcp --permanent
systemctl restart firewalld.service
2018/11/30更新
解决字符编码问题
首先停止mysql服务;
systemctl stop mysql
然后修改配置文件
vim /etc/my.cnf
修改前(安装之后默认)
# For advice on how to change settings please see
# http://dev.mysql.com/doc/refman/5.7/en/server-configuration-defaults.html

[mysqld]
#
# Remove leading # and set to the amount of RAM for the most important data
# cache in MySQL. Start at 70% of total RAM for dedicated server, else 10%.
# innodb_buffer_pool_size = 128M
#
# Remove leading # to turn on a very important data integrity option: logging
# changes to the binary log between backups.
# log_bin
#
# Remove leading # to set options mainly useful for reporting servers.
# The server defaults are faster for transactions and fast SELECTs.
# Adjust sizes as needed, experiment to find the optimal values.
# join_buffer_size = 128M
# sort_buffer_size = 2M
# read_rnd_buffer_size = 2M
datadir=/var/lib/mysql/data
socket=/var/lib/mysql/mysql.sock

# Disabling symbolic-links is recommended to prevent assorted security risks
symbolic-links=0

log-error=/var/log/mysqld.log
pid-file=/var/run/mysqld/mysqld.pid
修改后
# For advice on how to change settings please see
# http://dev.mysql.com/doc/refman/5.7/en/server-configuration-defaults.html

[mysqld]
character-set-server=utf8
#创建新表时将使用的默认存储引擎
default-storage-engine=INNODB
collation-server=utf8_general_ci
#关闭validate-password插件
validate_password=off
#
# Remove leading # and set to the amount of RAM for the most important data
# cache in MySQL. Start at 70% of total RAM for dedicated server, else 10%.
# innodb_buffer_pool_size = 128M
#
# Remove leading # to turn on a very important data integrity option: logging
# changes to the binary log between backups.
# log_bin
#
# Remove leading # to set options mainly useful for reporting servers.
# The server defaults are faster for transactions and fast SELECTs.
# Adjust sizes as needed, experiment to find the optimal values.
# join_buffer_size = 128M
# sort_buffer_size = 2M
# read_rnd_buffer_size = 2M
datadir=/var/lib/mysql/data
socket=/var/lib/mysql/mysql.sock

# Disabling symbolic-links is recommended to prevent assorted security risks
symbolic-links=0

log-error=/var/log/mysqld.log
pid-file=/var/run/mysqld/mysqld.pid

[client]
default-character-set=utf8

[mysql]
#设置mysql客户端默认字符集
default-character-set=utf8
重新启动mysql即可;
systemctl restart mysqld
查看字符编码设置
show VARIABLES like '%char%'
2019/7/19更新
离线安装方式(解决在线下载速度过慢问题)
近日,不少同学都在安装Mysql的过程中发现,下载速度实在是太慢了,这时候你就可以考虑离线方式的安装了;
具体步骤:
卸载自带的Mariadb
参见前面章节;
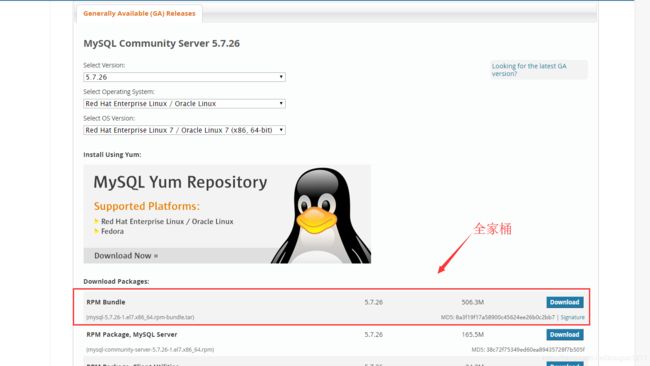
下载rpm源
以Mysql5.7.26为例
rpm安装
下载之后解压
tar -vxf mysql-5.7.26-1.el7.x86_64.rpm-bundle.tar
安装顺序
###1 common
rpm -ivh mysql-community-common-5.7.26-1.el7.x86_64.rpm
###2 libs
rpm -ivh mysql-community-libs-5.7.26-1.el7.x86_64.rpm
###3 client
rpm -ivh mysql-community-client-5.7.26-1.el7.x86_64.rpm
###4 server
rpm -ivh mysql-community-server-5.7.26-1.el7.x86_64.rpm
###5 devel
rpm -ivh mysql-community-devel-5.7.26-1.el7.x86_64.rpm
安装完成后跳转至前面的启动Mysql服务章节

