booktest-3
1.在app booktest下面的views.py里面增加视图函数
from django.shortcuts import render
from django.http import HttpResponse


# Create your views here.
# http://127.0.0.1/index
def index(request):
    return HttpResponse('老铁,没毛病')
2 在app booktest里面新建urls.py文件
3.修改项目test1x下面的urls.py文件增加访问booktest.urls的路由
from django.contrib import admin
from django.urls import path
from django.conf.urls import include, url


urlpatterns = [
    path('admin/', admin.site.urls),
    url(r'^',include('booktest.urls'))
]
4.修改app booktest下面urls.py文件,增加url到视图函数的路由,注意该路由必须要严格匹配
from django.conf.urls import url
from . import  views

urlpatterns=[
    url(r'^index$',views.index)
]
5.在浏览器里面输入http://127.0.0.1:8000/index,则显示视图函数返回的内容
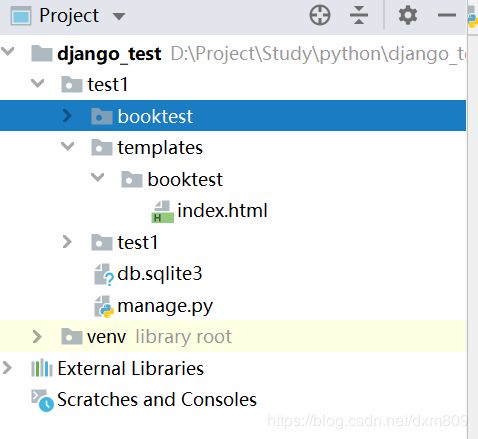
6.在django项目中新建templates文件夹
7.在项目的settings.py里面的TEMPLATES里面修改DIRS,配置项目的视图模板文件夹
TEMPLATES = [
    {
        'BACKEND': 'django.template.backends.django.DjangoTemplates',
        'DIRS': [os.path.join(BASE_DIR,'templates')],
        'APP_DIRS': True,
        'OPTIONS': {
            'context_processors': [
                'django.template.context_processors.debug',
                'django.template.context_processors.request',
                'django.contrib.auth.context_processors.auth',
                'django.contrib.messages.context_processors.messages',
            ],
        },
    },
]
8.在templates目录下再创建对应app的文件夹booktest,这里专门用于存放booktest的视图模板
9.在booktest模板文件夹下面添加index.html
    模板文件


    这是个模板文件
10.修改视图函数
from django.shortcuts import render
from django.http import HttpResponse
from django.template import loader


# Create your views here.
# http://127.0.0.1/index
def index(request):
    # return HttpResponse('老铁,没毛病')
    #加载模板
    temp = loader.get_template('booktest/index.html')
    #定义上下文
    context = {}
    #模板渲染
    res = temp.render(context)
    return HttpResponse(res)


def index2(request):
    return HttpResponse('Hello.python')
11.在浏览器中访问Http://127.0.0.1:8000/index
12.将加载模板,定义上下文,模板渲染封装成一个方法myrender(),方便调用其他模板
from django.shortcuts import render
from django.http import HttpResponse
from django.template import loader

def myreder(request,template_path,context_dict):
    # 加载模板
    temp = loader.get_template(template_path)
    # 定义上下文
    context = context_dict
    # 模板渲染
    res = temp.render(context)
    return HttpResponse(res)

# Create your views here.
# http://127.0.0.1/index
def index(request):
    # return HttpResponse('老铁,没毛病')
    return  myreder(request,'booktest/index.html',{})


def index2(request):
    return HttpResponse('Hello.python')
13.再次访问,效果相同
14.实际上,django自带上面的函数,直接调用即可
from django.shortcuts import render
from django.http import HttpResponse
from django.template import loader

def myreder(reques,template_path,context_dict):
    # 加载模板
    temp = loader.get_template(template_path)
    # 定义上下文
    context = context_dict
    # 模板渲染
    res = temp.render(context)
    return HttpResponse(res)

# Create your views here.
# http://127.0.0.1/index
def index(request):
    # return HttpResponse('老铁,没毛病')
    return  render(request,'booktest/index.html',{})


def index2(request):
    return HttpResponse('Hello.python')
15.修改视图函数,传入字典数据
def index(request):
    # return HttpResponse('老铁,没毛病')
    return  render(request,'booktest/index.html',{'content':"Hello,python"})
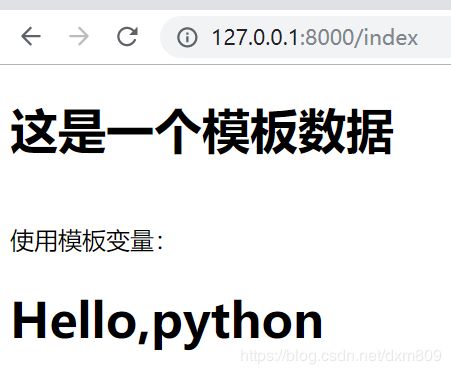
16.修改index.html视图模板,显示模板变量
    模板文件


    这是一个模板数据

    使用模板变量:

    {{content}}
17.刷新Http://127.0.0.1/index
18.修改视图函数,增加列表数据
def index(request):
    # return HttpResponse('老铁,没毛病')
    return  render(request,'booktest/index.html',
                   {'content':"Hello,python",'list':list(range(1,10))})
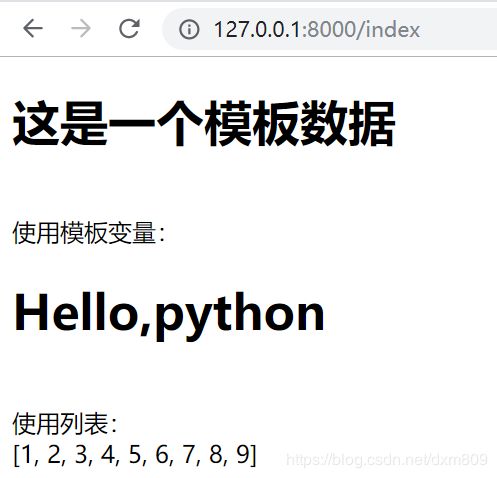
19.修改视图模板
    模板文件


    这是一个模板数据

    使用模板变量:

    {{content}}

    使用列表:

    {{list}}
20.刷新页面
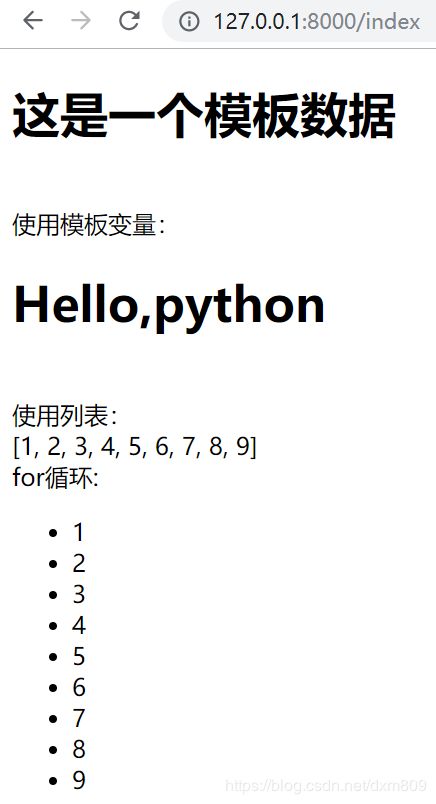
21.在视图模板中增加for循环
模板文件
这是一个模板数据
使用模板变量:
{{content}}
使用列表:
{{list}}
for循环:
{% for i in list %}
- {{i}}
{% endfor %}
22.刷新页面


