elasticsearch之单节点安装
目录
一、说明
1、安装前环境准备
2、学习成本
3、安装
二、安装
1、下载:
2、将下载的压缩包拷进相应的目录
3、解压
4、创建用户和用户组
5、创建data和logs文件夹
6、为新建用户赋权限
7、进行配置
8、进入es用户运行es
9、页面登录
三、遇到的错误
1、bootstrap checks failed
一、说明
1、安装前环境准备
elasticsearch依赖JDK环境,所以安装之前要安装好jdk,以及配置好相关的环境变量,⽐如es7.x版本要装jdk8以上的版本;
2、学习成本
es强依赖jvm,也很吃内存,所以⼀定要保证你的机器⾄少空闲出2G以上内存;
3、安装
本博客以 elasticsearch 6.4.2安装版本为例,7.x也是同样使用此步骤安装的;
二、安装
1、下载:
https://www.elastic.co/cn/elasticsearch
https://www.elastic.co/guide/en/elastic-stack/7.2/index.html
2、将下载的压缩包拷进相应的目录
3、解压
[root@cnode es]# tar -zxvf elasticsearch-6.4.2.tar.gz
4、创建用户和用户组
[root@cnode es]# groupadd es
[root@cnode es]# useradd es -g es
[root@cnode es]# passwd es
5、创建data和logs文件夹
[root@cnode es]# mkdir data
[root@cnode es]# mkdir logs
注意:这两个文件夹在配置的时候能用得到。
6、为新建用户赋权限
[root@cnode es]# chown -R es:es /opt/softWare/es/
7、进行配置
[root@cnode ~]# cd /opt/softWare/es/elasticsearch-6.4.2/config/
[root@cnode config]# vim elasticsearch.yml
cluster.name: my-es
node.name: cnode
node.master: true
node.data: true
path.data: /opt/softWare/es/data
path.logs: /opt/softWare/es/logs
network.host: 192.168.43.117
http.port: 9200

#放开此设置,里面名字和上面node.name一致
cluster.initial_master_nodes: ["cnode"]8、进入es用户运行es
[root@cnode bin]# su es
[es@cnode bin]$ cd /opt/softWare/es/elasticsearch-6.4.2/bin/
[es@cnode bin]$ ./elasticsearch
在这步可能出错:
ERROR: [2] bootstrap checks failed
[1]: max file descriptors [4096] for elasticsearch process is too low, increase to at least [65536]
[2]: max virtual memory areas vm.max_map_count [65530] is too low, increase to at least [262144]
解决[1]:
[root@cnode ~]# vi /etc/security/limits.d/90-nproc.conf
添加:
oft nproc 4096
root soft nproc unlimited
es soft nofile 65536
es hard nofile 65536
解决[2]:
[root@cnode ~]# vi /etc/sysctl.conf
添加:
vm.max_map_count=655360然后执行:
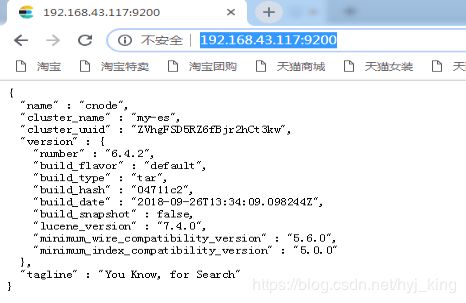
[root@cnode ~]# sysctl -p9、页面登录
http://192.168.43.117:9200/
三、遇到的错误
1、bootstrap checks failed
ERROR: [1] bootstrap checks failed
[1]: the default discovery settings are unsuitable for production use; at least one of [discovery.seed_hosts, discovery.seed_providers, cluster.initial_master_nodes] must be configured
问题分析:
这是由于之前在elasticsearch.yml中设置了:node.name: cnode
解决办法:
将elasticsearch.yml中的#cluster.initial_master_nodes: ["node-1","node-2"]注释去掉,并将“node-2”去掉,node-1换成cnode,重启即可。

