ubuntu 搭建Hadoop,hive,zookeeper详细步骤
Hadoop install
Standalone operation
Step #1, install
1. Install VMWare ESXi 6.0,vSphere Client.
2. Install Ubuntu 16.04 (ubuntu-16.04.1-desktop-amd64.iso)
3. Install rsync, openssh-server,x11vnc
4. Download Hadoop (hadoop-2.7.3.tar.gz)and JDK (jdk-8u101-linux-x64.tar.gz).
5. Install java and set the javaEnvs.
$ sudo mkdir –p /opt/java
$ sudo tar xzvf /home/jiguoh/Downloads/jdk-8u101-linux-x64.tar.gz–C /opt/java
6. Add Hadoop group and user.
$ sudo addgroupHadoop
$ sudo adduser--ingroup hadoop Hadoop
$ sudo vi/etc/sudoers
7. Login with Hadoop user
8. Setup ssh to localhost withpassword .
$ ssh-keygen
$ ssh-copy-id localhost
$ ssh localhost $ test
$ exit $ exittest
9. Install Hadoop
$ mkdir –p /home/hadoop/Hadoop
$ tar xzvf /home/jiguoh/Downloads/hadoop-2.7.3.tar.gz –C /opt/hadoop
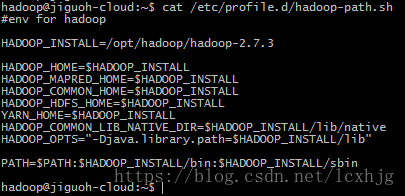
$ sudo vi /etc/profile.d/Hadoop-path.sh
$ sudo vi /opt/hadoop/hadoop-2.7.3/etc/hadoop/hadoop-env.sh
Step #2, testing
1.	Reboot and login with hadoop.
2.	$ mkdir –p ~/input
3.	$ rm –rf ~/output
4.	$ cp xxx ~/input
5.	$ hadoop jar $HADOOP_HOME/share/hadoop/mapreduce/sources/hadoop-mapreduce-examples-2.7.3-sources.jar org.apache.hadoop.examples.WordCount ~/input ~/output
Pseudo-Distributed Operation
Hadoop can also be run on a single-node in a pseudo-distributedmode where each Hadoop daemon runs in a separate Java process.
Step #1, Configure hadoop without yarn
1. Based on the Standaloneoperation.
2. Login as user: hadoop
3. Add the host
$ vi /etc/hosts
$ ssh hadoop@hadoop-master
4. Configure the Hadoop
$ vi /opt/hadoop/hadoop-2.7.3/etc/hadoop/core-site.xml
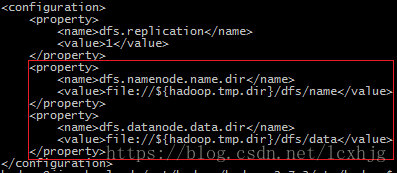
$ vi /opt/hadoop/hadoop-2.7.3/etc/hadoop/hdfs-site.xml
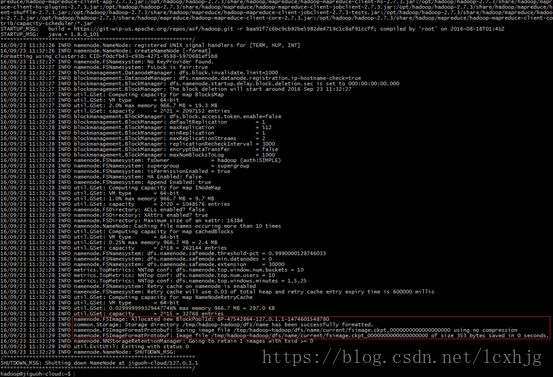
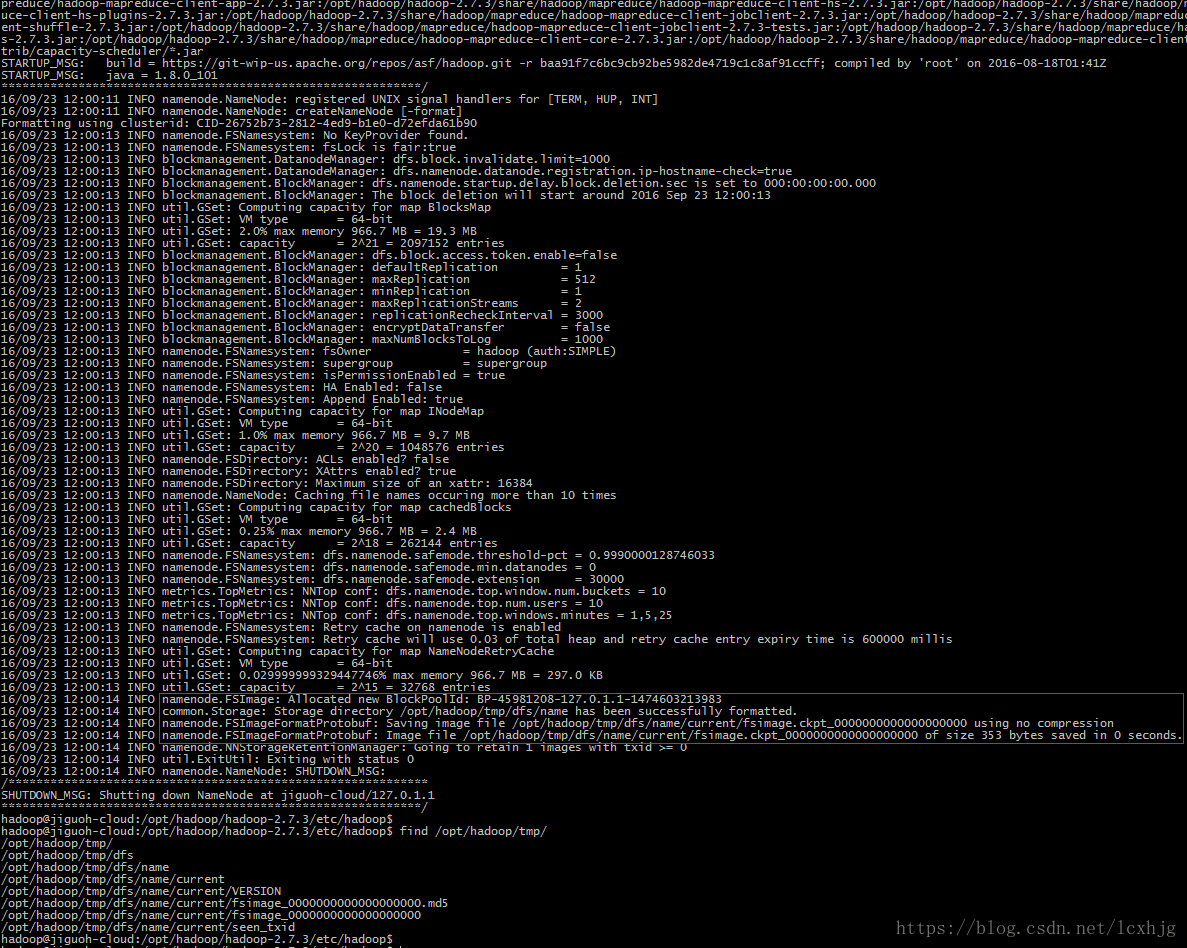
5. Format the hdfs node
$ hdfs namenode -format
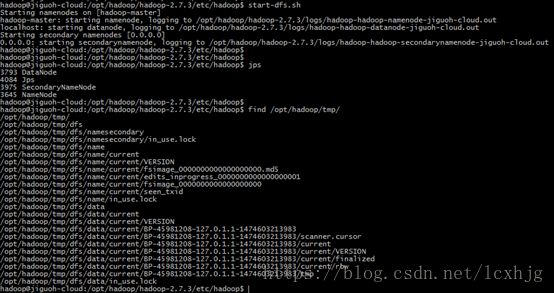
6. Start the dfs
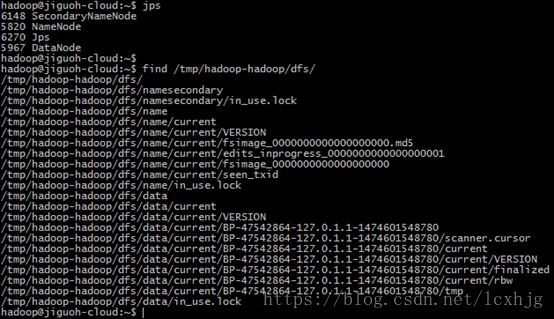
$ start-dfs.sh
Step #2, Checking and testing
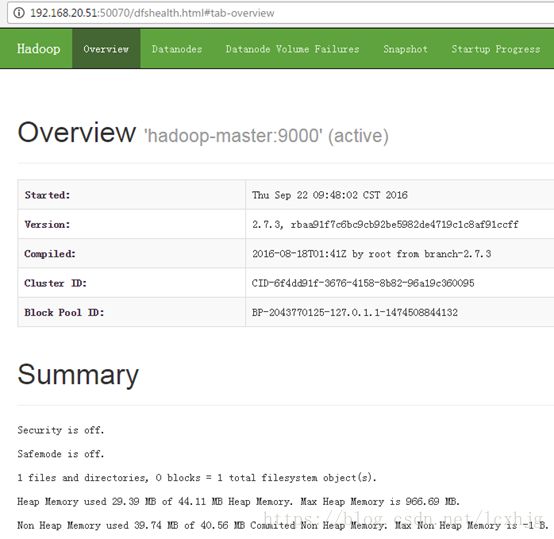
1. Checking the WEBUI: http://192.168.20.51:50070
2. Checking the hadoop-mapreduce-exampleson hdfs
$ hdfs dfs -mkdir /tmp
$ hdfs dfs -put ~/input /tmp
$ hdfs dfs -rmdir --ignore-fail-on-non-empty /tmp/output
$ hadoop jar$HADOOP_HOME/share/hadoop/mapreduce/sources/hadoop-mapreduce-examples-2.7.3-sources.jarorg.apache.hadoop.examples.WordCount /tmp/input /tmp/output
$ rm –rf ~/output
$ hdfs dfs -get /tmp/output ~/output
$ cat ~/output/part-r-00000
3. Checking the Hadoop on WEBUI: http://192.168.20.51:50070
Step #3, Configure Hadoop with yarn
1. Stop last started Hadoop
$ stop-dfs.sh
2. Configure the Hadoop with yarn
$ cp/opt/hadoop/hadoop-2.7.3/etc/hadoop/mapred-site.xml.template/opt/hadoop/hadoop-2.7.3/etc/hadoop/mapred-site.xml
$ vi /opt/hadoop/hadoop-2.7.3/etc/hadoop/mapred-site.xml
$ vi /opt/hadoop/hadoop-2.7.3/etc/hadoop/yarn-site.xml
3. Start dfs and yarn
$ start-dfs.sh
$ start-yarn.sh
4. Checking the Hadoop (yarn) onWEBUI:
http://192.168.20.51:8088
http://192.168.20.51:8042
5. Checking the hadoop-mapreduce-examples
$ hdfs dfs -rmdir --ignore-fail-on-non-empty /tmp/output
$ hadoop jar$HADOOP_HOME/share/hadoop/mapreduce/sources/hadoop-mapreduce-examples-2.7.3-sources.jarorg.apache.hadoop.examples.WordCount /tmp/input /tmp/output
$ rm –rf ~/output
$ hdfs dfs -get /tmp/output ~/output
$ cat ~/output/part-r-00000
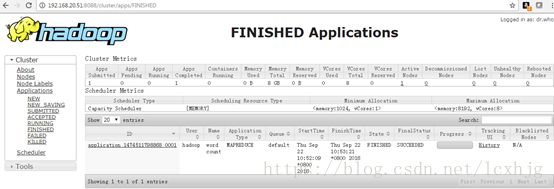
6. Checking on the WEBUI, FinishedApplications: http://192.168.20.51:8088
7. Checking the hadoop defaultlist ports.

Step #4, How to load hadoop after reboot
1. Reboot the system.
2. Re-format the hdfs data node. (defaultdata node is on the /tmp directory, after the OS reboot, it will be cleared.)
$ hdfs namenode -format
3. Start the services.
$ start-dfs.sh
$ start-yarn.sh
4. Before shutdown the OS, stopthe service.
$ stop-yarn.sh
$ stop-dfs.sh
Step #5, Configure the long-term, stable HDFS
1. Reboot the system, and do notstart Hadoop.
2. Reconfigure the Hadoop.
a) Change the Hadoop tmpdirectory.
$ vi /opt/hadoop/hadoop-2.7.3/etc/Hadoop/core-site.xml
b) Change the name node and datanode directory.
c) $ vi /opt/hadoop/hadoop-2.7.3/etc/Hadoop/hdfs-site.xml
3. Format the hdfs.
$ hdfs namenode –format
4. Start the Hadoop
$ start-dfs.sh
$ start-yarn.sh
5. Testing
$ hdfs dfs -mkdir /tmp
$ hdfs dfs -put ~/input /tmp
$ hdfs dfs -rmdir --ignore-fail-on-non-empty /tmp/output
$ hadoop jar$HADOOP_HOME/share/hadoop/mapreduce/sources/hadoop-mapreduce-examples-2.7.3-sources.jarorg.apache.hadoop.examples.WordCount /tmp/input /tmp/output
$ rm –rf ~/output
$ hdfs dfs -get /tmp/output ~/output
$ cat ~/output/part-r-00000
#shutdown the Hadoop servers and reboot the system, afterthe system startup, check the hdfs again.
$ hdfs dfs -ls /tmp
Mysql & Hive install
Step #1, Start Hadoop
1. Start Hadoop service
$ start-dfs.sh
$ start-yarn.sh
Step #2, Install mysql & Hive
1. Login with user hadoop;
2. Install mysql packages. (mysqlroot account password: 123456)
$ sudo apt-get install mysql-server
$ sudo apt-get install mysql-client
$ sudo apt-get install php-mysql
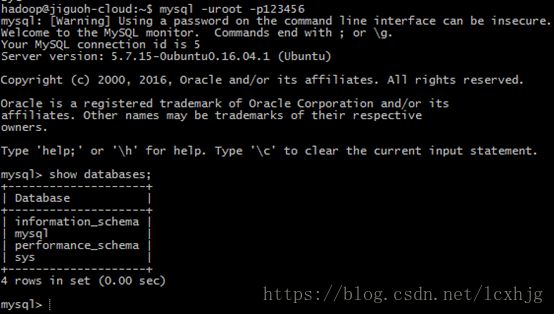
3. Testing mysql
$ mysql -uroot -p123456
4. Download Hive package (apache-hive-2.1.0-bin.tar.gz)and mysql connect jar (mysql-connector-java-5.1.39.tar.gz).
5. Install hive
$ mkdir –p /opt/hive
$ sudo chown hadoop:hadoop /opt/hive –R
$ tar xzvf /home/jiguoh/Downloads/apache-hive-2.1.0-bin.tar.gz-C /opt/hive
6. Set the hive env and libs
a) Copy mysql connect jar to hive.
$ cp/home/jiguoh/Downloads/tmp/mysql-connector-java-5.1.39/mysql-connector-java-5.1.39-bin.jar/opt/hive/apache-hive-2.1.0-bin/lib/
b) /etc/profile.d/hive-path.sh
Step #3, Configure the Mysql & Hive.
1. Configure the mysql.
a) Create mysql user ‘hive’;
hadoop@jiguoh-cloud:~$ mysql -uroot -p123456
mysql> CREATE USER 'hive' IDENTIFIED BY 'mysql';
mysql> GRANT ALL PRIVILEGES ON *.* TO 'hive'@'%' WITH GRANT OPTION;
mysql> flush privileges;

hadoop@jiguoh-cloud:~$ mysql -uroot -p123456
mysql> SET PASSWORD FOR hive=PASSWORD('123456');
mysql> flush privileges;
b) Login the mysql with ‘hive’account
$ mysql -uhive -p123456
c) Create the new database ‘hive’with ‘hive’ account.
mysql> create database hive;
d) Allow connect to the mysqlanywhere, not only from local PC.
e) Restart the mysql service;
$ server mysql restart
2. Configure the Hive
a) Init the hdfs for hive.
$ hadoop fs -mkdir /tmp
$ hadoop fs -mkdir -p /user/hive/warehouse
$ hadoop fs -chmod g+w /tmp
$ hadoop fs -chmod g+w /user/hive/wareouse
b) Set the hive conf
$ cd /opt/hive/apache-hive-2.1.0-bin/conf
$ cp hive-default.xml.template hive-default.xml
$ vi hive-site.xml
    hive.metastore.local
    true


    javax.jdo.option.ConnectionURL
    jdbc:mysql://192.168.20.51:3306/hive?createDatabaseIfNotExist=true&useSSL=false&characterEncoding=UTF-8
    JDBC connect string for a JDBC metastore


    javax.jdo.option.ConnectionDriverName
    com.mysql.jdbc.Driver
    Driver class name for a JDBC metastore


    javax.jdo.option.ConnectionUserName
    hive
    username to use against metastore database


    javax.jdo.option.ConnectionPassword
    123456
    password to use against metastore database


    hive.metastore.warehouse.dir

    /user/hive/warehouse
    location of default database for the warehouse
c) Create and initialize the Hivemetastore database.
$ schematool -dbType mysql -initSchema
Step #4, Testing and checking hive
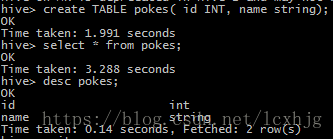
1. Create table using hive andchecking the data;
2. Checking from mysql;
$mysql -uhive -p123456
Zookeeper Install
Standalone operation
Step #1, install
1. change to root user
$ su -
2. Install zookeeper.
$ mkdir –p /opt/zookeeper
$ tar xzvf /home/jiguoh/Downloads/zookeeper-3.4.9.tar.gz –C/opt/zookeeper
$ mkdir –p /opt/zookeeper/zkdata
$ mkdir –p /opt/zookeeper/zkdatalog
$ vi /etc/profile.d/zookeeper-path.sh
3. Configure the zookeeper
$ cd /opt/zookeeper/zookeeper-3.4.9/conf/
$ cp zoo_sample.cfg zoo.cfg
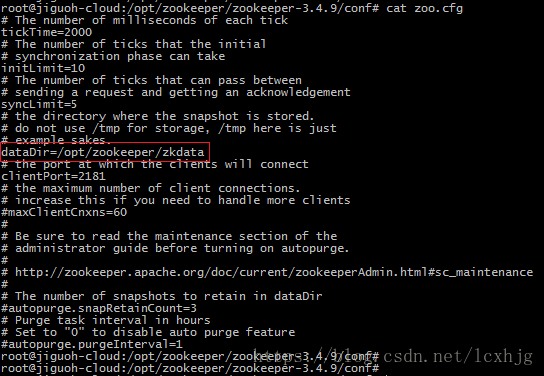
$ vi zoo.cfg
4. Reboot the OS
Step #2, testing
1. Start the zookeeper service
$ su –
$ zkServer.sh start
2. Testing
$ jps
$ zkServer.sh status
$ zkServer.sh stop
$ zkServer.sh restart
Pseudo-Distributed Operation
Step #1, install
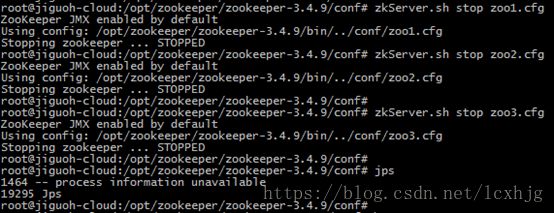
1. Stop the zookeeper server fist.
2. Prepare zookeeper files.
$ cd /opt/zookeeper
$ mkdir zkdata1 zkdata2 zkdata3
$ echo “1” zkdata1/myid
$ echo “2” zkdata2/myid
$ echo “3” zkdata3/myid
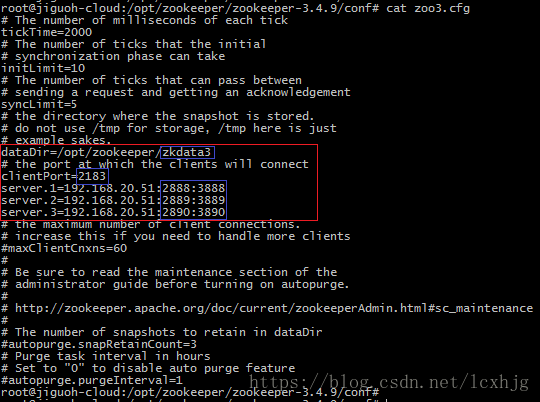
3. Configure the zookeeper.
$ cd /opt/zookeeper/zookeeper-3.4.9/
$ cp zoo.cfg zoo1.cfg
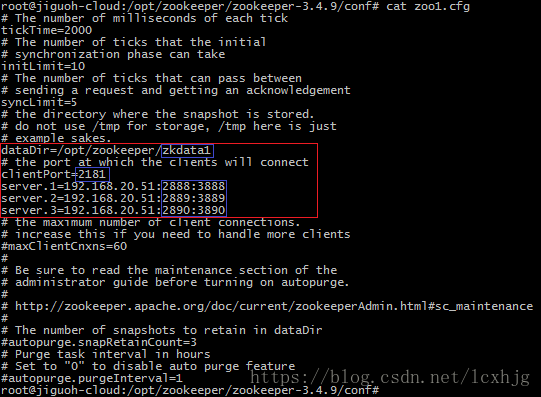
$ vi zoo1.cfg
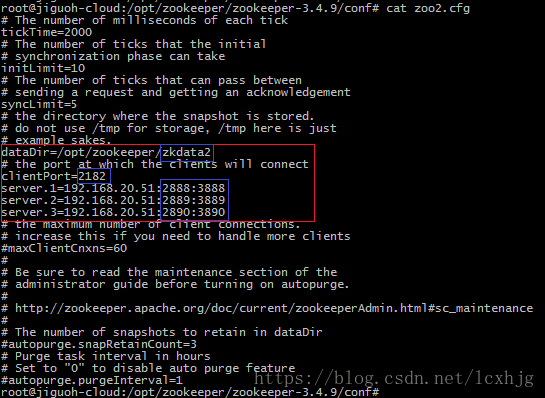
$ cp zoo1.cfg zoo2.cfg
$ cp zoo1.cfg zoo3.cfg
Step #2, testing
1. Start the zookeeper
$ zkServer.sh start zoo1.cfg
$ zkServer.sh start zoo2.cfg
$ zkServer.sh start zoo3.cfg
2. Checkings
$ jps
$ zkServer status zooX.cfg
Distributed Operation
Step #1, install
1. Copy from the internet, youcould follow the following steps when deploying it.


